走进WPF之数据绑定
在软件三层架构中,数据需要在业务逻辑层,显示层,数据处理层来回传递,在WPF中,Binding是可以实现数据关联在一起的桥梁,所谓“一桥飞架南北,天堑变通途”。有了Binding,后台可以专心处理程序与算法,前台可以专注于UI设计。本文以一些简单的小例子,简述数据绑定的相关内容,仅供学习分享使用,如有不足之处,还请指正。
控件之间的绑定
通过绑定两个控件,可以实现数据的实时同步,且不需要写后台代码。本例Slider源控件,TextBox为目标控件,通过Text="{Binding ElementName=one, Path=Value,Mode=TwoWay,FallbackValue=0,UpdateSourceTrigger=PropertyChanged}" 实现数据的双向绑定。 如下所示:
示例源码
控件之间数据绑定的固定格式为{Binding ElementName=源, Path=属性,Mode=方式,FallbackValue=默认值,UpdateSourceTrigger=触发方式}。其中有些可以省略,如下所示:
 1 <Window x:Class="WpfApp2.B1Window"
 2         xmlns="http://schemas.microsoft.com/winfx/2006/xaml/presentation"
 3         xmlns:x="http://schemas.microsoft.com/winfx/2006/xaml"
 4         xmlns:d="http://schemas.microsoft.com/expression/blend/2008"
 5         xmlns:mc="http://schemas.openxmlformats.org/markup-compatibility/2006"
 6         xmlns:local="clr-namespace:WpfApp2"
 7         mc:Ignorable="d"
 8         Title="数据绑定基础示例" Height="450" Width="600">
 9     <StackPanel>
10         <Slider x:Name="one" Orientation="Horizontal" Minimum="0" Maximum="100" Height="25" Margin="5" Value="10" Foreground="AliceBlue" Background="LightSalmon" IsSnapToTickEnabled="True" ></Slider>
11         <TextBox x:Name="two"  Text="{Binding ElementName=one, Path=Value,Mode=TwoWay,FallbackValue=0,UpdateSourceTrigger=PropertyChanged}" Padding="5" Margin="5" FontSize="20"></TextBox>
12     </StackPanel>
13 </Window>
控件与资源的绑定
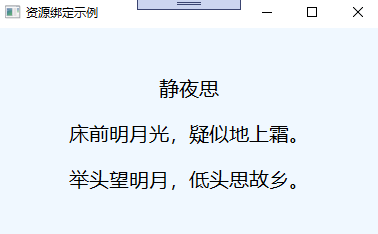
控件绑定资源,即可达到资源的一次定义,多次复用。通过Text="{Binding Source={StaticResource zero}}"进行绑定资源,如下所示:
示例源码
控件与资源之间,通过{Binding Source={StaticResource 资源名}}的方式进行绑定,如果资源还有其他属性,则需要指定Path对应的属性名,若纯文本内容,则不需要指定Path。如下所示:
 1 <Window x:Class="WpfApp2.B2Window"
 2         xmlns="http://schemas.microsoft.com/winfx/2006/xaml/presentation"
 3         xmlns:x="http://schemas.microsoft.com/winfx/2006/xaml"
 4         xmlns:d="http://schemas.microsoft.com/expression/blend/2008"
 5         xmlns:mc="http://schemas.openxmlformats.org/markup-compatibility/2006"
 6         xmlns:local="clr-namespace:WpfApp2"
 7         xmlns:sys="clr-namespace:System;assembly=mscorlib"
 8         mc:Ignorable="d"
 9         Title="资源绑定示例" Height="250" Width="400" Background="AliceBlue">
10     <Window.Resources>
11         <sys:String x:Key="zero">静夜思</sys:String>
12         <sys:String x:Key="one">床前明月光,疑似地上霜。</sys:String>
13         <sys:String x:Key="two">举头望明月,低头思故乡。</sys:String>
14     </Window.Resources>
15     <StackPanel Orientation="Vertical" HorizontalAlignment="Center" VerticalAlignment="Center" >
16         <TextBlock x:Name="title"  Text="{Binding Source={StaticResource zero}}" Margin="5" Padding="5" FontSize="20" TextAlignment="Center"></TextBlock>
17         <TextBlock x:Name="first"  Text="{Binding Source={StaticResource one}}" Margin="5" Padding="5" FontSize="20"></TextBlock>
18         <TextBlock x:Name="after" Text="{Binding Source={StaticResource two}}" Margin="5" Padding="5" FontSize="20"></TextBlock>
19     </StackPanel>
20 </Window>
DataContext
DataContext是指数据上下文,在WPF中,每一个控件都可以设置DataContext。通过上下文,可以自动匹配属性进行绑定。
XAML中设置DataContext
1. 设置资源x:Key="student",定义一个学生对象,如下所示:
 1     <Window.Resources>
 2         <Style TargetType="TextBlock">
 3             <Setter Property="HorizontalAlignment" Value="Center"></Setter>
 4             <Setter Property="VerticalAlignment" Value="Center"></Setter>
 5             <Setter Property="FontSize" Value="16"></Setter>
 6         </Style>
 7         <Style TargetType="TextBox">
 8             <Setter Property="VerticalAlignment" Value="Center"></Setter>
 9             <Setter Property="FontSize" Value="16"></Setter>
10         </Style>
11         <local:Student x:Key="student" Name="张三" Age="18" Sex="男" Classes="三班" >
12
13         </local:Student>
14     </Window.Resources>
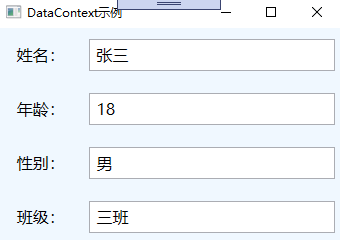
2. 将资源赋值给DataContext,并在控件上绑定属性,如下所示:
 1    <Grid DataContext="{StaticResource student}">
 2         <Grid.ColumnDefinitions>
 3             <ColumnDefinition Width="1*"></ColumnDefinition>
 4             <ColumnDefinition Width="3*"></ColumnDefinition>
 5         </Grid.ColumnDefinitions>
 6         <Grid.RowDefinitions>
 7             <RowDefinition></RowDefinition>
 8             <RowDefinition></RowDefinition>
 9             <RowDefinition></RowDefinition>
10             <RowDefinition></RowDefinition>
11         </Grid.RowDefinitions>
12         <TextBlock Margin="5" Padding="5">姓名:</TextBlock>
13         <TextBox Grid.Row="0" Grid.Column="1" x:Name="txtName" Margin="5" Padding="5" Text="{Binding Name}"></TextBox>
14
15         <TextBlock Grid.Row="1" Grid.Column="0" Margin="5" Padding="5">年龄:</TextBlock>
16         <TextBox Grid.Row="1" Grid.Column="1" x:Name="txtAge" Margin="5" Padding="5" Text="{Binding Age}"></TextBox>
17
18         <TextBlock Grid.Row="2" Grid.Column="0" Margin="5" Padding="5">性别:</TextBlock>
19         <TextBox Grid.Row="2" Grid.Column="1" x:Name="txtSex" Margin="5" Padding="5" Text="{Binding Sex}"></TextBox>
20
21         <TextBlock Grid.Row="3" Grid.Column="0" Margin="5" Padding="5">班级:</TextBlock>
22         <TextBox Grid.Row="3" Grid.Column="1" x:Name="txtClassses" Margin="5" Padding="5" Text="{Binding Classes}"></TextBox>
23
24     </Grid>
经过以上两步,就可以实现数据的绑定,示例效果如下:
代码设置DataContext
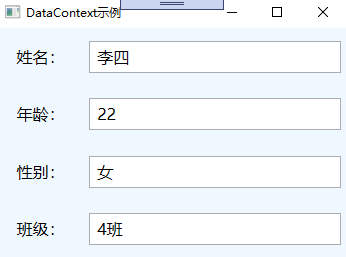
DataContext不仅可以通过XAML进行赋值,也可以通过C#代码设定,如下所示:
1 Student s = new Student()
2 {
3      Name="李四",
4      Age=22,
5      Sex="女",
6      Classes="4班"
7 };
8 //one是grid的Name
9 this.one.DataContext = s;
示例效果与XAML一致,如下所示:
注意:要实现DataContext数据绑定,有以下两点要求:
- 数据源对象的属性不能是private修饰。
- 绑定的名称必须和属性名保持一致,如不一致,则绑定失效。
双向绑定
普通的对象只能实现一次的单向绑定,如果要实现双向绑定,需要实现通知接口【System.ComponentModel.INotifyPropertyChanged】并在属性变更时进行通知,如下所示:
 1     public class Person:INotifyPropertyChanged
 2     {
 3         private string name;
 4         public string Name
 5         {
 6             get
 7             {
 8                 return name;
 9             }
10             set
11             {
12                 name = value;
13                 OnPropertyChanged("Name");
14             }
15         }
16
17         private int age;
18
19         public int Age
20         {
21             get { return age; }
22             set
23             {
24                 age = value;
25                 OnPropertyChanged("Age");
26             }
27         }
28
29         private string sex;
30
31         public string Sex
32         {
33             get { return sex; }
34             set
35             {
36                 sex = value;
37                 OnPropertyChanged("Sex");
38             }
39         }
40
41         private string classes;
42
43         public string Classes
44         {
45             get { return classes; }
46             set
47             {
48                 classes = value;
49                 OnPropertyChanged("Classes");
50             }
51         }
52
53         public event PropertyChangedEventHandler PropertyChanged;
54
55         protected void OnPropertyChanged(string propertyName)
56         {
57             if (PropertyChanged != null) {
58                 PropertyChanged(this, new PropertyChangedEventArgs(propertyName));
59             }
60         }
61     }
在初始化时对DataCotext进行赋值,然后在变更事件中,更改属性值,则页面绑定的值也会随着改变。如下所示:
 1     /// <summary>
 2     /// B4Window.xaml 的交互逻辑
 3     /// </summary>
 4     public partial class B4Window : Window
 5     {
 6         private Person person;
 7         public B4Window()
 8         {
 9             InitializeComponent();
10             person = new Person()
11             {
12                 Name = "李四",
13                 Age = 22,
14                 Sex = "女",
15                 Classes = "4班"
16             };
17             //one是grid的Name
18             this.one.DataContext = person;
19         }
20
21         private void btnUpdate_Click(object sender, RoutedEventArgs e)
22         {
23             this.person.Name = "王五";
24             this.person.Age = 18;
25             this.person.Sex = "男";
26             this.person.Classes = "6班";
27
28         }
29     }
双向绑定效果,如下所示:
备注
以上就是数据绑定的简单介绍,旨在抛砖引玉,共同学习,一起进步。
夜雨寄北【作者】李商隐
君问归期未有期,巴山夜雨涨秋池。何当共剪西窗烛,却话巴山夜雨时。

 作者:老码识途
出处:http://www.cnblogs.com/hsiang/
本文版权归作者和博客园共有,写文不易,支持原创,欢迎转载【点赞】,转载请保留此段声明,且在文章页面明显位置给出原文连接,谢谢。
关注个人公众号,定时同步更新技术及职场文章

 浙公网安备 33010602011771号