

Javaweb分片上传大文件
Javaweb分片上传大文件
大文件上传采取分片上传,实现为:1、分片上传文件,2、合并文件
1、后端java接口代码
 /**
 * 上传分片文件
 * @param file 分片文件
 * @param fileid 前端生成的uuid,用于指定此次上传的唯一标识
 * @param request
 * @return
 * @throws IOException
 */
@RequestMapping(value = "/file/uploadFilePart", method = {RequestMethod.POST})
public Map<String,Object> uploadFilePart(@RequestParam("file") MultipartFile file,String fileid,HttpServletRequest request) throws IOException {
    Map<String,Object> resultMap = new HashMap<>();

    String basePath =  appConfig.getZipUnPath() + File.separatorChar + fileid;
    File baseDir= new File(basePath);
    if(!baseDir.exists()) {
        baseDir.mkdirs();
    }
    System.out.println("文件目录为:"+ basePath);

    Integer current = Integer.parseInt(request.getParameter("index"));
    // 总分片数
    Integer total = Integer.parseInt(request.getParameter("total"));

    // 当前文件的路径
    String fileNamePath = basePath + File.separatorChar + current;
    OutputStream out = new FileOutputStream(fileNamePath);
    // 获取文件的相关数据,然后写入到文件中
    byte[] bytes = file.getBytes();
    out.write(bytes);
    out.flush();
    out.close();

    return resultMap;
}

 /**
 * 合并分片文件
 * @param filename 合并后的文件名(也可后端自定义)
 * @param fileid 前端生成的uuid,用于指定此次上传的唯一标识
 * @return
 * @throws IOException
 */
@RequestMapping(value = "/file/mergeFilePart", method = {RequestMethod.POST})
public Map<String,Object> mergeFilePart(String filename,String fileid) throws IOException {
    Map<String,Object> resultMap = new HashMap<>();

    String basePath =  appConfig.getZipUnPath() + File.separatorChar + fileid;
    int combineFlag = 0;
    // 合并操作
    try {
        String fileUrl = combineFiles(filename, basePath);
        if(StringUtils.isNotBlank(fileUrl)) {
            combineFlag = 1;
            resultMap.put("filePath", fileUrl);
        }
    } catch (Exception e) {
        e.printStackTrace();
    } finally {
        if(combineFlag == 0) {
            // 合并失败
            resultMap.put("errMessage", "合并文件失败");
            resultMap.put("code", 500);
        } else {
            resultMap.put("code", 0);
        }
    }
    resultMap.put("code", 0);
    resultMap.put("massage", "合并成功");
    return resultMap;
}

//合并文件
private String combineFiles(String fileName, String basePath) throws Exception {
    int returnFlag = CombineFile(fileName, basePath);
    String fileUrl = null;
    if(returnFlag == 1) {
        // 此处表示文件合并成功,合并后的文件路径为:basePath+"/"+fileName
        fileUrl = basePath+"/"+fileName;
    }
    return fileUrl;
}

/**
 * 合并文件,
 * @param tar 合成目标的文件名称
 * @param baseFilePath 你要合并哪个文件夹的文件,里面必须是要合并的文件
 * @return
 * @throws Exception
 */
public int CombineFile(String tar, String baseFilePath) throws Exception {
    File dirFile = new File(baseFilePath);
    FileInputStream fis;

    // 一次读取2M数据,将读取到的数据保存到byte字节数组中
    byte buffer[] = new byte[1024 * 1024 * 2];
    int len;
    // 判断file是否为目录
    if(dirFile.isDirectory()) {
        String[] fileNames = dirFile.list();
        FileOutputStream fos = new FileOutputStream(baseFilePath + File.separatorChar + tar);
        // 实现目录自定义排序
        Arrays.sort(fileNames, new StringComparator());
        for (int i = 0;i<fileNames.length ;i++){
            fis = new FileInputStream(baseFilePath + File.separatorChar + fileNames[i]);
            len = 0;
            while ((len = fis.read(buffer)) != -1) {
                // buffer从指定字节数组写入。buffer:数据中的起始偏移量,len:写入的字数。
                fos.write(buffer, 0, len);
            }
            fos.flush();
            fis.close();
        }
        fos.close();
    }
    return 1;
}
文件名比较类
import java.util.Comparator;

/**
 * 文件名排序比较类
 */
public class StringComparator implements Comparator<String> {
    @Override
    public int compare(String s1, String s2) {
        if (returnDouble(s1) < returnDouble(s2)){
            return -1;
        } else if (returnDouble(s1) > returnDouble(s2)) {
            return 1;
        } else {
            return 0;
        }
    }

    public static double returnDouble(String str){
        StringBuffer sb = new StringBuffer();
        for(int i=0;i<str.length();i++){
            if(Character.isDigit(str.charAt(i))) {
                sb.append(str.charAt(i));
            }  else if(str.charAt(i)=='.'&&i<str.length()-1&&Character.isDigit(str.charAt(i+1))) {
                sb.append(str.charAt(i));
            } else {
                break;
            }
        }
        if(sb.toString().isEmpty()){
            return 0;
        } else {
            return Double.parseDouble(sb.toString());
        }

    }
}
2、前端代码比较简单,网上寻找根据自己需要更改的,简单的js+html实现的分片上传文件
<!DOCTYPE html>
<html lang="en">

<head>
    <meta charset="UTF-8">
    <meta name="viewport" content="width=device-width, initial-scale=1.0">
    <meta http-equiv="X-UA-Compatible" content="ie=edge">
    <title>文件上传</title>
    <script src="https://cdn.bootcss.com/axios/0.18.0/axios.min.js"></script>
    <script src="https://code.jquery.com/jquery-3.4.1.js"></script>
    <script src="https://cdnjs.cloudflare.com/ajax/libs/spark-md5/3.0.0/spark-md5.js"></script>
    <style>
        /* 自定义进度条样式 */
        .precent input[type=range] {
            -webkit-appearance: none;
            /*清除系统默认样式*/
            width: 7.8rem;
            /* background: -webkit-linear-gradient(#ddd, #ddd) no-repeat, #ddd; */
            /*设置左边颜色为#61bd12,右边颜色为#ddd*/
            background-size: 75% 100%;
            /*设置左右宽度比例*/
            height: 0.6rem;
            /*横条的高度*/
            border-radius: 0.4rem;
            border: 1px solid #ddd;
            box-shadow: 0 0 10px rgba(0,0,0,.125) inset ;
        }

        /*拖动块的样式*/
        .precent input[type=range]::-webkit-slider-thumb {
            -webkit-appearance: none;
            /*清除系统默认样式*/
            height: .9rem;
            /*拖动块高度*/
            width: .9rem;
            /*拖动块宽度*/
            background: #fff;
            /*拖动块背景*/
            border-radius: 50%;
            /*外观设置为圆形*/
            border: solid 1px #ddd;
            /*设置边框*/
        }

    </style>
</head>

<body>
<h1>大文件分片上传测试</h1>
<div>
    <input id="file" type="file" name="avatar" />
    <div style="padding: 10px 0;">
        <input id="submitBtn" type="button" value="提交" />
        <input id="pauseBtn" type="button" value="暂停" />
    </div>
    <div class="precent">
        <input type="range" value="0" /><span id="precentVal">0%</span>
    </div>
</div>
<script type="text/javascript" src="./index.js"></script>
</body>

</html>
$(document).ready(() => {
    const submitBtn = $('#submitBtn');  //提交按钮
    const precentDom = $(".precent input")[0]; // 进度条
    const precentVal = $("#precentVal");  // 进度条值对应dom
    const pauseBtn = $('#pauseBtn');  // 暂停按钮
    // 每个chunk的大小,设置为1兆
    const chunkSize = 1 * 1024 * 1024;
    // 获取slice方法,做兼容处理
    const blobSlice = File.prototype.slice || File.prototype.mozSlice || File.prototype.webkitSlice;
    // 对文件进行MD5加密(文件内容+文件标题形式)
    const hashFile = (file) => {
        return new Promise((resolve, reject) => {
            const chunks = Math.ceil(file.size / chunkSize);
            let currentChunk = 0;
            const spark = new SparkMD5.ArrayBuffer();
            const fileReader = new FileReader();
            function loadNext() {
                const start = currentChunk * chunkSize;
                const end = start + chunkSize >= file.size ? file.size : start + chunkSize;
                fileReader.readAsArrayBuffer(blobSlice.call(file, start, end));
            }
            fileReader.onload = e => {
                spark.append(e.target.result); // Append array buffer
                currentChunk += 1;
                if (currentChunk < chunks) {
                    loadNext();
                } else {
                    console.log('finished loading');
                    const result = spark.end();
                    // 通过内容和文件名称进行md5加密
                    const sparkMd5 = new SparkMD5();
                    sparkMd5.append(result);
                    sparkMd5.append(file.name);
                    const hexHash = sparkMd5.end();
                    resolve(hexHash);
                }
            };
            fileReader.onerror = () => {
                console.warn('文件读取失败!');
            };
            loadNext();
        }).catch(err => {
            console.log(err);
        });
    }

    // 提交
    submitBtn.on('click', async () => {
        var pauseStatus = false;
        var nowUploadNums = 0
        // 1.读取文件
        const fileDom = $('#file')[0];
        const files = fileDom.files;
        const file = files[0];
        if (!file) {
            alert('没有获取文件');
            return;
        }
        // 2.设置分片参数属性、获取文件MD5值
        const hash = await hashFile(file); //文件 hash
        const blockCount = Math.ceil(file.size / chunkSize); // 分片总数
        const axiosPromiseArray = []; // axiosPromise数组
        const fileid = getUuid();
        const naame = file.name;
        debugger;
        // 文件上传
        const uploadFile = () => {
            const start = nowUploadNums * chunkSize;
            const end = Math.min(file.size, start + chunkSize);
            // 构建表单
            const form = new FormData();
            // blobSlice.call(file, start, end)方法是用于进行文件分片
            form.append('file', blobSlice.call(file, start, end));
            form.append('index', nowUploadNums);
            form.append('total', blockCount);
            //form.append('hash', hash);
            form.append('filename', name);
            form.append('fileid', fileid);
            // ajax提交 分片,此时 content-type 为 multipart/form-data
            const axiosOptions = {
                onUploadProgress: e => {
                    nowUploadNums++;
                    // 判断分片是否上传完成
                    if (nowUploadNums < blockCount) {
                        setPrecent(nowUploadNums, blockCount);
                        uploadFile(nowUploadNums)
                    } else {
                        // 4.所有分片上传后,请求合并分片文件
                        setPrecent(blockCount, blockCount); // 全部上传完成
                        var merge = new FormData();
                        debugger;
                        merge.append('filename', file.name);
                        merge.append('total', blockCount);
                        merge.append('fileid', fileid);
                        axios.post('/file/mergeFilePart',merge).then(res => {
                            console.log(res.data, file);
                            pauseStatus = false;
                            alert('上传成功');
                        }).catch(err => {
                            console.log(err);
                        });
                    }
                },
            };
            // 加入到 Promise 数组中
            if (!pauseStatus) {
                axiosPromiseArray.push(axios.post('/file/uploadFilePart', form, axiosOptions));
            }

        }
        function getUuid() {
            return 'xxxxxxxx-xxxx-4xxx-yxxx-xxxxxxxxxxxx'.replace(/[xy]/g, function (c) {
                var r = (Math.random() * 16) | 0,
                    v = c == 'x' ? r : (r & 0x3) | 0x8;
                return v.toString(16);
            });
        }
        // 设置进度条
        function setPrecent(now, total) {
            var prencentValue = ((now / total) * 100).toFixed(2)
            precentDom.value = prencentValue
            precentVal.text(prencentValue + '%')
            precentDom.style.cssText = `background:-webkit-linear-gradient(top, #059CFA, #059CFA) 0% 0% / ${prencentValue}% 100% no-repeat`
        }
        // 暂停
        pauseBtn.on('click', (e) => {
            pauseStatus = !pauseStatus;
            e.currentTarget.value = pauseStatus ? '开始' : '暂停'
            if (!pauseStatus) {
                uploadFile(nowUploadNums)
            }
        })
        uploadFile();
    });
})
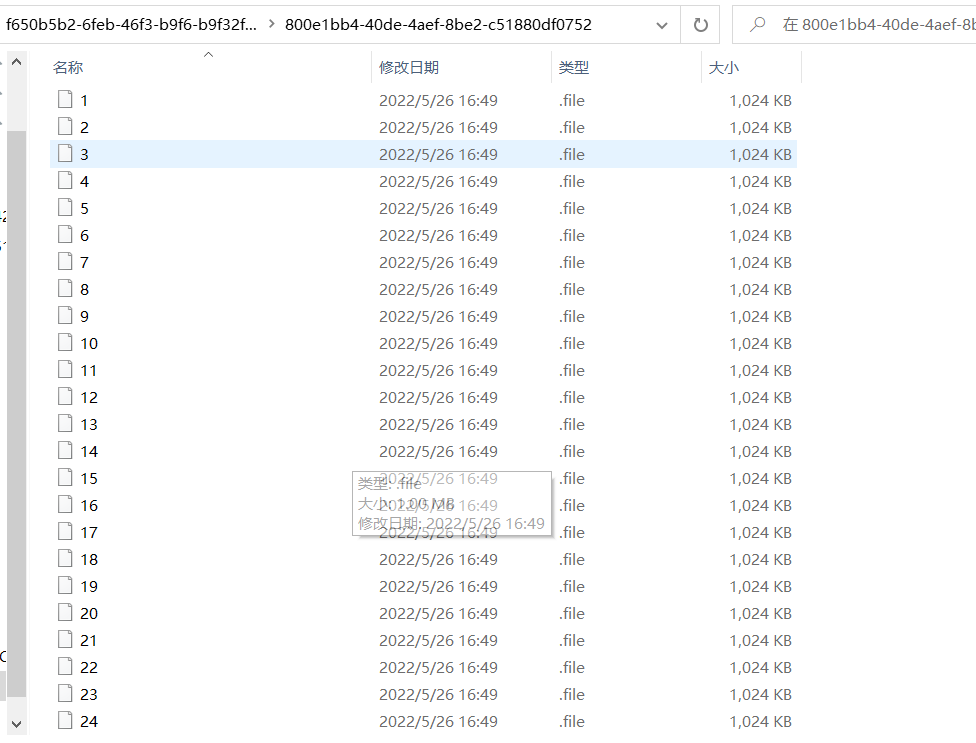
3、效果展示,压缩文件为合并后的文件


【推荐】国内首个AI IDE,深度理解中文开发场景,立即下载体验Trae
【推荐】编程新体验,更懂你的AI,立即体验豆包MarsCode编程助手
【推荐】抖音旗下AI助手豆包,你的智能百科全书,全免费不限次数
【推荐】轻量又高性能的 SSH 工具 IShell:AI 加持,快人一步
· 分享一个免费、快速、无限量使用的满血 DeepSeek R1 模型,支持深度思考和联网搜索!
· 25岁的心里话
· 基于 Docker 搭建 FRP 内网穿透开源项目(很简单哒)
· ollama系列01:轻松3步本地部署deepseek,普通电脑可用
· 按钮权限的设计及实现