springboot整合elasticJob实战(纯代码开发三种任务类型用法)以及分片系统,事件追踪详解
一 springboot整合
介绍就不多说了,只有这个框架是当当网开源的,支持分布式调度,分布式系统中非常合适(两个服务同时跑不会重复,并且可灵活配置分开分批处理数据,贼方便)!
这里主要还是用到zookeeper,如果没有zk环境,可以百度或者参考我之前的博客搭建
添加依赖,这里有一点,如果是在springcloud中的话,需要排除自带的curator依赖,因为cloud已经集成一些,会冲突:


 1  <!-- elastic-job -->
 2         <dependency>
 3             <groupId>com.dangdang</groupId>
 4             <artifactId>elastic-job-lite-core</artifactId>
 5             <version>2.1.5</version>
 6             <exclusions>
 7                 <exclusion>
 8                     <artifactId>curator-client</artifactId>
 9                     <groupId>org.apache.curator</groupId>
10                 </exclusion>
11                 <exclusion>
12                     <artifactId>curator-framework</artifactId>
13                     <groupId>org.apache.curator</groupId>
14                 </exclusion>
15                 <exclusion>
16                     <artifactId>curator-recipes</artifactId>
17                     <groupId>org.apache.curator</groupId>
18                 </exclusion>
19             </exclusions>
20         </dependency>
21         <dependency>
22             <groupId>com.dangdang</groupId>
23             <artifactId>elastic-job-lite-spring</artifactId>
24             <version>2.1.5</version>
25         </dependency>
26         <dependency>
27             <groupId>org.apache.curator</groupId>
28             <artifactId>curator-framework</artifactId>
29             <version>2.10.0</version>
30         </dependency>
31         <dependency>
32             <groupId>org.apache.curator</groupId>
33             <artifactId>curator-client</artifactId>
34             <version>2.10.0</version>
35         </dependency>
36         <dependency>
37             <groupId>org.apache.curator</groupId>
38             <artifactId>curator-recipes</artifactId>
39             <version>2.10.0</version>
40         </dependency>
41     </dependencies>
然后就是配置zk注册中心,分布式功能主要依赖这个,所有属性都从yml中注入,这里注意一点,可以把超时时间设置大一点:
@Configuration
public class ElasticRegCenterConfig {
    /**
     * 配置zookeeper注册中心
     */
    @Bean(initMethod = "init")  // 需要配置init执行初始化逻辑
    public ZookeeperRegistryCenter regCenter(
            @Value("${regCenter.serverList}") final String serverList,
            @Value("${regCenter.namespace}") final String namespace) {
        ZookeeperConfiguration zookeeperConfiguration = new ZookeeperConfiguration(serverList, namespace);
        zookeeperConfiguration.setMaxRetries(3); //设置重试次数,可设置其他属性
        zookeeperConfiguration.setSessionTimeoutMilliseconds(500000); //设置会话超时时间,尽量大一点,否则项目无法正常启动
        return new ZookeeperRegistryCenter(zookeeperConfiguration);
    }
}
然后就是配置job了,其实和spring的quartz配置都差不多,一个job类,一个调度类
这里先贴我的yml配置,任务执行周期,分片个数都从这里注入即可,分片使用后面单独说明:

二 simplejob
job类:
@Component
public class MySimpleJob implements SimpleJob {
@Override
public void execute(ShardingContext shardingContext) {
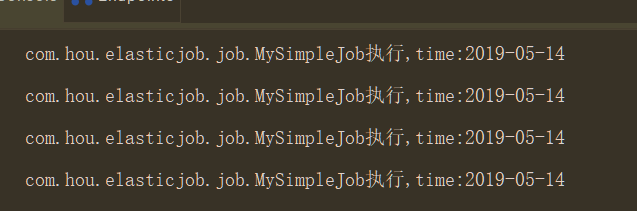
System.out.println(shardingContext.getJobName()+"执行:"+
"分片参数:"+shardingContext.getShardingParameter()+
",当前分片项:"+shardingContext.getShardingItem()+
",time:"+ LocalDate.now());
}
}
配置类,这里用到了一个工具方法,工具类放下面:
/**
 * 配置MySimpleJob
 */
@Configuration
public class MySimpleJobConf {
    @Autowired ZookeeperRegistryCenter regCenter;
    @Autowired MySimpleJob mySimpleJob;
    /**
     * 配置任务调度: 参数:  任务
     *                    zk注册中心
     *                    任务详情
     */
    @Bean(initMethod = "init")
    public JobScheduler simpleJobScheduler(@Value("${mySimpleJob.cron}") final String cron,  //yml注入
                                           @Value("${mySimpleJob.shardingTotalCount}") final int shardingTotalCount,
                                           @Value("${mySimpleJob.shardingItemParameters}") final String shardingItemParameters) {
        return new SpringJobScheduler(mySimpleJob, regCenter,
                                      ElasticJobUtils.getSimpleJobConfiguration(
                                              mySimpleJob.getClass(),
                                              cron,
                                              shardingTotalCount,
                                              shardingItemParameters)
                                              //,new MyElasticJobListener() 可配置监听器
        );
    }
}
工具类:
public class ElasticJobUtils {

    /**
     * 创建简单任务详细信息
     */
    public static LiteJobConfiguration getSimpleJobConfiguration(final Class<? extends SimpleJob> jobClass, //任务类
                                                                final String cron,    // 运行周期配置
                                                                final int shardingTotalCount,  //分片个数
                                                                final String shardingItemParameters) {  // 分片参数
        return LiteJobConfiguration.newBuilder(new SimpleJobConfiguration(
                JobCoreConfiguration.newBuilder(jobClass.getName(), cron, shardingTotalCount)
                        .shardingItemParameters(shardingItemParameters).build()
                , jobClass.getCanonicalName())
        ).overwrite(true).build();
    }

    /**
     * 创建流式作业配置
     */
    public static LiteJobConfiguration getDataFlowJobConfiguration(final Class<? extends DataflowJob> jobClass, //任务类
                                                                   final String cron,    // 运行周期配置
                                                                   final int shardingTotalCount,  //分片个数
                                                                   final String shardingItemParameters,
                                                                   final Boolean streamingProcess   //是否是流式作业
                                                                   ) {  // 分片参数
        return LiteJobConfiguration.newBuilder(new DataflowJobConfiguration(
                JobCoreConfiguration.newBuilder(jobClass.getName(), cron, shardingTotalCount)
                        .shardingItemParameters(shardingItemParameters).build()
                // true为流式作业,除非fetchData返回数据为null或者size为0,否则会一直执行
                // false 非流式,只会按配置时间执行一次
                , jobClass.getCanonicalName(),streamingProcess)
        ).overwrite(true).build();
    }
}
测试:
三 dataflowjob
job类:
@Component
public class MyDataFlowJob implements DataflowJob<String> {
@Override
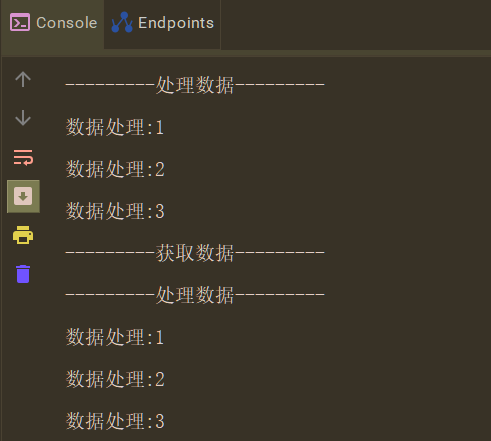
public List<String> fetchData(ShardingContext shardingContext) { //抓取数据
System.out.println("---------获取数据---------");
return Arrays.asList("1","2","3");
}
@Override
public void processData(ShardingContext shardingContext, List<String> list) {//处理数据
System.out.println("---------处理数据---------");
list.forEach(x-> System.out.println("数据处理:"+x));
}
}
配置类:
@Configuration
public class MyDataFlowJobConf {
    @Autowired ZookeeperRegistryCenter regCenter;
    @Autowired MyDataFlowJob myDataFlowJob;
    /**
     * 配置任务调度: 参数:  任务
     *                    zk注册中心
     *                    任务详情
     */
    @Bean(initMethod = "init")
    public JobScheduler dataFlowJobScheduler(@Value("${myDataFlowJob.cron}") final String cron,  //yml注入
                                           @Value("${myDataFlowJob.shardingTotalCount}") final int shardingTotalCount,
                                           @Value("${myDataFlowJob.shardingItemParameters}") final String shardingItemParameters) {
        return new SpringJobScheduler(myDataFlowJob, regCenter,
                ElasticJobUtils.getDataFlowJobConfiguration(
                        myDataFlowJob.getClass(),
                        cron,
                        shardingTotalCount,
                        shardingItemParameters,true)
                //,new MyElasticJobListener() 可配置监听器
        );
    }
}
测试:
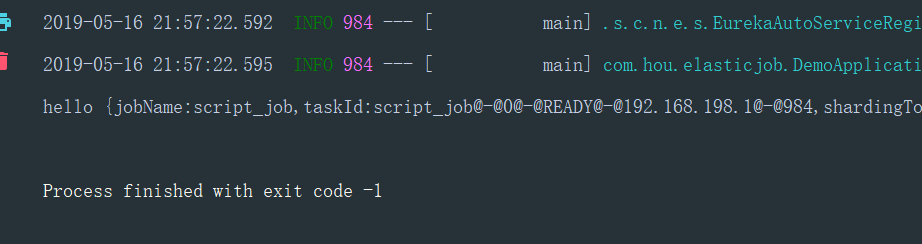
需要注意一点流式作业如果数据不为空会一直跑
四 scriptjob
脚本任务有一点,不需要创建类实例,否则会报错,参数直接传null即可
配置类:
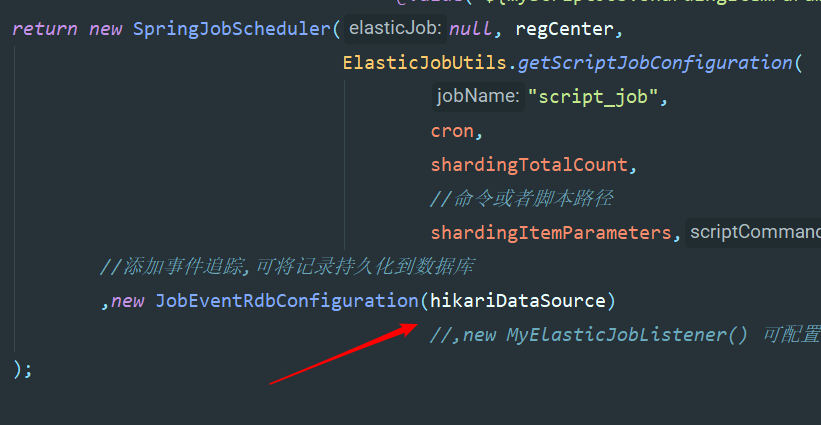
@Configuration
public class MyScriptJobConf {
    @Autowired ZookeeperRegistryCenter regCenter;
    /**
     * 配置任务调度: 参数:  任务
     *                    zk注册中心
     *                    任务详情
     */
    @Bean(initMethod = "init")
    public JobScheduler scriptJobScheduler(@Value("${myScriptJob.cron}") final String cron,  //yml注入
                                           @Value("${myScriptJob.shardingTotalCount}") final int shardingTotalCount,
                                           @Value("${myScriptJob.shardingItemParameters}") final String shardingItemParameters) {
        return new SpringJobScheduler(null, regCenter,
                                      ElasticJobUtils.getScriptJobConfiguration(
                                              "script_job",
                                              cron,
                                              shardingTotalCount,
                                              //命令或者脚本路径
                                              shardingItemParameters,"echo hello")
                                              //,new MyElasticJobListener() 可配置监听器
        );
    }
}
工具添加静态方法:
/**
     * 创建脚本作业配置
     */
    public static LiteJobConfiguration getScriptJobConfiguration(final String jobName, //任务名字
                                                                 final String cron,    // 运行周期配置
                                                                 final int shardingTotalCount,  //分片个数
                                                                 final String shardingItemParameters,
                                                                 final String scriptCommandLine   //是脚本路径或者命令
    ) {  // 分片参数
        return LiteJobConfiguration.newBuilder(new ScriptJobConfiguration(
                JobCoreConfiguration.newBuilder(jobName, cron, shardingTotalCount)
                        .shardingItemParameters(shardingItemParameters).build()
                // 此处配置文件路径或者执行命令
                , scriptCommandLine)
        ).overwrite(true).build();
    }
测试:
五 分片用法
分片的目的就是通过配置分片个数,让不同的分片参数到不同的服务中去,比如配置了分片个数是2,那么分片一会到服务一中,分片二到服务二中
项目中根据分片参数来决定哪个服务处理哪些数据,比如 0=客户甲,1=客户乙,但是分片item是从1开始
分片算法默认是平均,可自定义,然后参数就是上面yml那种配置,比如2,就是 0=,1= 4就是0=,1=,2=,3=,两个服务的话服务一就是0,1的参数,服务二就是2,3的参数,并且分片item是3,4
然后要注意一点的是,这个分片识别是根据ip的,也就是说同一台电脑,跑两个程序没用,两个程序都会全部执行,还是会重复
主要是这个分片保证分布式中处理数据不重复,分片也会转移,即一个服务挂了之后,分片参数和item会自动转移到剩下服务中
六 事件追踪(即任务信息持久化到mysql)
需要提前创建btach_log数据库
配置数据源Bean,在任务配置中添加event
@Configuration
@ConfigurationProperties(prefix = "spring.datasource")
public class JobDataSourceConf {
    private String url;
    private String username;
    private String password;
    private String driver_class_name;

    @Bean
    @Primary
    public DataSource hikariDataSource() {
        HikariDataSource dataSource = new HikariDataSource();
        dataSource.setJdbcUrl(url);
        dataSource.setUsername(username);
        dataSource.setPassword(password);
        dataSource.setDriverClassName(driver_class_name);
        return dataSource;
    }
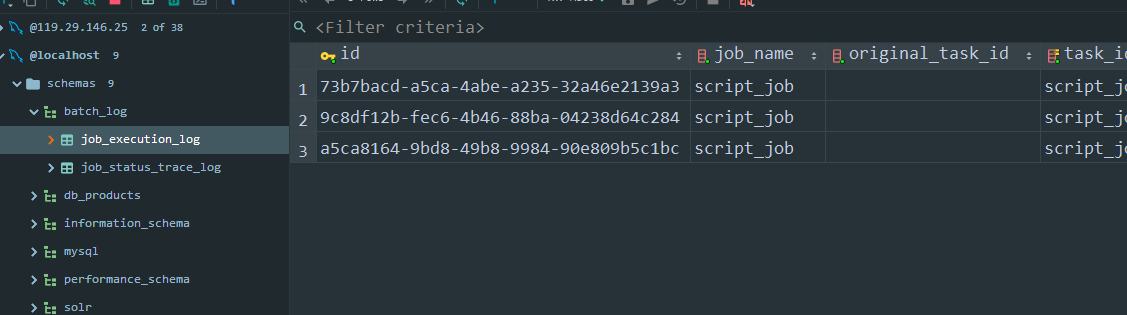
程序会自动创建两张表并添加记录
七 容易踩的坑
一 配置类中配置bean的时候,方法名不要重复,否则会发现任务不跑,
二 测试分布式的时候,必须跑在ip不一样的服务上,否则不会实现分片
三 我的版本再pom里面,springboot版本是2.0.6,版本不一样可能用法也有些区别
四 理论上xml更简单,但是我个人比较喜欢代码风格,哈哈
五 脚本任务不能新建实例,参数传null,且确认命令是否有权限

