十九、SpringCloud Alibaba Sentinel实现熔断和限流(简介+安装+demo)
一、Sentinel简介#
1、官网#
http://github.com/alibaba/Sentinel
中文文档:https://github.com/alibaba/Sentinel/wiki/%E4%BB%8B%E7%BB%8D
2、是什么?#
一句话总结来说:升级版的Hystrix
3、下载地址#
http://github.com/alibaba/Sentinel/releases
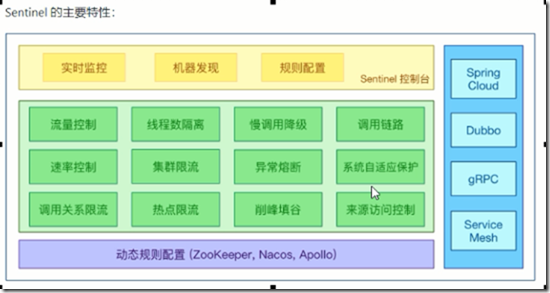
4、能干嘛#
5、怎么玩#
官网教你如何使用Sentinel
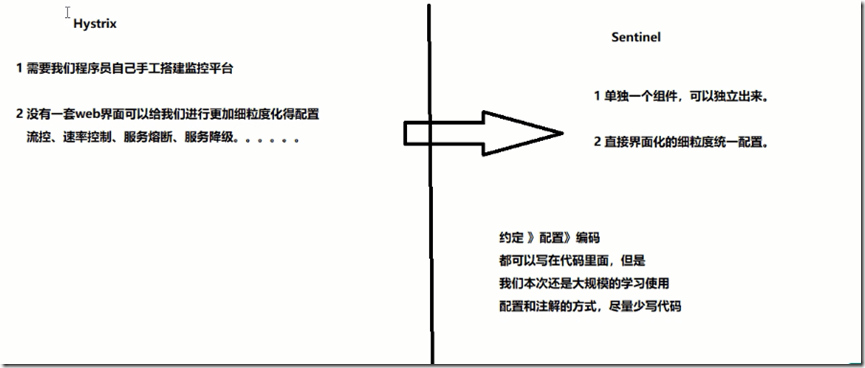
6、Sentinel和Hystrix的对比#
二、安装Sentinel控制台#
1、Sentinel分为两个部分#
核心库(JAVA客户端)不依赖任何框架/库,能够运行于所有java运行时环境,同时对Dubbo,Spring Cloud框架也有较好的支持
控制台(Dashboard)基于SpringBoot开发打包后直接运行,不需要Tomcat等应用
2、安装#
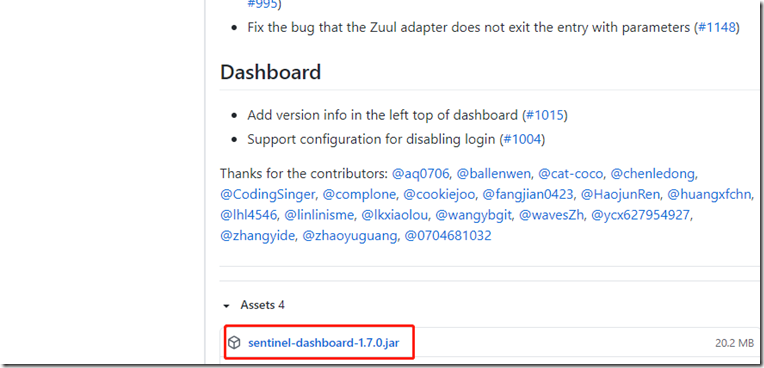
1)下载 Sentinel-dashboard
https://github.com/alibaba/Sentinel/releases
2)运行命令 : java -jar sentinel-dashboard-1.7.0.jar
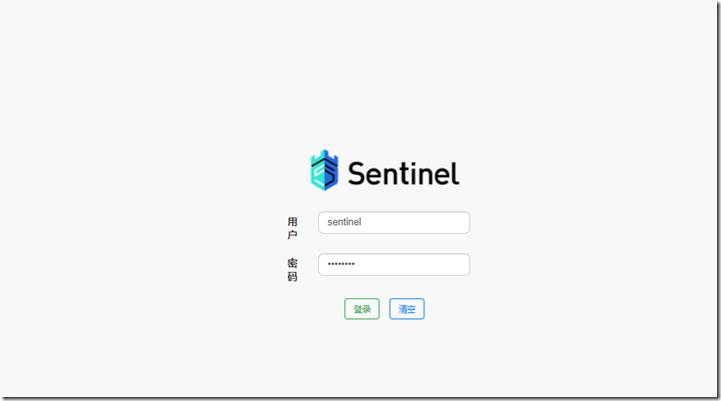
3)访问sentinel管理界面
localhost:8080
登录账号密码均为 sentinel
三、演示工程整合Sentinel#
1、启动Nacos8848#
2、新建module cloudalibaba-sentinel-service8401 整合Sentinel#
1)新建module (maven工程)
2)添加pom文件
<dependencies>
        <dependency><!-- 引入自己定义的api通用包,可以使用Payment支付Entity -->
            <groupId>com.atguigu.springcloud</groupId>
            <artifactId>cloud-api-commons</artifactId>
            <version>${project.version}</version>
        </dependency>
        <!--SpringCloud ailibaba nacos -->
        <dependency>
            <groupId>com.alibaba.cloud</groupId>
            <artifactId>spring-cloud-starter-alibaba-nacos-discovery</artifactId>
        </dependency>
        <!--SpringCloud ailibaba sentinel-datasource-nacos 后续做持久化用到-->
        <dependency>
            <groupId>com.alibaba.csp</groupId>
            <artifactId>sentinel-datasource-nacos</artifactId>
        </dependency>
        <!--SpringCloud ailibaba sentinel -->
        <dependency>
            <groupId>com.alibaba.cloud</groupId>
            <artifactId>spring-cloud-starter-alibaba-sentinel</artifactId>
        </dependency>
        <!--openfeign-->
        <dependency>
            <groupId>org.springframework.cloud</groupId>
            <artifactId>spring-cloud-starter-openfeign</artifactId>
        </dependency>
        <!-- SpringBoot整合Web组件+actuator -->
        <dependency>
            <groupId>org.springframework.boot</groupId>
            <artifactId>spring-boot-starter-web</artifactId>
        </dependency>
        <dependency>
            <groupId>org.springframework.boot</groupId>
            <artifactId>spring-boot-starter-actuator</artifactId>
        </dependency>
        <!--日常通用jar包配置-->
        <dependency>
            <groupId>org.springframework.boot</groupId>
            <artifactId>spring-boot-devtools</artifactId>
            <scope>runtime</scope>
            <optional>true</optional>
        </dependency>
        <dependency>
            <groupId>cn.hutool</groupId>
            <artifactId>hutool-all</artifactId>
            <version>4.6.3</version>
        </dependency>
        <dependency>
            <groupId>org.projectlombok</groupId>
            <artifactId>lombok</artifactId>
            <optional>true</optional>
        </dependency>
        <dependency>
            <groupId>org.springframework.boot</groupId>
            <artifactId>spring-boot-starter-test</artifactId>
            <scope>test</scope>
        </dependency>
    </dependencies>
3)添加yml文件
server:
  port: 8401

spring:
  application:
    name: cloudalibaba-sentinel-service
  cloud:
    nacos:
      discovery:
        server-addr: localhost:8848 #Nacos服务注册中心地址
    sentinel:
      transport:
        dashboard: localhost:8080 #配置Sentinel dashboard地址
        #在应用对应的机器上启动一个 Http Server,该 Server 会与 Sentinel 控制台做交互
        port: 8719

management:
  endpoints:
    web:
      exposure:
        include: '*'
4)主启动类
@EnableDiscoveryClient
@SpringBootApplication
public class MainApp8401
{
    public static void main(String[] args) {
        SpringApplication.run(MainApp8401.class, args);
    }
}
5)controller
@RestController
public class TestController {

    @GetMapping("testA")
    public String getA(){
        return "test a";
    }

    @GetMapping("testB")
    public String getB(){
        return "test b";
    }
}
3、启动Sentinel8080#
4、启动微服务8401#
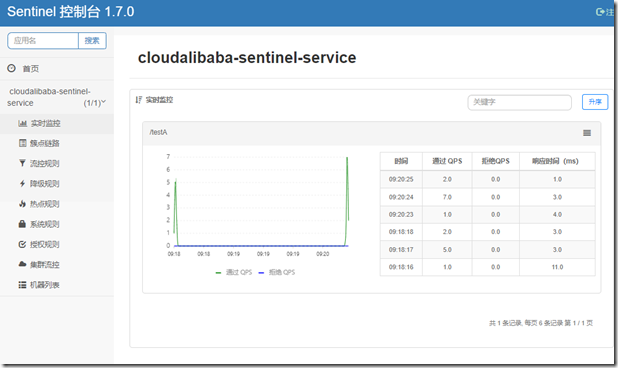
5、启动8401微服务后查看#
此时要先发送一个请求: http://localhost:8401/testA
Sentinel控制台才能检测到该微服务





【推荐】国内首个AI IDE,深度理解中文开发场景,立即下载体验Trae
【推荐】编程新体验,更懂你的AI,立即体验豆包MarsCode编程助手
【推荐】抖音旗下AI助手豆包,你的智能百科全书,全免费不限次数
【推荐】轻量又高性能的 SSH 工具 IShell:AI 加持,快人一步
· 从 HTTP 原因短语缺失研究 HTTP/2 和 HTTP/3 的设计差异
· AI与.NET技术实操系列:向量存储与相似性搜索在 .NET 中的实现
· 基于Microsoft.Extensions.AI核心库实现RAG应用
· Linux系列:如何用heaptrack跟踪.NET程序的非托管内存泄露
· 开发者必知的日志记录最佳实践
· TypeScript + Deepseek 打造卜卦网站:技术与玄学的结合
· Manus的开源复刻OpenManus初探
· AI 智能体引爆开源社区「GitHub 热点速览」
· 三行代码完成国际化适配,妙~啊~
· .NET Core 中如何实现缓存的预热?