ndoe.js 和npm私有仓库的搭建
下载nodejs的压缩包 网址:https://nodejs.org/en/
下载以tar.xz结尾的包例如:node-v8.9.4-linux-x64.tar.xz
上传包到制定的目录 可以用lrzsz
解压:xz -d
node-v8.9.4-linux-x64.tar.xz
然后在 拆包: tar –xvf node-v8.9.4-linux-x64.tar
配置环境变量在/etc/profile
Vim /etc/profilr 最后加入node的变量
export NODE=/root/node-v8.9.4-linux-x64 #node的安装路径
export PATH=$PATH:$NODE/bin #node的bin目录
推出声明一下
Source /etc/profile #环境变量就设好了
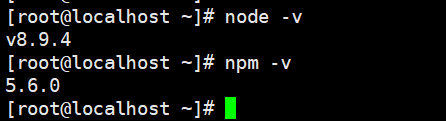
查看是否安装成功:出现版本号就是安装成功了
配置npm的源:
npm set registry https://registry.npm.taobao.org/ # 推荐淘宝npm镜像
安装配置sinopia
npm install -g sinopia启动sinopia
输入:sinopia 启动了就
配置文件config.yaml如下:
# This is the default config file. It allows all users to do anything,
# so don't use it on production systems.
# Look here for more config file examples:
# https://github.com/rlidwka/sinopia/tree/master/conf
# path to a directory with all packages
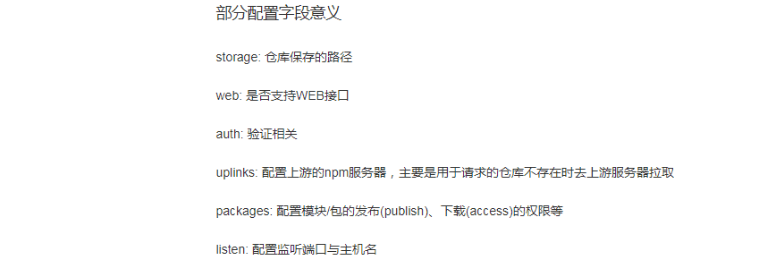
storage: /home/{user}/.local/share/sinopia/storage # 库存路径,需要考虑磁盘空间
web: # 自定义web项,即浏览器访问页面
# web interface is disabled by default in 0.x, will be enabled soon in 1.x
# when all its issues will be fixed
# set this to `true` if you want to experiment with web ui now;
# this has a lot of issues, e.g. no auth yet, so use at your own risk
#enable: true
title: Sinopia
# logo: logo.png
# template: custom.hbs
auth:
htpasswd:
file: ./htpasswd # 添加用户(npm adduser)后自动创建,保存用户信息,可以初始化用户
# Maximum amount of users allowed to register, defaults to "+inf".
# You can set this to -1 to disable registration.
#max_users: 1000 # 设置为-1不能npm adduser
# a list of other known repositories we can talk to
uplinks: # 可以配置多个上游地址,后面packages中的proxy指定用哪个
npmjs:
url: https://registry.npm.taobao.org/ # 更改此上游地址
# amount of time to wait for repository to respond
# before giving up and use the local cached copy
#timeout: 30s # 请求上游地址超时时间
# maximum time in which data is considered up to date
# default is 2 minutes, so server won't request the same data from
# uplink if a similar request was made less than 2 minutes ago
#maxage: 2m # 包过期时间
# if two subsequent requests fail, no further requests will be sent to
# this uplink for five minutes
#max_fails: 2 # 容许依赖请求最大失败数
#fail_timeout: 5m # 依赖请求超时时间
packages: # 包的权限管理,$all为所有人,$authenticated为通过验证人
# 分布和安装两种权限,值可以特指某几人
'@*/*': # 跟package.json中的name属性进行匹配
# scoped packages
access: $all
publish: $authenticated
'*':
# allow all users (including non-authenticated users) to read and
# publish all packages
# you can specify usernames/groupnames (depending on your auth plugin)
# and three keywords: "$all", "$anonymous", "$authenticated"
access: $all
# allow all known users to publish packages
# (anyone can register by default, remember?)
publish: $authenticated
# if package is not available locally, proxy requests to 'npmjs' registry
proxy: npmjs
# log settings
logs:
- {type: stdout, format: pretty, level: http}
#- {type: file, path: sinopia.log, level: info}
listen: 0.0.0.0:4873 # 设置监听地址,0.0.0.0匹配本机地址
# if you use nginx with custom path, use this to override links
#url_prefix: https://dev.company.local/sinopia/
# Configure HTTPS, it is required if you use "https" protocol above.
#https:
# key: path/to/server.key
# cert: path/to/server.crt
# you can specify proxy used with all requests in wget-like manner here
# (or set up ENV variables with the same name)
#http_proxy: http://something.local/ # 设置代理服务器
#https_proxy: https://something.local/
#no_proxy: localhost,127.0.0.1
# maximum size of uploaded json document
# increase it if you have "request entity too large" errors
#max_body_size: 1mb # http请求body大小
修改uplinks及listen值,同上,重启sinopia
如果想引用别的配置文件,请通过sinopia -c <配置文件>指定
用pm2托管sinopia
上面方式启动sinopia只是暂时的,退出命令行就没有了,因此需要一个长期开启sinopia方案,通过pm2托管,可以让sinopia进程永远活着,就算意外挂了也可自动重启。
安装pm2
$ npm install -g pm2
安装完后,使用pm2启动sinopia
$ pm2 start sinopia
关闭时
pm2 stop sinopia
最后更改npm源地址为私有库地址
$ npm set registryhttp://{服务器ip}:4873/# 内网测试可行
Nrm是npm的管理工具:
nrm的安装:

添加私有仓库
nrm add mynpm http://192.168.44.139:4873
使用私有仓库
nrm use mynpm
测试私有仓库
$ mkdir test$ cd test$ npm install webpack# 第一次安装比较慢
...
$ rm -rf webpack$ npm install webpack# 第二次安装就比较快了
搭建好私有npm仓库后遇到什么坑?
我发现使用nrm切换到私有npm仓库对应的源后,下载带@ 符号的包都下载失败,比如下载 @angular/core,就会下载失败,这是为什么呢,查阅了一些资料,发现这其实是Sinopia自己的bug,bug产生的原因就是:sinopia在代理到npmjs.org公有库时将@符号转码为%40,致使在公有库中找不到对应的包,返回404 ,简单点说就是 @angular/core 代理请求的时候被转换成了 %40angular/core,所以我们需要在代理请求发出之前将其转回 @angular/core
修改sinopia源码:修改位于sinopia/lib/up-storage.js文件第10行:将var encode = encodeURIComponen;,更改为:var encode = function(thing) {return encodeURIComponent(thing).replace(/^%40/, '@');}; ,这段代码的含义就是将%40转回@,于是就解决了不能下载带有@符号的npm包的bug
现在sinopia不好用有时解决不了下载带@ 符号的包都下载失败的问题 ,就不需要安装sinopia可以安装更好的verdaccio
安装 verdaccio
npm install –g verdaccio
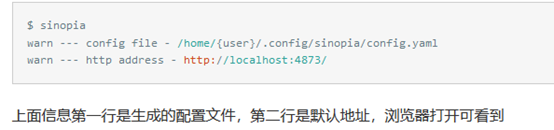
安装完以后可以启动
verdaccio 例:

会显示撇子文件的路径等等,但是这个是其他运行,退出终端就挂,所以要安装mp2 来管理verdaccio
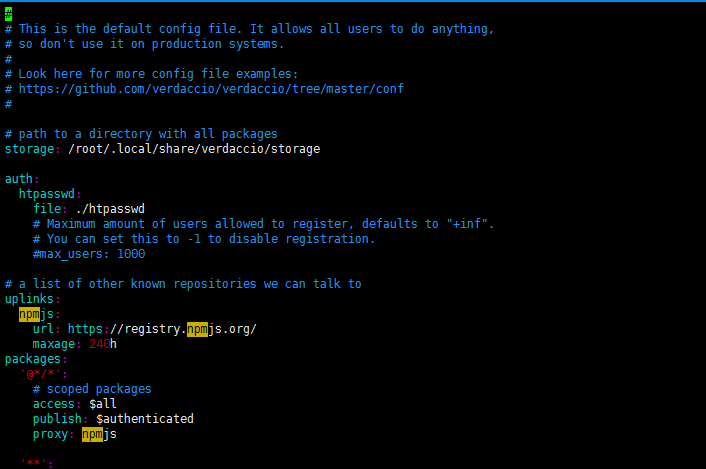
修改配置文件Verdaccio
cd /root/.config/verdaccio
vim config.yaml (实例)(也可以参考https://verdaccio.org/docs/en/configuration)

(2)安装pm2进程管理 并启动verdaccio服务
•npm install –g pm2
•ls –s/root/node-v6.9.5-linux-x64/bin/pm2 /usr/local/bin/pm2 (这不可以不做)
•pm2 start `which verdaccio` #启动
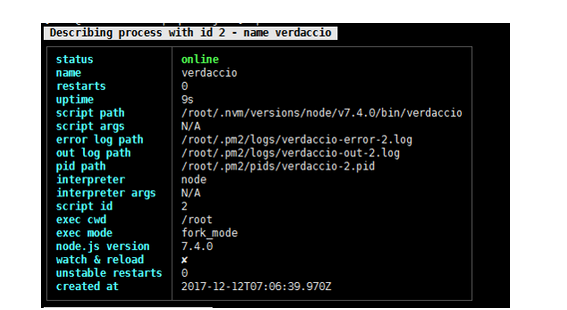
网上的资料散 搞了好半天,总算完成了 哈哈哈哈
可以参考 https://segmentfault.com/a/1190000005790827

 浙公网安备 33010602011771号