

webpack普通多页面打包
场景
在日常工作中,我们可能会遇到开发一个纯展示的静态官网的需求。
此时我们不想使用React、Vue来构建项目,但是我们又想使用create-react-app或者vue-cli的打包功能。其实我们只要去学习一下webpack或者gulp就可以轻松实现普通页面的打包优化了。
本文将介绍基于webpack生产简单多页面项目的一些步骤,如果你想直接使用,也可直接点击链接跳转:项目地址
注:所用系统为mac
起步
初始化项目
// 1. 新建目录
mkdir normal-webpack-demo
cd normal-webpack-demo
// 2. 初始化
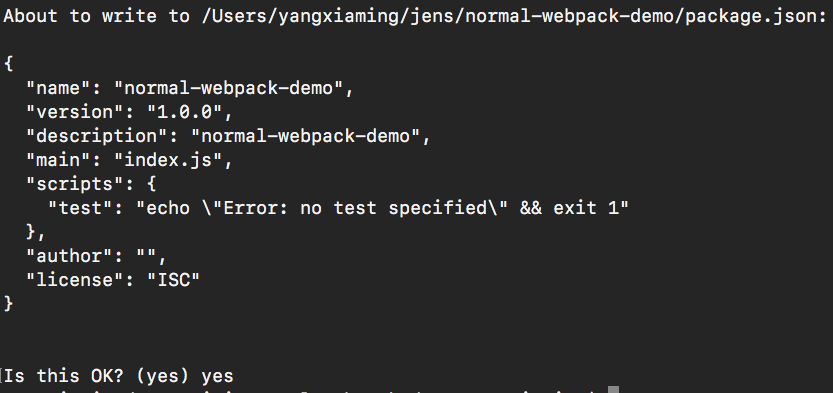
npm init
// 一些选项,回车就行
安装相关依赖
// 1. webpack相关

npm i webpack webpack-cli webpack-dev-server webpack-merge -D
// webpack-cli 可以简单的理解成webpack的命令行工具
// webpack-dev-server 是webpack提供的一个小型Express服务器,开发中提供web服务
// webpack-merge 是合并不同环境下的webpack配置

// 2. css相关

// css-loader
npm i less css-loader postcss-loader less-loader -D
// css压缩
npm i mini-css-extract-plugin optimize-css-assets-webpack-plugin autoprefixer -D

// 3. js/html相关

npm i babel-loader @babel/core @babel/preset-env -D
npm i html-webpack-plugin clean-webpack-plugin -D

// 4. 字体/图片相关
npm i file-loader -D
组织项目结构
├── config  // 目录存放配置相关文件
├── package-lock.json
├── package.json
└── src // 目录放在项目源码
    ├── assets // 目录放资源文件 - 例如字体、全局样式等
    └── views  // 目录放页面文件
配置项目
webpack相关配置
我们在config目录下新建三个文件,分别为webpack公共配置、开发环境配置以及生产环境配置
├── config
│   ├── webpack.base.js
│   ├── webpack.dev.js
│   └── webpack.prod.js
- webpack.base.js
此配置文件是公共配置文件,定义了webpack基本等一些配置项
const path = require('path');
const {
    CleanWebpackPlugin
} = require('clean-webpack-plugin');
const HtmlWebpackPlugin = require('html-webpack-plugin');
// 不再将样式内嵌到 JS bundle 而是独立分离压缩的 CSS 文件
const MiniCssExtractPlugin = require('mini-css-extract-plugin');

module.exports = {
    entry: {
        index: './src/views/index/main.js',
        detail: './src/views/detail/main.js',
    },
    resolve: {
        alias: {
            'css': path.resolve(__dirname, '../', 'src/assets/css/'),
            'font': path.resolve(__dirname, '../', 'src/assets/font/'),
            'img': path.resolve(__dirname, '../', 'src/assets/img/'),
            'js': path.resolve(__dirname, '../', 'src/assets/js/'),
        }
    },
    stats: {
        children: false
    },
    module: {
        // noParse: /jquery/,
        rules: [{
                test: /\.less$/,
                use: [
                    {
                        loader: MiniCssExtractPlugin.loader,
                        options: {
                            publicPath: '../',
                            hmr: process.env.NODE_ENV === 'development', // 热更新
                        }
                    },
                    {
                        loader: 'css-loader',
                        options: {
                            importLoaders: 1
                        }
                    },
                    'postcss-loader',
                    'less-loader'
                ]
            },
            {
                test: /\.(woff|woff2|eot|ttf|otf)$/,
                use: [{
                    loader: 'file-loader',
                    options: {
                        name: '[name].[ext]',
                        outputPath: 'font',
                    },
                }]
            },
            {
                test: /\.js$/,
                exclude: /(node_modules|bower_components)/,
                use: {
                  loader: 'babel-loader',
                  options: {
                    presets: ['@babel/preset-env']
                  }
                }
            },
            {
                test: /\.(png|jpg|gif|svg)$/,
                use: [{
                    loader: 'file-loader',
                    options: {
                        name: '[name].[ext]',
                        outputPath: 'img',
                    },
                }]
            }
        ]
    },
    plugins: [
        new CleanWebpackPlugin(),
        new MiniCssExtractPlugin({
            filename: 'css/[name].css',
        }),
        new HtmlWebpackPlugin({
            filename: 'index.html',
            chunks: ['index'],
            template: './src/views/index/index.html'
        }),
        new HtmlWebpackPlugin({
            filename: 'detail.html',
            chunks: ['detail'],
            template: './src/views/detail/index.html'
        }),
    ],
};
- webpack.dev.js
此配置文件是开发环境时等配置文件,它使用webpack-merge插件整合了基础配置,并输出了一些开发环境下等特色配置,比如热更新、source-map,代理等
const {
    smart
} = require('webpack-merge');
const base = require('./webpack.base');
const webpack = require('webpack');

module.exports = smart(base, {
    mode: 'development',
    devtool: 'inline-source-map',
    devServer: {
        open: true,
        hot: true,
        contentBase: './dist',
        port: 9000,
        // proxy: {
        //     '/blog': {
        //         target: 'http://10.0.38.223:3000',
        //         changeOrigin: true,
        //         secure: false,
        //     },
        // }
    },
    plugins: [
        new webpack.NamedModulesPlugin(), // 当开启 HMR 的时候使用该插件会显示模块的相对路径
        new webpack.HotModuleReplacementPlugin(), //模块热替换插件
    ]
});
- webpack.prod.js
生产打包时使用的配置项,也会合并基础配置,定义输出配置,对css,js进行了压缩处理等
const path = require('path');
const { smart } = require('webpack-merge');
const base = require('./webpack.base');
// 压缩JavaScript
const UglifyJsPlugin = require('uglifyjs-webpack-plugin');
// 压缩css
const OptimizeCss = require('optimize-css-assets-webpack-plugin');


module.exports = smart(base, {
    mode: 'production',
    output: {
        path: path.resolve(__dirname, '../', 'dist'),
        filename: './js/[name].bundle.js',
        chunkFilename: './js/[name].bundle.js',
        publicPath: ""
    },
    optimization: {
        minimizer: [
            new OptimizeCss(),
            new UglifyJsPlugin({
                cache: true, //缓存
                parallel: true, //并发多个
                sourceMap: false //源码映射
            })
        ]
    }
});
其他配置
- .browserslistrc
配置 babel-env 和 autoprefixer 预期兼容到的目标环境
> 1%
last 2 versions
- postcss.config.js
配置 postcss
module.exports = {
    plugins: [
        require('autoprefixer')
    ]
}
- 修改 package.json
// 删除 "main": "index.js",
// 在 "scripts" 中增加一下命令

"dev": "webpack-dev-server --config ./config/webpack.dev.js",
"build": "webpack --config ./config/webpack.prod.js",
开发
在 src 目录下创建相应页面, 例如:
src
    ├── assets
    │   ├── css
    │   │   └── global.less
    │   ├── font
    │   │   ├── ... // 字体文件
    │   ├── img
    │   │   └── bg.jpg
    │   └── js
    └── views
        ├── detail
        │   ├── detail.less // 样式文件
        │   ├── index.html  // 页面模板
        │   └── main.js // 入口文件
        ├── index
        │   ├── index.html
        │   ├── index.less
        │   └── main.js
        └── ...
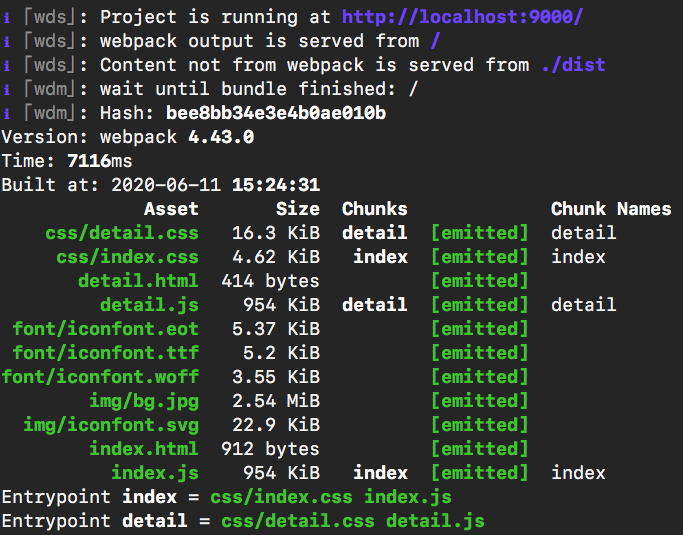
开发完成后,运行 npm run dev 即可看到项目效果。
到这里我们就可以算是完成了,基于 webpack 配置普通页面打包项目了。
升级
接下来这部分,是让我们可以解脱CV大法,直接生成新的页面。
运行效果为,在mac系统下, 运行 npm run new page-name,就生成相应的页面模板。
调整相关配置
webpack.base.js
调整 entry 和 HtmlWebpackPlugin
// 增加
let { entry, pages } = require('./page.config');

module.exports = {
    entry,
    ...
    plugins: [
        new CleanWebpackPlugin(),
        new MiniCssExtractPlugin({
            filename: 'css/[name].css',
        }),
        ...pages
    ],
};
自动生成模板脚本
// new.sh

#!/bin/bash
if [ "$1" ]; then

cd src/views
for file in $(ls)
do
if [ $file == $1 ];then
    echo $1'\033[33m 目录已存在, 请使用其他名称 \033[0m'
    exit
fi
done
mkdir $1
cd $1

echo "" > main.js
echo "import 'css/global.less'
import './$1.less'" > main.js


echo "" > index.html
echo '<!DOCTYPE html>
<html lang="zh">
  <head>
      <meta charset="utf-8">
      <meta name="viewport" content="width=device-width,initial-scale=1,maximum-scale=1, minimum-scale=1,user-scalable=no">
      <meta name="renderer" content="webkit">
      <meta http-equiv="X-UA-Compatible" content="IE=Edge,chrome=1">
      <meta name="format-detection" content="telephone=no">
      <meta name="msapplication-tap-highlight" content="no">
      <meta http-equiv="Expires" content="0">
      <meta http-equiv="Pragma" content="no-cache">
      <meta http-equiv="Cache-control" content="no-cache">
      <meta http-equiv="Cache" content="no-cache">
      <link rel="icon" href="favicon.ico">
      <title>'$2'</title>
  </head>
  <body>
  </body>
</html>' > index.html

echo "" > $1.less


echo $1'\033[32m 文件已生成 \033[0m'

gulp setout

else
    echo "\033[33m 文件名称不能为空 \033[0m" "参考输入(举例): npm run new about"
fi
gulp自动生成页面配置文件
const { series, src } = require('gulp')
const through = require('through2')
const fs = require('fs')

function getPagesInfo(cb) {
    let pages = [],
        entry = {}
    src('./src/views/**/main.js')
        .pipe(through.obj(
            (chunk, enc, callback) => {
                let filename = chunk.path.split('/src/views/')[1].slice(0, -8)
                var page = `{
            filename: '${filename}.html',
            chunks: ['${filename}'],
            template: './src/views/${filename}/index.html'
        }`
                pages.push(page)
                entry[filename] = `./src/views/${filename}/main.js`
                callback(null, chunk)
            },
            (callback) => {
                setConfigInfo(entry, pages, cb)
                callback()
            }
        ))
}

function setConfigInfo(entry, pages, cb) {
    let eStr = ``
    Object.entries(entry).forEach(item => {
    eStr+= `${item[0]}: '${item[1]}',
        `
    })
    let pStr = ``
    pages.forEach(item => {
    pStr+=`new HtmlWebpackPlugin(${item}),
        `
    })

let pageConfig = `
const HtmlWebpackPlugin = require('html-webpack-plugin');

module.exports = {
    entry: {
        ${eStr}
    },
    pages: [
        ${pStr}
    ]
}`
    writeInfo(pageConfig)
    cb()
}

function writeInfo(info) {
    fs.writeFile('config/page.config.js', info ,  function(err) {
        if (err) {
            return console.error(err);
        }
        console.log("页面配置数据写入成功!");
    });
}

exports.setout = series(getPagesInfo)

以上就是本次分享内容。
