

阿里云-搭建支付宝小程序
1、入驻支付宝开放平台
开发支付宝小程序前需要您入驻支付宝开放平台,具体操作请参见开发者入驻。
2、创建应用
在支付宝开放平台上创建小程序应用,具体操作请参见创建小程序。
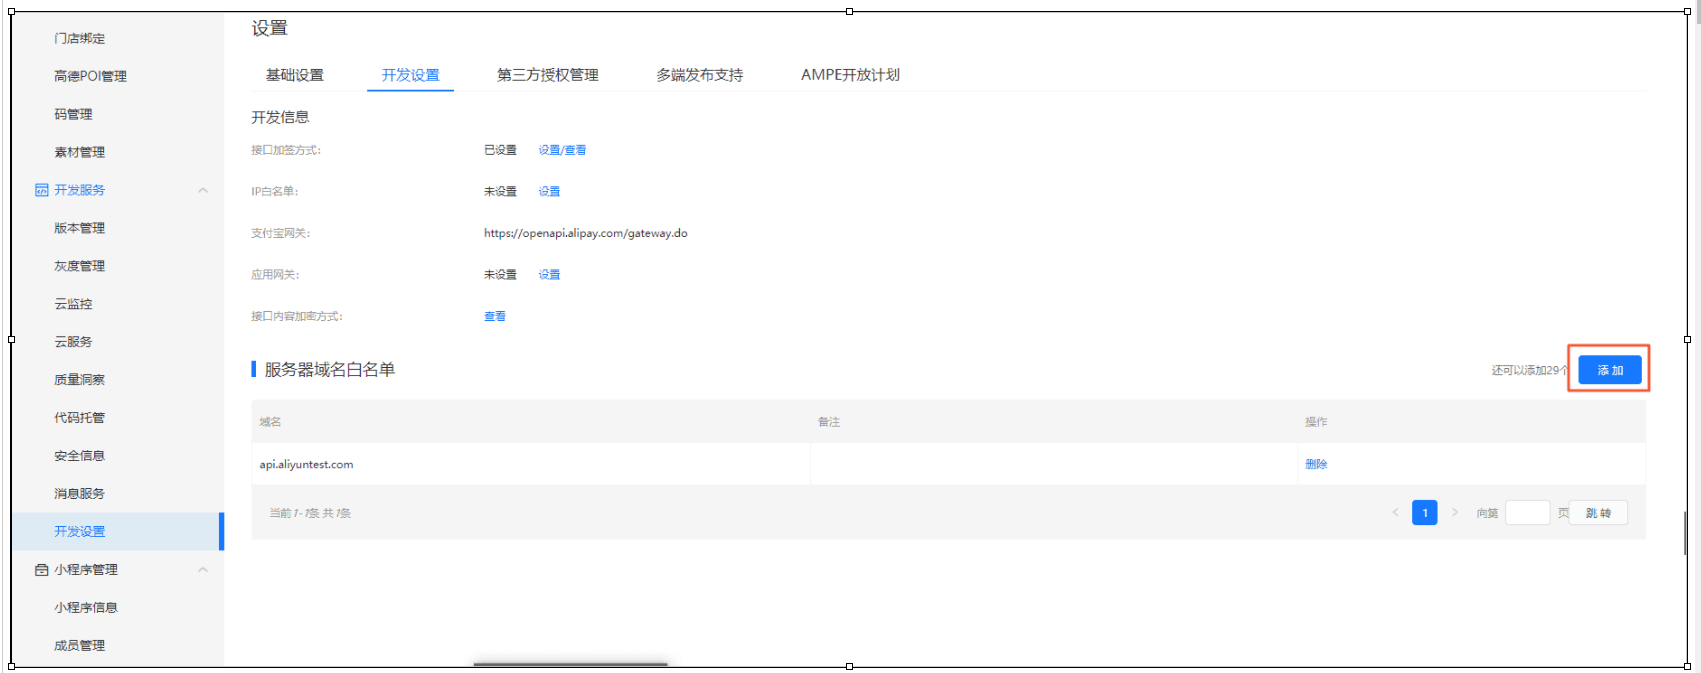
小程序应用创建完成后,在开发服务 > 开发设置 > 服务器域名白名单添加您的服务器域名,否则上线后的小程序将访问不到后端服务。
3、安装小程序开发环境并创建项目
1. 安装Node.js开发环境,请到Node.js页面下载并安装Node.js环境。
2. 下载并安装支付宝小程序开发者工具。详细信息请参见下载说明。
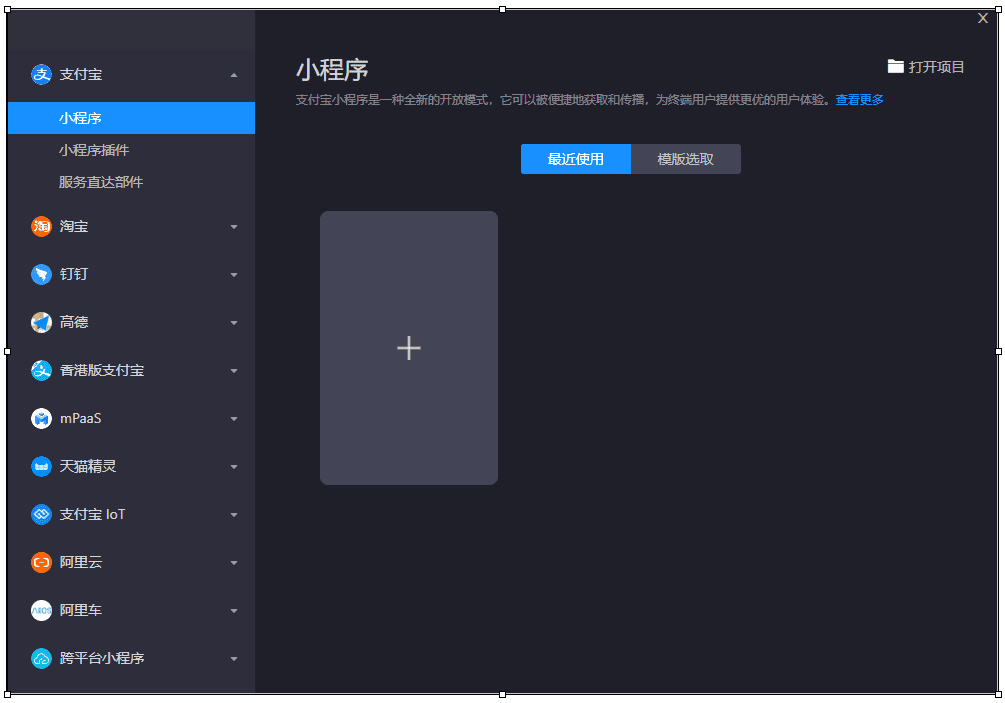
3. 打开小程序开发者工具。
4. 单击加号创建支付宝小程序空白项目。
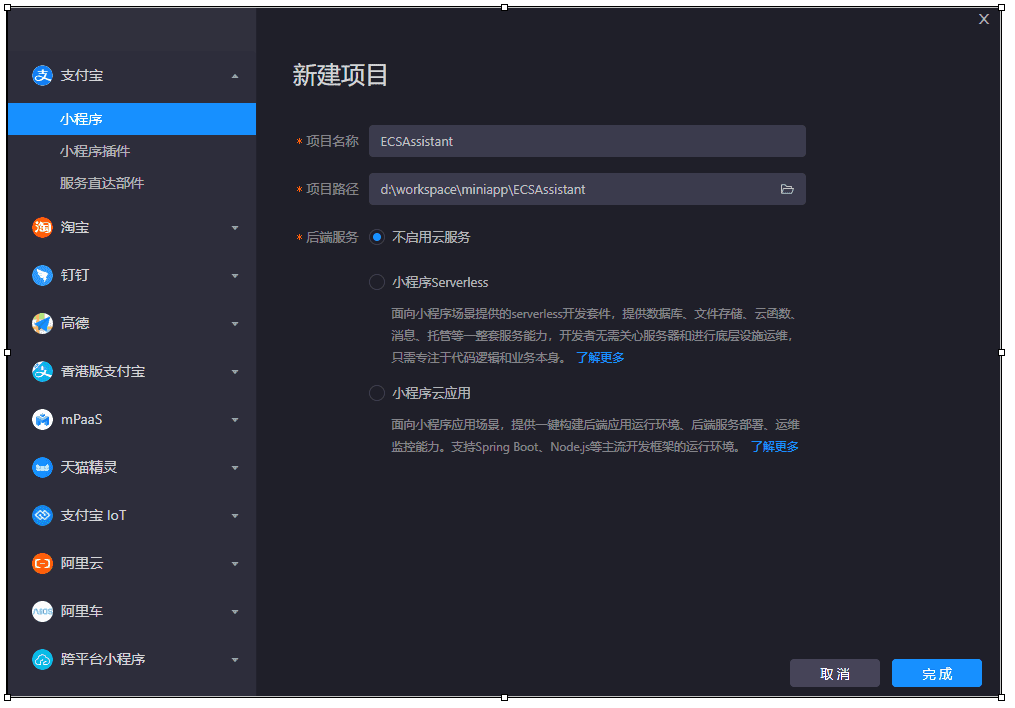
5. 填写项目名称,例如:ECSAssistant。然后填写项目路径,后端服务选择不启用云服务。最后单击完成。
4、初识小程序项目结构
生成的小程序空白项目结构如下。
ECSAssistant
├── app.acss
├── app.js
├── app.json
└── pages
    └── index
        ├── index.axml
        ├── index.js
        └── index.json
可以看到小程序的顶层有三个文件,它们定义了小程序的一些全局配置。
- app.json 是小程序的全局配置,用于配置小程序的页面列表、默认窗口标题、导航栏背景色等。更多配置请参见小程序全局配置介绍。
- app.acss 定义了全局样式,作用于当前小程序的所有页面。
- app.js 用于注册小程序应用,可配置小程序的生命周期,声明全局数据,调用丰富的 API。
小程序所有的页面文件都在pages/路径下,页面文件有四种文件类型,分别是.js、.axml、.acss和.json后缀的文件。相比全局配置文件,页面配置文件只对当前页面生效。其中.axml文件定义了当前页面的页面结构。
此外,小程序中的所有页面都需要在app.json文件中声明。
5、开发小程序
1. 编辑app.json文件,将小程序页面Title修改为ECS小助手,修改后的app.json文件内容如下。
{
  "pages": [
    "pages/index/index"
  ],
  "window": {
    "defaultTitle": "ECS小助手"
  }
}
2. 编辑index.axml文件,定义index页面的页面结构,修改后的index.axml文件内容如下。
<view class='container'>
  <input placeholder='请输入你的ECS实例ID' class='search-input' value='{{ inputValue }}' onBlur='bindblur'></input>
  <view class='resultView' hidden='{{ showView }}'>
    <text class='result'>CPU数:{{queryResult.Cpu}} 核