

动态代理详解
动态代理详解
1、什么是代理模式
代理模式引用官方原文话来讲:代理模式通过引入一个代理对象来控制对原对象的访问。代理对象在客户端和目标对象之间充当中介,负责将客户端的请求转发给目标对象,同时可以在转发请求前后进行额外的处理。转化为生活中例子来讲(代购/秘书等),我们需要购买一个物品时,自己又不想动,就在网上找了一个代购的小姐姐帮忙购买,这样即拿到了商品,自己本身并没有做什么事情,可以看作是一个代理,即 将自己的权利交给其他人/秘书来做的情况,就是代理模式的一种。
代理模式分为静态代理,与动态代理两种模式,我们就展开来讲讲这两种模式的区别。
静态代理:静态代理是一种在编译时就已经确定代理类和目标对象关系的代理方式。在静态代理中,代理类的代码在编译时就已经确定,因此实现起来比较简单,易于理解和维护。然而,由于代理类的行为无法在运行时动态改变,这限制了其灵活性和扩展性。
动态代理:动态代理是一种程序设计技术,它允许在运行时动态地创建对象的代理,而不需要在编译时知道具体的类。动态代理的主要目的是在不修改原始类代码的情况下,为对象提供额外的功能,比如日志记录、权限检查、事务管理等。动态代理广泛应用于面向切面编程(AOP)中。
总结:以上两种模式各有各的好处与优缺点,可以根据实际场景运用相关技术实现。本文只阐述动态代理部分,静态代理后续文章可查看。
2、动态代理有几种实现方式
动态代理的实现方式有两种,一种是基于接口的JDK动态代理,只要有JDK的包就有代理相关的类与方法。一种基于类的CGLIB动态代理,需要我们引入第三方的maven包才能使用。这两种方式都是代理的一种,没有好坏之分,可以根据是否接口来判定使用哪种编程即可。具体的实现方式往下看。
3、动态代理的好处是什么,有哪些场景会使用
好处:
解耦合:动态代理可以在不修改原有类代码的情况下,为对象添加额外的功能,从而实现功能和业务逻辑的解耦。
扩展性:动态代理允许在运行时动态地为对象添加新的行为,这使得代码更加灵活,易于扩展。
场景:日志记录,权限检查,事务管理,RPC框架,AOP等等,很多业务都可以使用动态代理来增强功能。
4、JDK代理实现方式
我们先来看看最初版的动态代理实现方式,大家注意观察有哪些地方可以优化的。
1、业务接口
/**
 * @author wh
 * 核心业务接口类
 */
public interface CoreService {

    /**
     * 服务执行
     */
    void execute();

}
2、业务实现类
/**
 * 新增业务的实现类
 */
public class AddService implements CoreService {
    /**
     * 服务执行
     */
    @Override
    public void execute() {
        System.out.println("新增数据。");
    }
}
3、代理实现类:在新增业务的execute()方法前后做其他业务的处理。
import java.lang.reflect.InvocationHandler;
import java.lang.reflect.Method;

/**
 * @author wh
 * 基础代理模式已经实现了JDK的动态代理,
 * 但是有个缺陷,invoke方法涉及到了硬编码,每个业务的动态代理都需要重新写一份,
 * 这样并不符合我们精简代码与业务解耦,所以需要升级哈
 */
public class ProxyWrapperOneVersion implements InvocationHandler {

    /**
     * 目标对象
     */
    private Object targetObject;

    /**
     * 构造器
     * 通过组合的方式将需要代理的对象传递过来,降低类与类之间的耦合度
     *
     * @param targetObject 需要被代理的对象
     */
    public ProxyWrapperOneVersion(Object targetObject) {
        this.targetObject = targetObject;
    }

    /**
     * 代理对象执行的方法
     *
     * @param proxy  代理类
     * @param method 方法
     * @param args   参数
     * @return 返回执行结果
     * @throws Throwable 异常
     */
    @Override
    public Object invoke(Object proxy, Method method, Object[] args) throws Throwable {
        System.out.println("前置处理器");
        Object invoke = method.invoke(targetObject, args);
        System.out.println("后置处理器");
        return invoke;
    }
}
4、测试类
import com.test.proxy.core.proxy_test.coreInterface.CoreService;
import com.test.proxy.core.proxy_test.coreInterface.impl.AddService;
import com.test.proxy.core.proxy_test.proxy.core.ProxyWrapperOneVersion;

/**
 * @author wh
 */
public class ProxyTestApplication {

    public static void main(String[] args) {
        // 获取新增服务代理对象
        CoreService addProxy = (CoreService) ProxyWrapperOneVersion.warp(new AddService());
        addProxy.execute();
    }
} 
通过结果来看,以上的代码实现了我们的功能,但仔细来看,通用能力不行,且invoke方法中有硬编码情况。那我们如何怎么处理呢,我们不妨想一想,假设这个是日志的增强,目前产品确定只权限的增强,那我们就必须撤销日志的增强,那我们是不是就需要重新写一个权限的InvocationHandler实现类(产品的需要是动态的,说不定哪天有要日志了),虽然可以实现业务需要,但是终归不是最终的解决方案。为了解决上述的问题,我们将这样目标对象一致,增强功能不同的情况(其实就是invoke方法的业务不同),直接将invoke的方法抽成一个类来统一管理,不同的业务实现不同的需求,想要时就加入,不想要就撤销,这样就不存在硬编码的情况了,提升了系统的稳定性与拓展性。
1、拦截器接口
import java.lang.reflect.Method;

/**
 * @author wh
 * 1、定义接口类,每个增强业务都实现它即可。
 * 拦截器接口:可以看成代理对象具体执行的invoke方法
 */
public interface Interceptor {
    /**
     * 拦截执行
     *
     * @param targetObject 目标对象
     * @param method       目标方法
     * @param args         目标参数
     * @return 返回执行结果
     * @throws Exception 异常
     */
    Object intercepte(Object targetObject, Method method, Object[] args) throws Exception;
}
2、日志拦截器
import com.test.proxy.core.proxy_test.proxy.interceptor.Interceptor;
import java.lang.reflect.Method;
/**
 * @author wh
 * 2、各个业务实现类
 * 日志拦截器,对方法增加了日志的接入
 */
public class LogInterceptor implements Interceptor {
    /**
     * 拦截执行(第二版)
     *
     * @param targetObject 目标对象
     * @param method       目标方法
     * @param args         目标参数
     * @return 返回执行结果
     * @throws Exception 异常
     */
    @Override
    public Object intercepte(Object targetObject, Method method, Object[] args) throws Exception {
        System.out.println("日志记录启动");
        Object invoke = method.invoke(targetObject, args);
        System.out.println("日志记录完成");
        return invoke;
    }
}
3、代理包装类
import com.test.proxy.core.proxy_test.proxy.interceptor.Interceptor;
import java.lang.reflect.InvocationHandler;
import java.lang.reflect.Method;
import java.lang.reflect.Proxy;
/**
 * @author wh
 * 第二版本虽然解决了第一个版本硬编码且无法复用的问题,但是也同时抛出了另外的一个风险。
 * 例如:某一个功能需要将日志,事务,权限的功能都增强进去,这时候就无法满足现状了,需要在升级改造一次。
 * 3、代理包装类
 */
public class ProxyWrapperTwoVersion implements InvocationHandler {
    /**
     * 目标对象
     */
    private Object targetObject;

    /**
     * 拦截器
     */
    private Interceptor interceptor;

    public ProxyWrapperTwoVersion(Object targetObject, Interceptor interceptor) {
        this.targetObject = targetObject;
        this.interceptor = interceptor;
    }

    @Override
    public Object invoke(Object proxy, Method method, Object[] args) throws Throwable {
        return interceptor.intercepte(targetObject, method, args);
    }

    /**
     * 静态方法:主要构建代理类
     *
     * @param targetObject 目标对象
     * @param interceptor  拦截器
     * @return 返回代理类
     */
    public static Object wrap(Object targetObject, Interceptor interceptor) {
        ProxyWrapperTwoVersion serviceProxyTwo = new ProxyWrapperTwoVersion(targetObject, interceptor);
        return Proxy.newProxyInstance(targetObject.getClass().getClassLoader(), targetObject.getClass().getInterfaces(), serviceProxyTwo);
    }
}
4、测试类
import com.test.proxy.core.proxy_test.coreInterface.CoreService;
import com.test.proxy.core.proxy_test.coreInterface.impl.AddService;
import com.test.proxy.core.proxy_test.proxy.core.ProxyWrapperTwoVersion;
import com.test.proxy.core.proxy_test.proxy.interceptor.impl.LogInterceptor;
/**
 * @author wh
 * 4、测试类
 */
public class ProxyTestApplication {
    public static void main(String[] args) {
        CoreService addProxy = (CoreService) ProxyWrapperTwoVersion.wrap(new AddService(), new LogInterceptor());
        addProxy.execute();
    }
}
通过对invoke方法业务抽离,封装具体Interceptor的实现类,那么我们只需要关注对业务的Interceptor的实现,而不需要关注代理包装类,达到我们想要的效果,也解决了上诉的问题。但是这样也同时抛出了另外一个问题,即产品要想将execute()方法同时加上 日志、权限、事务 的增强,这样就无法满足了。是不是有小伙伴想直接更改LogInterceptor实现类,这样是不允许的,因为其他业务也会使用,一旦加上,影响面很广,故障率也会增强,所以还是的在原有版本来看看如果改进一哈,满足业务需求。重点:在不影响现有业务的情况,对功能的增强。既然要同时实现多个interceptor,那我么不妨将这些interceptor看作一个链路,按照我们规划的链路来执行,这样既不会对其他业务产生影响,也不会对现有功能问题。既然我们要实现链路,那我们是不是需要将设计模式中的责任链模式嵌入进来呢。
1、代理配置实体类
import java.lang.reflect.Method;

/**
 * 拦截器核心参数
 *
 * @author wh
 */
public class Invocation {

    /**
     * 目标对象
     */
    private Object targetObject;

    /**
     * 目标方法
     */
    private Method method;

    /**
     * 目标方法的参数
     */
    private Object[] args;

    public Object getTargetObject() {
        return targetObject;
    }

    public void setTargetObject(Object targetObject) {
        this.targetObject = targetObject;
    }

    public Method getMethod() {
        return method;
    }

    public void setMethod(Method method) {
        this.method = method;
    }

    public Object[] getArgs() {
        return args;
    }

    public void setArgs(Object[] args) {
        this.args = args;
    }

    public Invocation(Object targetObject, Method method, Object[] args) {
        this.targetObject = targetObject;
        this.method = method;
        this.args = args;
    }

    /**
     * 执行方法invoke方法:既代理对象最终执行的方法
     *
     * @return 返回结果
     * @throws Exception 异常
     */
    public Object wrap() throws Exception {
        return method.invoke(targetObject, args);
    }
}
2、改造拦截器接口
import com.test.proxy.core.proxy_test.proxy.interceptor.core.Invocation;
import java.lang.reflect.Method;
public interface Interceptor {
    /**
     * 拦截执行
     *
     * @param invocation 代理所需核心参数
     * @return 返回执行结果
     * @throws Exception 异常
     */
    Object intercepte(Invocation invocation) throws Exception;

    /**
     * 插件类
     *
     * @param targetObject 目标对象
     * @return 返回代理对象
     */
    Object plugin(Object targetObject);
}
3、改造日志拦截器,新增权限、事务拦截器
日志拦截器:
import com.test.proxy.core.proxy_test.proxy.core.ProxyWrapperThreeVersion;
import com.test.proxy.core.proxy_test.proxy.interceptor.Interceptor;
import com.test.proxy.core.proxy_test.proxy.interceptor.core.Invocation;
import java.lang.reflect.Method;

public class LogInterceptor implements Interceptor {
    /**
     * 拦截执行
     *
     * @param invocation 代理所需核心参数
     * @return 返回执行结果
     */
    @Override
    public Object intercepte(Invocation invocation) throws Exception {
        System.out.println("日志记录启动");
        Object invoke = invocation.wrap();
        System.out.println("日志记录完成");
        return invoke;
    }

    /**
     * 插件类
     *
     * @param targetObject 目标对象
     * @return 返回执行结果
     */
    @Override
    public Object plugin(Object targetObject) {
        return ProxyWrapperThreeVersion.wrap(targetObject, this);
    }
}
权限拦截器:
import com.test.proxy.core.proxy_test.proxy.core.ProxyWrapperThreeVersion;
import com.test.proxy.core.proxy_test.proxy.interceptor.Interceptor;
import com.test.proxy.core.proxy_test.proxy.interceptor.core.Invocation;
import java.lang.reflect.Method;

public class PermissionInterceptor implements Interceptor {
    /**
     * 拦截执行
     *
     * @param invocation 代理所需核心参数
     * @return 返回执行结果
     * @throws Exception 异常
     */
    @Override
    public Object intercepte(Invocation invocation) throws Exception {
        System.out.println("权限前置通知处理完毕");
        Object wrap = invocation.wrap();
        System.out.println("权限后置通知处理完毕");
        return wrap;
    }

    /**
     * 插件类
     *
     * @param targetObject 目标对象
     * @return 返回代理对象
     */
    @Override
    public Object plugin(Object targetObject) {
        return ProxyWrapperThreeVersion.wrap(targetObject, this);
    }
}
事务拦截器:
import com.test.proxy.core.proxy_test.proxy.core.ProxyWrapperThreeVersion;
import com.test.proxy.core.proxy_test.proxy.interceptor.Interceptor;
import com.test.proxy.core.proxy_test.proxy.interceptor.core.Invocation;
import java.lang.reflect.Method;
public class TransactionInterceptor implements Interceptor {
    /**
     * 拦截执行
     *
     * @param invocation 代理所需核心参数
     * @return 返回执行结果
     * @throws Exception 异常
     */
    @Override
    public Object intercepte(Invocation invocation) throws Exception {
        System.out.println("事务前置通知处理完毕");
        Object wrap = invocation.wrap();
        System.out.println("事务后置通知处理完毕");
        return wrap;
    }

    /**
     * 插件类
     *
     * @param targetObject 目标对象
     * @return 返回代理对象
     */
    @Override
    public Object plugin(Object targetObject) {
        return ProxyWrapperThreeVersion.wrap(targetObject, this);
    }
}
4、改造代理包装类
import com.test.proxy.core.proxy_test.proxy.interceptor.Interceptor;
import com.test.proxy.core.proxy_test.proxy.interceptor.core.Invocation;
import java.lang.reflect.InvocationHandler;
import java.lang.reflect.Method;
import java.lang.reflect.Proxy;

/**
 * @author wh
 * 第三版本采用了责任链模式来解决多功能嵌入增强问题,但是仔细一看,还是有一点问题,增强的顺序既然要倒序来进行传递,不然会按照相反的顺序来增强,其次主类上链路过多看起来不是很美观,所以还得升级优化一哈
 * 例如:先通过执行 日志 -> 事务 -> 权限 -> 最终的方法 -> 权限 -> 事务 -> 日志 的链路来运行,也实现了前置,后置的切入方式
 */
public class ProxyWrapperThreeVersion implements InvocationHandler {

    /**
     * 目标对象
     */
    private Object targetObject;

    /**
     * 拦截器:可看作是各自业务的需要正确的方法
     */
    private Interceptor interceptor;

    public ProxyWrapperThreeVersion(Object targetObject, Interceptor interceptor) {
        this.targetObject = targetObject;
        this.interceptor = interceptor;
    }

    @Override
    public Object invoke(Object proxy, Method method, Object[] args) throws Throwable {
        return interceptor.intercepte(new Invocation(targetObject, method, args));
    }

    /**
     * 静态方法:主要构建代理类
     *
     * @param targetObject 目标对象
     * @param interceptor  拦截器
     * @return 返回代理类
     */
    public static Object wrap(Object targetObject, Interceptor interceptor) {
        ProxyWrapperThreeVersion serviceProxyTwo = new ProxyWrapperThreeVersion(targetObject, interceptor);
        return Proxy.newProxyInstance(targetObject.getClass().getClassLoader(), targetObject.getClass().getInterfaces(), serviceProxyTwo);
    }
}
5、测试类
import com.test.proxy.core.proxy_test.coreInterface.CoreService;
import com.test.proxy.core.proxy_test.coreInterface.impl.AddService;
import com.test.proxy.core.proxy_test.proxy.core.ProxyWrapperTwoVersion;
import com.test.proxy.core.proxy_test.proxy.interceptor.impl.LogInterceptor;
import com.test.proxy.core.proxy_test.proxy.interceptor.impl.PermissionInterceptor;
import com.test.proxy.core.proxy_test.proxy.interceptor.impl.TransactionInterceptor;
public class ProxyTestApplication {
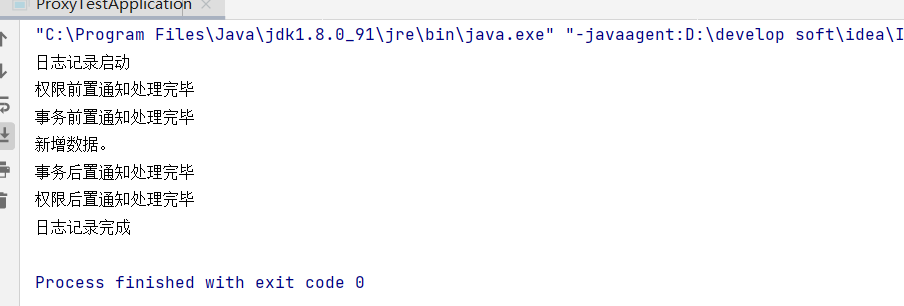
public static void main(String[] args) {
// 实例化新增业务对象
AddService addService = new AddService();
// 创建事务拦截器,并对业务对象进行代理
CoreService proxyObject = (CoreService) new TransactionInterceptor().plugin(addService);
// 创建权限拦截器,并对事务拦截器返回的代理对象进行代理
proxyObject = (CoreService) new PermissionInterceptor().plugin(proxyObject);
// 创建日志拦截器,并对事务拦截器返回的代理对象进行代理
proxyObject = (CoreService) new LogInterceptor().plugin(proxyObject);
proxyObject.execute();
}
}
通过对代理invoke方法中的参数进行封装(好处:统一管理,oop思想),并传递至Interceptor中,同时Interceptor添加plugin()方法代理目标对象,这样一来,日志、权限、事务 的链路通过plugin方法连接起来了。是不是很开心,终于成功了(其实已经可以交付使用),但是别急,通过对测试类的链路顺序来看,他们之间链路关系是反过来的,这样交给其他同事使用会不会被吐槽一番,对于我们严格的程序员来说,这是不能忍受的,既然是公用型功能,就需要符合事实,传递什么就按照什么执行,那我们就再次优化改进一哈把。
1、既然要保证顺序,那我们就自动构建一个链路类(InterceptorChain),帮我们管理链路。注意:链路类中的拦截器不能通过set方法注入,需要统一走addInterceptor()方法,这么做的目标是保证入口唯一性,方便管理。
import com.test.proxy.core.proxy_test.proxy.interceptor.Interceptor;
import java.util.ArrayList;
import java.util.List;

/**
 * @author wh
 */
public class InterceptorChain {

    /**
     * 拦截器
     */
    private List<Interceptor> interceptorList;

    /**
     * 构造器:用于初始化链路集合
     */
    public InterceptorChain() {
        this.interceptorList = new ArrayList<>();
    }

    /**
     * 初始化链路
     *
     * @return 返回代理对象
     */
    public Object initChain(Object targetObject) {
        Object proxyObject = targetObject;
        // 注意:这里需要倒叙挂载关系哦
        for (int i = this.interceptorList.size() - 1; i >= 0; i--) {
            // 设置代理
            proxyObject = interceptorList.get(i).plugin(proxyObject);
        }
        return proxyObject;
    }

    /**
     * 添加拦截器
     *
     * @param interceptor 拦截器
     */
    public void addInterceptor(Interceptor interceptor) {
        this.interceptorList.add(interceptor);
    }
}
2、改造代理包装类:将链路类放入代理包装器中,主要看构造器与wrap方法。
import com.test.proxy.core.proxy_test.proxy.interceptor.Interceptor;
import com.test.proxy.core.proxy_test.proxy.interceptor.core.InterceptorChain;
import com.test.proxy.core.proxy_test.proxy.interceptor.core.Invocation;
import java.lang.reflect.InvocationHandler;
import java.lang.reflect.Method;
import java.lang.reflect.Proxy;

/**
 * @author wh
 * 第四版本与第三版本中执行添加了一个成员变量:拦截器链路实体,同时添加了一个可实现链路的代理方法
 */
public class ProxyWrapperFourVersion implements InvocationHandler {

    /**
     * 目标对象
     */
    private Object targetObject;

    /**
     * 拦截器:可看作是各自业务的需要正确的方法
     */
    private Interceptor interceptor;

    /**
     * 拦截器执行链路
     */
    private InterceptorChain interceptorChain;

    public ProxyWrapperFourVersion(Object targetObject, Interceptor interceptor) {
        this.targetObject = targetObject;
        this.interceptor = interceptor;
    }

    public ProxyWrapperFourVersion(Object targetObject, InterceptorChain interceptorChain) {
        this.targetObject = targetObject;
        this.interceptorChain = interceptorChain;
    }

    @Override
    public Object invoke(Object proxy, Method method, Object[] args) throws Throwable {
        return interceptor.intercepte(new Invocation(targetObject, method, args));
    }

    /**
     * 静态方法:主要构建代理类
     *
     * @param targetObject 目标对象
     * @param interceptor  拦截器
     * @return 返回代理类
     */
    public static Object wrap(Object targetObject, Interceptor interceptor) {
        ProxyWrapperFourVersion serviceProxyTwo = new ProxyWrapperFourVersion(targetObject, interceptor);
        return Proxy.newProxyInstance(targetObject.getClass().getClassLoader(), targetObject.getClass().getInterfaces(), serviceProxyTwo);
    }


    /**
     * 静态方法:主要构建代理类
     *
     * @param targetObject     目标对象
     * @param interceptorChain 拦截器链路
     * @return 返回代理类
     */
    public static Object wrap(Object targetObject, InterceptorChain interceptorChain) {
        return interceptorChain.initChain(targetObject);
    }
}
3、测试
import com.test.proxy.core.proxy_test.coreInterface.CoreService;
import com.test.proxy.core.proxy_test.coreInterface.impl.AddService;
import com.test.proxy.core.proxy_test.proxy.core.ProxyWrapperFourVersion;
import com.test.proxy.core.proxy_test.proxy.core.ProxyWrapperTwoVersion;
import com.test.proxy.core.proxy_test.proxy.interceptor.core.InterceptorChain;
import com.test.proxy.core.proxy_test.proxy.interceptor.impl.LogInterceptor;
import com.test.proxy.core.proxy_test.proxy.interceptor.impl.PermissionInterceptor;
import com.test.proxy.core.proxy_test.proxy.interceptor.impl.TransactionInterceptor;
public class ProxyTestApplication {
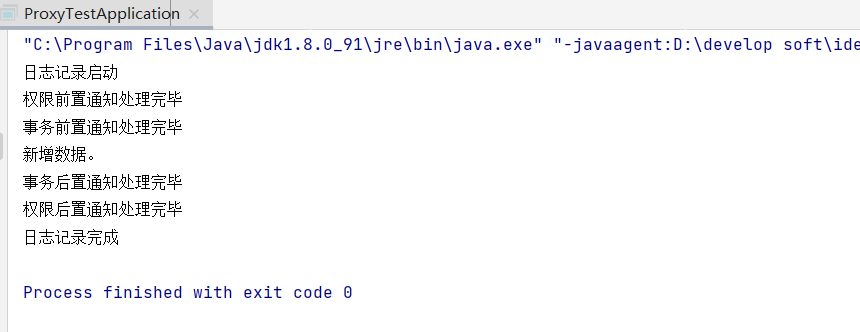
public static void main(String[] args) {
AddService addService = new AddService();
InterceptorChain interceptorChain = new InterceptorChain();
interceptorChain.addInterceptor(new LogInterceptor());
interceptorChain.addInterceptor(new PermissionInterceptor());
interceptorChain.addInterceptor(new TransactionInterceptor());
CoreService coreService = (CoreService) ProxyWrapperFourVersion.wrap(addService, interceptorChain);
coreService.execute();
}
}
本次改造主要通过链路类来统一管理拦截器,既保证了顺序,也隐藏了细节,从而让用户只需要关注方法。到了这里,整理动态代理也就结束了,对应的CGLIB的动态代理,思维逻辑是一样的,只是将JDK的代理InvocationHanler实现类,置换成CGLIB的即可。
5、总结
本章主要介绍了动态代理模式,其中核心使用的思想包括 JDK动态代理 + 责任链模式,通过两者的结合,对整个公用型的代理做到了有出有进,隐藏细节,暴露方法,让用户只关注方法,而不是细节。动态代理是一项非常好的技术,我们使用的各个框架底层都包含,只有深刻理解了动态代理,才会对各个框架技术有更深刻的了解。

【推荐】国内首个AI IDE,深度理解中文开发场景,立即下载体验Trae
【推荐】编程新体验,更懂你的AI,立即体验豆包MarsCode编程助手
【推荐】抖音旗下AI助手豆包,你的智能百科全书,全免费不限次数
【推荐】轻量又高性能的 SSH 工具 IShell:AI 加持,快人一步