SpringBoot配置——@PropertySource、@ImportResource、@Bean
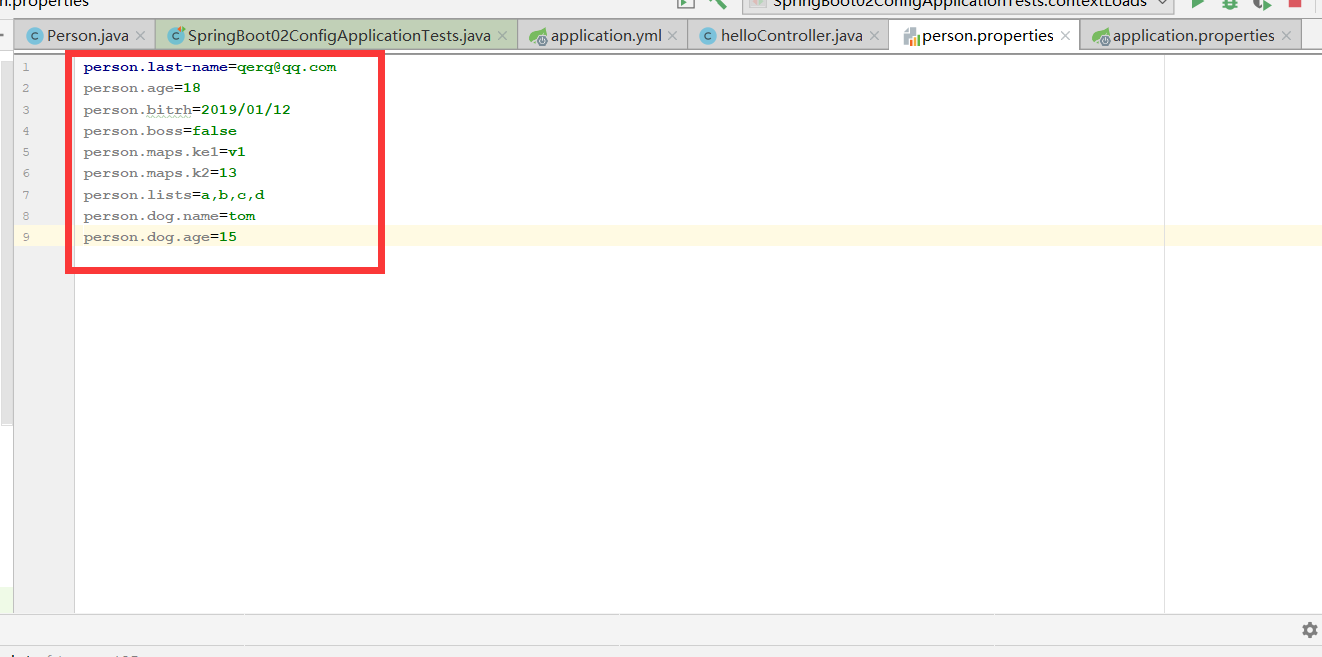
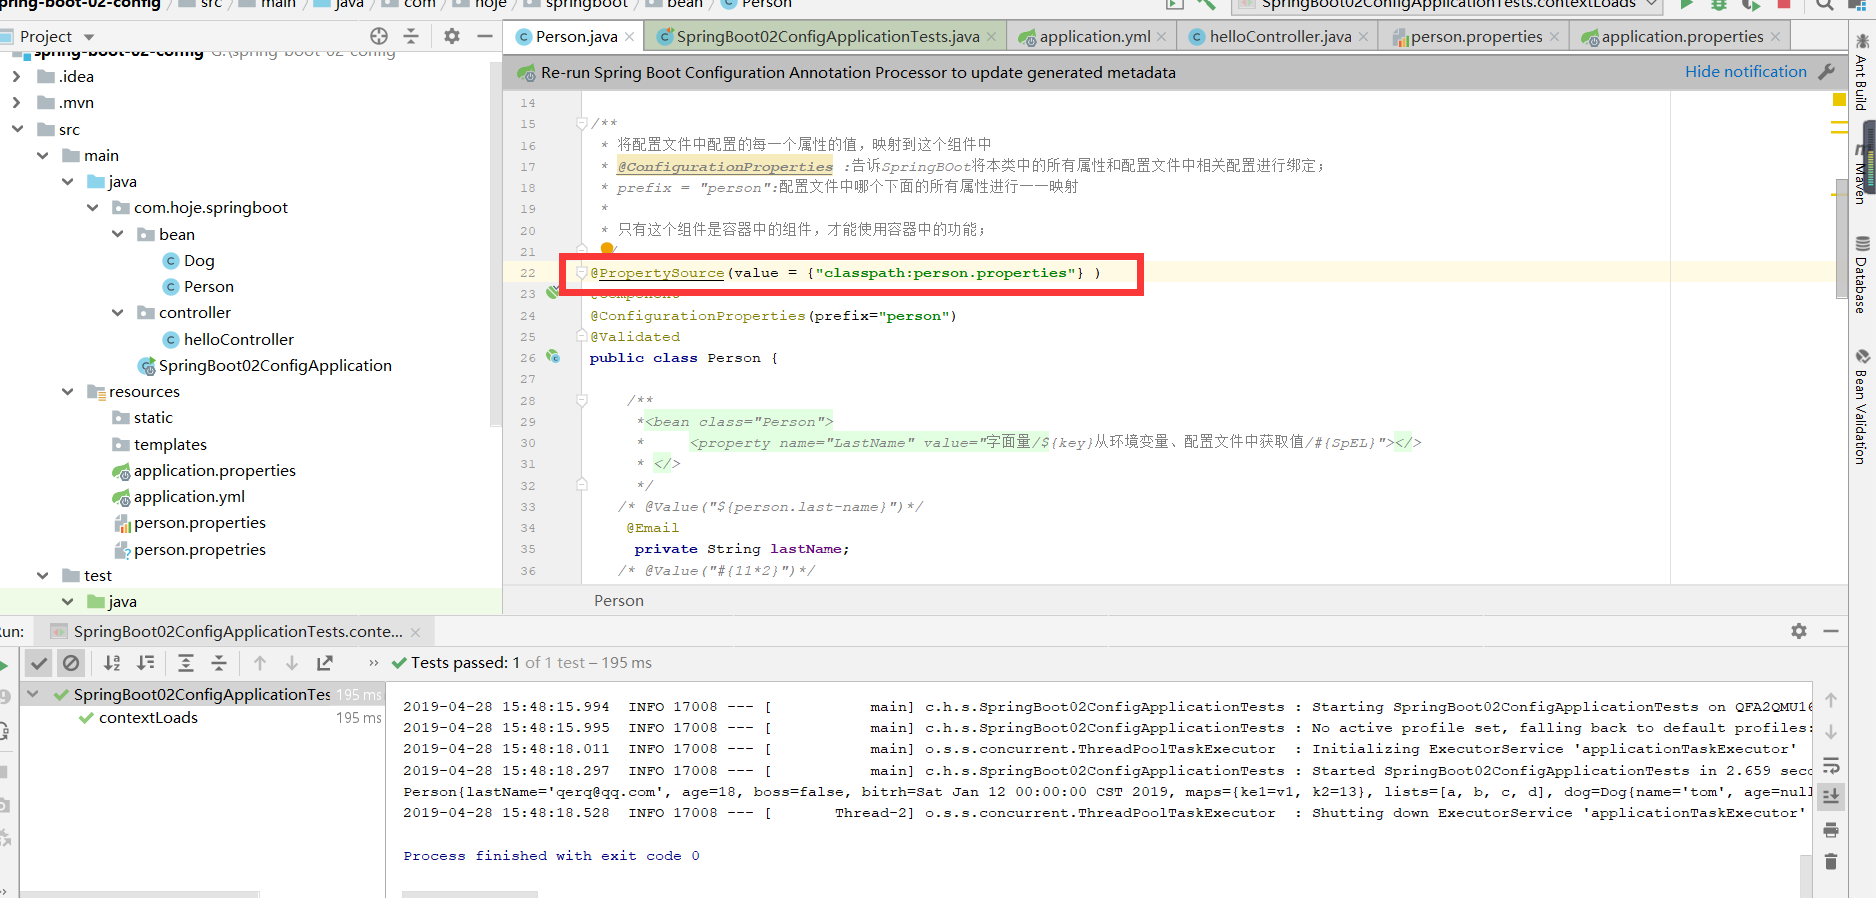
@PropertySource:加载指定的配置文件


package com.hoje.springboot.bean;

import org.springframework.beans.factory.annotation.Value;
import org.springframework.boot.context.properties.ConfigurationProperties;
import org.springframework.boot.context.properties.EnableConfigurationProperties;
import org.springframework.context.annotation.PropertySource;
import org.springframework.stereotype.Component;
import org.springframework.validation.annotation.Validated;

import javax.validation.constraints.Email;
import java.util.Date;
import java.util.List;
import java.util.Map;

/**
 * 将配置文件中配置的每一个属性的值,映射到这个组件中
 * @ConfigurationProperties :告诉SpringBOot将本类中的所有属性和配置文件中相关配置进行绑定;
 * prefix = "person":配置文件中哪个下面的所有属性进行一一映射
 *
 * 只有这个组件是容器中的组件,才能使用容器中的功能;
 */
@PropertySource(value = {"classpath:person.properties"} )
@Component
@ConfigurationProperties(prefix="person")
@Validated
public class Person {

    /**
     *<bean class="Person">
     *     <property name="LastName" value="字面量/${key}从环境变量、配置文件中获取值/#{SpEL}"></>
     * </>
     */
   /* @Value("${person.last-name}")*/
    @Email
     private String lastName;
   /* @Value("#{11*2}")*/
     private Integer age;
   /*  @Value("true")*/
     private Boolean boss;
     private Date bitrh;
     private Map<String,Object> maps;
     private List<Object>  lists;
     private Dog dog;

    @Override
    public String toString() {
        return "Person{" +
                "lastName='" + lastName + '\'' +
                ", age=" + age +
                ", boss=" + boss +
                ", bitrh=" + bitrh +
                ", maps=" + maps +
                ", lists=" + lists +
                ", dog=" + dog +
                '}';
    }

    public String getLastName() {
        return lastName;
    }

    public void setLastName(String lastName) {
        this.lastName = lastName;
    }

    public Integer getAge() {
        return age;
    }

    public void setAge(Integer age) {
        this.age = age;
    }

    public Boolean getBoss() {
        return boss;
    }

    public void setBoss(Boolean boss) {
        this.boss = boss;
    }

    public Date getBitrh() {
        return bitrh;
    }

    public void setBitrh(Date bitrh) {
        this.bitrh = bitrh;
    }

    public Map<String, Object> getMaps() {
        return maps;
    }

    public void setMaps(Map<String, Object> maps) {
        this.maps = maps;
    }

    public List<Object> getLists() {
        return lists;
    }

    public void setLists(List<Object> lists) {
        this.lists = lists;
    }

    public Dog getDog() {
        return dog;
    }

    public void setDog(Dog dog) {
        this.dog = dog;
    }
}
@ImportResource:导入Spring的配置文件,让配置文件里面的内容生效

1 <?xml version="1.0" encoding="UTF-8"?>
2 <beans xmlns="http://www.springframework.org/schema/beans"
3        xmlns:xsi="http://www.w3.org/2001/XMLSchema-instance"
4        xsi:schemaLocation="http://www.springframework.org/schema/beans http://www.springframework.org/schema/beans/spring-beans.xsd">
5     <bean id="helloService" class="com.hoje.springboot.service.HelloService" ></bean>
6 </beans>
package com.hoje.springboot.service;

public class HelloService {
}
package com.hoje.springboot;

import com.hoje.springboot.bean.Person;
import org.junit.Test;
import org.junit.runner.RunWith;
import org.springframework.beans.factory.annotation.Autowired;
import org.springframework.boot.test.context.SpringBootTest;
import org.springframework.context.ApplicationContext;
import org.springframework.test.context.junit4.SpringRunner;

@RunWith(SpringRunner.class)
@SpringBootTest
public class SpringBoot02ConfigApplicationTests {

    @Autowired
    Person person;

    @Autowired
    ApplicationContext ioc;
    @Test
    public void testHelloService(){
        boolean b = ioc.containsBean("helloService");
        System.out.println(b);
    }
    @Test
    public void contextLoads() {
        System.out.println(person);
    }

}

Spring Boot里面没有Spring的配置文件,我们自己编写的配置文件,也不能自动识别;
想让Spring的配置文件生效,加载进来;@ImportResource标注在一个配置类上
package com.hoje.springboot;

import org.springframework.boot.SpringApplication;
import org.springframework.boot.autoconfigure.SpringBootApplication;
import org.springframework.context.annotation.ImportResource;

@ImportResource(locations = {"classpath:beans.xml"})
@SpringBootApplication
public class SpringBoot02ConfigApplication {

    public static void main(String[] args) {
        SpringApplication.run(SpringBoot02ConfigApplication.class, args);
    }

}

导入Spring的配置文件使其生效
@ImportResource(locations = {"classpath:beans.xml"})
该方式比较麻烦
SpringBoot推荐给容器中添加组件的方式
1、配置类(Spring配置文件)
不编写Spring的配置文件
<?xml version="1.0" encoding="UTF-8"?>
<beans xmlns="http://www.springframework.org/schema/beans"
       xmlns:xsi="http://www.w3.org/2001/XMLSchema-instance"
       xsi:schemaLocation="http://www.springframework.org/schema/beans http://www.springframework.org/schema/beans/spring-beans.xsd">
    <bean id="helloService" class="com.hoje.springboot.service.HelloService" ></bean>
</beans>
2、使用@Bean给容器中添加组件
推荐使用全注解的方式
package com.hoje.springboot.config;

import com.hoje.springboot.service.HelloService;
import org.springframework.context.annotation.Bean;
import org.springframework.context.annotation.Configuration;

/**
 *@Configuration:指明当前类是一个配置类,就是来替代Spring之前的配置文件
 * 在配置文件中用<bean><bean/>标签添加组件
 */
@Configuration
public class MyAppConfig {
    //将方法的返回值添加到容器;容器中默认组件的id就是方法名
    @Bean
    public HelloService helloService(){
        System.out.println("配置类@Bean给容器添加组件了");
     return new HelloService();
    }
}


