

SSM(SpringMVC+Spring+Mybaties)框架整合步骤
文章目录
简介
SpringMVC:视图层,界面层,负责接收请求,显示处理结果的。 Spring:业务层,管理service,dao,工具类对象的。
MyBatis:持久层, 访问数据库的
-
请求处理过程
用户发起请求–SpringMVC接收–Spring中的Service对象–MyBatis处理数据
-
容器分析
1.第一个容器SpringMVC容器, 管理Controller控制器对象的。
2.第二个容器Spring容器,管理Service,Dao,工具类对象的
我们要做的把使用的对象交给合适的容器创建,管理。 把Controller还有web开发的相关对象交给springmvc容器, 这些web用的对象写在springmvc配置文件中
service,dao对象定义在spring的配置文件中,让spring管理这些对象。
springmvc容器和spring容器是有关系的,关系已经确定好了 springmvc容器是spring容器的子容器,
类似java中的继承。 子可以访问父的内容 在子容器中的Controller可以访问父容器中的Service对象,
就可以实现controller使用service对象
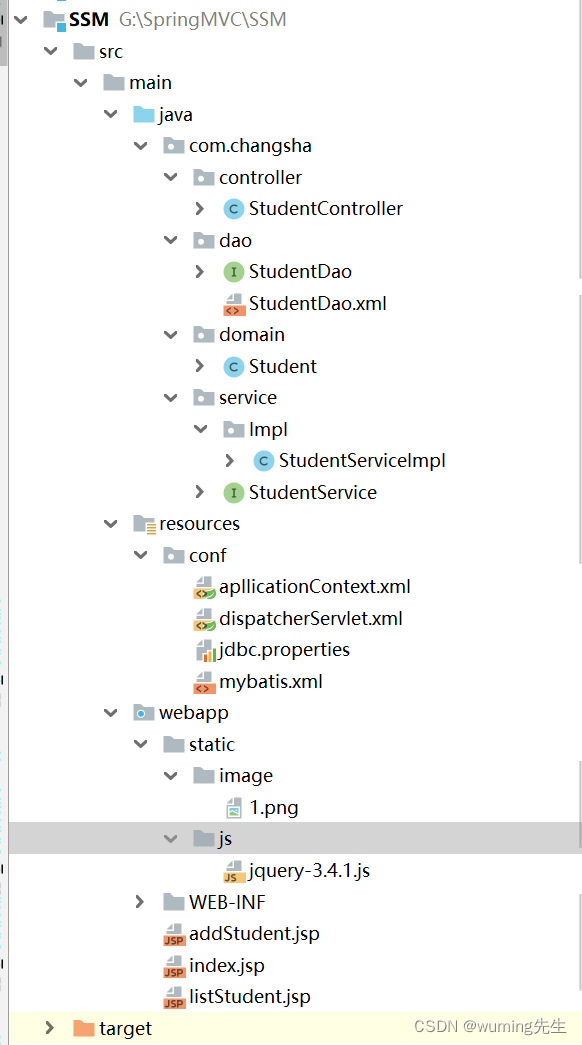
项目整体结构
使用步骤
0.使用springdb的mysql库, 表使用student(id auto_increment, name, age)

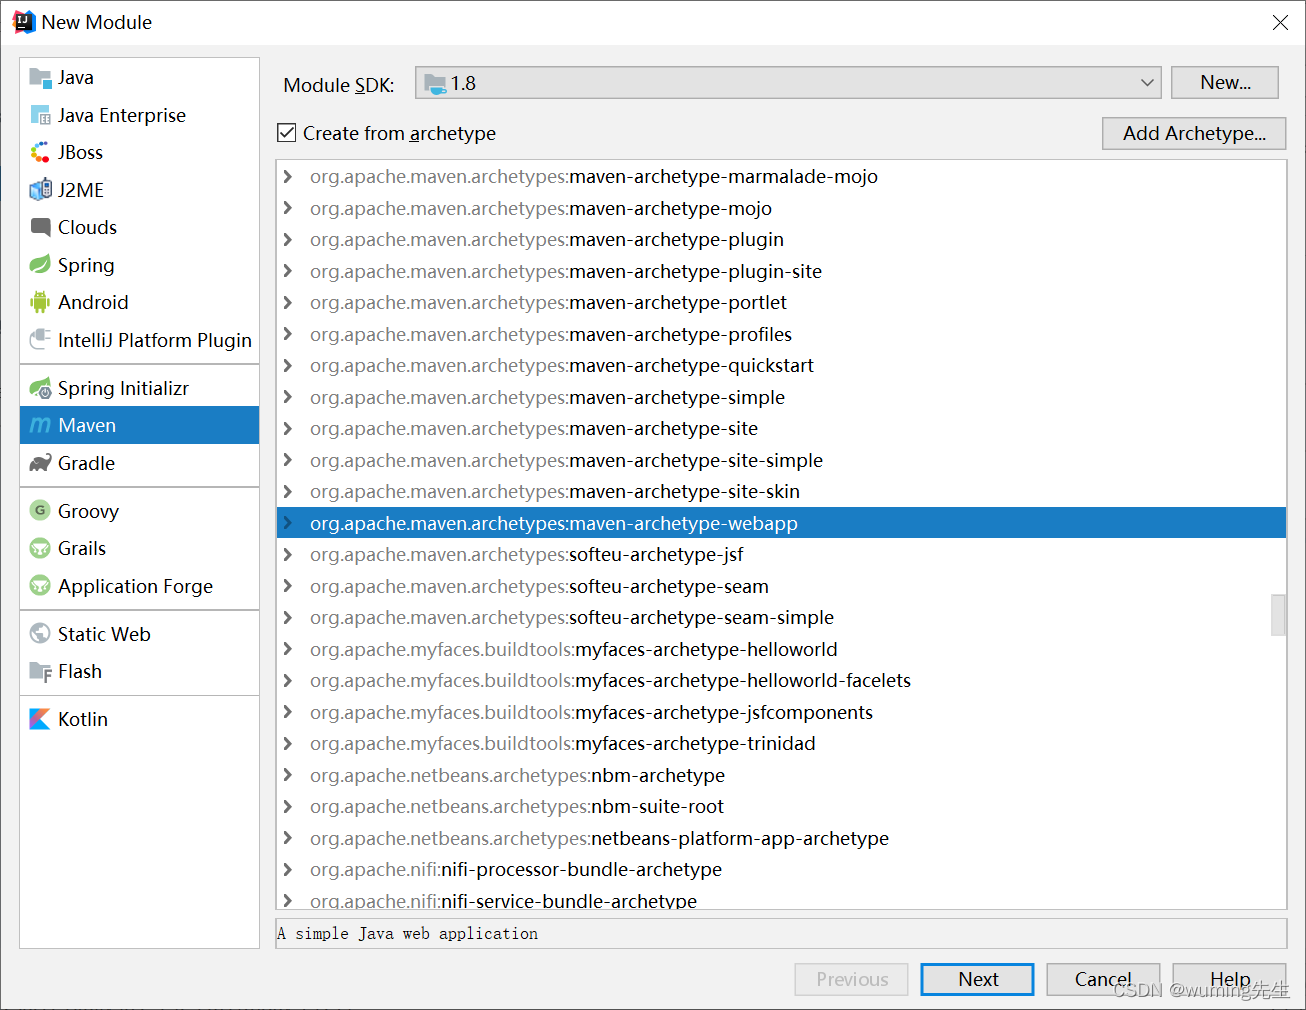
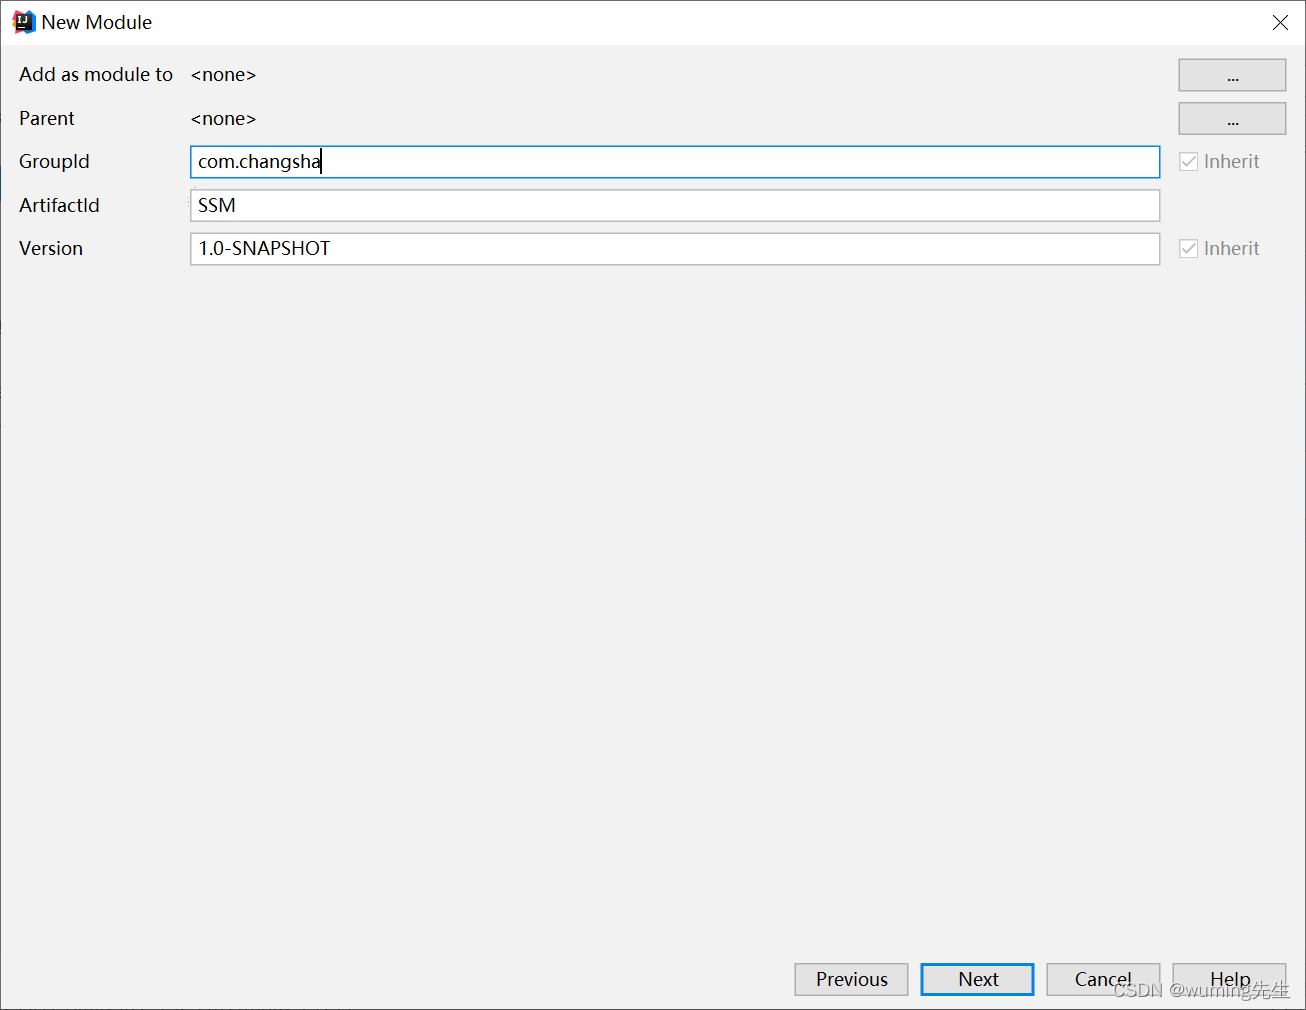
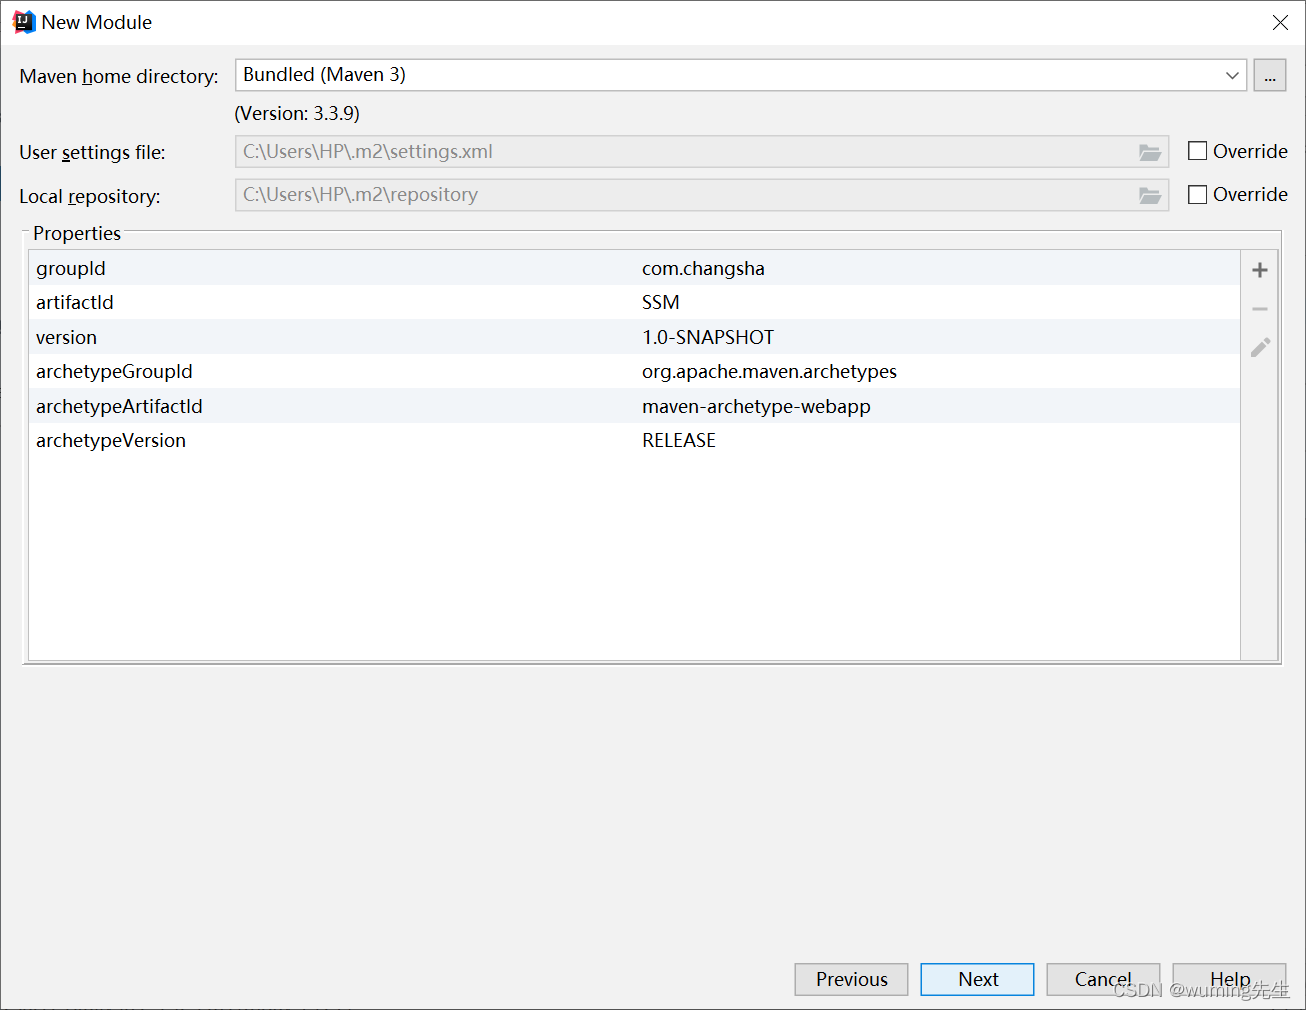
1.新建maven web项目
在main目录下加上缺失的java代码目录和resources资源目录

2.加入依赖
springmvc,spring,mybatis三个框架的依赖,jackson依赖,mysql驱动,druid连接池
jsp,servlet依赖
<?xml version="1.0" encoding="UTF-8"?> <project xmlns="http://maven.apache.org/POM/4.0.0" xmlns:xsi="http://www.w3.org/2001/XMLSchema-instance" xsi:schemaLocation="http://maven.apache.org/POM/4.0.0 http://maven.apache.org/xsd/maven-4.0.0.xsd"> <modelVersion>4.0.0</modelVersion> <groupId>com.changsha</groupId> <artifactId>SSM</artifactId> <version>1.0-SNAPSHOT</version> <packaging>war</packaging> <properties> <project.build.sourceEncoding>UTF-8</project.build.sourceEncoding> <maven.compiler.source>1.8</maven.compiler.source> <maven.compiler.target>1.8</maven.compiler.target> </properties> <dependencies> <!--单元测试依赖--> <dependency> <groupId>junit</groupId> <artifactId>junit</artifactId> <version>4.11</version> <scope>test</scope> </dependency> <!--servlet--> <dependency> <groupId>javax.servlet</groupId> <artifactId>javax.servlet-api</artifactId> <version>3.1.0</version> <scope>provided</scope> </dependency> <!-- jsp 依赖 --> <dependency> <groupId>javax.servlet.jsp</groupId> <artifactId>jsp-api</artifactId> <version>2.2.1-b03</version> <scope>provided</scope> </dependency> <!--springmvc--> <dependency> <groupId>org.springframework</groupId> <artifactId>spring-webmvc</artifactId> <version>5.2.5.RELEASE</version> </dependency> <!--事务的--> <dependency> <groupId>org.springframework</groupId> <artifactId>spring-tx</artifactId> <version>5.2.5.RELEASE</version> </dependency> <dependency> <groupId>org.springframework</groupId> <artifactId>spring-jdbc</artifactId> <version>5.2.5.RELEASE</version> </dependency> <!--aspectj 依赖--> <dependency> <groupId>org.springframework</groupId> <artifactId>spring-aspects</artifactId> <version>5.2.5.RELEASE</version> </dependency> <!--jackson--> <dependency> <groupId>com.fasterxml.jackson.core</groupId> <artifactId>jackson-core</artifactId> <version>2.9.0</version> </dependency> <dependency> <groupId>com.fasterxml.jackson.core</groupId> <artifactId>jackson-databind</artifactId> <version>2.9.0</version> </dependency> <!--mybatis 和 spring 整合的--> <dependency> <groupId>org.mybatis</groupId> <artifactId>mybatis-spring</artifactId> <version>1.3.1</version> </dependency> <!--mybatis--> <dependency> <groupId>org.mybatis</groupId> <artifactId>mybatis</artifactId> <version>3.5.1</version> </dependency> <!--mysql 驱动--> <dependency> <groupId>mysql</groupId> <artifactId>mysql-connector-java</artifactId> <version>8.0.24</version> </dependency> <!--druid--> <dependency> <groupId>com.alibaba</groupId> <artifactId>druid</artifactId> <version>1.1.12</version> </dependency> </dependencies> <build> <resources> <resource> <directory>src/main/java</directory><!--所在的目录--> <includes><!--包括目录下的.properties,.xml 文件都会扫描到--> <include>**/*.properties</include> <include>**/*.xml</include> </includes> <filtering>false</filtering> </resource> </resources> <plugins> <plugin> <artifactId>maven-compiler-plugin</artifactId> <version>3.1</version> <configuration> <source>1.8</source> <target>1.8</target> </configuration> </plugin> </plugins> </build> </project>
3.写web.xml
1)注册DispatcherServlet
目的:
1.创建springmvc容器对象,才能创建Controller类对象。
2.创建的是Servlet,才能接受用户的请求。
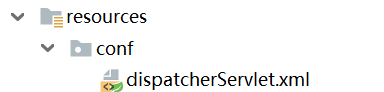
在resources目录下创建conf目录进行资源分级管理。
然后在conf目录下创建springmvc的spring配置文件
向web.xml文件中加入配置
<!--注册中央调度器--> <servlet> <servlet-name>myWeb</servlet-name> <servlet-class>org.springframework.web.servlet.DispatcherServlet</servlet-class> <init-param> <param-name>contextConfigLocation</param-name> <param-value>classpath:conf/dispatcherServlet.xml</param-value> </init-param> <load-on-startup>1</load-on-startup> </servlet>
2)注册spring的监听器:ContextLoaderListener,目的: 创建spring的容器对象,才能创建service,dao等对象。
在resources/conf目录下创建spring的配置文件
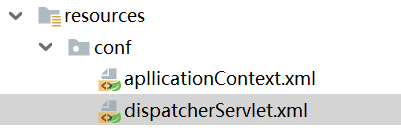
然后再web.xml中加入注册spring监听器的配置
<!--注册监听器--> <context-param> <param-name>contextConfigLocation</param-name> <param-value>classpath:conf/apllicationContext.xml</param-value> </context-param> <listener> <listener-class>org.springframework.web.context.ContextLoaderListener</listener-class> </listener>
3)注册字符集过滤器,解决post请求乱码的问题
在web.xml配置文件中加入字符集过滤器的配置代码
<!--注册字符集过滤器--> <filter> <filter-name>characterEncodingFilter</filter-name> <filter-class>org.springframework.web.filter.CharacterEncodingFilter</filter-class> <init-param> <param-name>encoding</param-name> <param-value>utf-8</param-value> </init-param> <init-param> <param-name>forceRequestEncoding</param-name> <param-value>true</param-value> </init-param> <init-param> <param-name>forceResponseEncoding</param-name> <param-value>true</param-value> </init-param> </filter> <filter-mapping> <filter-name>characterEncodingFilter</filter-name> <url-pattern>/*</url-pattern> </filter-mapping>
完整的web.xml配置文件
<?xml version="1.0" encoding="UTF-8"?> <web-app xmlns="http://xmlns.jcp.org/xml/ns/javaee" xmlns:xsi="http://www.w3.org/2001/XMLSchema-instance" xsi:schemaLocation="http://xmlns.jcp.org/xml/ns/javaee http://xmlns.jcp.org/xml/ns/javaee/web-app_4_0.xsd" version="4.0"> <!--注册中央调度器--> <servlet> <servlet-name>myWeb</servlet-name> <servlet-class>org.springframework.web.servlet.DispatcherServlet</servlet-class> <init-param> <param-name>contextConfigLocation</param-name> <param-value>classpath:conf/dispatcherServlet.xml</param-value> </init-param> <load-on-startup>1</load-on-startup> </servlet> <servlet-mapping> <servlet-name>myWeb</servlet-name> <url-pattern>/</url-pattern> </servlet-mapping> <!--注册监听器--> <context-param> <param-name>contextConfigLocation</param-name> <param-value>classpath:conf/apllicationContext.xml</param-value> </context-param> <listener> <listener-class>org.springframework.web.context.ContextLoaderListener</listener-class> </listener> <!--注册字符集过滤器--> <filter> <filter-name>characterEncodingFilter</filter-name> <filter-class>org.springframework.web.filter.CharacterEncodingFilter</filter-class> <init-param> <param-name>encoding</param-name> <param-value>utf-8</param-value> </init-param> <init-param> <param-name>forceRequestEncoding</param-name> <param-value>true</param-value> </init-param> <init-param> <param-name>forceResponseEncoding</param-name> <param-value>true</param-value> </init-param> </filter> <filter-mapping> <filter-name>characterEncodingFilter</filter-name> <url-pattern>/*</url-pattern> </filter-mapping> </web-app>
4.创建包, Controller包, service ,dao,实体类包名创建好
在java代码目录下创建类的存储包
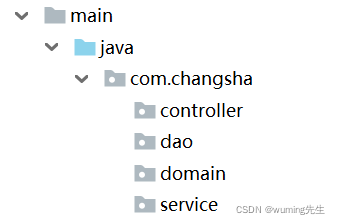
controller包存控制器类
dao包存操作数据库的dao类
domain包存储实体类,实体类表示数据库一行的数据
service包存储服务类
5.写springmvc,spring,mybatis的配置文件
1)springmvc配置文件
dispatcherServlet.xml
①组件扫描器
用于扫描控制器对象
<context:component-scan base-package="com.changsha.controller"/>
②视图解析器
<bean class="org.springframework.web.servlet.view.InternalResourceViewResolver"> <property name="prefix" value="/WEB-INF/jsp"/> <property name="suffix" value=".jsp"/> </bean>
③注解驱动
作用:
a. 响应ajax请求,返回 json
b. 解决静态资源的访问问题
<mvc:annotation-driven/>
完整的springmvc配置文件
静态资源不要放再WEB-INF下,因为WEB-INF下的资源是不能直接访问的
<?xml version="1.0" encoding="UTF-8"?> <beans xmlns="http://www.springframework.org/schema/beans" xmlns:xsi="http://www.w3.org/2001/XMLSchema-instance" xmlns:context="http://www.springframework.org/schema/context" xmlns:mvc="http://www.springframework.org/schema/mvc" xsi:schemaLocation="http://www.springframework.org/schema/beans http://www.springframework.org/schema/beans/spring-beans.xsd http://www.springframework.org/schema/context https://www.springframework.org/schema/context/spring-context.xsd http://www.springframework.org/schema/mvc https://www.springframework.org/schema/mvc/spring-mvc.xsd"> <context:component-scan base-package="com.changsha.controller"/> <bean class="org.springframework.web.servlet.view.InternalResourceViewResolver"> <property name="prefix" value="/WEB-INF/jsp/"/> <property name="suffix" value=".jsp"/> </bean> <mvc:resources mapping="/static/**" location="/static/"/> <mvc:annotation-driven/> </beans>
2)spring配置文件
applicationContext.xml
① 声明数据源
创建步骤:
a. 在资源文件resources/conf目录下创建数据库信息存储的配置文件jdbc.properties,里面的内容为数据库的信息
jdbc.url=jdbc:mysql://localhost:3306/study jdbc.username=root jdbc.password=123456
在spring配置文件中加入数据库信息配置文件的路径
<Context:property-placeholder location="conf/jdbc.properties"/>
b. 创建数据源
在spring配置文件加入声明数据源的代码
<bean id="dataSource" class="com.alibaba.druid.pool.DruidDataSource" init-method="init" destroy-method="close"> <property name="username" value="${jdbc.username}"/> <property name="url" value="${jdbc.url}"/> <property name="password" value="${jdbc.password}"/> <property name="maxActive" value="20"/> </bean>
② 声明 SqlsessionFactoryBean对象
创建这个对象需要数据源和mybatis主配置文件,所以在资源目录resources/conf下创建mybatis的主配置文件mybaties.xml
向spring配置文件中加入创建SqlsessionFactoryBean的配置
<bean id="sqlSessionFactory" class="org.mybatis.spring.SqlSessionFactoryBean"> <property name="dataSource" ref="dataSource"/> <property name="configLocation" value="conf/mybatis.xml"/> </bean>
③声明mybatis的扫描器
这个对象是用来自动创建dao对象的
<bean class="org.mybatis.spring.mapper.MapperScannerConfigurer"> <property name="sqlSessionFactoryBeanName" value="sqlSessionFactory"/> <property name="basePackage" value="com.changsha.dao"/> </bean>
④注解创建对象的对象扫描器
扫描@Service注解创建的对象
<context:component-scan base-package="com.changsha.service"/>
⑤事务配置
在代码运行正常后再添加
<!--事务配置:注解的配置, aspectj的配置--> <bean id="dataSourceTransactionManager" class="org.springframework.jdbc.datasource.DataSourceTransactionManager"> <property name="dataSource" ref="dataSource"/> </bean> <!--tx结尾的--> <tx:annotation-driven transaction-manager="dataSourceTransactionManager"/>
完整spring配置文件
<?xml version="1.0" encoding="UTF-8"?> <beans xmlns="http://www.springframework.org/schema/beans" xmlns:xsi="http://www.w3.org/2001/XMLSchema-instance" xmlns:Context="http://www.springframework.org/schema/context" xmlns:context="http://www.springframework.org/schema/context" xmlns:tx="http://www.springframework.org/schema/tx" xsi:schemaLocation="http://www.springframework.org/schema/beans http://www.springframework.org/schema/beans/spring-beans.xsd http://www.springframework.org/schema/context https://www.springframework.org/schema/context/spring-context.xsd http://www.springframework.org/schema/tx http://www.springframework.org/schema/tx/spring-tx.xsd"> <Context:property-placeholder location="classpath:conf/jdbc.properties"/> <!--声明数据源,连接数据库--> <bean id="dataSource" class="com.alibaba.druid.pool.DruidDataSource" init-method="init" destroy-method="close"> <property name="username" value="${jdbc.username}"/> <property name="url" value="${jdbc.url}"/> <property name="password" value="${jdbc.password}"/> <property name="maxActive" value="20"/> </bean> <!--SqlSessionFactoryBean创建SqlSessionFactory--> <bean id="sqlSessionFactory" class="org.mybatis.spring.SqlSessionFactoryBean"> <property name="dataSource" ref="dataSource"/> <property name="configLocation" value="classpath:conf/mybatis.xml"/> </bean> <!--声明mybatis的扫描器,创建dao对象--> <bean class="org.mybatis.spring.mapper.MapperScannerConfigurer"> <property name="sqlSessionFactoryBeanName" value="sqlSessionFactory"/> <property name="basePackage" value="com.changsha.dao"/> </bean> <!--声明service的注解@Service所在的包名位置--> <context:component-scan base-package="com.changsha.service"/> <!--事务配置:注解的配置, aspectj的配置--> <bean id="dataSourceTransactionManager" class="org.springframework.jdbc.datasource.DataSourceTransactionManager"> <property name="dataSource" ref="dataSource"/> </bean> <!--tx结尾的--> <tx:annotation-driven transaction-manager="dataSourceTransactionManager"/> </beans>
3)写mybatis主配置文件
<?xml version="1.0" encoding="UTF-8" ?> <!DOCTYPE configuration PUBLIC "-//mybatis.org//DTD Config 3.0//EN" "http://mybatis.org/dtd/mybatis-3-config.dtd"> <configuration> <!--打印日志的设置--> <!--<settings>--> <!--<setting name="logImpl" value="STDOUT_LOGGING"/>--> <!--</settings>--> <!--配置 mybatis 环境--> <!--设置别名--> <typeAliases> <!--name:实体类(表示行的数据类)所在的包名--> <package name="com.changsha.domain"/> </typeAliases> <mappers> <!--也可以使用包名的方法一次导入多个mapper文件--> <!--这种方式dao接口和mapper文件同名且在同一目录之下--> <package name="com.changsha.dao"/> </mappers> </configuration>
6.写代码, dao接口和mapper文件, service和实现类,controller, 实体类。
1)实体类
保存数据表一行的数据,属性名和列名一致
package com.changsha.domain; public class Student { private Integer id; private String name; private Integer age; public Integer getId() { return id; } public void setId(Integer id) { this.id = id; } public String getName() { return name; } public void setName(String name) { this.name = name; } public Integer getAge() { return age; } public void setAge(Integer age) { this.age = age; } @Override public String toString() { return "Student{" + "id=" + id + ", name='" + name + '\'' + ", age=" + age + '}'; } }
2)dao接口
package com.changsha.dao; import com.changsha.domain.Student; import java.util.List; public interface StudentDao { public int insertStudent(Student student); public List<Student> selectStudents(); }
3)mapper文件
和dao同名且放在第一个目录(com.changsha.dao)下
<?xml version="1.0" encoding="UTF-8" ?> <!DOCTYPE mapper PUBLIC "-//mybatis.org//DTD Mapper 3.0//EN" "http://mybatis.org/dtd/mybatis-3-mapper.dtd"> <!-- namespace:必须有值,自定义的唯一字符串 推荐使用:dao 接口的全限定名称 语句的id建议和接口方法的名字相同 --> <mapper namespace="com.changsha.dao.StudentDao"> <insert id="insertStudent"> insert into student(name, age) values (#{name},#{age}) </insert> <select id="接口方法的名称" resultType="返回类型(包含包名))"> select id,name,age from student order id desc </select> </mapper>
4)创建service接口和实现类
接口
package com.changsha.service; import com.changsha.domain.Student; import java.util.List; public interface StudentService { public int addStudent(Student student); public List<Student> findStudents(); }
实现类(采用注解的方式创建对象)
package com.changsha.service.Impl; import com.changsha.dao.StudentDao; import com.changsha.domain.Student; import com.changsha.service.StudentService; import org.springframework.stereotype.Service; import org.springframework.transaction.annotation.Transactional; import javax.annotation.Resource; import java.util.List; @Service public class StudentServiceImpl implements StudentService { //引用类型自动注入@Autowired, @Resource @Resource private StudentDao studentDao; // @Transactional配置事务 @Transactional @Override public int addStudent(Student student) { int nums = studentDao.insertStudent(student); return nums; } @Override public List<Student> findStudents() { return studentDao.selectStudents(); } }
5)controller对象
package com.changsha.controller; import com.changsha.domain.Student; import com.changsha.service.StudentService; import org.springframework.stereotype.Controller; import org.springframework.transaction.annotation.Transactional; import org.springframework.web.bind.annotation.RequestMapping; import org.springframework.web.bind.annotation.ResponseBody; import org.springframework.web.servlet.ModelAndView; import javax.annotation.Resource; import java.util.List; @Controller @RequestMapping("/student") public class StudentController { // 自动注入 @Resource private StudentService studentService; @RequestMapping("/addStudent") public ModelAndView addStudent(Student student){ ModelAndView mv = new ModelAndView(); String tips = "注册失败"; if(studentService.addStudent(student)>0){ tips = "学生【" + student.getName() + "】注册成功"; } mv.addObject("tips",tips); mv.setViewName("/result"); return mv; } @RequestMapping("/queryStudent") @ResponseBody public List<Student> queryStudents(){ return studentService.findStudents(); } }
7.写jsp页面
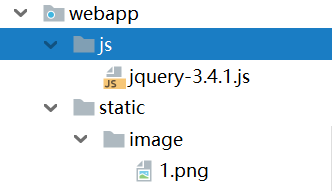
0)加入静态资源
在webapp下创建static文件夹存放静态资源。创建js目录存放js文件。
1)index程序入口
<%@ page contentType="text/html;charset=UTF-8" language="java" %> <% String basePath = request.getScheme() + "://" + request.getServerName() + ":" + request.getServerPort() + request.getContextPath() + "/"; %> <html> <head> <title>功能入口</title> <base href="<%=basePath%>>"/> </head> <body> <div align="center"> <p>SSM整合的例子</p> <img src="static/image/1.png" /> <table> <tr> <td><a href="addStudent.jsp"> 注册学生</a></td> </tr> <tr> <td><a href="listStudent.jsp">浏览学生</a></td> </tr> </table> </div> </body> </html>
2)添加请求发起页面
<%@ page contentType="text/html;charset=UTF-8" language="java" %> <% String basePath = request.getScheme() + "://" + request.getServerName() + ":" + request.getServerPort() + request.getContextPath() + "/"; %> <html> <head> <title>注册学生</title> <base href="<%=basePath%>" /> </head> <body> <div align="center"> <form action="student/addStudent" method="post"> <table> <tr> <td>姓名:</td> <td><input type="text" name="name"></td> </tr> <tr> <td>年龄:</td> <td><input type="text" name="age"></td> </tr> <tr> <td> </td> <td><input type="submit" value="注册"></td> </tr> </table> </form> </div> </body> </html>
3)添加结果显示页面
<%@ page contentType="text/html;charset=UTF-8" language="java" %> <html> <head> <title>Title</title> </head> <body> result.jsp 结果页面,注册结果: ${tips} </body> </html>
4)查询发起界面
<%@ page contentType="text/html;charset=UTF-8" language="java" %> <% String basePath = request.getScheme() + "://" + request.getServerName() + ":" + request.getServerPort() + request.getContextPath() + "/"; %> <html> <head> <title>查询学生ajax</title> <base href="<%=basePath%>" /> <script type="text/javascript" src="static/js/jquery-3.4.1.js"></script> <script type="text/javascript"> $(function(){ //在当前页面dom对象加载后,执行loadStudentData() loadStudentData(); $("#btnLoader").click(function(){ loadStudentData() }) }) function loadStudentData(){ $.ajax({ url:"student/queryStudent", type:"get", dataType:"json", success:function(data){ //清除旧的数据 $("#info").html(""); //增加新的数据 $.each(data,function(i,n){ $("#info").append("<tr>") .append("<td>"+n.id+"</td>") .append("<td>"+n.name+"</td>") .append("<td>"+n.age+"</td>") .append("</tr>") }) } }) } </script> </head> <body> <div align="center"> <table border="1"> <thead> <tr> <td>学号</td> <td>姓名</td> <td>年龄</td> </tr> </thead> <tbody id="info"> </tbody> </table> <input type="button" id="btnLoader" value="查询数据"> </div> </body> </html>
本文来自博客园,作者:墨镜一戴谁也不爱,转载请注明原文链接:https://www.cnblogs.com/hnuzmh/p/16196499.html


【推荐】国内首个AI IDE,深度理解中文开发场景,立即下载体验Trae
【推荐】编程新体验,更懂你的AI,立即体验豆包MarsCode编程助手
【推荐】抖音旗下AI助手豆包,你的智能百科全书,全免费不限次数
【推荐】轻量又高性能的 SSH 工具 IShell:AI 加持,快人一步
· 分享一个免费、快速、无限量使用的满血 DeepSeek R1 模型,支持深度思考和联网搜索!
· 25岁的心里话
· 基于 Docker 搭建 FRP 内网穿透开源项目(很简单哒)
· ollama系列01:轻松3步本地部署deepseek,普通电脑可用
· 按钮权限的设计及实现