Android 动态壁纸原理 及 例子
最近做动态壁纸的项目,原来觉得动态壁纸是个很小的项目,但是看到Android Market上有个专门的动态壁纸分类(现在升级为Google Play了), 而且自己做的这个项目可连接上服务器,供用户购买下载图片,终于有了自信,认识到这个不算是个小项目了。接下来我主要谈谈动态壁纸的原理,然后会解释一个 “小球的例子”,供大家能深入的理解该原理。
一:原理
动态壁纸为:在手机上点击 Menu→Wallpapers→Live wallpapers→然后打开自己的程序。建个最简单的动态壁纸的步骤如下:
1.在rex/xml中新建一个.xml.其中注册一个wallpaper.假设这个名字为ab.xml(下文要用到,可随意设置,没要求)
最简单的就是写 这一句,这样的话打开动态壁纸就会出现只出现一个按钮(左图),一般我们不这样做,要像右图这样子。


若动态壁纸"设置..."(Setting...)你想连接Activity,也在这里指定,比如:
android:settingsActivity="com.birbeck.wallpaperslideshow.SettingsActivity" (这个一般是继承了PreferenceActivity类的Activity。就是首选项模式的类),要设置了这个属性,就会如有图所示了。

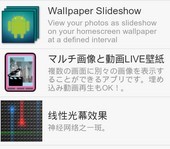
如上截图是手机上的动态壁纸列表,你也可以通过android:description=“XXX”来设置描述,通过anroid:thumbnail="XX"来设置该动态壁纸的图片。
2.接下来要在manifest中注册一个service。
XXX
在这个servier中要指定你继承WallpaperService类的路径,指定1中设置的xml,设置广播,设置允许权限等。比如:
通过android:name="com.bn.ex12f.Sample12_6_WallPaper"指定继承WallpaperService的类 ,
通过android:permission="android.permission.BIND_WALLPAPER">允许动态壁纸权限。
这一种还必须设置一个,用来监听Android系统发出的动态壁纸的广播。
还要通过ab" />.这篇文章中主要讲原理和重要的点,源码我会附上的。
3.就是实现继承了WallpaerService的类了。只需要重写WallpaperServiced的onCreateEngine方法。
@Override
public Engine onCreateEngine()
{
ce=new BallEngine();(class BallEngine extends Engine{...})
return ce;
}
在这个方法里只需返回一个Engine的子类对象就可以了。所以重头戏,写动态壁纸程序的主要工作量就是实现Engine的子类。
4.实现Engine的子类
简而言之,该类的作用就是让你去实现动态壁纸的具体代码。以上三点可认为是格式化的一些东西。这个类不需要强制继承任何方法,现在简述一下一般要重写的方法的功能。
public void onCreate(SurfaceHolder surfaceHolder){...}
public void onDestroy(){...}这俩方法就不说明了
public void onVisibilityChanged(boolean visible)
{
if(visible)//如果可见
{
...
}
else//如果不可见
{
...
}
}该方法作用是当前动态壁纸可见时要画图。重写这个方法一般如以上格式所示。
public void onSurfaceCreated(SurfaceHolder holder) //重写onSurfaceCreated方法
{
super.onSurfaceCreated(holder);//调用父类对应方法
}该方法是应用程序第一次创建时要调用。可在这个方法里调用父类对应方法。该方法执行完毕后系统会立即调用onSurfaceChanged方法(如下)。若在这里调用父类对应方法,那么就在onSurfaceChanged中实现主要功能。
public void onSurfaceChanged(SurfaceHolder holder, int format, int width, int height)
{
...
}该方法有两个用处。1.若动态壁纸要随着横屏竖屏而切换可在这里写。2.想和用户交互的话,比如用户滑动屏幕时,点击屏幕时等。3.注意:onSurfaceCreated调用之后会立即调用该方法。
这些就是动态壁纸原理的介绍。接下来是一个小例,希望大家能够喜欢。这个例子很简单。效果图如下:
功能说明:黄 蓝 绿三个小球(截图不好,球显示不对)。碰到屏幕边的话会像谈到地面上一样,会返回。
效果不错吧,你们会了吗? (代码虽然都附上了,但是资源,布局都没法附。博客园又不支持附件,还用原来的方法,想要代码,邮箱联系我:carman_loneliness@163.com )

这个是继承了WallpaerService的类的代码。
001 |
package com.bn.ex12f; |
002 |
003 |
import android.graphics.Bitmap; |
004 |
import android.graphics.BitmapFactory; |
005 |
import android.graphics.Canvas; |
006 |
import android.graphics.Color; |
007 |
import android.graphics.Paint; |
008 |
import android.os.Handler; |
009 |
import android.service.wallpaper.WallpaperService; |
010 |
import android.view.SurfaceHolder; |
011 |
012 |
public class Sample12_6_WallPaper extends WallpaperService |
013 |
{ |
014 |
BallEngine ce; //BallEngine的引用 |
015 |
Handler hd = new Handler();//创建Handler对象 |
016 |
Bitmap yellowBallBitmap;//黄球位图 |
017 |
Bitmap blueBallBitmap;//蓝球位图 |
018 |
Bitmap greenBallBitmap;//绿球位图 |
019 |
@Override |
020 |
public Engine onCreateEngine() //重写onCreateEngine方法 |
021 |
{ |
022 |
ce=new BallEngine(); //创建 BallEngine对象 |
023 |
return ce;//返回创建的对象 |
024 |
} |
025 |
//初始化图片资源的方法 |
026 |
public void initBitmap(){ |
027 |
yellowBallBitmap=BitmapFactory.decodeResource(this.getResources(), R.drawable.yellowball);//初始化黄球 |
028 |
blueBallBitmap=BitmapFactory.decodeResource(this.getResources(), R.drawable.blueball);//初始化蓝球 |
029 |
greenBallBitmap=BitmapFactory.decodeResource(this.getResources(), R.drawable.greenball);//初始化绿球 |
030 |
} |
031 |
class BallEngine extends Engine //创建内部类 |
032 |
{ |
033 |
Sample12_6_WallPaper father;//MovingBallWallPaper的引用 |
034 |
private final Paint paint = new Paint(); //创建画笔 |
035 |
boolean ifDraw;//是否可见的标志位 |
036 |
BallGoThread bgThread; //BallGoThread引用 |
037 |
AllBalls allBalls;// AllBalls对象的引用 |
038 |
private final Runnable mDrawCube = new Runnable() {//匿名内部类 |
039 |
public void run() {//重写run方法 |
040 |
drawBalls();//调用drawBalls方法 |
041 |
} |
042 |
}; |
043 |
@Override |
044 |
public void onCreate(SurfaceHolder surfaceHolder) //重写onCreate方法 |
045 |
{ |
046 |
super.onCreate(surfaceHolder); //调用父类对应方法 |
047 |
paint.setAntiAlias(true);//打开抗锯齿 |
048 |
initBitmap();//初始化位图资源 |
049 |
} |
050 |
051 |
@Override |
052 |
public void onDestroy() //重写onDestroy方法 |
053 |
{ |
054 |
super.onDestroy();//调用父类对应方法 |
055 |
} |
056 |
057 |
@Override |
058 |
public void onVisibilityChanged(boolean visible) //重写onVisibilityChanged方法 |
059 |
{ |
060 |
ifDraw=visible;//获得是否可见标志位 |
061 |
if(ifDraw)//如果可见 |
062 |
{ |
063 |
bgThread=new BallGoThread(allBalls);//创建BallGoThread线程 |
064 |
bgThread.start();//启动该线程 |
065 |
hd.postDelayed(mDrawCube, Constant.MOVE_TIME);//一定时间后绘制球 |
066 |
} |
067 |
else//如果不可见 |
068 |
{ |
069 |
bgThread.ballGoFlag=false;//停止BallGoThread线程 |
070 |
} |
071 |
} |
072 |
073 |
@Override |
074 |
public void onSurfaceChanged(SurfaceHolder holder, int format, int width, intheight) //重写onSurfaceChanged方法 |
075 |
{ |
076 |
super.onSurfaceChanged(holder, format, width, height); //调用父类对应方法 |
077 |
|
078 |
Constant.SCREEN_HEIGHT=height; //初始化宽和高 |
079 |
Constant.SCREEN_WIDTH=width; |
080 |
|
081 |
int[] ballsSize={Constant.YELLOW_BALL_SIZE,Constant.BLUE_BALL_SIZE,Constant.GREEN_BALL_SIZE};//所有球尺寸数组 |
082 |
Bitmap[] ballsBitmap={yellowBallBitmap,blueBallBitmap,greenBallBitmap};//所有球位图数组 |
083 |
int[] ballsXspan={Constant.YELLOW_XSPAN,Constant.BLUE_XSPAN,Constant.GREEN_XSPAN};//所有球的xSpan数组 |
084 |
int[] ballsYspan={Constant.YELLOW_YSPAN,Constant.BLUE_YSPAN,Constant.GREEN_YSPAN};//所有球的ySpan数组 |
085 |
allBalls=new AllBalls(ballsSize,ballsBitmap,ballsXspan,ballsYspan);//创建AllBalls对象 |
086 |
} |
087 |
088 |
@Override |
089 |
public void onSurfaceCreated(SurfaceHolder holder) //重写onSurfaceCreated方法 |
090 |
{ |
091 |
super.onSurfaceCreated(holder);//调用父类对应方法 |
092 |
} |
093 |
094 |
@Override |
095 |
public void onSurfaceDestroyed(SurfaceHolder holder) //重写onSurfaceDestroyed方法 |
096 |
{ |
097 |
super.onSurfaceDestroyed(holder);//调用父类对应方法 |
098 |
} |
099 |
void drawBalls() //绘制所有球的方法 |
100 |
{ |
101 |
final SurfaceHolder holder = getSurfaceHolder();//获得SurfaceHolder对象 |
102 |
Canvas canvas = null;//声明画布引用 |
103 |
try |
104 |
{ |
105 |
canvas = holder.lockCanvas();//锁定并获得画布对象 |
106 |
if (canvas != null) //如果已得到画布对象 |
107 |
{ |
108 |
canvas.drawColor(Color.argb(255, 0, 0, 0));//擦空界面 |
109 |
allBalls.drawSelf(canvas, paint);//绘制所有的球 |
110 |
} |
111 |
} |
112 |
finally |
113 |
{ |
114 |
if (canvas != null) holder.unlockCanvasAndPost(canvas);//绘制完释放画布 |
115 |
} |
116 |
if(ifDraw)//如果桌面可见 |
117 |
{ |
118 |
hd.postDelayed(mDrawCube,Constant.MOVE_TIME);//一定时间后绘制球 |
119 |
} |
120 |
} |
121 |
} |
122 |
} |
定义常量的类:
01 |
package com.bn.ex12f; |
02 |
/* |
03 |
* 横竖屏公共常量类 |
04 |
*/ |
05 |
public class Constant { |
06 |
public static int SCREEN_WIDTH;//屏幕宽度 |
07 |
public static int SCREEN_HEIGHT;//屏幕高度 |
08 |
|
09 |
public static final int MOVE_TIME=10;//绘制所有球的时间间隔 |
10 |
public static final int YELLOW_XSPAN=1;//黄球x方向步进 |
11 |
public static final int YELLOW_YSPAN=1;//黄球y方向步进 |
12 |
public static final int BLUE_XSPAN=1;//蓝球x方向步进 |
13 |
public static final int BLUE_YSPAN=1;//蓝球y方向步进 |
14 |
public static final int GREEN_XSPAN=1;//绿球x方向步进 |
15 |
public static final int GREEN_YSPAN=1;//绿球y方向步进 |
16 |
|
17 |
public static final int YELLOW_BALL_SIZE=42;//黄球尺寸 |
18 |
public static final int BLUE_BALL_SIZE=39;//蓝球尺寸 |
19 |
public static final int GREEN_BALL_SIZE=35;//绿球尺寸 |
20 |
} |
定义单个球控制的类:
001 |
package com.bn.ex12f; |
002 |
003 |
import android.graphics.Bitmap; |
004 |
import android.graphics.Canvas; |
005 |
import android.graphics.Paint; |
006 |
/* |
007 |
* 表示单个球的类 |
008 |
*/ |
009 |
public class SingleBall { |
010 |
public static final int DIRECTION_YS=0;//右上 |
011 |
public static final int DIRECTION_ZS=1;//左上 |
012 |
public static final int DIRECTION_ZX=2;//左下 |
013 |
public static final int DIRECTION_YX=3;//右下 |
014 |
int x;//球位置坐标 |
015 |
int y; |
016 |
int size;//球的尺寸 |
017 |
int xSpan=2;//球x方向的步进 |
018 |
int ySpan=2;//球y方向的步进 |
019 |
int direction;//球的运动方向 |
020 |
Bitmap bitmap;//球的位图 |
021 |
public SingleBall(int x,int y,int size,int direction,Bitmap bitmap,int xSpan,intySpan)//构造器 |
022 |
{ |
023 |
this.x=x;//初始化坐标位置 |
024 |
this.y=y; |
025 |
this.size=size;//初始化球的尺寸 |
026 |
this.bitmap=bitmap;//初始化球的位图 |
027 |
this.direction=direction;//球的运动方向 |
028 |
this.xSpan=xSpan;//初始化x方向的步进 |
029 |
this.ySpan=ySpan;//初始化y方向的步进 |
030 |
} |
031 |
void drawSelf(Canvas canvas, Paint paint) //绘制单个球的方法 |
032 |
{ |
033 |
canvas.drawBitmap(bitmap, x,y, paint); |
034 |
} |
035 |
void go()//单个球运动的方法 |
036 |
{ |
037 |
int tempX,tempY;//球的目标位置 |
038 |
switch(direction) |
039 |
{ |
040 |
case DIRECTION_YS://如果在向右上方运动 |
041 |
tempX=x+xSpan;//计算目标位置坐标 |
042 |
tempY=y-ySpan; |
043 |
if(isCollideWithRight(tempX,tempY))//到达屏幕右侧 |
044 |
{ |
045 |
direction=DIRECTION_ZS;//改变运动方向为左上 |
046 |
} |
047 |
else if(isCollideWithUp(tempX,tempY))//到达屏幕上侧 |
048 |
{ |
049 |
direction=DIRECTION_YX;//改变运动方向为右下 |
050 |
} |
051 |
else//如果没有碰撞 |
052 |
{ |
053 |
x=tempX;//更新坐标位置 |
054 |
y=tempY; |
055 |
} |
056 |
break; |
057 |
case DIRECTION_ZS://如果在向左上方运动 |
058 |
tempX=x-xSpan;//计算目标位置坐标 |
059 |
tempY=y-ySpan; |
060 |
if(isCollideWithLeft(tempX,tempY))//到达屏幕左侧 |
061 |
{ |
062 |
direction=DIRECTION_YS;//改变运动方向为右上 |
063 |
} |
064 |
else if(isCollideWithUp(tempX,tempY))//到达屏幕上侧 |
065 |
{ |
066 |
direction=DIRECTION_ZX;//改变运动方向为左下 |
067 |
} |
068 |
else//如果没有碰撞 |
069 |
{ |
070 |
x=tempX;//更新坐标位置 |
071 |
y=tempY; |
072 |
} |
073 |
break; |
074 |
case DIRECTION_ZX://如果在向左下方运动 |
075 |
tempX=x-xSpan;//计算目标位置坐标 |
076 |
tempY=y+ySpan; |
077 |
if(isCollideWithLeft(tempX,tempY))//到达屏幕左侧 |
078 |
{ |
079 |
direction=DIRECTION_YX;//改变运动方向为右下 |
080 |
} |
081 |
else if(isCollideWithDown(tempX,tempY))//到达屏幕下侧 |
082 |
{ |
083 |
direction=DIRECTION_ZS;//改变运动方向为左上 |
084 |
} |
085 |
else//如果没有碰撞 |
086 |
{ |
087 |
x=tempX;//更新坐标位置 |
088 |
y=tempY; |
089 |
} |
090 |
break; |
091 |
case DIRECTION_YX://如果在向右下方运动 |
092 |
tempX=x+xSpan;//计算目标位置坐标 |
093 |
tempY=y+ySpan; |
094 |
if(isCollideWithRight(tempX,tempY))//到达屏幕右侧 |
095 |
{ |
096 |
direction=DIRECTION_ZX;//改变运动方向为左下 |
097 |
} |
098 |
else if(isCollideWithDown(tempX,tempY))//到达屏幕下侧 |
099 |
{ |
100 |
direction=DIRECTION_YS;//改变运动方向为右上 |
101 |
} |
102 |
else//如果没有碰撞 |
103 |
{ |
104 |
x=tempX;//更新坐标位置 |
105 |
y=tempY; |
106 |
} |
107 |
break; |
108 |
} |
109 |
} |
110 |
boolean isCollideWithRight(int tempX,int tempY)//判断是否与屏右侧碰撞的方法 |
111 |
{ |
112 |
return !(tempX>0&&tempX<Constant.SCREEN_WIDTH - this.size * 1.5); |
113 |
} |
114 |
boolean isCollideWithUp(int tempX,int tempY)//判断是否与屏上侧碰撞的方法 |
115 |
{ |
116 |
return !(tempY>0); |
117 |
} |
118 |
boolean isCollideWithLeft(int tempX,int tempY)//判断是否与屏左侧碰撞的方法 |
119 |
{ |
120 |
return !(tempX>0); |
121 |
} |
122 |
boolean isCollideWithDown(int tempX,int tempY)//判断是否与屏下侧碰撞的方法 |
123 |
{ |
124 |
return !(tempY>0&&tempY<Constant.SCREEN_HEIGHT - this.size * 1.5); |
125 |
} |
126 |
} |
管理所有球运动的类:
01 |
package com.bn.ex12f; |
02 |
/* |
03 |
* 控制所有球的类 |
04 |
*/ |
05 |
import java.util.ArrayList; |
06 |
import android.graphics.Bitmap; |
07 |
import android.graphics.Canvas; |
08 |
import android.graphics.Paint; |
09 |
10 |
public class AllBalls { |
11 |
ArrayList<SingleBall> alSingleBall=new ArrayList<SingleBall>();//单个球列表 |
12 |
Bitmap[] ballsBitmap;//位图数组 |
13 |
int[] ballsSize;//球尺寸数组 |
14 |
int[] ballsXSpan;//球x方向步进数组 |
15 |
int[] ballsYSpan;//球y方向步进数组 |
16 |
public AllBalls(int[] ballsSize,Bitmap[] ballsBitmap,int[] ballsXSpan,int[] ballsYSpan)//构造器 |
17 |
{ |
18 |
this.ballsSize=ballsSize;//成员变量赋值 |
19 |
this.ballsBitmap=ballsBitmap;//成员变量赋值 |
20 |
this.ballsXSpan=ballsXSpan;//成员变量赋值 |
21 |
this.ballsYSpan=ballsYSpan;//成员变量赋值 |
22 |
for(int i=0;i<ballsSize.length;i++)//循环球尺寸数组 |
23 |
{ |
24 |
int x=(int) (Math.random()*(Constant.SCREEN_WIDTH-ballsSize[i]));//随机生成单个球的初始位置 |
25 |
int y=(int) (Math.random()*(Constant.SCREEN_HEIGHT-ballsSize[i])); |
26 |
int direction=(int) Math.random()*4;//随机生成单个球的运动方向 |
27 |
alSingleBall.add//创建单个球对象,并加入列表 |
28 |
( |
29 |
newSingleBall(x,y,ballsSize[i],direction,ballsBitmap[i],ballsXSpan[i],ballsYSpan[i]) |
30 |
31 |
); |
32 |
} |
33 |
} |
34 |
public void drawSelf(Canvas canvas, Paint paint)//绘制所有球的方法 |
35 |
{ |
36 |
for(SingleBall sb:alSingleBall)//循环单个球列表 |
37 |
{ |
38 |
sb.drawSelf(canvas, paint);//绘制单个球 |
39 |
} |
40 |
} |
41 |
public void go()//使所有球运动的方法 |
42 |
{ |
43 |
for(SingleBall sb:alSingleBall)//循环单个球列表 |
44 |
{ |
45 |
sb.go();//使单个球运动 |
46 |
} |
47 |
} |
48 |
} |
最后是启动球运动的线程类:
01 |
package com.bn.ex12f; |
02 |
/* |
03 |
* 控制所有球运动的线程 |
04 |
*/ |
05 |
public class BallGoThread extends Thread { |
06 |
AllBalls allBalls;//声明AllBalls的引用 |
07 |
public BallGoThread(AllBalls allBalls)//构造器 |
08 |
{ |
09 |
this.allBalls=allBalls;//成员变量赋值 |
10 |
} |
11 |
boolean ballGoFlag=true;//循环标志位 |
12 |
@Override |
13 |
public void run()//重写run方法 |
14 |
{ |
15 |
while(ballGoFlag)//while循环 |
16 |
{ |
17 |
allBalls.go();//调用使所有球运动的方法 |
18 |
try |
19 |
{ |
20 |
Thread.sleep(Constant.MOVE_TIME);//一段时间后再运动 |
21 |
} |
22 |
catch(Exception e) |
23 |
{ |
24 |
e.printStackTrace();//打印异常 |
25 |
} |
26 |
} |
27 |
} |
28 |
} |
转自:http://www.cnblogs.com/carmanloneliness/archive/2012/03/10/2388500.html


