


使用uiautomator2自动化测试app-搭建环境
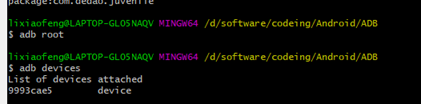
1、 安装adb工具
2、 电脑USB联上手机,开启手机的开发者模式。如果不知道开,可以下载360手机助手(同时下载电脑版和手机版)。通过360助手开始开发者模式
3、 通过进程管理,将360手机助手相关进程全部关闭。否则adb shell无法使用
4、 在cmd中,分别输入adb device, adb root,获root权限
5、 安装uiautomator2, pip install --pre uiautomator2, pip install pillow
初始化
部署相关的守护进程。
电脑连接上一个手机或多个手机, 确保adb已经添加到环境变量中,执行下面的命令会自动安装本库所需要的设备端程序:uiautomator-server 、atx-agent、openstf/minicap、openstf/minitouch
python -m uiautomator2 init # 执行该语句的目标是向设备端安装app-uiautomator.apk和app-uiautomator-test.apk。执行完毕后,输入以下语句确认设备端是否成功安装或直接查看手机。
$ adb shell am instrument -w -r -e debug false -e class com.github.uiautomator.stub.Stub com.github.uiautomator.test/android.support.test.runner.AndroidJUnitRunner
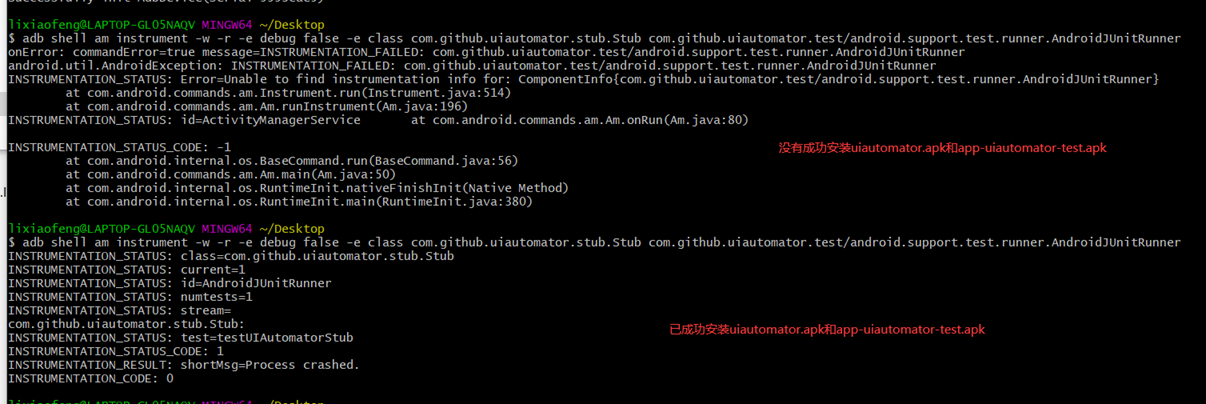
注意,每次执行该语句时,如果手机已经本身已经安装了app-uiautomator.apk和app-uiautomator-test.apk。会被自动覆盖掉。
如果发现执行该语句,无法成功安装可。可通过手动在设备端进行安装。
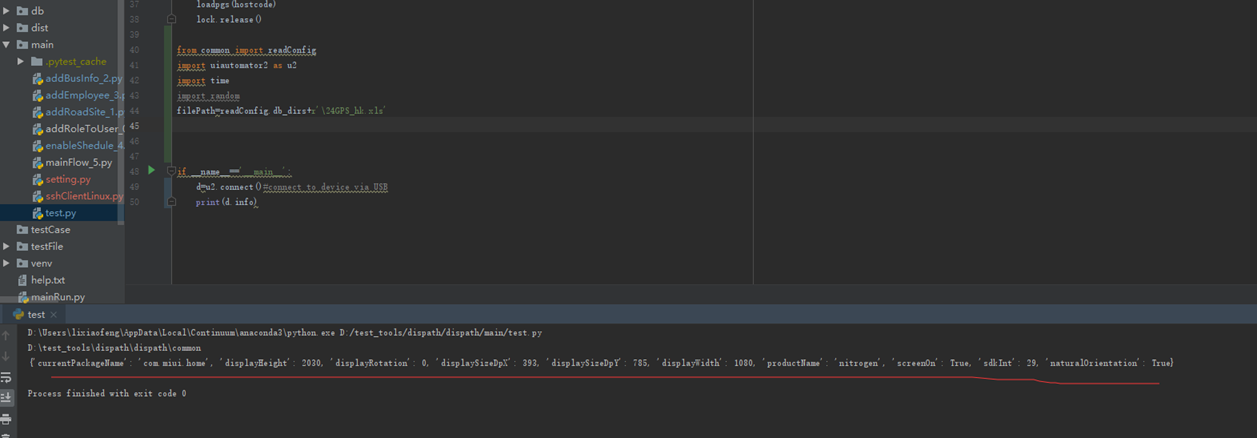
安装完毕后,执行以下代码,uiautomator成功联接设备。
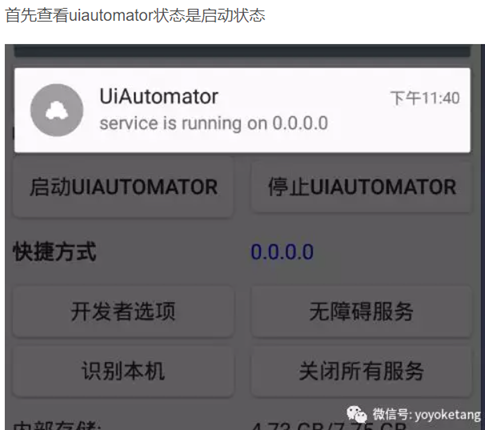
安装完成,设备上会多一个uiautomator的应用。
6、 pip install opencv-python
7、 pip install weditor
8、 python -m weditor —shortcut #桌面创建快捷键
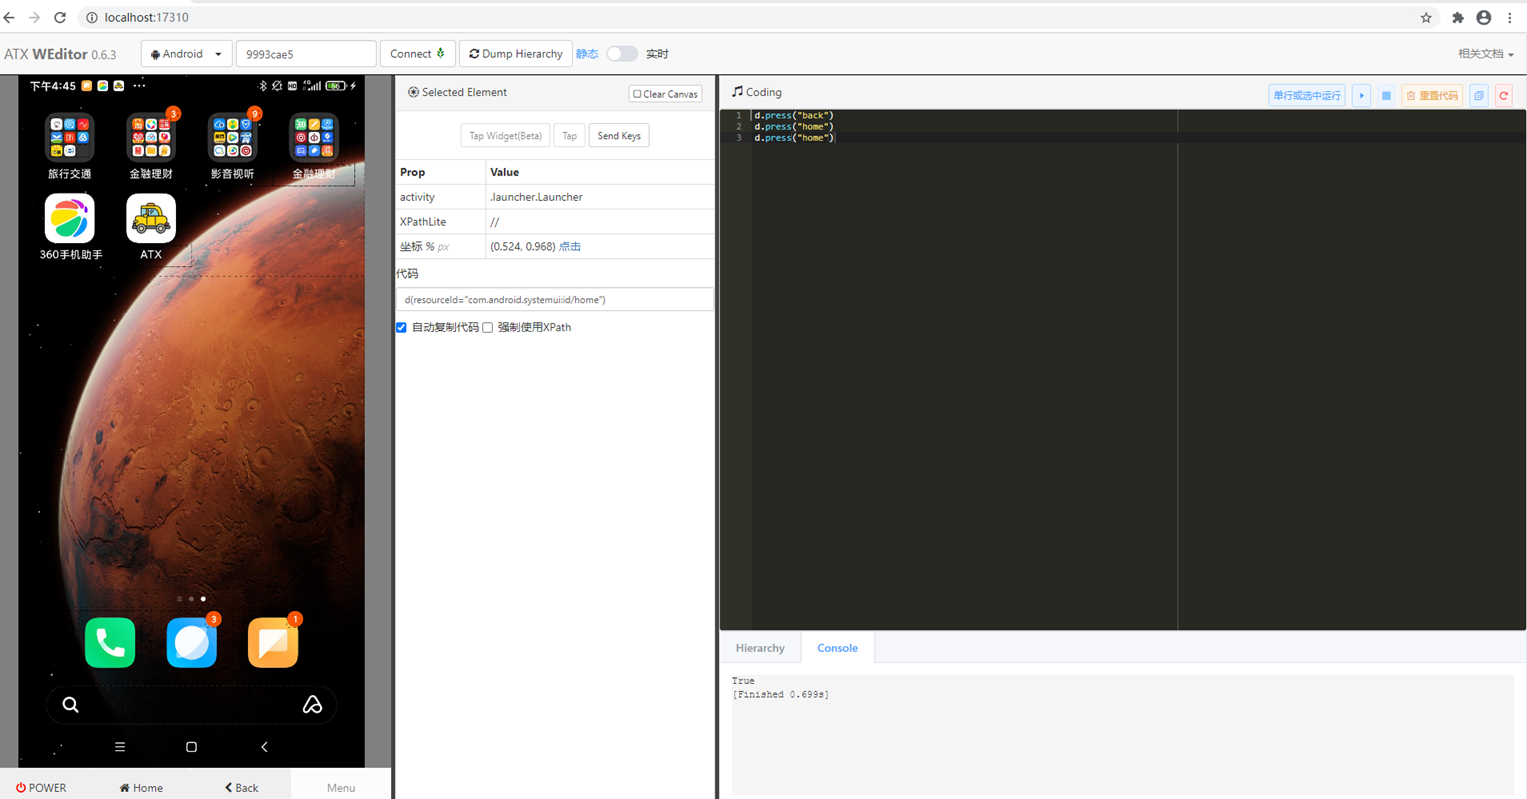
如果weditor一直显示灰屏,则在设备端ATX app中,点击‘启动UIAUTOMATOR’按钮,再浏览器刷新重新加载。
环境搭建完毕。


【推荐】国内首个AI IDE,深度理解中文开发场景,立即下载体验Trae
【推荐】编程新体验,更懂你的AI,立即体验豆包MarsCode编程助手
【推荐】抖音旗下AI助手豆包,你的智能百科全书,全免费不限次数
【推荐】轻量又高性能的 SSH 工具 IShell:AI 加持,快人一步
· 从 HTTP 原因短语缺失研究 HTTP/2 和 HTTP/3 的设计差异
· AI与.NET技术实操系列:向量存储与相似性搜索在 .NET 中的实现
· 基于Microsoft.Extensions.AI核心库实现RAG应用
· Linux系列:如何用heaptrack跟踪.NET程序的非托管内存泄露
· 开发者必知的日志记录最佳实践
· winform 绘制太阳,地球,月球 运作规律
· AI与.NET技术实操系列(五):向量存储与相似性搜索在 .NET 中的实现
· 超详细:普通电脑也行Windows部署deepseek R1训练数据并当服务器共享给他人
· 【硬核科普】Trae如何「偷看」你的代码?零基础破解AI编程运行原理
· 上周热点回顾(3.3-3.9)