

百度API接口调用流程
一、登录注册,实名认证,进入开放平台,选择需要的功能
二、选择人脸识别,获取免费资源,免费资源有365天
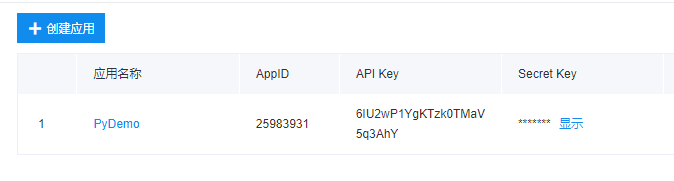
三、创建应用,应用使用途径填学习使用
四、应用生成后会获得APIkey和SecretKey 后面会使用到
五、然后就可以到pycharm中开始编码了
①复制 百度API 技术文档 中的代码
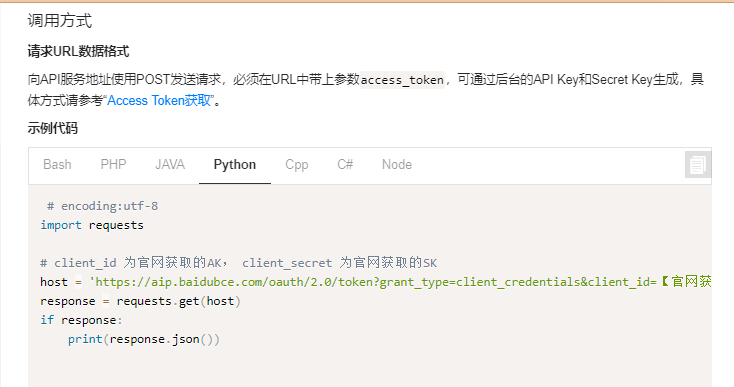
其中 client_id=AK,client_secret=SK
②将函数封装 传入参数 client_key client_secret 返回access_token
 # encoding:utf-8
import requests
import json  #pip install 直接下载json包
import base64
client_id = "换成自己生成的码"
client_secret = "换成自己生成的码"

def get_access_tocken(client_id,client_secret):
    # client_id 为官网获取的AK, client_secret 为官网获取的SK
    host = 'https://aip.baidubce.com/oauth/2.0/token?grant_type=client_credentials&client_id={}&client_secret={}'.format(client_id,client_secret)
    response = requests.get(host)
    if response:
        #print(response.json())
        #print(response.json()['access_token'])  #把json看做一个字典,从字典中取值
        return response.json()['access_token']
③调用百度API人脸识别的接口
params 中是需要上传的图像数据。
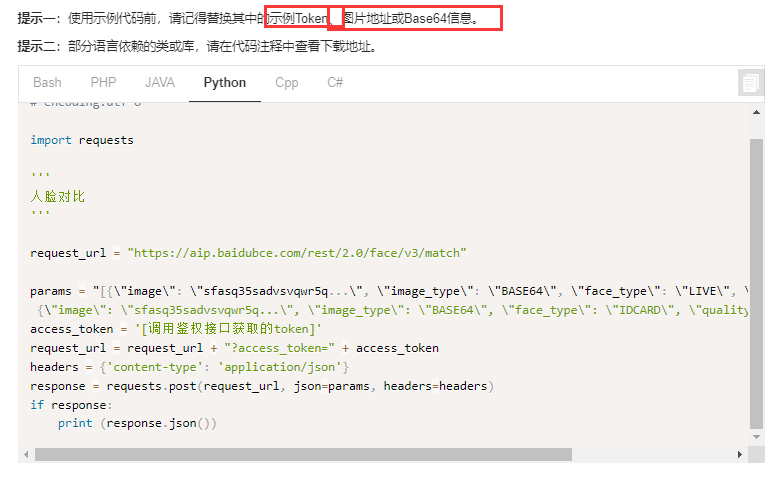
其中 image 图片信息需要转换成BASE64:
f1=open('./photo/img1.jpeg','rb')
img1=base64.b64encode(f1.read()).decode()
f2=open('./photo/img2.jpeg','rb')
img2=base64.b64encode(f2.read()).decode()
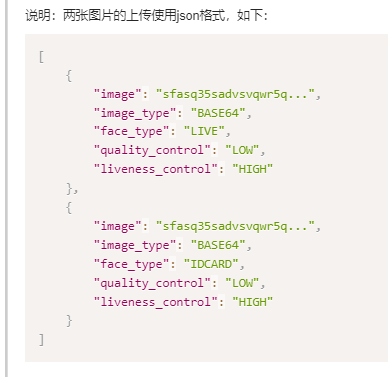
如果上传的是静态的图片,需要把liveness_control这一参数修改成NONE。
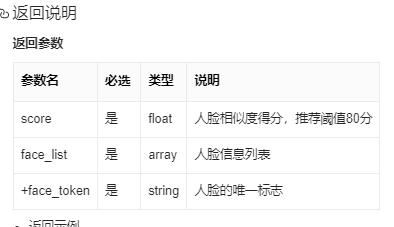
六、API接口返回的都是json格式,所以需要自己获取json格式中自己需要的字段
response()['result']['score'],具体的需要查看百度提供的API技术文档
access_token =myaccess_token   #自己定义的变量
request_url = request_url + "?access_token=" + access_token
headers = {'content-type': 'application/json'}
response = requests.post(request_url, json=params, headers=headers)
if response:
    print (response.json())
    if response.json()['result']['score']>92:
       print("相似")


【推荐】国内首个AI IDE,深度理解中文开发场景,立即下载体验Trae
【推荐】编程新体验,更懂你的AI,立即体验豆包MarsCode编程助手
【推荐】抖音旗下AI助手豆包,你的智能百科全书,全免费不限次数
【推荐】轻量又高性能的 SSH 工具 IShell:AI 加持,快人一步
· 阿里最新开源QwQ-32B,效果媲美deepseek-r1满血版,部署成本又又又降低了!
· 开源Multi-agent AI智能体框架aevatar.ai,欢迎大家贡献代码
· Manus重磅发布:全球首款通用AI代理技术深度解析与实战指南
· 被坑几百块钱后,我竟然真的恢复了删除的微信聊天记录!
· AI技术革命,工作效率10个最佳AI工具