


源码学习之路----mybatis
在开始本文之前呢,我们首先需要了解一下传统的jdbc存在的问题
传统的jdbc的代码是这样的:
代码 1
public class Test {

    public static final String URL = "jdbc:mysql://localhost:3306/test";
    public static final String USER = "root";
    public static final String PASSWORD = "root";

    public static void main(String[] args) throws Exception {
        //1.加载驱动程序
        Class.forName("com.mysql.jdbc.Driver");
        //2. 获得数据库连接
        Connection conn = DriverManager.getConnection(URL, USER, PASSWORD);
        //3.操作数据库,实现增删改查
        Statement stmt = conn.createStatement();
        ResultSet rs = stmt.executeQuery("SELECT user_name, age FROM imooc_goddess");
        //如果有数据,rs.next()返回true
        while(rs.next()){
            System.out.println(rs.getString("user_name")+" 年龄:"+rs.getInt("age"));
        }
    }
观察如上代码发现 ,传统的jdbc存在如下问题:
1)数据库配置信息,以及sql语句的编写,我们都放入配置文件中,由此以来,方便维护。
<configuration> <!--数据库配置信息--> <dataSource> <property name="dirverClass" value="com.mysql.jdbc.Driver"></property> <property name="jdbcUrl" value="jdbc:mysql://localhost:3306/test?useUnicode=true&characterEncoding=UTF-8"></property> <property name="username" value="root"></property> <property name="password" value="root"></property> </dataSource> <!-- 为了一次性将所有的资源全部读入,此处我们用来存放mapper.xml全路径--> <mapper resource="UserMapper.xml"></mapper> </configuration>
代码 3
mapper.xml
说明:
  为了防止我们在调用方法时,不同类中方法名重复,我们设置 sql的唯一标识namespace.id =》statementId 来避免这个问题,
比如 UserMapper.class中与Order.class中都存在findAll方法,我们就要在userMapper.xml和OrderMapper.xml中都设置一下namespace属性,
这样 mapper标签的namespace属性加上select标签的id属性就可以唯一的确定一个sql语句了。
<mapper namespace="user">
<!--   为了防止我们在调用方法时,不同类中方法名重复,我们设置 sql的唯一标识namespace.id =》statementId 来避免这个问题
  比如 UserMapper.class中与Order.class中都存在findAll方法,我们就要在userMapper.xml和OrderMapper.xml中都设置一下namespace属性,
这样 mapper标签的namespace属性加上select标签的id属性就可以唯一的确定一个sql语句了-->
    <select id="findAll" resultType="com.hg.pojo.User">
        select * from user
    </select>

    <select id="findByCondition" resultType="com.hg.pojo.User" paramterType="com.hg.pojo.User">
        select * from user where id = #{id} and username = #{username}
    </select>
</mapper>
这样,配置文件就写好了。
接下来,我们分析下框架中需要的类,以及实现方法:
首先,我们需要加载使用者的配置文件:根据配置文件的路径加载配置文件成字节输入流,存储在内存中。
于是,我们创建一个Resource类来实现这个功能
我们创建一个maven工程,创建一个包com.xx.io来存放我们的Resource类,该类只有一个方法,就是读取配置信息成字节流到内存中。
引入依赖
 <dependency>
            <groupId>mysql</groupId>
            <artifactId>mysql-connector-java</artifactId>
            <version>5.1.17</version>
        </dependency>
        <dependency>
            <groupId>c3p0</groupId>
            <artifactId>c3p0</artifactId>
            <version>0.9.1.2</version>
        </dependency>
        <dependency>
            <groupId>log4j</groupId>
            <artifactId>log4j</artifactId>
            <version>1.2.12</version>
        </dependency>
        <dependency>
            <groupId>junit</groupId>
            <artifactId>junit</artifactId>
            <version>4.10</version>
        </dependency>
        <dependency>
            <groupId>dom4j</groupId>
            <artifactId>dom4j</artifactId>
            <version>1.6.1</version>
        </dependency>
        <dependency>
            <groupId>jaxen</groupId>
            <artifactId>jaxen</artifactId>
            <version>1.1.6</version>
        </dependency>
代码 4
public class Resource {
    //根据配置文件路径,将配置文件ji加载成字节流,存储在内存中
    public static InputStream getResourceAsStream(String path){
        InputStream resourceAsStream = Resource.class.getClassLoader().getResourceAsStream(path);
        return resourceAsStream;
    }
}
然后我们需要创建两个Bean来存放解析出来的数据库配置信息和sql配置信息:
import javax.sql.DataSource;
import java.util.HashMap;
import java.util.Map;
public class Configuration {
    private DataSource dataSource;

    public DataSource getDataSource() {
        return dataSource;
    }

    public void setDataSource(DataSource dataSource) {
        this.dataSource = dataSource;
    }

    public Map<String, MappedStatement> getMappedStatementMap() {
        return mappedStatementMap;
    }

    public void setMappedStatementMap(Map<String, MappedStatement> mappedStatementMap) {
        this.mappedStatementMap = mappedStatementMap;
    }

    //key statementId  value:封装好的 mappedStatement
    Map<String,MappedStatement> mappedStatementMap = new HashMap<>();
}
public class MappedStatement {
    //id标识
    private String id;
    // 返回值类型
    private String resultType;
    // 参数值类型
    private String paramterType;
    // sql语句
    private String sql;
public String getId() {
        return id;
    }

    public void setId(String id) {
        this.id = id;
    }

    public String getResultType() {
        return resultType;
    }

    public void setResultType(String resultType) {
        this.resultType = resultType;
    }

    public String getParamterType() {
        return paramterType;
    }

    public void setParamterType(String paramterType) {
        this.paramterType = paramterType;
    }

    public String getSql() {
        return sql;
    }

    public void setSql(String sql) {
        this.sql = sql;
    }

}
MappedStatement类中,我们定义了四个属性,分别对应我们将来解析出来的mapper.xml文件中的id、resultType、paramterType和sql。
Configuration类中,我们设置两个属性,分别是dataSource和mappedStatementMap ,dataSource属性存放的是数据库的配置信息,mappedStatementMap存放的是sql的信息,这里可以看到,我们的mappedStatementMap是一个map类型,因为我们每个mapper.xml中都会存在多个sql语句,所以,我们在解析时,将会把我们前面提到的用来唯一定位一条sql语句的statementid来当做map的key,而解析出来的MappedStatement就是map的value。
至此,我们就把两个配置文件解析好后存放配置信息的类都创建好了,接下来,我们来看一下,这个配置文件是如何解析的呢?
public interface SqlSession {
//    查询所有
    public <E> List<E> selectList(String statementId,Object... params) throws Exception;
    // 根据条件查询一条
    public <T> T selectOne(String statementId,Object... params) throws Exception;

    public int insert(String statementId,Object... params) throws Exception;

    public int delete(String statementId,Object... params) throws Exception;

    public int update(String statementId,Object... params) throws Exception;

    //为dao接口生成代理实现类
    public <T> T getMapper(Class<?> mapperClass);
}
public interface SqlSessionFactory {
    public SqlSession openSession();
}
import com.hg.config.XMLConfigBuilder;
import com.hg.pojo.Configuration;
import org.dom4j.DocumentException;

import java.beans.PropertyVetoException;
import java.io.InputStream;

public class SqlSessionFactoryBuilder {
    public SqlSessionFactory build(InputStream in) throws DocumentException, PropertyVetoException {
//        第一:使用dom4j解析配置文件,将解析出来的内容封装到Configuration中
        XMLConfigBuilder xmlConfigBuilder = new XMLConfigBuilder();
        Configuration configuration = xmlConfigBuilder.parseConfig(in);


//        第二:创建sqlSessionFactory对象: 工厂类:生产sqlSession:会话对象
        DefaultSqlSessionFactory defaultSqlSessionFactory = new DefaultSqlSessionFactory(configuration);

        return defaultSqlSessionFactory;
    }
}
import com.hg.io.Resource;
import com.hg.pojo.Configuration;
import com.mchange.v2.c3p0.ComboPooledDataSource;
import org.dom4j.Document;
import org.dom4j.DocumentException;
import org.dom4j.Element;
import org.dom4j.io.SAXReader;

import java.beans.PropertyVetoException;
import java.io.InputStream;
import java.util.List;
import java.util.Properties;

public class XMLConfigBuilder {
    private Configuration configuration;

    public XMLConfigBuilder() {
        this.configuration = new Configuration();
    }

    //该方法是使用dom4j将配置文件践行解析,封装Configuration
    public Configuration parseConfig(InputStream inputStream) throws DocumentException, PropertyVetoException {
        Document document = new SAXReader().read(inputStream);
        //拿到 <configuration>
        Element rootElement = document.getRootElement();
        List<Element> list = rootElement.selectNodes("//property");
        Properties properties = new Properties();
        for (Element element : list) {
            String name = element.attributeValue("name");
            String value = element.attributeValue("value");
            properties.setProperty(name,value);
        }

        ComboPooledDataSource comboPooledDataSource = new ComboPooledDataSource();
        comboPooledDataSource.setDriverClass(properties.getProperty("dirverClass"));
        comboPooledDataSource.setJdbcUrl(properties.getProperty("jdbcUrl"));
        comboPooledDataSource.setUser(properties.getProperty("username"));
        comboPooledDataSource.setPassword(properties.getProperty("password"));

        configuration.setDataSource(comboPooledDataSource);

//        mapper.xml解析  拿到路径 获取字节输入流 进行解析
        List<Element> mapperList = rootElement.selectNodes("//mapper");
        for (Element element : mapperList) {
            String mapperPath = element.attributeValue("resource");
            InputStream resourceAsStream = Resource.getResourceAsStream(mapperPath);
            XMLMapperBuilder xmlMapperBuilder = new XMLMapperBuilder(configuration);
            xmlMapperBuilder.parse(resourceAsStream);
        }

        return configuration;
    }
}
这边我们详细讲解一下这个类:
首先我们创建一个午餐的构造方法来初始化一个Configuration类用来存储接下来解析的所有配置信息。
上面我们提到为了一次性将所有的资源全部读入我们将mapper.xml文件的的全路径也配置到了sqlMapConfig.xml中,接下来我们将进行mapper.xml 的解析
我们通过rootElement.selectNodes("//mapper");来获取到配置信息中的所有mapper标签,上文代码中层提到,里面包含着所有的mapper.xml 的路径信息(因为我们可能会有多个mapper文件)。
接下来我们通过循环遍历element.attributeValue("resource")获取到每一个mapper.xml的路径,并使用Resource类进行字节流的读取。
然后我们需要创建一个XMLMapperBuilder类来对每个mapper.xml进行处理。我们将Configuration作为参数传递进去是为了将解析后的mapper.xml信息存储到Configuration里面的mappedStatementMap集合中。
然后我们调用XMLMapperBuilder的parse方法来处理读取到的mapper.xml文件字节流。
好了,接下来我们开始研究下如何将mapper.xml文件的信息解析出来。
我们先创建XMLMapperBuilder类
代码 9
package com.hg.config;
import com.hg.pojo.Configuration;
import com.hg.pojo.MappedStatement;
import org.dom4j.Document;
import org.dom4j.DocumentException;
import org.dom4j.Element;
import org.dom4j.io.SAXReader;

import java.io.InputStream;
import java.util.List;

public class XMLMapperBuilder {
    private Configuration configuration;
    public XMLMapperBuilder(Configuration configuration) {
        this.configuration = configuration;
    }
    public void parse(InputStream inputStream) throws DocumentException {
        Document document = new SAXReader().read(inputStream);
        Element rootElement = document.getRootElement();
        String namespace = rootElement.attributeValue("namespace");
        List<Element> list = rootElement.selectNodes("//select");
        for (Element element : list) {
            String id = element.attributeValue("id");
            String resultType = element.attributeValue("resultType");
            String paramterType = element.attributeValue("paramterType");
            String sqlText = element.getTextTrim();
            MappedStatement mappedStatement = new MappedStatement();
            mappedStatement.setId(id);
            mappedStatement.setParamterType(paramterType);
            mappedStatement.setResultType(resultType);
            mappedStatement.setSql(sqlText);
            String key = namespace+"."+id;
            configuration.getMappedStatementMap().put(key,mappedStatement);
        }
    }
}
上面解析sqlMapConfig.xml 的代码中我们曾提到,将 Configuration 作为参数传递给 XMLMapperBuilder ,那么 XMLMapperBuilder 代码中,我们创建了一个有参的构造方法来进行参数的传递,接下来我们创建一个parse方法来进行mapper.xml文件的解析,这里我们接收到的参数是 XMLConfigBuilder 中传递过来的mapper.xml字节流,同样的使用dom4j来进行解析,重复的代码我不再赘述,这边解析的是mapper.xml中所有select(insert,update,delete)标签下的所有属性,包括id,resultType,paramterType以及sql(后面我们还要在MappedStatement中加入一个标记属性,来判断我们这个MappedStatement是增,删,改,查中的哪种);
上文我们提到要想准确的定位一个sql需要通过 statementid(namespace.id)来进行唯一标示,所以这边使用 statementid 作为 mappedStatementMap 的key,而获取到的select标签下的所有信息封装成 MappedStatement 作为mappedStatementMap 的value,这样这个parse方法就把mapper.xml中的配置信息传递到了 Configuration 中的 mappedStatementMap 里。最终 XMLConfigBuilder 中的parseConfig方法将所有配置信息都读取到了Configuration中并将Configuration返回。这样上文中的 代码7 SQLSessionFactoryBuilder 类的第一部分就完成了,有了配置信息,接下来,我们继续探讨如何来进行 SQLSession 的创建以及如何进行查询,对查询结果的解析以及封装。
我们创建一个DefaultSqlSessionFactory来实现SqlSessionFactory接口
代码 10
public class DefaultSqlSessionFactory implements SqlSessionFactory{
    private Configuration configuration;

    public DefaultSqlSessionFactory(Configuration configuration) {
        this.configuration = configuration;
    }

    @Override
    public SqlSession openSession() {
        return new DefaultSqlSession(configuration);
    }
}
此时,我们要创建一个构造函数来传递我们刚才解析出来的Configuration,然后我们再创建一个DefaultSqlSession类来实现SqlSession接口的方法,同使这个DefaultSqlSession类也要创建一个有参的构造方法用来传递我们的Configuration参数(上面我们分析过,这个Configuration参数很重要,数据库的配置信息以及sql的信息全都存储在这个Configuration中),然后我们在DefaultSqlSessionFactory类的openSession方法中创建这个DefaultSqlSession实例对象。
接下来我们一起研究一下这个DefaultSqlSession都完成了什么功能:
代码 11
public class DefaultSqlSession implements SqlSession {
    private Configuration configuration;

    public DefaultSqlSession(Configuration configuration) {
        this.configuration = configuration;
    }

    @Override
    public <E> List<E> selectList(String statementId, Object... params) throws Exception {
//        将要完成对simpleExcutor里的query方法
        SimpleExecutor simpleExecutor = new SimpleExecutor();
        MappedStatement mappedStatement = configuration.getMappedStatementMap().get(statementId);
        List<Object> list = simpleExecutor.query(configuration, mappedStatement, params);
        return (List<E>) list;
    }

    @Override
    public <T> T selectOne(String statementId, Object... params) throws Exception {
        List<Object> objects = selectList(statementId, params);
        if(objects.size()==1){
            return (T) objects.get(0);
        }else{
            throw new RuntimeException("查询结果为空或返回结果过多");
        }
    }

    @Override
    public int insert(String statementId, Object... params) throws Exception {
        return this.update(statementId,params);
    }

    @Override
    public int delete(String statementId, Object... params) throws Exception {
        return this.update(statementId,params);
    }


    @Override
    public int update(String statementId, Object... params) throws Exception {
        SimpleExecutor simpleExecutor = new SimpleExecutor();
        MappedStatement mappedStatement = configuration.getMappedStatementMap().get(statementId);
        int rows = simpleExecutor.update(configuration, mappedStatement, params);
        return rows;
    }


    @Override
    public <T> T getMapper(Class<?> mapperClass) {
        //使用动态代理为DAO接口生成代理对象;并返回
        Object proxyInstance = Proxy.newProxyInstance(DefaultSqlSession.class.getClassLoader(), new Class[]{mapperClass}, (proxy, method, args) -> {
//                底层就是执行jdbc  根据不同情况,调用  selectList和selectOne
//                准备参数  1statementid  sql的唯一标识  namespace.id=接口权限定名.方法名
            System.out.println(DefaultSqlSession.class.getClassLoader());
            System.out.println(mapperClass.getClassLoader());
            String methodName = method.getName();
            String className = method.getDeclaringClass().getName();
            String statementId = className+"."+methodName;
            MappedStatement mappedStatement = configuration.getMappedStatementMap().get(statementId);
            SqlCommandType sqlCommandType = mappedStatement.getSqlCommandType();
            switch (sqlCommandType){
                case SELECT:
                    //准备参数2:params:args
                    //获取被调用方法的返回值类型
                    Type genericReturnType = method.getGenericReturnType();
                    //判断是否进行了泛型类型参数化
                    if(genericReturnType instanceof ParameterizedType){
                        List<Object> objects = selectList(statementId, args);
                        return objects;
                    }
                    return selectOne(statementId,args);
                case DELETE:
                    return delete(statementId,args);
                case INSERT:
                    return insert(statementId,args);
                case UPDATE:
                    return update(statementId,args);
                default:
                    return null;
            }

        });
        return (T) proxyInstance;
    }
}
我们实现了SqlSession接口中的所有方法,接下来我们逐步介绍这个类:
可以看到,我们的增删改查方法中都用到一个SimpleExecutor类,这个类就是用来实现我们的核心功能:
1.数据库的连接
2.获取sql语句并进行转换(把我们写的sql语句中的#{}替换成?)
3.获取预处理对象
4.设置参数(将我们的传值设置到预处理对象中)
5.执行sql
6.封装返回结果(将查询到的数据库数据封装成我们的pojo对象)
接下来我们将一步一步完成这些功能。
我们创建一个执行器接口Executor,这里我们提供两个方法,query和update,query我们用来查数据,update我们用来 增 删 改 数据。
代码 12
public interface Executor {
    public <E> List<E> query(Configuration configuration, MappedStatement mappedStatement, Object... params) throws Exception;

    public int update(Configuration configuration, MappedStatement mappedStatement, Object... params) throws Exception;

}
然后我们创建一个SimpleExecutor类来实现这个接口中的方法,后面我们将重点的分析一下查询方法的实现
代码 13
public class SimpleExecutor implements Executor {
    @Override
    public <E> List<E> query(Configuration configuration, MappedStatement mappedStatement, Object... params) throws Exception {
        //1注册驱动,获取连接
        Connection connection = configuration.getDataSource().getConnection();
        //2获取sql语句 转换sql语句  #{} 转换成 ? 转换的过程对#{}的值解析出来并存储
        String sql = mappedStatement.getSql();
        BoundSql boundSql = getBoundSql(sql);
        //3获取预处理对象
        PreparedStatement preparedStatement = connection.prepareStatement(boundSql.getSqlText());

        //4设置参数
//        获取到参数的全路径
        String paramterType = mappedStatement.getParamterType();
        Class<?> paramterTypeClass = getClassType(paramterType);
        List<ParameterMapping> parameterMappingList = boundSql.getParameterMappingList();
        for (int i = 0; i < parameterMappingList.size(); i++) {
            ParameterMapping parameterMapping = parameterMappingList.get(i);
            String content = parameterMapping.getContent();
            //反射
            Field declaredField = paramterTypeClass.getDeclaredField(content);
//            设置暴力访问
            declaredField.setAccessible(true);
            Object o = declaredField.get(params[0]);
            preparedStatement.setObject(i+1,o);

        }

        //5执行sql
        ResultSet resultSet = preparedStatement.executeQuery();
        String resultType = mappedStatement.getResultType();
        Class<?> resultTypeClass = getClassType(resultType);


        ArrayList<Object> objects = new ArrayList<>();

        //6封装返回结果集
        while(resultSet.next()){
            Object o = resultTypeClass.newInstance();
            //元数据
            ResultSetMetaData metaData = resultSet.getMetaData();
//            getColumnCount  获取总列数  就是属性的个数
            for (int i = 1; i <= metaData.getColumnCount(); i++) {
                //字段名
                String columnName = metaData.getColumnName(i);
                //字段的值
                Object value = resultSet.getObject(columnName);
                //使用反射或者内省,根据数据库表和实体的对应关系,完成封装
                PropertyDescriptor propertyDescriptor = new PropertyDescriptor(columnName,resultTypeClass);
                Method writeMethod = propertyDescriptor.getWriteMethod();
                writeMethod.invoke(o,value);
            }
            objects.add(o);
        }

        return (List<E>) objects;
    }


    @Override
    public int update(Configuration configuration, MappedStatement mappedStatement, Object... params) throws Exception {

        //1注册驱动,获取连接
        Connection connection = configuration.getDataSource().getConnection();
        //2获取sql语句 转换sql语句  #{} 转换成 ? 转换的过程对#{}的值解析出来并存储
        String sql = mappedStatement.getSql();
        BoundSql boundSql = getBoundSql(sql);
        //3获取预处理对象
        PreparedStatement preparedStatement = connection.prepareStatement(boundSql.getSqlText());

        //4设置参数
//        获取到参数的全路径
        String paramterType = mappedStatement.getParamterType();
        Class<?> paramterTypeClass = getClassType(paramterType);
        List<ParameterMapping> parameterMappingList = boundSql.getParameterMappingList();
        for (int i = 0; i < parameterMappingList.size(); i++) {
            ParameterMapping parameterMapping = parameterMappingList.get(i);
            String content = parameterMapping.getContent();
            //反射
            Field declaredField = paramterTypeClass.getDeclaredField(content);
//            设置暴力访问
            declaredField.setAccessible(true);
            Object o = declaredField.get(params[0]);
            preparedStatement.setObject(i+1,o);

        }

        //5执行sql
        int rows = preparedStatement.executeUpdate();
        return rows;
    }


    private Class<?> getClassType(String paramterType) throws ClassNotFoundException {
        if (paramterType!=null){
            Class<?> aClass = Class.forName(paramterType);
            return aClass;
        }
        return null;
    }

    //对#{}进行解析,将#{}使用?代替,解析#{}中的值进行存储
    private BoundSql getBoundSql(String sql) {
        //标记处理类:配置标记解析器来完成对占位符的解析处理工作
        ParameterMappingTokenHandler parameterMappingTokenHandler = new ParameterMappingTokenHandler();
        //标记解析器
        GenericTokenParser genericTokenParser = new GenericTokenParser("#{", "}", parameterMappingTokenHandler);
        //用标记解析器解析出来的sql
        String parseSql = genericTokenParser.parse(sql);
//        #{}解析出来的参数名称
        List<ParameterMapping> parameterMappings = parameterMappingTokenHandler.getParameterMappings();
        BoundSql boundSql = new BoundSql(parseSql, parameterMappings);
        return boundSql;
    }
}
我们具体来分析下这个query方法,首先我们注册驱动,获取数据库连接,然后,根据从MappedStatement中获取sql语句,然后通过getBoundSql方法来解析我们的sql,实际上这一步就是来将我们sql中的#{}替换成?并将#{}中的属性取出并存储到parameterMappingList,也就是代码中getBoundSql方法的作用,该方法用到的工具类我后面会贴出来。
将sql处理好后,我们获取预处理对象,然后开始设置参数,这里我们将会用到反射。
首先我们获取到入参的全路径,比如com.xx.User,然后我们通过getClassType这个方法初始化这个类,然后我们循环遍历 parameterMappingList 取出里面的每一个参数,并通过反射将我们传递进来的参数中的值取出来,并对应到?相应的位置。而后,我们执行查询操作,获取到查询的结果。
既然获取到结果,我们就要根据我们设置的resultType来对结果集进行封装,我们同样根据反射来取得我们resultType中的类,因为我们查询的时候,可能是多条,可能是一条,所以我们创建一个Object集合来进行结果集的存储和返回。
这里我们通过while来遍历结果集,每一次循环都是一条数据,所以我们没循环一次结果集都要创建一个Object对象进行接收, 每遍历一次结果集我们都要取出数据源再进行每一列,也就是每个字段的遍历,此处我们for循环的 i 是从1开始的,因为我们在数据源中取列名是从脚标1开始的,我们获取到列名再通过列名获取到列值,而后我们通过内省来将列的值赋值给我们创建的 Object对象,每一次for循环就遍历赋值一个列,这样我们就将每个结果集的每一条数据都映射给了Object对象,最终生成一个集合最终返回给用户。这样,我们的Query方法就实现了。至此,传统(后面我们还讲分析一下传统方法的不足,以及如何优化,代码中已经给出了优化的部分)的查询方法就完成了,我们可以写测试类进行测试。我将工具类粘贴在下面,方便我们接下来的测试。
public class GenericTokenParser {

  private final String openToken; //开始标记
  private final String closeToken; //结束标记
  private final TokenHandler handler; //标记处理器

  public GenericTokenParser(String openToken, String closeToken, TokenHandler handler) {
    this.openToken = openToken;
    this.closeToken = closeToken;
    this.handler = handler;
  }

  /**
   * 解析${}和#{}
   * @param text
   * @return
   * 该方法主要实现了配置文件、脚本等片段中占位符的解析、处理工作,并返回最终需要的数据。
   * 其中,解析工作由该方法完成,处理工作是由处理器handler的handleToken()方法来实现
   */
  public String parse(String text) {
    // 验证参数问题,如果是null,就返回空字符串。
    if (text == null || text.isEmpty()) {
      return "";
    }

    // 下面继续验证是否包含开始标签,如果不包含,默认不是占位符,直接原样返回即可,否则继续执行。
    int start = text.indexOf(openToken, 0);
    if (start == -1) {
      return text;
    }

   // 把text转成字符数组src,并且定义默认偏移量offset=0、存储最终需要返回字符串的变量builder,
    // text变量中占位符对应的变量名expression。判断start是否大于-1(即text中是否存在openToken),如果存在就执行下面代码
    char[] src = text.toCharArray();
    int offset = 0;
    final StringBuilder builder = new StringBuilder();
    StringBuilder expression = null;
    while (start > -1) {
     // 判断如果开始标记前如果有转义字符,就不作为openToken进行处理,否则继续处理
      if (start > 0 && src[start - 1] == '\\') {
        builder.append(src, offset, start - offset - 1).append(openToken);
        offset = start + openToken.length();
      } else {
        //重置expression变量,避免空指针或者老数据干扰。
        if (expression == null) {
          expression = new StringBuilder();
        } else {
          expression.setLength(0);
        }
        builder.append(src, offset, start - offset);
        offset = start + openToken.length();
        int end = text.indexOf(closeToken, offset);
        while (end > -1) {////存在结束标记时
          if (end > offset && src[end - 1] == '\\') {//如果结束标记前面有转义字符时
            // this close token is escaped. remove the backslash and continue.
            expression.append(src, offset, end - offset - 1).append(closeToken);
            offset = end + closeToken.length();
            end = text.indexOf(closeToken, offset);
          } else {//不存在转义字符,即需要作为参数进行处理
            expression.append(src, offset, end - offset);
            offset = end + closeToken.length();
            break;
          }
        }
        if (end == -1) {
          // close token was not found.
          builder.append(src, start, src.length - start);
          offset = src.length;
        } else {
          //首先根据参数的key(即expression)进行参数处理,返回?作为占位符
          builder.append(handler.handleToken(expression.toString()));
          offset = end + closeToken.length();
        }
      }
      start = text.indexOf(openToken, offset);
    }
    if (offset < src.length) {
      builder.append(src, offset, src.length - offset);
    }
    return builder.toString();
  }
}


public class ParameterMapping {

    private String content;

    public ParameterMapping(String content) {
        this.content = content;
    }

    public String getContent() {
        return content;
    }

    public void setContent(String content) {
        this.content = content;
    }
}


public class ParameterMappingTokenHandler implements TokenHandler {
    private List<ParameterMapping> parameterMappings = new ArrayList<ParameterMapping>();

    // context是参数名称 #{id} #{username}

    public String handleToken(String content) {
        parameterMappings.add(buildParameterMapping(content));
        return "?";
    }

    private ParameterMapping buildParameterMapping(String content) {
        ParameterMapping parameterMapping = new ParameterMapping(content);
        return parameterMapping;
    }

    public List<ParameterMapping> getParameterMappings() {
        return parameterMappings;
    }

    public void setParameterMappings(List<ParameterMapping> parameterMappings) {
        this.parameterMappings = parameterMappings;
    }

}

public interface TokenHandler {
  String handleToken(String content);
}
整个工程结构如下

 <dependency>
      <groupId>com.xx</groupId>
      <artifactId>框架工程名</artifactId>
      <version>1.0-SNAPSHOT</version>
 </dependency>
然后我们创建一个包com.xx.pojo来存储我们的User类
public class User {
    private Integer id;

    @Override
    public String toString() {
        return "User{" +
                "id=" + id +
                ", username='" + username + '\'' +
                '}';
    }

    public String getUsername() {
        return username;
    }

    public void setUsername(String username) {
        this.username = username;
    }

    private String username;

    public Integer getId() {
        return id;
    }

    public void setId(Integer id) {
        this.id = id;
    }
}
我们再创建一个 com.xx.dao包,然后在该包下创建UserDao接口以及他的实现类UserDaoImpl
public interface IUserDao {
//    查询所有用户
    public List<User> findAll() throws Exception;
//    根素条件进行查询
    public User findByCondition(User user) throws Exception;

    public int save(User user) throws PropertyVetoException, DocumentException, Exception;

    public int delete(User user);

    public int update(User user);
}
public class UserDaoImpl implements IUserDao{
    @Override
    public List<User> findAll() throws Exception {
        InputStream resourceAsStream = Resource.getResourceAsStream("sqlMapConfig.xml");
        SqlSessionFactory sqlSessionFactory = new SqlSessionFactoryBuilder().build(resourceAsStream);
        SqlSession sqlSession = sqlSessionFactory.openSession();

        List<User> users = sqlSession.selectList("user.selectList");
        for (User user : users) {
            System.out.println(user);
        }
        return users;
    }

    @Override
    public User findByCondition(User user) throws Exception {
        InputStream resourceAsStream = Resource.getResourceAsStream("sqlMapConfig.xml");
        SqlSessionFactory sqlSessionFactory = new SqlSessionFactoryBuilder().build(resourceAsStream);
        SqlSession sqlSession = sqlSessionFactory.openSession();
        User user2 = sqlSession.selectOne("user.selectOne", user);
        System.out.println(user2);

        return user2;
    }

    @Override
    public int save(User user) throws Exception {
        InputStream resourceAsStream = Resource.getResourceAsStream("sqlMapConfig.xml");
        SqlSessionFactory sqlSessionFactory = new SqlSessionFactoryBuilder().build(resourceAsStream);
        SqlSession sqlSession = sqlSessionFactory.openSession();
        int rows = sqlSession.insert("user.insert", user);
        return rows;
    }

    @Override
    public int delete(User user) {
        return 0;
    }

    @Override
    public int update(User user) {
        return 0;
    }
}
我们再创建一个com.xx.test包,在该包下创建Test类
public class MybatisTest {
    @Test
    public void test() throws Exception {
        InputStream resourceAsStream = Resource.getResourceAsStream("sqlMapConfig.xml");
        SqlSessionFactory sqlSessionFactory = new SqlSessionFactoryBuilder().build(resourceAsStream);
        SqlSession sqlSession = sqlSessionFactory.openSession();
        User user = new User();
        user.setId(1);
        user.setUsername("lucy");
        User user2 = sqlSession.selectOne("com.hg.dao.IUserDao.findByCondition", user);
        System.out.println(user2);

//        List<User> users = sqlSession.selectList("user.selectList");
//        for (User user : users) {
//            System.out.println(user);
//        }

//        IUserDao userDao = sqlSession.getMapper(IUserDao.class);

//        List<User> all = userDao.findAll();
//        User user1 = userDao.findByCondition(user);
//        System.out.println(user1);
//        System.out.println(all);
    }

    @Test
    public void save() throws Exception {
        InputStream resourceAsStream = Resource.getResourceAsStream("sqlMapConfig.xml");
        SqlSessionFactory sqlSessionFactory = new SqlSessionFactoryBuilder().build(resourceAsStream);
        SqlSession sqlSession = sqlSessionFactory.openSession();
        User user = new User();
        user.setId(5);
        user.setUsername("张三");
        IUserDao userDao = sqlSession.getMapper(IUserDao.class);
        int rows = userDao.save(user);
        System.out.println(rows);
    }

    @Test
    public void delete() throws Exception {
        InputStream resourceAsStream = Resource.getResourceAsStream("sqlMapConfig.xml");
        SqlSessionFactory sqlSessionFactory = new SqlSessionFactoryBuilder().build(resourceAsStream);
        SqlSession sqlSession = sqlSessionFactory.openSession();
        IUserDao userDao = sqlSession.getMapper(IUserDao.class);
        User user = new User();
        user.setId(3);
        int rows = userDao.delete(user);
        System.out.println(rows);
    }

    @Test
    public void update() throws Exception {
        InputStream resourceAsStream = Resource.getResourceAsStream("sqlMapConfig.xml");
        SqlSessionFactory sqlSessionFactory = new SqlSessionFactoryBuilder().build(resourceAsStream);
        SqlSession sqlSession = sqlSessionFactory.openSession();
        IUserDao userDao = sqlSession.getMapper(IUserDao.class);
        User user = new User();
        user.setId(4);
        user.setUsername("李四");
        int rows = userDao.update(user);
        System.out.println(rows);
    }


}
我们还要将上面起初创建的两个客户端的配置文件配置到该工程的resource下
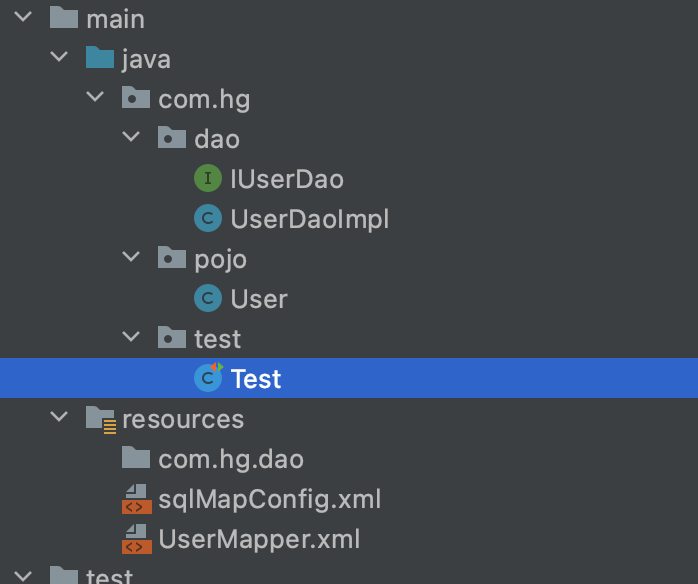
整个工程目录如下:
为了测试方便,我们的数据库中的user表只创建id和username两个字段,
准备完毕,我们开始测试代码,因为该篇文章只是介绍了通过statementid的定位方式进行查询。所以我们采用test方法进行测试,后面我还会介绍这个手写框架的不足,以及给出解决方案(其实代码已经是优化过的代码了),有兴趣的小伙伴可以研究一下,其实这个就是mybatis的基本雏形了。

