
Affine And Perspective Transform(仿射变换和透视变换)
相关函数
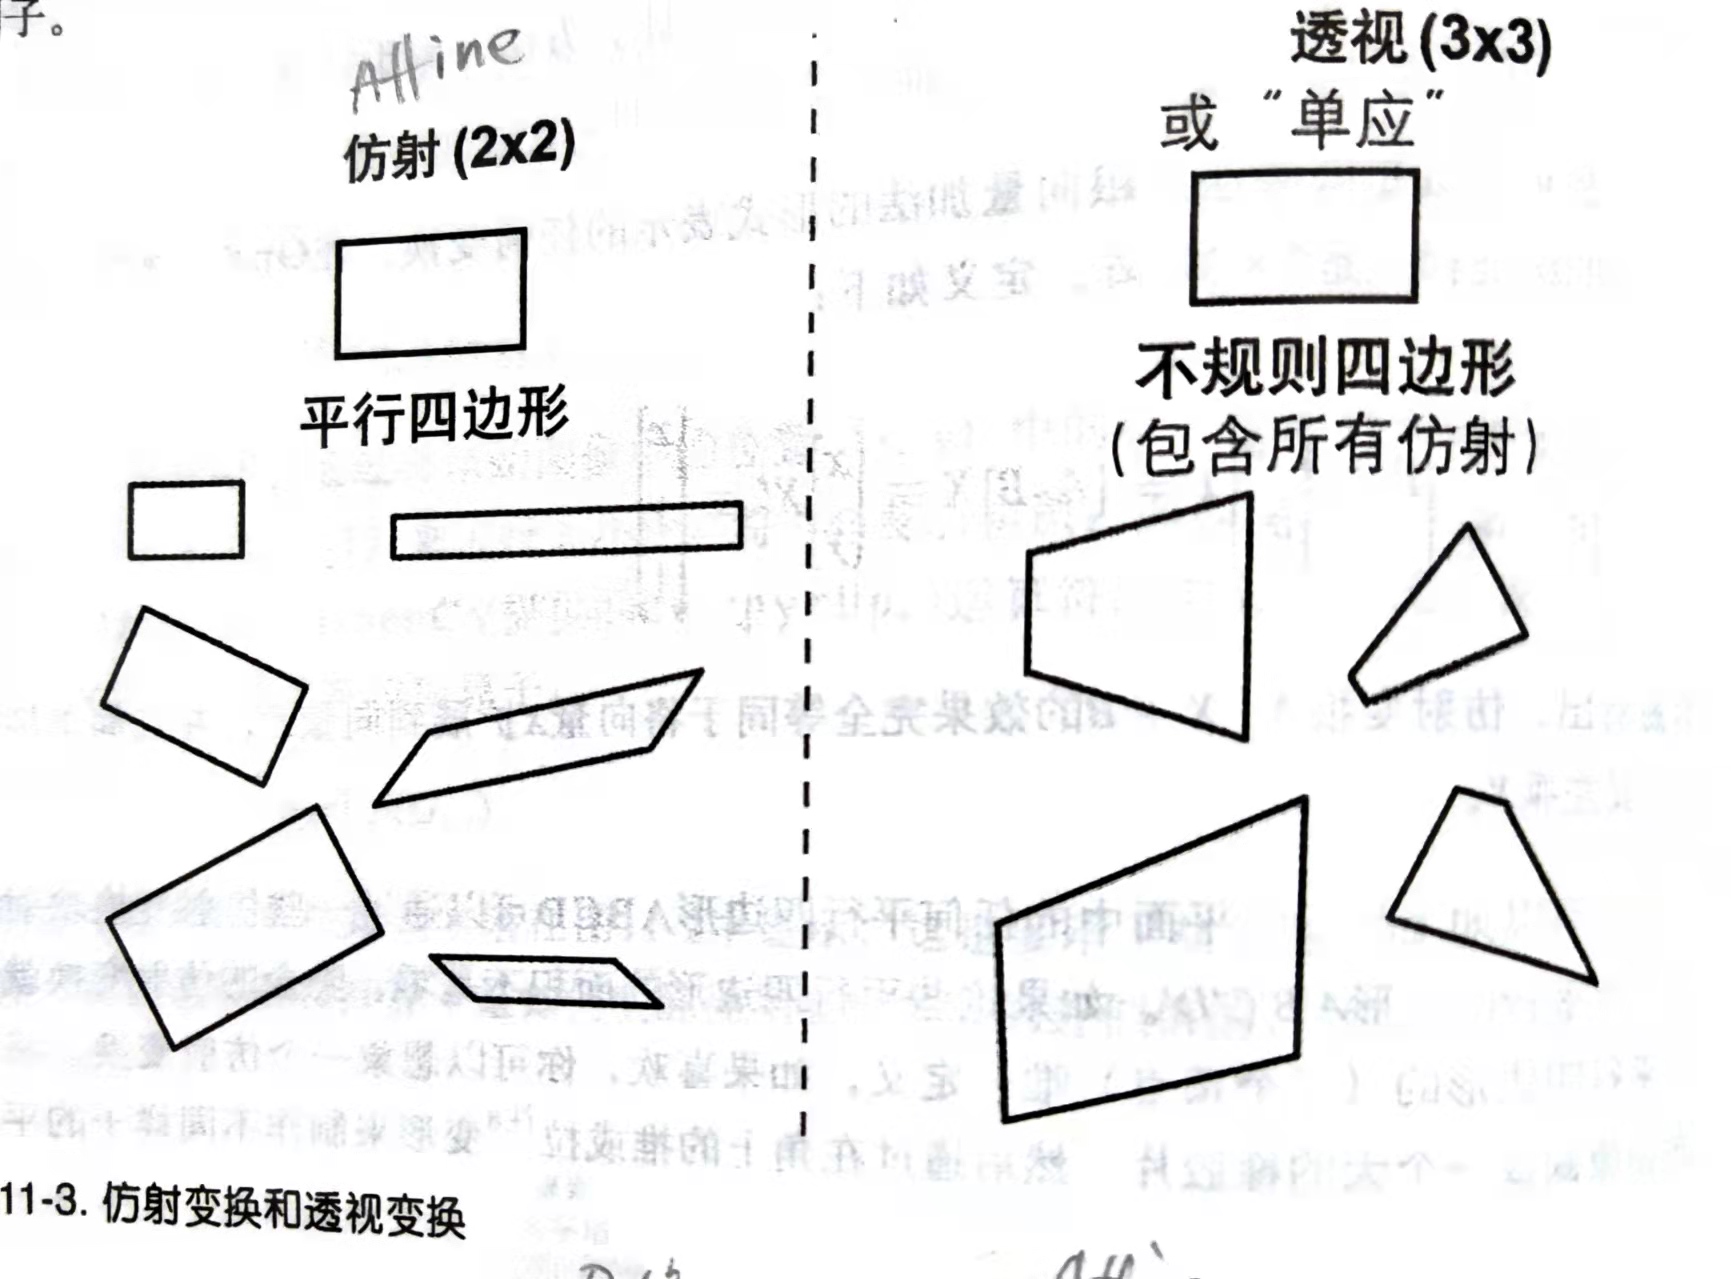
Affine Transform 仿射变换
仿射变换将长方形图像转化为平行四边形。
void cv::warpAffine( cv::InputArray src, // Input image cv::OutputArray dst, // Result image cv::InputArray M, // 2-by-3 transform mtx cv::Size dsize, // Destination image size int flags = cv::INTER_LINEAR, // Interpolation, inverse int borderMode = cv::BORDER_CONSTANT, // Pixel extrapolation const cv::Scalar& borderValue = cv::Scalar() // For constant borders );
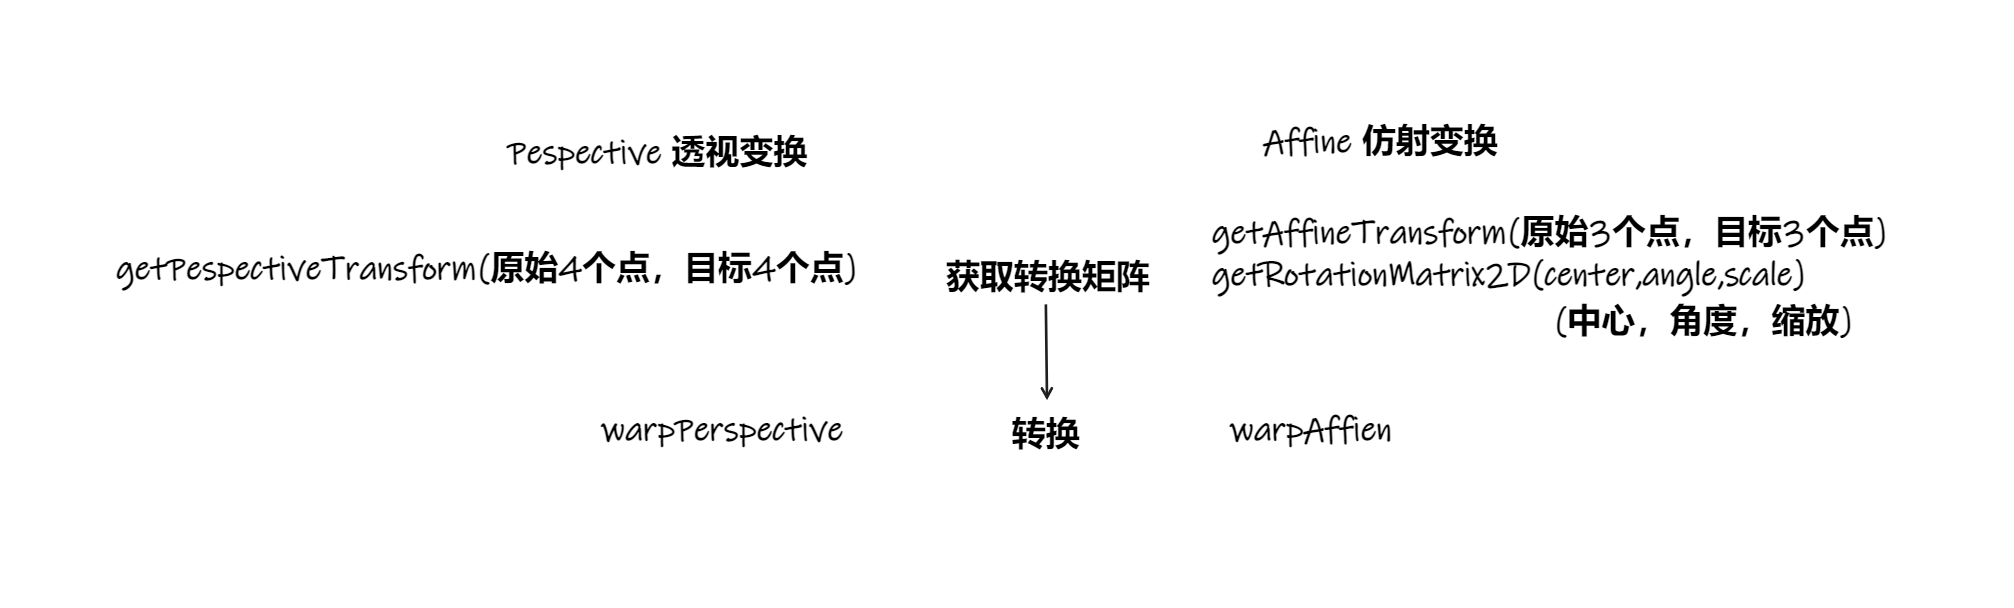
其中,cv::InputArray M(2x3的转换矩阵M)通过如下函数获得
// 方法1 :通过人工设定**3个**原图上的点 和 对应映射到目标图像的点,求得转换矩阵。 cv::Mat cv::getAffineTransform( // Return 2-by-3 matrix const cv::Point2f* src, // Coordinates *three* of vertices const cv::Point2f* dst // Target coords, three vertices ); //方法2 :设置旋转中心,旋转角度,缩放来求转换矩阵 cv::Mat cv::getRotationMatrix2D( // Return 2-by-3 matrix cv::Point2f center // Center of rotation double angle, // Angle of rotation double scale // Rescale after rotation );
通过人工设定3个原图上的点 和 对应映射到目标图像的点,求得转换矩阵。该转换矩阵用以转换整幅图像。
转换公式为:
Perspective Transform 透视变换
可以将长方形图像转化为任意形状。
void cv::warpPerspective( cv::InputArray src, // Input image cv::OutputArray dst, // Result image cv::InputArray M, // 3-by-3 transform mtx cv::Size dsize, // Destination image size int flags = cv::INTER_LINEAR, // Interpolation, inverse int borderMode = cv::BORDER_CONSTANT, // Extrapolation method const cv::Scalar& borderValue = cv::Scalar() // For constant borders );
求转化矩阵的函数,原始图像需要选4个点 映射到目标图像
cv::Mat cv::getPerspectiveTransform( // Return 3-by-3 matrix const cv::Point2f* src, // Coordinates of *four* vertices const cv::Point2f* dst // Target coords, four vertices );
公式为:
仿射变换和透视变换
流程图
复现
//learning OpenCV3 11-1 / 11-2 /* *运行首先出现的图片是仿射变换 * 按任意键运行透视变换 * 再按任意键退出 */ #include <opencv2/imgcodecs.hpp> #include <opencv2/imgproc.hpp> #include <opencv2/highgui.hpp> #include <iostream> using namespace std; using namespace cv; int main(int argc,char** argv) { if (argc != 2) { cout << "vs在调试-属性调试-调试-命令参数 输入图像路径" << "Clion在编辑运行/调试对话框-配置编辑-程序实参 输入图像路径" << endl; } //1、仿射变换 Mat imgOrg = imread(argv[1]), imgDis; const Point2f srcThreePoints[3] = { Point2f(0,0), //左上 Point2f(imgOrg.cols-1,0), //右上 Point2f(0,imgOrg.rows-1) //左下 }; const Point2f disThreePoints[3] = { cv::Point2f(imgOrg.cols * 0.f, imgOrg.rows * 0.33f), cv::Point2f(imgOrg.cols * 0.85f, imgOrg.rows * 0.25f), cv::Point2f(imgOrg.cols * 0.15f, imgOrg.rows * 0.7f) }; Mat m = getAffineTransform(srcThreePoints, disThreePoints); // 获得仿射变换矩阵 warpAffine(imgOrg, imgDis, m, imgOrg.size()); imshow("imgOrg", imgOrg); imshow("imgDis", imgDis); for (int i{ 0 }; ; i++) { Point2f center(imgOrg.cols * 0.5, imgOrg.rows * 0.5); double angle = i * 3 % 360; double scale = (cos((angle - 60) * CV_PI / 180) + 1.05) * 0.8; Mat M = getRotationMatrix2D(center, angle, scale), imgDisRotate; warpAffine(imgOrg,imgDisRotate,M,imgOrg.size()); imshow("imgDisRotate", imgDisRotate); if (waitKey(30) >= 0) { break; } } //2、透视变换 Point2f srcFourPoints[4] = { cv::Point2f(0, 0), // src Top left cv::Point2f(imgOrg.cols - 1, 0), // src Top right cv::Point2f(imgOrg.cols - 1, imgOrg.rows - 1), // src Bottom right cv::Point2f(0, imgOrg.rows - 1) // src Bottom left }; cv::Point2f dstFourQuad[] = { cv::Point2f(imgOrg.cols * 0.05f, imgOrg.rows * 0.33f), cv::Point2f(imgOrg.cols * 0.9f, imgOrg.rows * 0.25f), cv::Point2f(imgOrg.cols * 0.8f, imgOrg.rows * 0.9f), cv::Point2f(imgOrg.cols * 0.2f, imgOrg.rows * 0.7f) }; Mat m1 = getPerspectiveTransform(srcFourPoints, dstFourQuad),imgPerspective; warpPerspective(imgOrg, imgPerspective, m1,imgOrg.size()); imshow("Perspective", imgPerspective); waitKey(); destroyAllWindows(); return 0; }
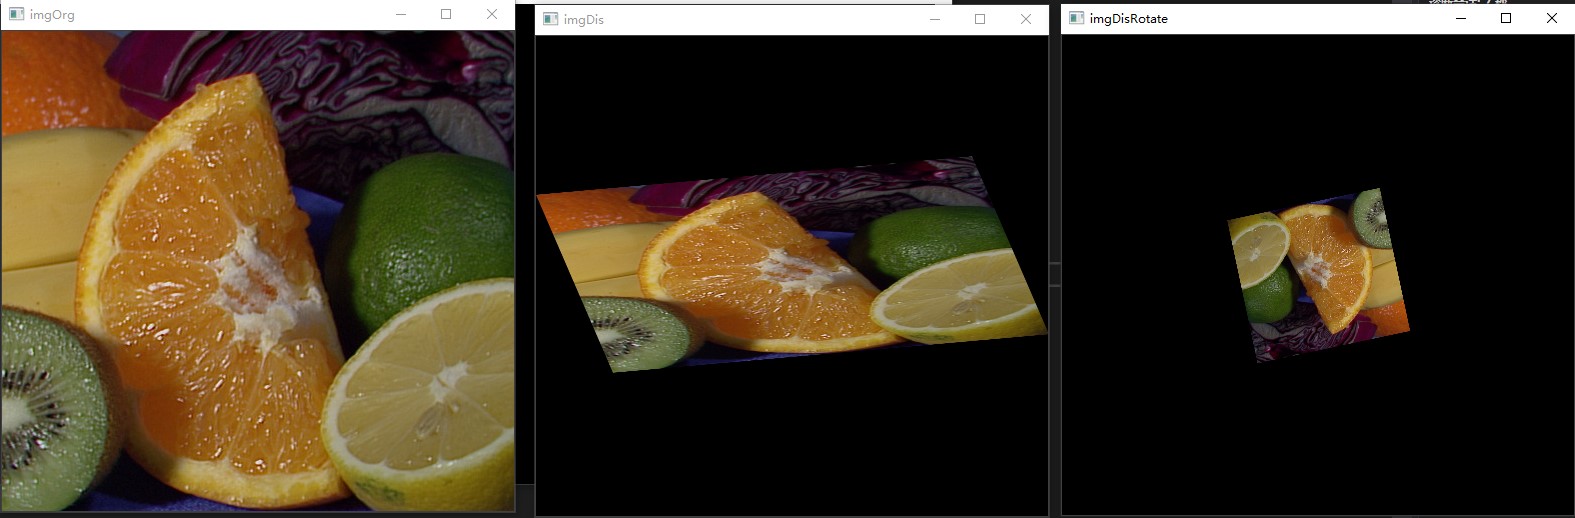
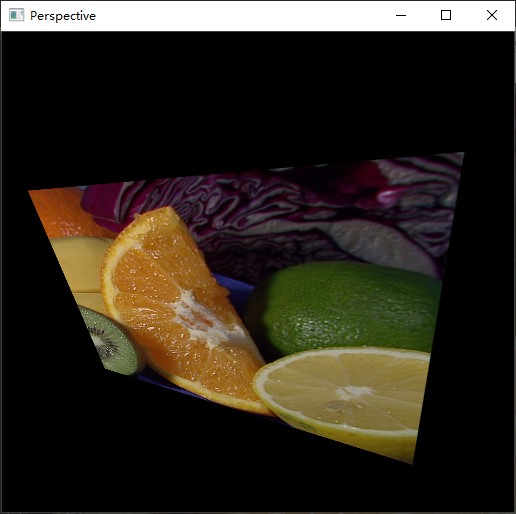
结果
本文作者:榴红八色鸫
本文链接:https://www.cnblogs.com/hezexian/p/16103326.html
版权声明:本作品采用知识共享署名-非商业性使用-禁止演绎 2.5 中国大陆许可协议进行许可。
分类:
OpenCV


【推荐】国内首个AI IDE,深度理解中文开发场景,立即下载体验Trae
【推荐】编程新体验,更懂你的AI,立即体验豆包MarsCode编程助手
【推荐】抖音旗下AI助手豆包,你的智能百科全书,全免费不限次数
【推荐】轻量又高性能的 SSH 工具 IShell:AI 加持,快人一步