spring boot入门程序
pom文件加入的依赖:
    <parent>
        <groupId>org.springframework.boot</groupId>
        <artifactId>spring-boot-starter-parent</artifactId>
        <version>1.5.4.RELEASE</version>
    </parent>

    <dependencies>
        <dependency>
            <groupId>org.springframework.boot</groupId>
            <artifactId>spring-boot-starter-web</artifactId>
        </dependency>
    </dependencies>


    <build>
        <plugins>
            <plugin>
                <groupId>org.springframework.boot</groupId>
                <artifactId>spring-boot-maven-plugin</artifactId>
            </plugin>
        </plugins>
    </build>
文件目录结构:

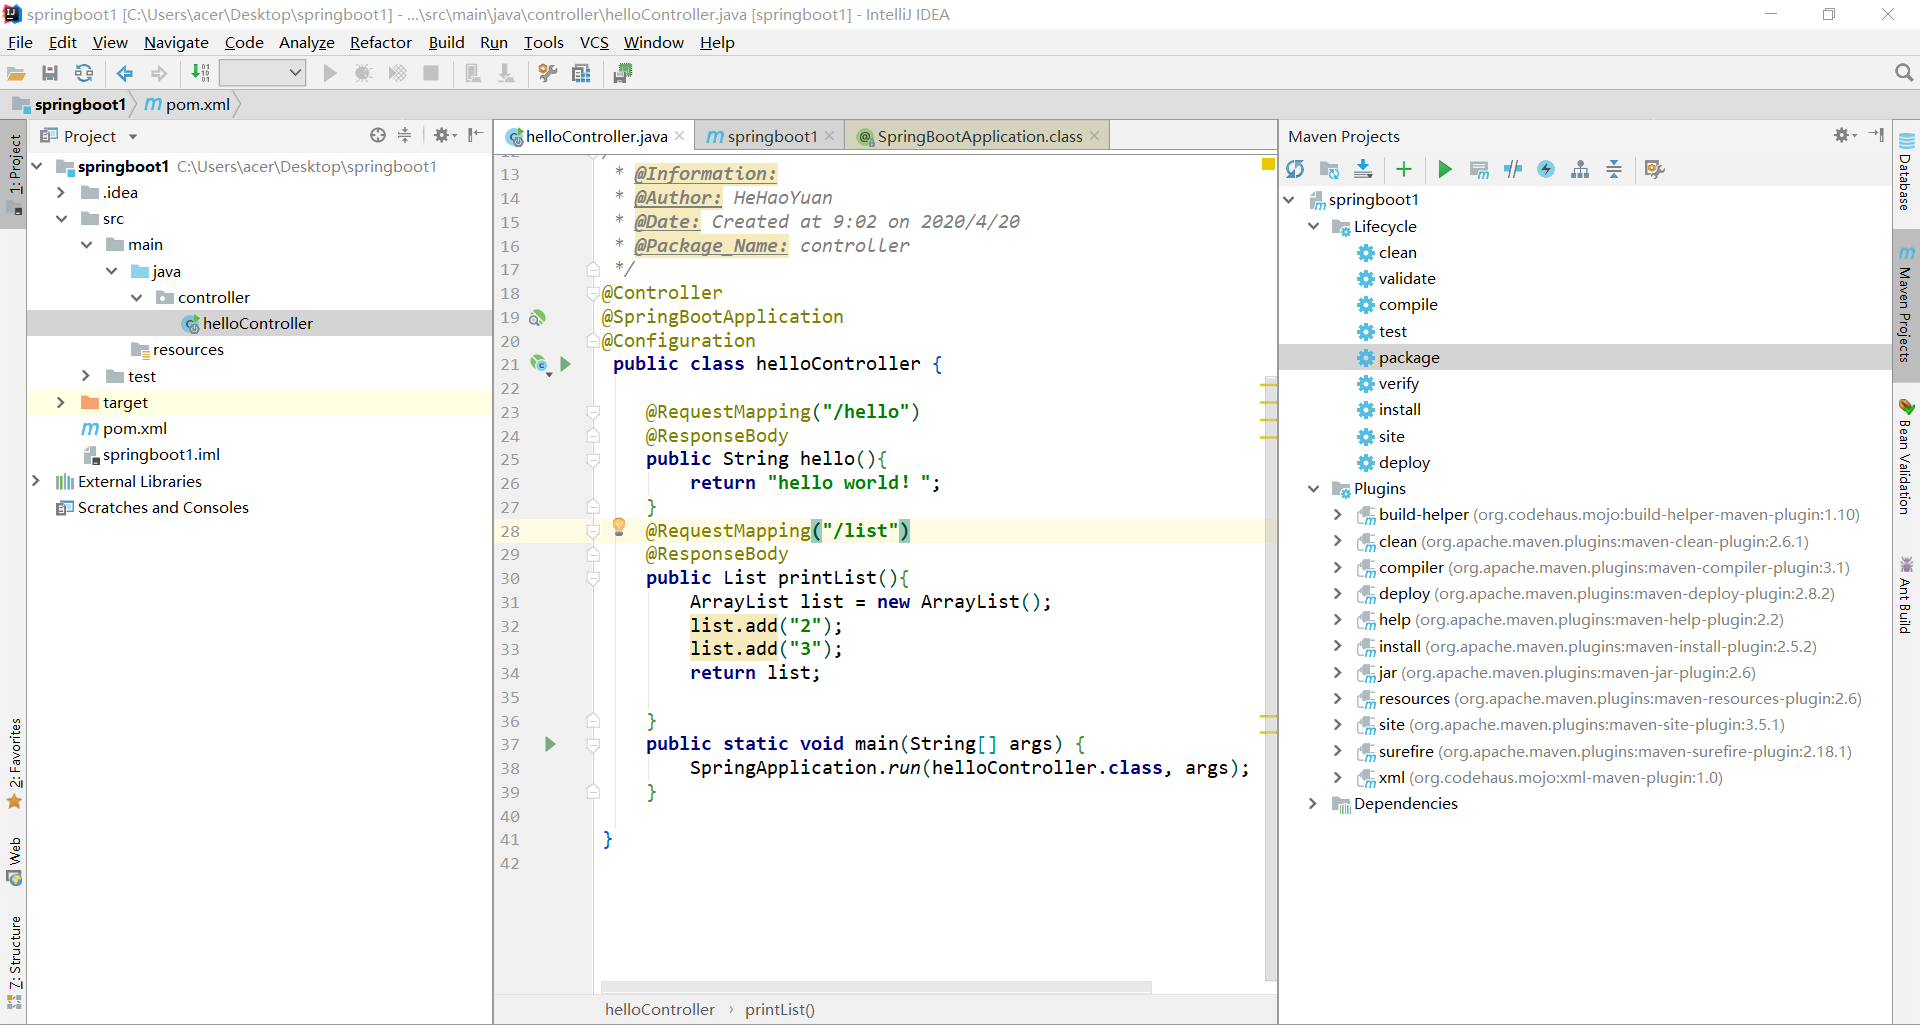
helloController代码:
package controller;

import org.springframework.boot.SpringApplication;
import org.springframework.boot.autoconfigure.SpringBootApplication;
import org.springframework.context.annotation.Configuration;
import org.springframework.stereotype.Controller;
import org.springframework.web.bind.annotation.RequestMapping;
import org.springframework.web.bind.annotation.ResponseBody;

import java.util.ArrayList;
import java.util.List;
/**
 * @Information:
 * @Author: HeHaoYuan
 * @Date: Created at 9:02 on 2020/4/20
 * @Package_Name: controller
 */
@Controller
@SpringBootApplication
@Configuration
 public class helloController {

    @RequestMapping("/hello")
    @ResponseBody
    public String hello(){
        return "hello world!";
    }
    @RequestMapping("/list")
    @ResponseBody
    public List printList(){
        ArrayList list = new ArrayList();
        list.add("2");
        list.add("3");
        return list;

    }
    public static void main(String[] args) {
        SpringApplication.run(helloController.class, args);
    }

}
在springboot Reference网站:https://docs.spring.io/spring-boot/docs/2.2.6.RELEASE/reference/html/getting-started.html#getting-started找到:
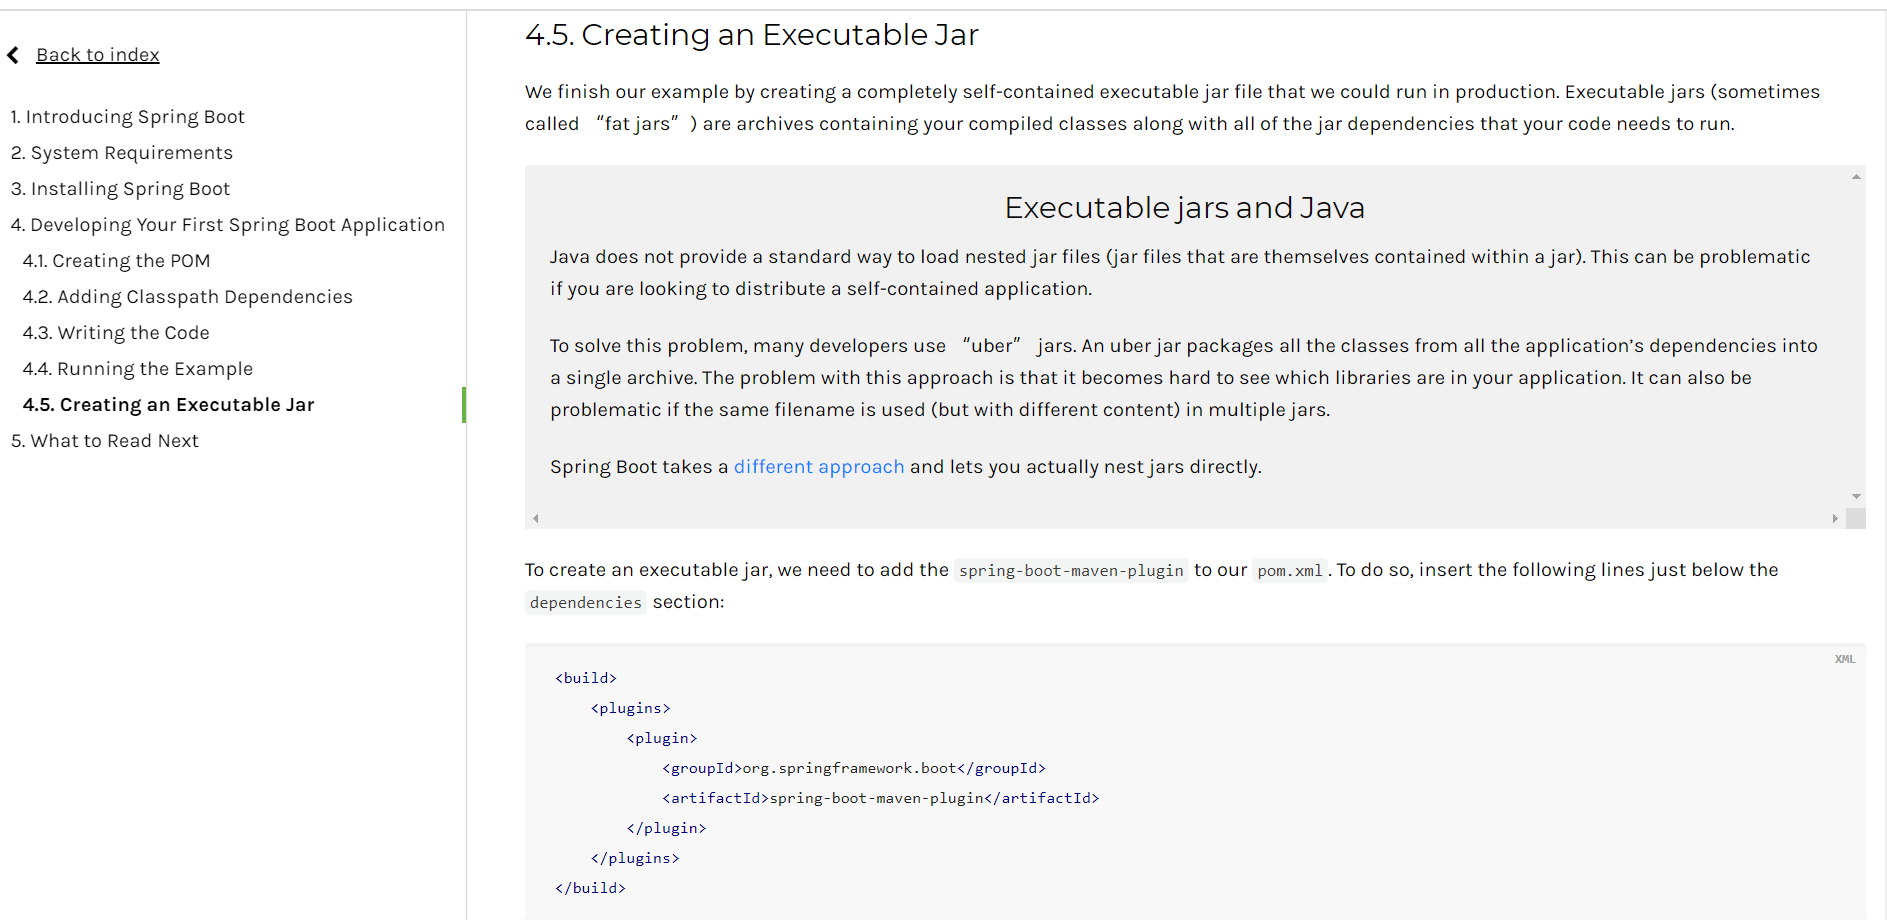
复制插件依赖到pom文件
如下图所示,点击package
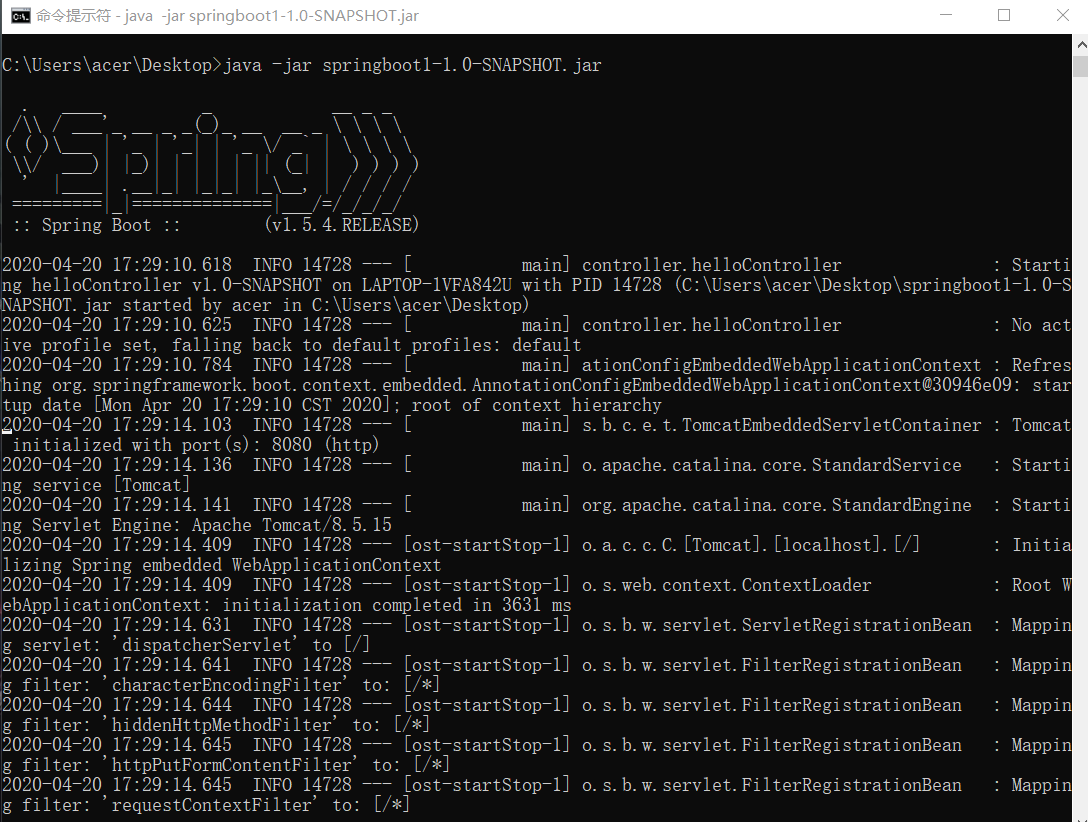
就可生成jar包,在target输出文件中找到该jar包,打开cmd,cd到jar包所在目录,执行命令:java -jar 包名,注意主类名称要与创建的java class名称相同,否则会报错
执行结果如下:

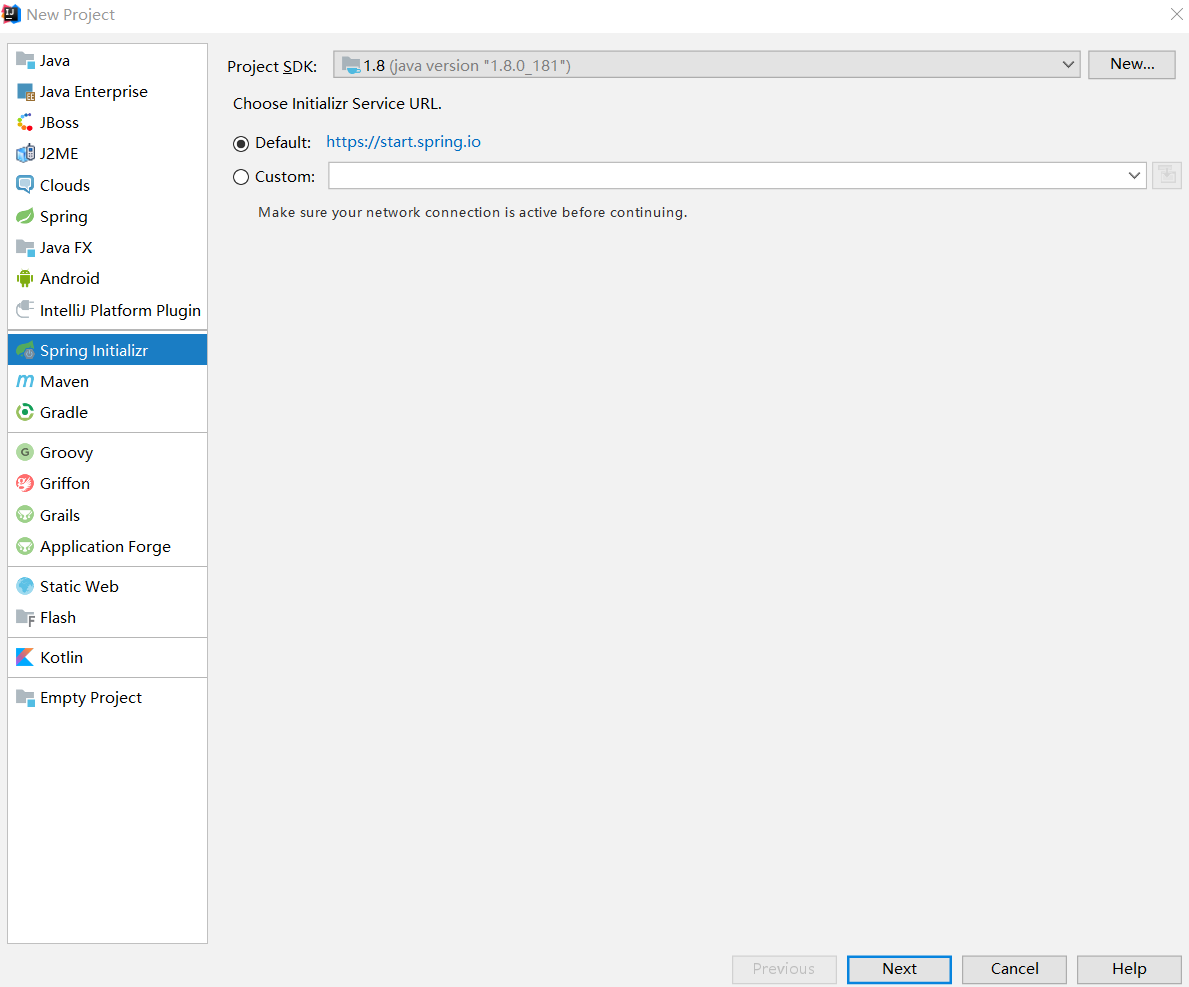
下面介绍一个快速版本的helloworld创建
在idea新建项目:
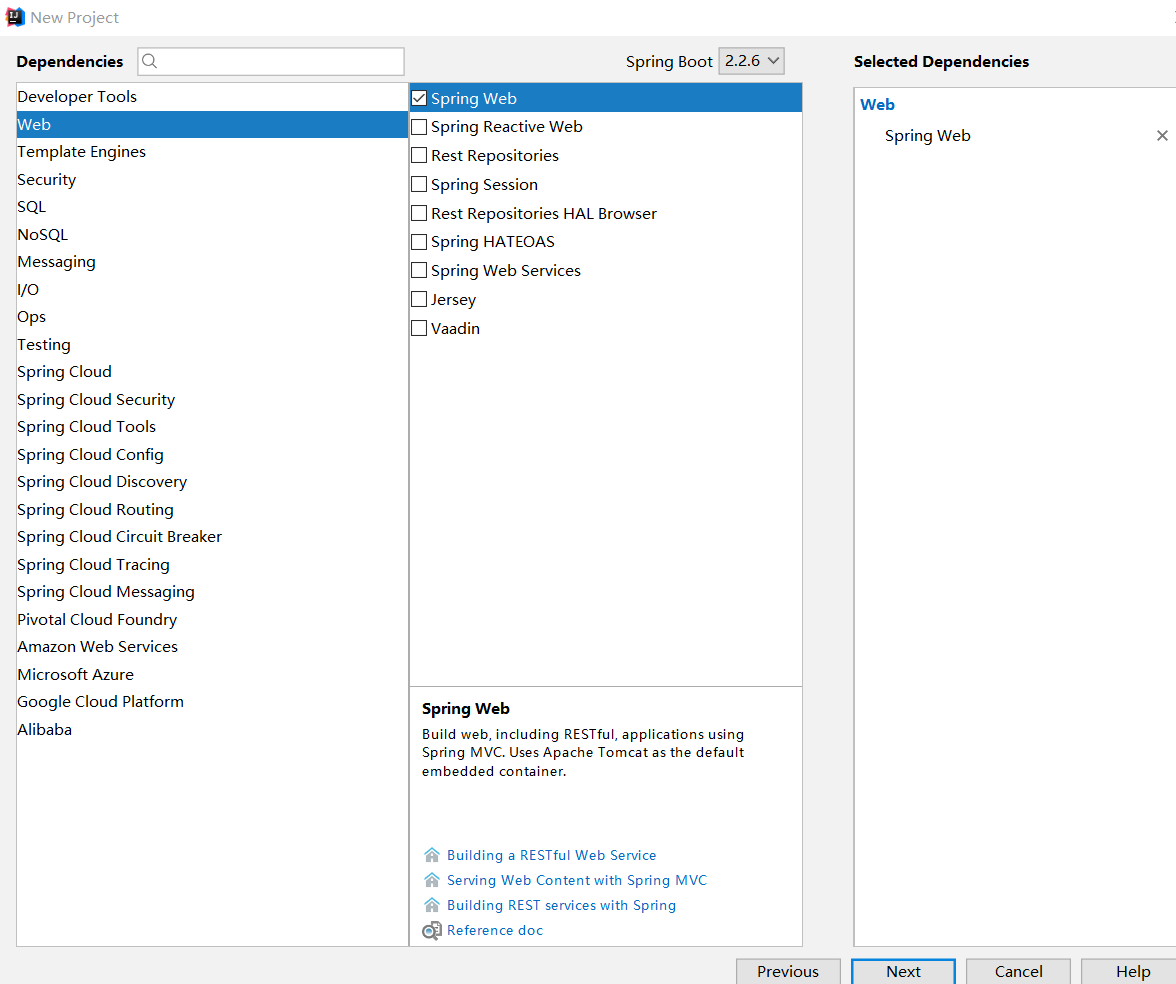
一路next,在依赖中选择web-spring web(根据需要选择)
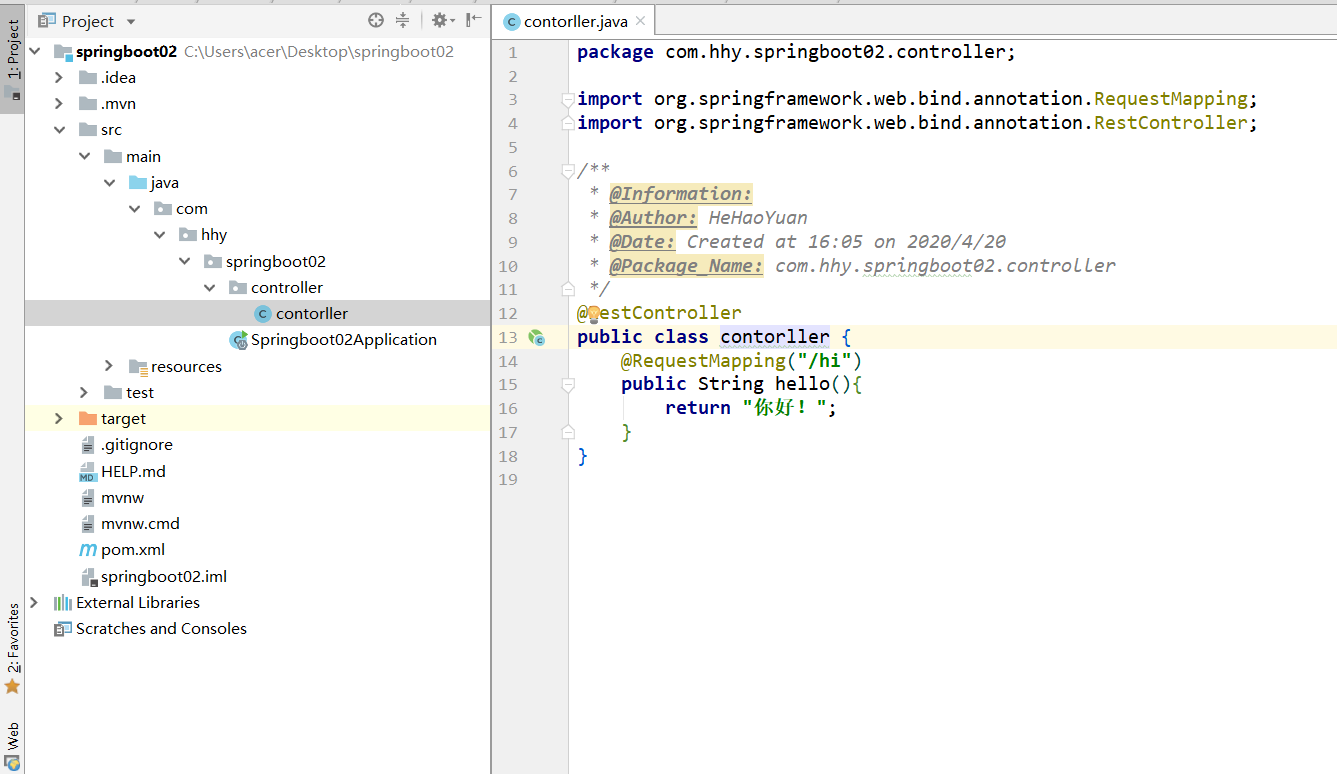
完成后,maven会自动下载所需要的业务依赖,自己只需要手动添加controller即可:
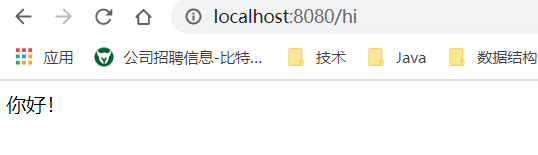
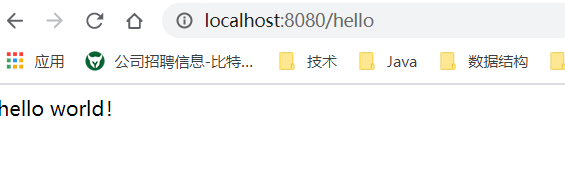
在spring02Application中启动项目,打开浏览器输入得到: