项目综合实践(1)——登入功能
一、数据库准备:
创建用户表
CREATE DATABASE IF NOT EXISTS myProject;
use myProject;
DROP TABLE user;
CREATE TABLE user(
    id INT NOT NULL AUTO_INCREMENT COMMENT '主键',
	name varchar(50) NOT NULL COMMENT '姓名',
    password VARCHAR(255) NOT NULL COMMENT '密码',
    sex char(1) NOT NULL COMMENT '性别',
    phone VARCHAR(20) COMMENT '联系电话',
    PRIMARY KEY(id)
 )ENGINE=InnoDB DEFAULT CHARSET=utf8 COMMENT '用户信息表';
二、后端接口准备
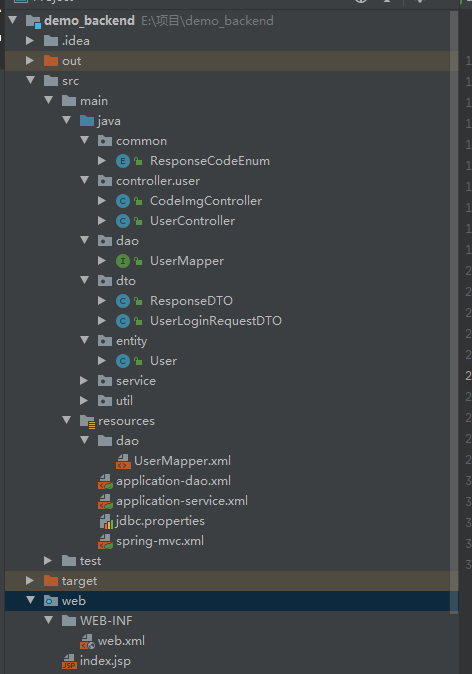
1、后端项目结构截图
2、POM导入包依赖
<?xml version="1.0" encoding="UTF-8"?>
<project xmlns="http://maven.apache.org/POM/4.0.0"
         xmlns:xsi="http://www.w3.org/2001/XMLSchema-instance"
         xsi:schemaLocation="http://maven.apache.org/POM/4.0.0 http://maven.apache.org/xsd/maven-4.0.0.xsd">
    <modelVersion>4.0.0</modelVersion>

    <groupId>org.example</groupId>
    <artifactId>demo_backend</artifactId>
    <version>1.0-SNAPSHOT</version>

    <dependencies>
        <dependency>
            <groupId>junit</groupId>
            <artifactId>junit</artifactId>
            <version>4.11</version>
            <scope>test</scope>
        </dependency>
        <!-- Spring相关依赖-->
        <dependency>
            <groupId>org.springframework</groupId>
            <artifactId>spring-context</artifactId>
            <version>5.2.8.RELEASE</version>
        </dependency>
        <!--Spring事务管理-->
        <dependency>
            <groupId>org.springframework</groupId>
            <artifactId>spring-tx</artifactId>
            <version>5.2.8.RELEASE</version>
        </dependency>
        <dependency>
            <groupId>org.springframework</groupId>
            <artifactId>spring-jdbc</artifactId>
            <version>5.2.8.RELEASE</version>
        </dependency>
        <dependency>
            <groupId>org.springframework</groupId>
            <artifactId>spring-test</artifactId>
            <version>5.2.8.RELEASE</version>
        </dependency>
        <!--Spring MVC的相关依赖-->
        <dependency>
            <groupId>org.springframework</groupId>
            <artifactId>spring-webmvc</artifactId>
            <version>5.2.8.RELEASE</version>
        </dependency>
        <!--MyBatis相关依赖-->
        <dependency>
            <groupId>org.mybatis</groupId>
            <artifactId>mybatis</artifactId>
            <version>3.5.2</version>
        </dependency>
        <!--MyBatis与Spring整合相关依赖-->
        <dependency>
            <groupId>org.mybatis</groupId>
            <artifactId>mybatis-spring</artifactId>
            <version>2.0.1</version>
        </dependency>
        <!--数据源-->
        <dependency>
            <groupId>com.alibaba</groupId>
            <artifactId>druid</artifactId>
            <version>1.1.20</version>
        </dependency>
        <!--单元测试相关的依赖-->
        <dependency>
            <groupId>junit</groupId>
            <artifactId>junit</artifactId>
            <version>4.12</version>
            <scope>test</scope>
        </dependency>
        <!-- 相关的依赖-->
        <!--ServletAPI:引入servlet的功能-->
        <dependency>
            <groupId>javax.servlet</groupId>
            <artifactId>javax.servlet-api</artifactId>
            <version>3.1.0</version>
            <scope>provided</scope>
        </dependency>
        <!--ServletAPI: jsp页面的功能包 -->
        <dependency>
            <groupId>javax.servlet.jsp</groupId>
            <artifactId>jsp-api</artifactId>
            <version>2.2</version>
            <scope>provided</scope>
        </dependency>
        <!-- 数据库驱动相关依赖-->
        <dependency>
            <groupId>mysql</groupId>
            <artifactId>mysql-connector-java</artifactId>
            <version>8.0.16</version>
        </dependency>
        <dependency>
            <groupId>junit</groupId>
            <artifactId>junit</artifactId>
            <version>4.12</version>
            <scope>compile</scope>
        </dependency>

        <!--Jackson转换核心包依赖-->
        <dependency>
            <groupId>com.fasterxml.jackson.core</groupId>
            <artifactId>jackson-core</artifactId>
            <version>2.9.2</version>
        </dependency>
        <!--Jackson转换的数据绑定包依赖-->
        <dependency>
            <groupId>com.fasterxml.jackson.core</groupId>
            <artifactId>jackson-databind</artifactId>
            <version>2.9.2</version>
        </dependency>
        <!--Jackson JSON转换注解包-->
        <dependency>
            <groupId>com.fasterxml.jackson.core</groupId>
            <artifactId>jackson-annotations</artifactId>
            <version>2.9.0</version>
        </dependency>

        <dependency>
            <groupId>org.projectlombok</groupId>
            <artifactId>lombok</artifactId>
            <version>1.18.24</version>
            <scope>provided</scope>
        </dependency>

    </dependencies>

</project>
3、spring、springmvc和mybatis配置文件设置
(1)web.xml 配置
<?xml version="1.0" encoding="UTF-8"?>
<web-app xmlns="http://xmlns.jcp.org/xml/ns/javaee"
         xmlns:xsi="http://www.w3.org/2001/XMLSchema-instance"
         xsi:schemaLocation="http://xmlns.jcp.org/xml/ns/javaee http://xmlns.jcp.org/xml/ns/javaee/web-app_4_0.xsd"
         version="4.0">

    <display-name>Archetype Created Web Application</display-name>
    <!--配置文件加载-->
    <context-param>
        <param-name>contextConfigLocation</param-name>
        <param-value>classpath:application-*.xml</param-value>
    </context-param>
    <!--容器加载的监听器-->
    <listener>
        <listener-class>
            org.springframework.web.context.ContextLoaderListener
        </listener-class>
    </listener>
    <!--Spring MVC 前端控制器-->
    <servlet>
        <servlet-name>DispatcherServlet</servlet-name>
        <servlet-class>
            org.springframework.web.servlet.DispatcherServlet
        </servlet-class>
        <!--初始化参数-->
        <init-param>
            <param-name>contextConfigLocation</param-name>
            <param-value>classpath:spring-mvc.xml</param-value>
        </init-param>
        <!--项目启动时候,初始化前端控制器-->
        <load-on-startup>1</load-on-startup>
    </servlet>
    <servlet-mapping>
        <servlet-name>DispatcherServlet</servlet-name>
        <url-pattern>/</url-pattern>
    </servlet-mapping>


</web-app>
(2)jdbc.properties
jdbc.driverClassName=com.mysql.cj.jdbc.Driver
jdbc.url=jdbc:mysql://localhost:3306/myProject?useUnicode=true\
  &characterEncoding=utf-8&serverTimezone=Asia/Shanghai
jdbc.username=root
jdbc.password=123456
(3)application-dao.xml
<?xml version="1.0" encoding="UTF-8"?>
<beans xmlns="http://www.springframework.org/schema/beans"
       xmlns:xsi="http://www.w3.org/2001/XMLSchema-instance"
       xmlns:context="http://www.springframework.org/schema/context"
       xsi:schemaLocation="
 	       http://www.springframework.org/schema/beans
 	       http://www.springframework.org/schema/beans/spring-beans.xsd
 	       http://www.springframework.org/schema/context
 	       http://www.springframework.org/schema/context/spring-context.xsd
 	">
    <!--引入属性文件-->
    <context:property-placeholder location="classpath:jdbc.properties"/>
    <!--数据源-->
    <bean id="dataSource" class="com.alibaba.druid.pool.DruidDataSource">
        <property name="driverClassName" value="${jdbc.driverClassName}"/>
        <property name="url" value="${jdbc.url}"/>
        <property name="username" value="${jdbc.username}"/>
        <property name="password" value="${jdbc.password}"/>
    </bean>
    <!--创建SqlSessionFactory对象-->
    <bean id="sqlSessionFactory"
          class="org.mybatis.spring.SqlSessionFactoryBean">
        <!--数据源-->
        <property name="dataSource" ref="dataSource"/>
    </bean>
    <!--扫描Dao包,创建动态代理对象, 会自动存储到spring IOC容器中-->
    <bean class="org.mybatis.spring.mapper.MapperScannerConfigurer">
        <!--指定要扫描的dao的包-->
        <property name="basePackage" value="dao"/>
    </bean>
</beans>
(4)application-service.xml
<?xml version="1.0" encoding="UTF-8"?>
<beans xmlns="http://www.springframework.org/schema/beans"
       xmlns:xsi="http://www.w3.org/2001/XMLSchema-instance"
       xmlns:context="http://www.springframework.org/schema/context"
       xsi:schemaLocation="
       	       http://www.springframework.org/schema/beans
       	       http://www.springframework.org/schema/beans/spring-beans.xsd
       	       http://www.springframework.org/schema/context
       	       http://www.springframework.org/schema/context/spring-context.xsd
       	">
    <!--开启注解扫描, 扫描包-->
    <context:component-scan base-package="service"/>
</beans>
(5)spring-mvc.xml配置文件编写
<?xml version="1.0" encoding="UTF-8"?>
<beans xmlns="http://www.springframework.org/schema/beans"
       xmlns:context="http://www.springframework.org/schema/context"
       xmlns:mvc="http://www.springframework.org/schema/mvc"
       xmlns:xsi="http://www.w3.org/2001/XMLSchema-instance"
       xsi:schemaLocation="http://www.springframework.org/schema/beans
       	       http://www.springframework.org/schema/beans/spring-beans.xsd
       		   http://www.springframework.org/schema/mvc
       	       http://www.springframework.org/schema/mvc/spring-mvc.xsd
       	       http://www.springframework.org/schema/context
       	    http://www.springframework.org/schema/context/spring-context.xsd">

<!-- 配置 Spring MVC 要扫描的包 -->
    <context:component-scan base-package="controller"/>
    <!-- 配置视图解析器 -->
    <bean class="org.springframework.web.servlet.view.InternalResourceViewResolver">
        <property name="prefix" value="/pages/"/>
        <property name="suffix" value=".jsp"/>
    </bean>

    <mvc:annotation-driven/>

</beans>
4、dao层代码编写
package dao;

import entity.User;

public interface UserMapper {

    public User findUserById(Integer id);

}
对应资源文件下创建mapper配置文件
<?xml version="1.0" encoding="utf-8" ?>
<!DOCTYPE mapper
        PUBLIC "-//mybatis.org//DTD Mapper 3.0//EN"
        "http://mybatis.org/dtd/mybatis-3-mapper.dtd">
<mapper namespace="dao.UserMapper">


    <select id="findUserById" parameterType="int"
            resultType="entity.User">
    		select * from user where id = #{id}
    </select>


</mapper>
5、创建service层
(1)UserService接口
public interface UserService {

    public User findUserById(Integer id);

}
(2)UserServiceImpl实现类
@Service("userService")
public class UserServiceImpl implements UserService {

    @Autowired
    private UserMapper userMapper;

    public User findUserById(Integer id) {
        return userMapper.findUserById(id);
    }

}
6、Controller层
(1)消息响应体
@Data
public class ResponseDTO<T> implements Serializable {
    private String code;
    private String msg;
    private T data;
}
(2)消息请求体
@Data
public class UserLoginRequestDTO implements Serializable {

    private String username;    //用户名

    private String password;    //密码

    private String code;    //验证码

}
(3)用户登入操作接口
@RestController
public class UserController {

    @Autowired
    private UserService userService;

    @PostMapping("/login")
    public ResponseDTO<String> login(@RequestBody UserLoginRequestDTO requestDTO){
        ResponseDTO<String> responseDTO = new ResponseDTO<String>();
        System.out.println(requestDTO.toString());
        responseDTO.setCode(ResponseCodeEnum.SUCCESS.getCode());
        responseDTO.setMsg("登入成功");
        responseDTO.setData("4212342144");

        User user = userService.findUserById(1);
        System.out.println(user.toString());

        return responseDTO;
    }

}
(4)验证码接口
@Controller
public class CodeImgController {

    @RequestMapping("/getCodeImgURL")
    public void drawCode(HttpServletResponse response, HttpServletRequest request) throws IOException {
        //画验证码
        DrawCheckCodeUtil drawCheckCode = new DrawCheckCodeUtil();
        BufferedImage image = drawCheckCode.doDraw();

        //设置响应头,防止缓存
        response.setHeader("Pragma","no-cache");
        response.setHeader("Cache-Control","no-cache");
        response.setHeader("Expires","0");
        //将验证码的值保存在session中,以便校验
        request.getSession().setAttribute("CHECK_CODE", drawCheckCode.getCheckCode());
        ServletOutputStream outputStream = response.getOutputStream();
        ImageIO.write(image,"jpeg",outputStream);
        outputStream.flush();   //清空缓冲区数据
        outputStream.close();   //关闭流
    }

}
创建验证码画板工具类,画验证码:
import java.awt.*;
import java.awt.image.BufferedImage;
import java.util.Random;

public class DrawCheckCodeUtil {


    private String checkCode;

    public String getCheckCode() {
        return checkCode;
    }

    public void setCheckCode(String checkCode) {
        this.checkCode = checkCode;
    }

    //随机产生颜色
    public Color getColor() {
        Random random = new Random();
        //获取0-255随机值
        int r = random.nextInt(256);
        int g = random.nextInt(256);
        int b = random.nextInt(256);
        return new Color(r, g, b);
    }

    //产生验证码值
    public String getNum() {
        //原来是0-8999,+1000后变成1000-9999
        int ran = (int) (Math.random() * 9000) + 1000;
        return String.valueOf(ran);
    }

    public BufferedImage doDraw() {
        //绘制验证码
        //参数:长,宽,图片类型
        BufferedImage image = new BufferedImage(100, 30, BufferedImage.TYPE_INT_RGB);
        //画笔
        Graphics graphics = image.getGraphics();
        //画长方形,坐标从0,0,到80,30
        graphics.fillRect(0, 0, 100, 30);
        //绘制50条干扰条
        for (int i = 0; i < 50; i++) {
            Random random = new Random();
            int xBegin = random.nextInt(110);
            int yBegin = random.nextInt(30);
            int xEnd = random.nextInt(xBegin + 10);
            int yEnd = random.nextInt(yBegin + 10);
            //画笔颜色,随机
            graphics.setColor(getColor());
            //绘制线条
            graphics.drawLine(xBegin, yBegin, xEnd, yEnd);
        }
        //绘制验证码
        //字体加粗,变大
        graphics.setFont(new Font("seif", Font.BOLD, 20));
        //画笔颜色
        graphics.setColor(Color.BLACK);
        //得到随机取得的数字
        String code = getNum();
        this.checkCode = code;
        for (int i = 0; i < code.length(); i++) {
            graphics.drawString(String.valueOf(code.charAt(i)), 1 + 25 * i,  16 + new Random().nextInt(16));
        }
        return image;
    }


}
二、前端Vue工程编写
1、前期准备工作。
(1)Element Plus 安装使用
Element Plus 是一套为构建基于 Vue 3 的组件库而设计的 UI 组件库(UI Kit)。它为开发者提供了一套丰富的 UI 组件和扩展功能,帮助开发者快速构建高质量的 Web 应用。(https://element-plus.org/zh-CN/),安装语法:
npm install element-plus --save
(2)Axios 安装使用
Axios 是一个基于 promise 的 HTTP 库,简单的讲就是可以发送get、post请求。安装语法:
npm install axios
2、项目实施
(1)创建项目
在将要存放vue3项目的路径打开cmd, 使用以下命令创建项目
npm init vue@latest

此时项目创建完成,vscode打开项目目录,在资源目录空白右键,打开终端
简化项目
① 删除App.vue多余内容,保留内容如下:
<script setup>

</script>

<template>


  <RouterView />
</template>

<style scoped>

</style>
② 修改router目录下index.js文件
const router = createRouter({
  history: createWebHistory(import.meta.env.BASE_URL),
  routes: [
    {
      path: '/',
      name: 'Login',
      component: Login,
    }
  ],
})

export default router
(2)配置请求
创建util/api.js文件。
import axios from "axios";
import { ElMessage } from 'element-plus'
import router from "@/router";

const baseURL = '/api';
const instance = axios.create({baseURL})


// 添加响应拦截器
instance.interceptors.response.use(
    result => {
        // 判断业务状态码
        if(result.status && result.status.status == 200){

            if(result.data.code = 500 || result.data.code == 401 || result.data.code == 403){
                ElMessage.error({message: result.data.message});
                return;
            }

            if (result.data.message) {
                ElMessage.success({message: result.data.message})
            }
        }

        return result.data;
    },
    err => {
        // 判断响应状态码, 401为未登录,提示登录并跳转到登录页面  (压根没有访问到后端接口)
        if (err.response.code === 404  || err.response.code == 504) {
            ElMessage.error({message: "服务器被吃了( ╯□╰ )"});
        } else if(err.response.code == 403){
            ElMessage.error({message: "权限不足,请联系管理员。"});
        }else if(err.response.code == 401){
            ElMessage.error({message: "尚未登入,请先登入!"});
            router.replace('/');
        }else{
            if(err.response.data.message){
                ElMessage.error({message: err.response.data.message});
            }else{
                ElMessage.error({message: "未知错误!"});
            }
        }
        return;
    }
)


export default instance
//传送json格式的post请求
export const postRequest = (url, params) => {
    return axios({
        method: 'post',
        url:  baseURL + url,
        data: params
    })
}
(3)配置跨域
import { fileURLToPath, URL } from 'node:url'

import { defineConfig } from 'vite'
import vue from '@vitejs/plugin-vue'
import VueDevTools from 'vite-plugin-vue-devtools'

// https://vitejs.dev/config/
export default defineConfig({
  plugins: [
    vue(),
    VueDevTools(),
  ],
  resolve: {
    alias: {
      '@': fileURLToPath(new URL('./src', import.meta.url))
    }
  },
   // 配置代理
   server: {
    proxy: {
      '/api': { // 获取请求中带 /api 的请求
        target: 'http://localhost:8080',  // 后台服务器的源
        changeOrigin: true,   // 修改源
        rewrite: (path) => path.replace(/^\/api/, "")   //  /api 替换为空字符串
      }
    }
  }
})
(4)创建视图组件
登入视图如下:
<template>
  <div class="body-bg">
    <el-form
      ref="ruleFormRef"
      :rules="rules"
      style="max-width: 600px"
      :model="loginForm"
      status-icon
      label-width="auto"
      class="loginContainer"
    >
      <h3 class="loginTitle">系统登入</h3>
      <el-form-item label="用户名" prop="username">
        <el-input v-model="loginForm.username" type="text" autocomplete="off" />
      </el-form-item>
      <el-form-item label="密   码" prop="password">
        <el-input
          v-model="loginForm.password"
          type="password"
          autocomplete="off"
        />
      </el-form-item>
      <el-form-item label="验证码" prop="checkCode" class="checkCodeItem">
        <el-input v-model.number="loginForm.checkCode" />
      </el-form-item>
      <img :src="checkCodeImgURL" class="checkCodeImg" @click="changCheckCodeImg()"/>
      <el-form-item>
        <el-button  type="primary" @click="submitData(ruleFormRef)"  style="width: 48%;">
          Submit
        </el-button>
        <el-button @click="resetForm(ruleFormRef)" style="width: 48%;">Reset</el-button>
      </el-form-item>
    </el-form>
  </div>
  </template>

  <script lang="ts" setup>
  import { reactive, ref } from 'vue'
  import type { FormInstance, FormRules } from 'element-plus'
  import { ElMessage } from 'element-plus'
import { postRequest } from '@/util/api';
import { useRouter } from 'vue-router';

  //定义表单input输入框中的初始值
  const loginForm = ref({
    username: "",
    password: "",
    checkCode: ""
  })

  const router = useRouter();

  //定义验证码路径
  const checkCodeImgURL = ref('/api/getCheckCode');
  const changCheckCodeImg = () => {
    checkCodeImgURL.value = "/api/getCheckCode?time=" + new Date();
  }


  //定义校验规则
  const rules = reactive({
    username:[
      {required: true, message:'请输入用户名', trigger: 'blur'}
    ],
    password:[
      {required: true, message:'请输入密码', trigger: 'blur'},
      {min: 3, max: 12, message:'请输入密码(密码长度是3到12位)', trigger: 'blur'},
    ],
    checkCode:[
      {required: true, message:'请输入验证码', trigger: 'blur'},
    ]
  })

//用户点击提交按钮

const successMsg = (tip) => {
  ElMessage({
    message: tip,
    type: 'success',
  })
}
const wrongMsg = (tip) => {
  ElMessage.error(tip);
}

const ruleFormRef = ref<FormInstance>()
const submitData = (formEl: FormInstance | undefined) => {
  if (!formEl) return
  formEl.validate((valid) => {
    if (valid) {
      postRequest("/login", loginForm.value).then(res => {
          if(res.data.data == "success"){
            successMsg(res.data.msg);
            router.replace('/home');
          }else{
            wrongMsg(res.data.msg)
          }
      }, err => {
         console.log(err)
      })

    } else {
      wrongMsg("数据格式不符合要求,禁止提交");
    }
  })
}

const resetForm = (formEl: FormInstance | undefined) => {
  if (!formEl) return
  formEl.resetFields()
}

</script>

 <style scoped>
.body-bg {
        position: absolute;
        width: 100%;
        height: 100%;
        top: 0;
        left: 0;
        overflow-y: auto;
        background-image: url(../assets/img/back.jpeg);
        background-size: 100% 100%;
}


.loginContainer{

  width: 400px;
  border: 1px solid #eaeaea;
  border-radius: 15px;
  background-clip: padding-box;
  margin: 120px auto;
  padding: 5px 35px 15px 35px;
  background: #fff;
  box-shadow: 0 0  25px #cacaca;

}


.loginTitle{
  text-align: center;
  line-height: 40px;
  padding-bottom: 10px;
}

.el-form-item{
  width: 300px;
}


.checkCodeItem{
  width: 170px;
  float: left;
  margin-right: 10px;
}

.checkCodeImg{
  width: 120px;
  height: 30px;
  background-color: brown;
}


</style>
很希望自己是一棵树,守静、向光、安然,敏感的神经末梢,触着流云和微风,窃窃的欢喜。脚下踩着最卑贱的泥,很踏实。还有,每一天都在隐秘成长。

 浙公网安备 33010602011771号