
SpringBoot--Thymeleaf入门使用
一、概述
今天学习到了SpringBoot中的WEB开发,SpringBoot提供了spring-boot-stater-web为web开发给予支持,它里面内嵌了以下依赖:
<dependencies>
    <dependency>
      <groupId>org.springframework.boot</groupId>
      <artifactId>spring-boot-starter</artifactId>
      <version>2.1.0.RELEASE</version>
      <scope>compile</scope>
    </dependency>
    <dependency>
      <groupId>org.springframework.boot</groupId>
      <artifactId>spring-boot-starter-json</artifactId>
      <version>2.1.0.RELEASE</version>
      <scope>compile</scope>
    </dependency>
    <dependency>
      <groupId>org.springframework.boot</groupId>
      <artifactId>spring-boot-starter-tomcat</artifactId>
      <version>2.1.0.RELEASE</version>
      <scope>compile</scope>
    </dependency>
    <dependency>
      <groupId>org.hibernate.validator</groupId>
      <artifactId>hibernate-validator</artifactId>
      <version>6.0.13.Final</version>
      <scope>compile</scope>
    </dependency>
    <dependency>
      <groupId>org.springframework</groupId>
      <artifactId>spring-web</artifactId>
      <version>5.1.2.RELEASE</version>
      <scope>compile</scope>
    </dependency>
    <dependency>
      <groupId>org.springframework</groupId>
      <artifactId>spring-webmvc</artifactId>
      <version>5.1.2.RELEASE</version>
      <scope>compile</scope>
    </dependency>
  </dependencies>
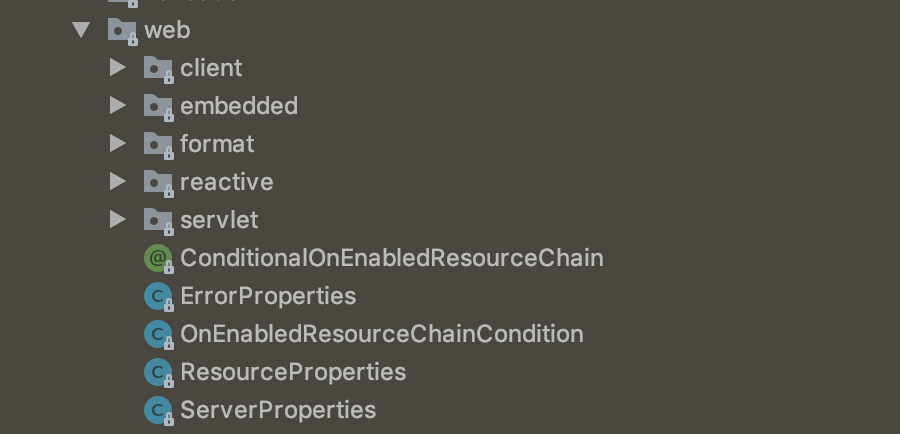
主要是Tomcat和Spring MVC的依赖,而web相关的自动配置则在spring-boot-autoconfigure.jar的org.springframework.boot.autoconfigure.web下,如下图所示:
springboot提供的模板引擎有:FreeMarker[fri'mɑːkə(r)]、Groovy['ɡruvi]、Thymeleaf[taɪm'lif]、Velocity[və'lɑsəti]、Mastache['mʌstæʃ],为了准确读出,我加了它们的音标,springboot中推荐使用Thymeleaf作为模板引擎,因为它提供了完美的SpringMVC的支持。关于Thymleaf的语法可以通过官网进行学习https://www.thymeleaf.org/doc/articles/thymeleaf3migration.html
二、通过一个简单的实例举例说明
本例以Thymleaf为模板引擎,从服务端获取数据并展示在页面。
第一步:创建一个Javabean用来在模板页面展示数据person.java
/**
 * 模板数据
 */
public class Person {

    private String userName;

    private int age;

    public Person(String userName, int age) {
        this.userName = userName;
        this.age = age;
    }

    public String getUserName() {
        return userName;
    }

    public void setUserName(String userName) {
        this.userName = userName;
    }

    public int getAge() {
        return age;
    }

    public void setAge(int age) {
        this.age = age;
    }
}
第二步:创建Controller
@Controller
@SpringBootApplication
public class WebdemoApplication {

    @RequestMapping("/")
    public String index(Model model) {
        Person person = new Person("张三", 26);

        List<Person> people = new ArrayList<>();
        Person p1 = new Person("李四", 27);
        Person p2 = new Person("王五", 27);
        Person p3 = new Person("赵六", 27);
        people.add(p1);
        people.add(p2);
        people.add(p3);

        model.addAttribute("singlePerson", person);
        model.addAttribute("people", people);
        return "index";
    }

    public static void main(String[] args) {
        SpringApplication.run(WebdemoApplication.class, args);
    }
}
上面红色加粗部分是将一个用户个一个用户列表设置到model中,传给前页面index.html,所以接下来再创建一个index.html。
第三步:创建页面index.html获取数据
<html xmlns:th="http://www.thymeleaf.org">
<head>
    <meta content="text/html;charset=UTF-8">
    <meta http-equiv="X-UA-Compatible" content="IE=edge">
    <meta name="viewport" content="width=device-width,initial-scale=1">
    <link th:href="@{bootstrap/css/bootstrap.css}" rel="stylesheet">
    <link th:href="@{bootstrap/css/bootstrap-theme.css}" rel="stylesheet">
    <link th:href="@{css/demo.css}" rel="stylesheet">
    <title>Title</title>
</head>
<body>

<div class="panel panel-primary">
    <div class="panel-heading">
        <h3 class="panel-title">访问model</h3>
    </div>
    <div class="panel-body">
        <label>姓名:</label><span th:text="${singlePerson.userName}"/>
        <label>年龄:</label><span th:text="${singlePerson.age}"/>
    </div>
</div>

<div th:if="${not #lists.isEmpty(people)}">
    <div class="panel panel-primary">
        <div class="panel-heading">
            <h3 class="panel-title">访问列表</h3>
        </div>
    </div>
    <div class="panel-body">
        <ul class="list-group">
            <li class="list-group-item">
                <span class="span1">用户名</span>
                <span class="span1">密码</span>
                <span class="span3">操作</span>
            </li>
            <li class="list-group-item" th:each="person:${people}">
                <span class="span2" th:text="${person.userName}"></span>
                <span class="span2" th:text="${person.age}"></span>
                <!--<button class="btn" th:onclick="'getName(\''+[[${person.userName}]]+'\');'">获取姓名</button>-->
                <button class="btn btn-info" th:onclick="getName([[${person.userName}]],[[${person.age}]],this);">
                    获取用户信息
                </button>
            </li>
        </ul>
    </div>
</div>
<script th:src="@{jquery-1.8.3.min.js}" type="text/javascript"></script>
<script th:src="@{bootstrap/js/bootstrap.js}" type="text/javascript"></script>
<script th:inline="javascript">
    var single = [[${singlePerson}]];
    console.log(single.userName + "--" + single.age);

    function getName(name, age, obj) {
        var html = "My name is " + name + " and i am " + age + " years old.";
        $(obj).parent().append(html);
    }
</script>
</body>
</html>
创建完之后的目录结构如下:
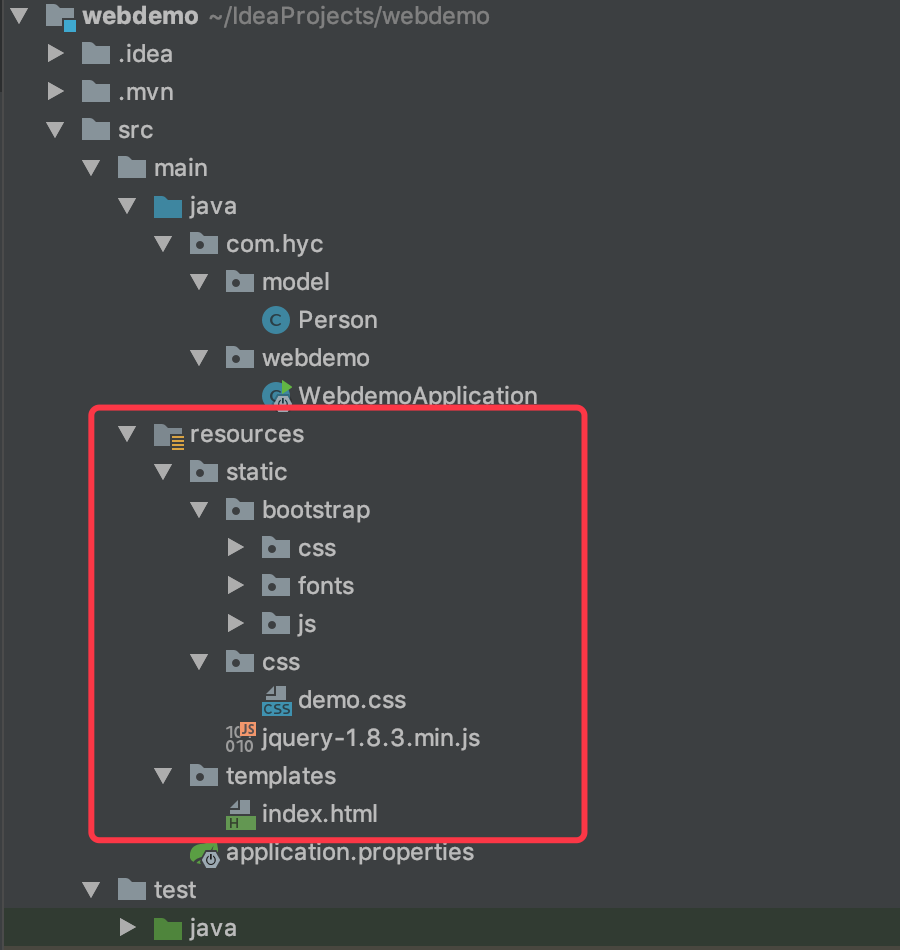
红色方框中的是web文件的目录,都放在resource目录下了。至此,所有文件创建完成,页面访问效果如下:
这是一个简单的入门例子,主要是熟悉一下Thymeleaf模板的使用,这个例子中用到的主要知识点有以下几个:
1、引入Thymeleaf
- 通过<html xmlns:th="http://www.thymeleaf.org">命名空间,将静态页面转换为动态视图。需要进行动态处理的元素需要使用"th:"作为前缀;
- 通过“@{}”引用web静态资源,如js、css、image等文件;
2、访问model中的数据
- 通过${}访问:如这句<span class="span2" th:text="${person.userName}"></span>,通过“${}” 获取
- 通过[[${}]]访问:如下面这句
<button class="btn btn-info" th:onclick="getName([[${person.userName}]],[[${person.age}]],this);">
    获取用户信息
</button>
这种方式一般用来在javascript中访问model中的数据
3、model中的数据迭代
使用th:each来循环迭代,如
<li class="list-group-item" th:each="person:${people}">
                <span class="span2" th:text="${person.userName}"></span>
                <span class="span2" th:text="${person.age}"></span>
                <button class="btn btn-info" th:onclick="getName([[${person.userName}]],[[${person.age}]],this);">
                    获取用户信息
                </button>
</li>
person作为迭代元素来使用,这样在下面的元素中就可以通过${person.*}来获取对象的属性了。
4、数据判断
<div th:if="${not #lists.isEmpty(people)}">
    .........省略......
</div>
上面代码中,在div内部使用列表数据之前要先判断列表是否为空,就用了${not #list.isEmpty(people)}这样的句式。
Thymeleaf还支持>、<、>=、<=、==、!=等作为条件比较。
以上就是这个入门实例中用到的Thymeleaf中的相关知识,需要注意的是下面这两句:
1、<button class="btn" th:onclick="'getName(\''+[[${person.userName}]]+'\');'">获取姓名</button>

2、<button class="btn btn-info" th:onclick="getName([[${person.userName}]],[[${person.age}]],this);">获取用户信息</button>
这两句都是在HTML中调用js函数时传递model数据的写法,但是第一种会报错!!!
本文来自博客园,作者:bug改了我,转载请注明原文链接:https://www.cnblogs.com/hellowhy/p/10035429.html

 浙公网安备 33010602011771号