
一、前提
注意:整合 Tomcat 的前提需要在 PC 上配置好 Java 的环境变量,并且能正常地启动 Tomcat 服务器。
二、Eclipse 整合 Tomcat
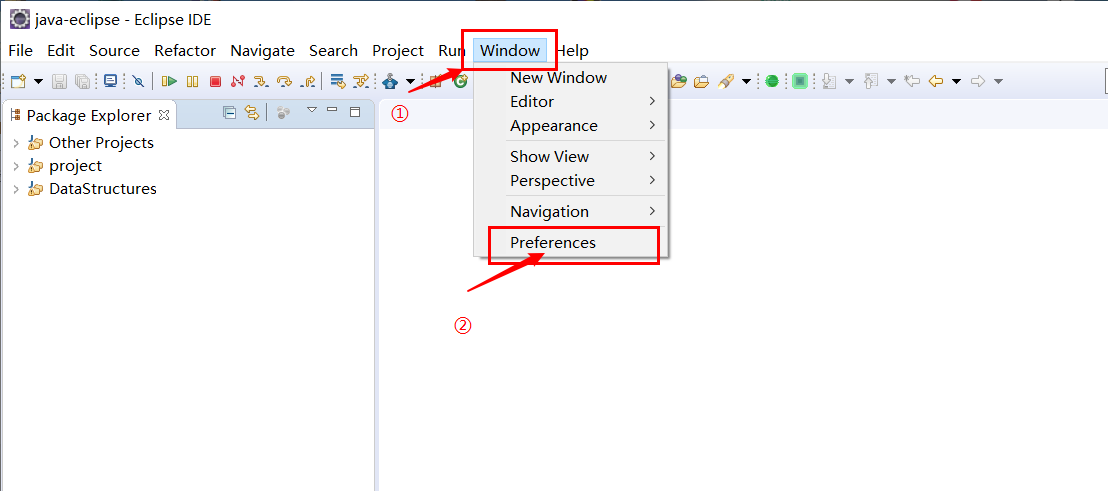
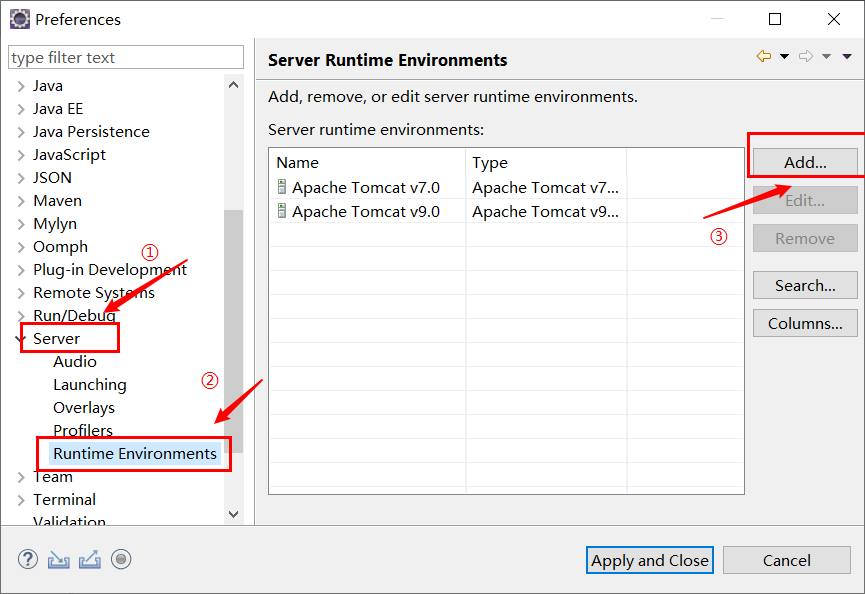
1、操作的菜单:Window | Preferences | Server | Runtime Environments
2、点击 Add 按钮,添加一个服务器运行环境
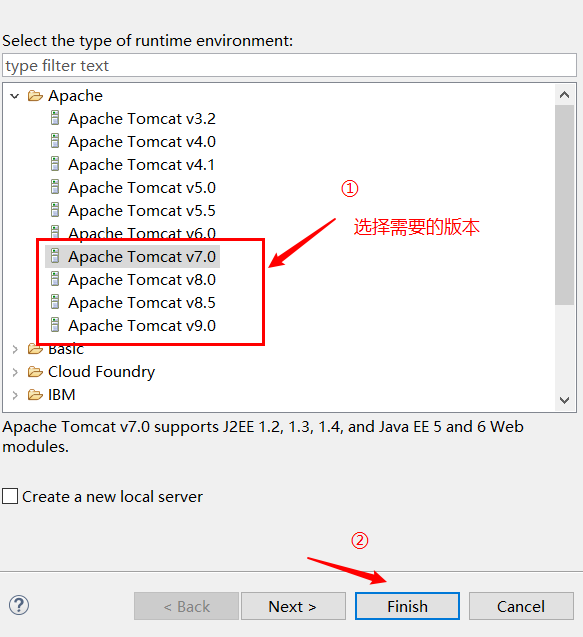
3、选择要添加 Tomcat 的版本
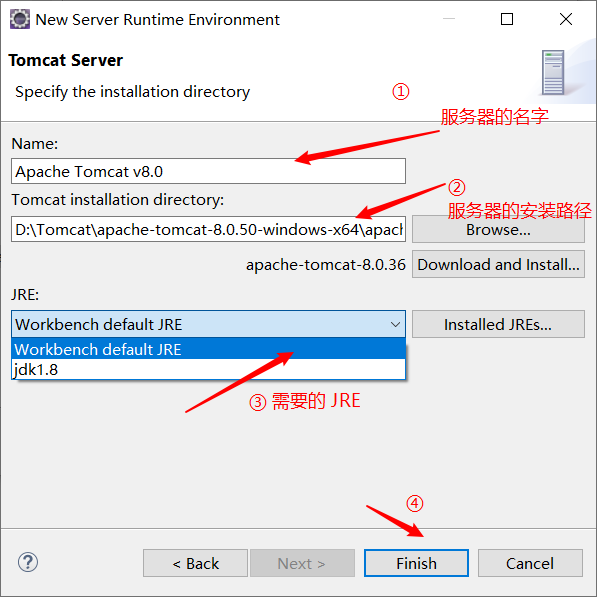
4、选择 Tomcat 的名字和安装目录,选择需要的 JRE
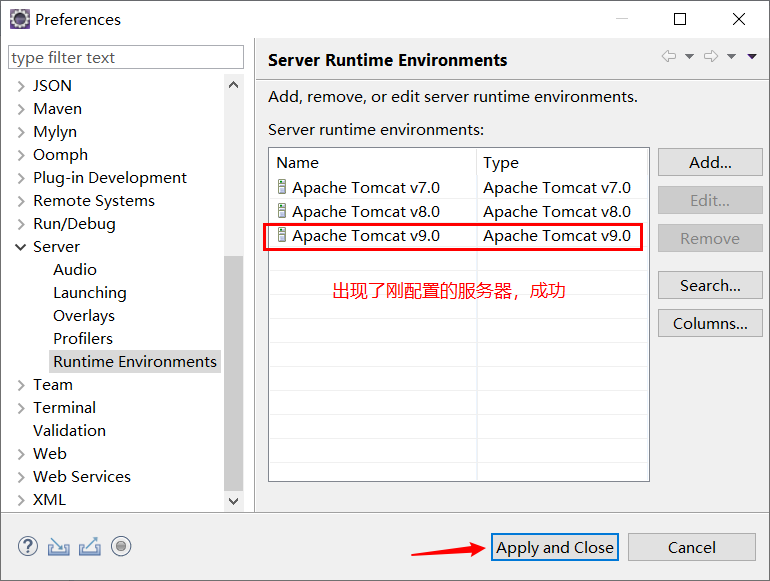
5、出现自己配置的服务器,点击应用并关闭
6、找到 Server
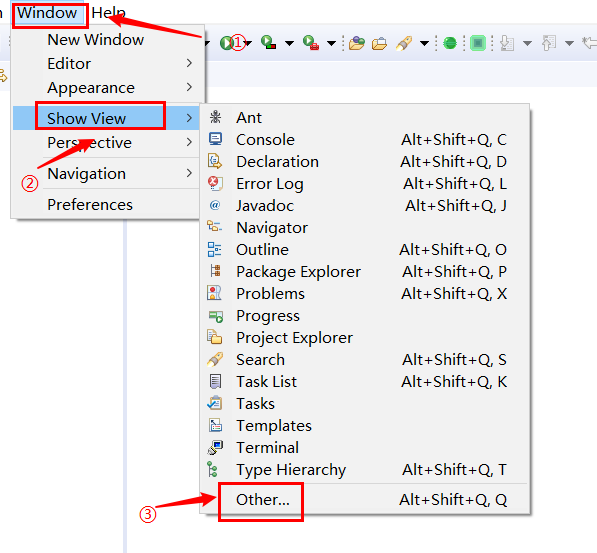
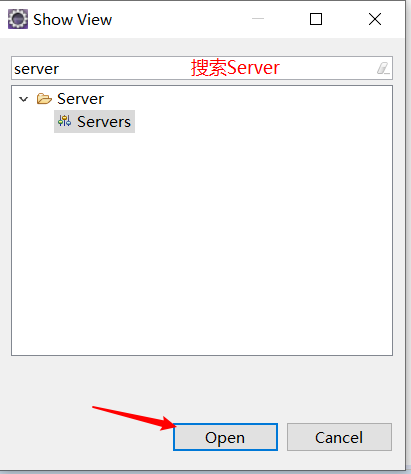
7、出现 Servers 界面

8、单击上面的 new server,创建一个新的服务器
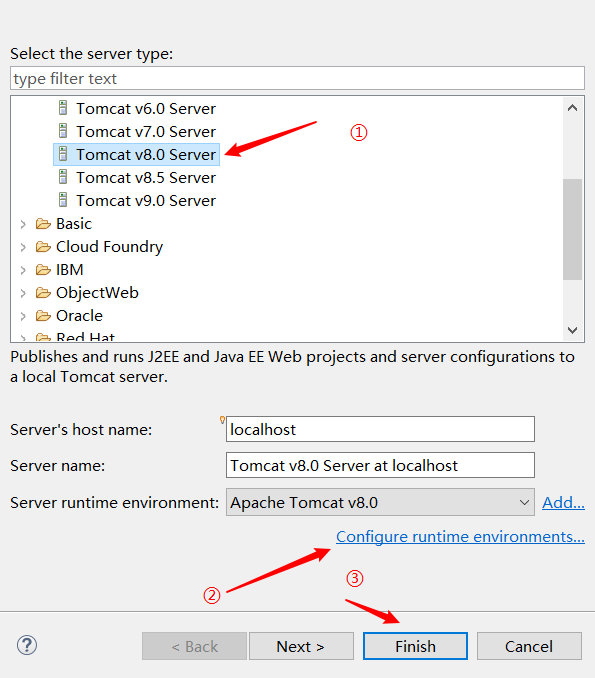

9、服务器配置,如果在上面的第二部进行了配置,这里不需要,如果没有,双击 服务器就可以进入配置页面
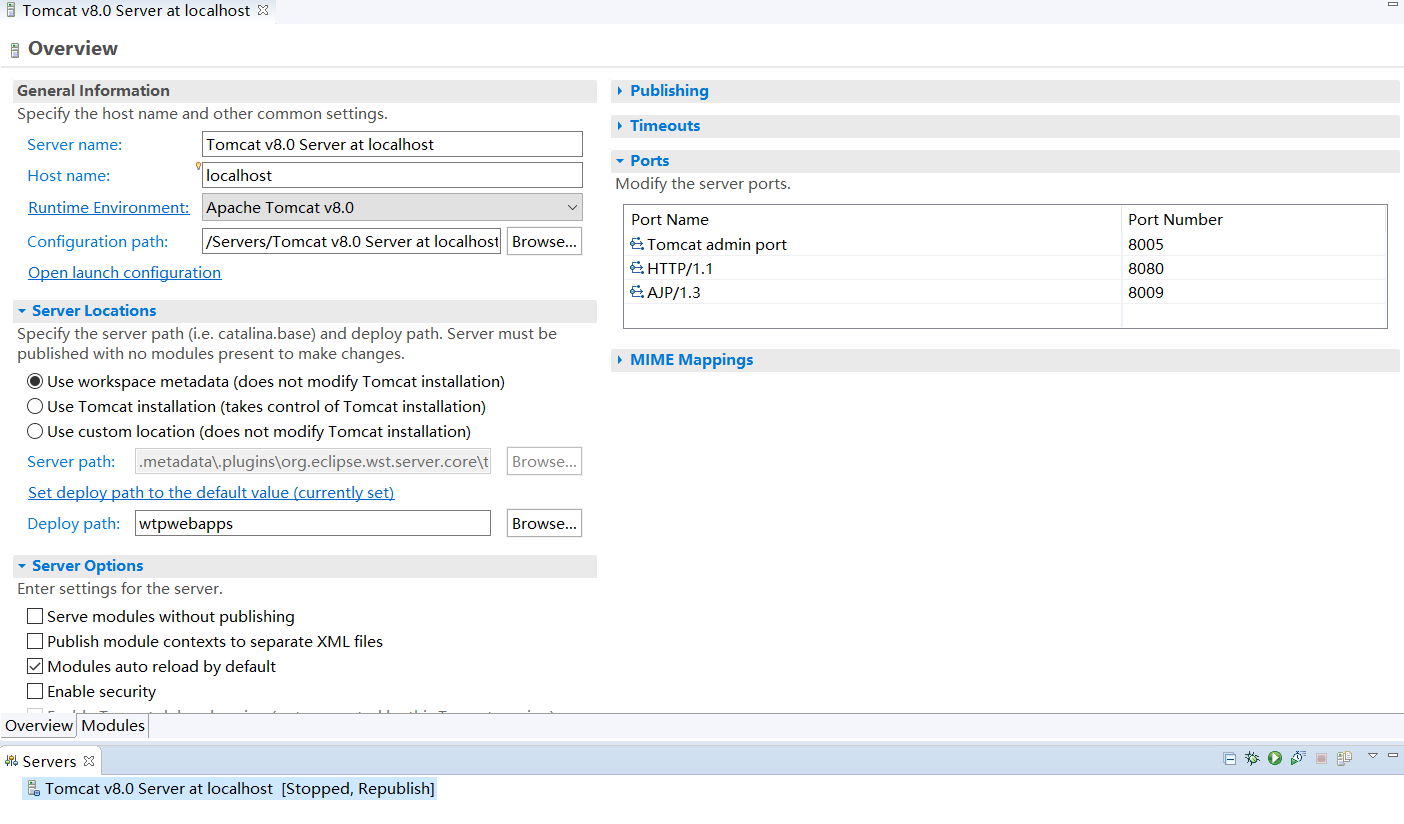
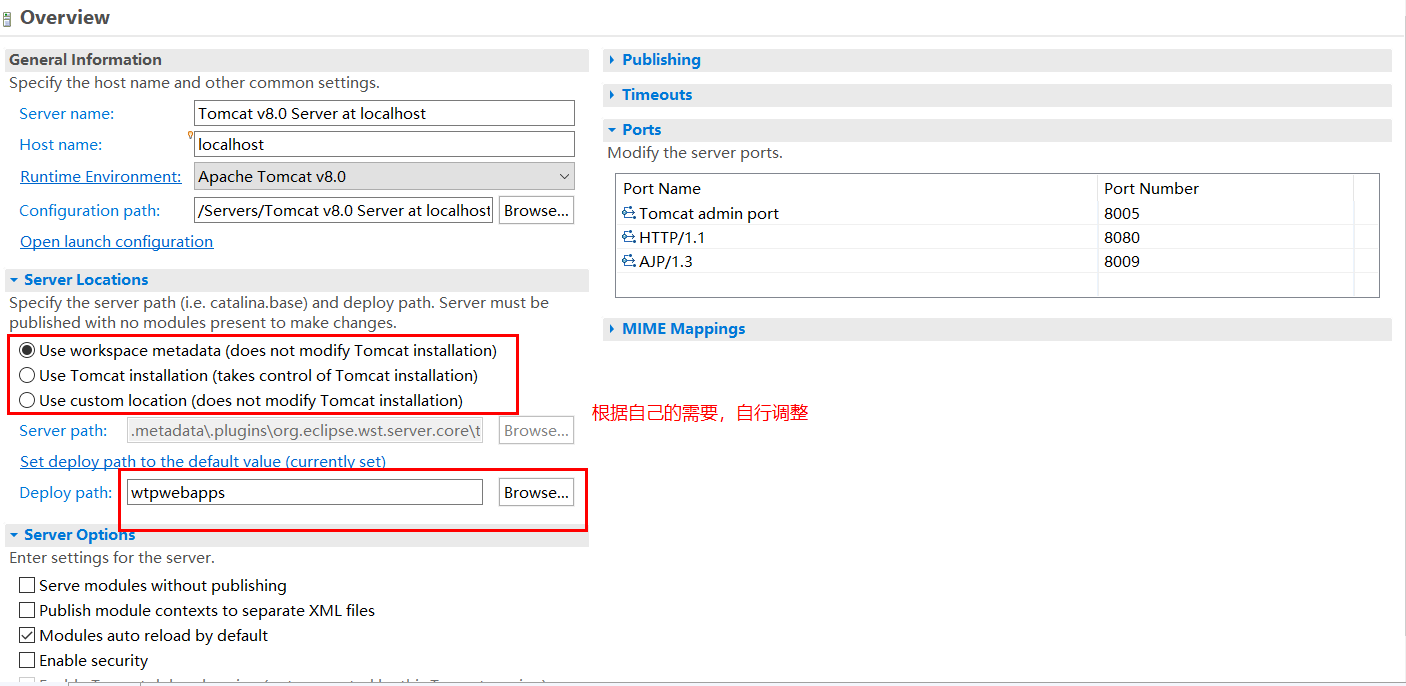
注意:eclipse 里面的项目的部署是在 eclipse 里面的(默认是放在工作空间里的.metadata 文件夹下),而不是在 Tomcat 里面的。
可以根据需要改变项目的部署位置,修改部署的路径 Deploy path
三、Intellij IDEA 整合 Tomcat
1、IDEA 整合 Tomcat(IDEA 版本 2019.3.2)
(1)操作的菜单如下: File | Settings | Build, Execution, Deployment | Application Servers
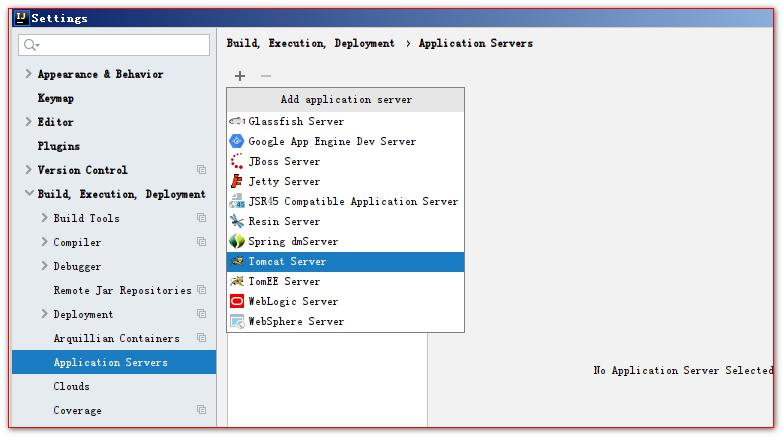
(2)配置 Tomcat 的安装目录

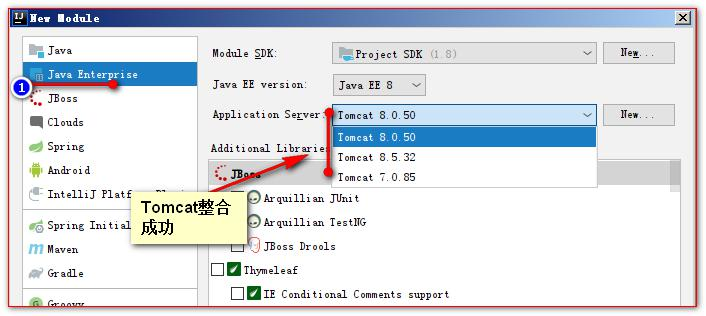
(3)通过创建一个 Model 或 Project 查看是否配置成功!
2、IDEA 中动态 web 工程的操作
(1)IDEA 创建动态 Web 工程/模块
① 创建一个新模块;

② 选择要创建类型的模块;

③ 输入模块名,点击 【Finish】完成创建;
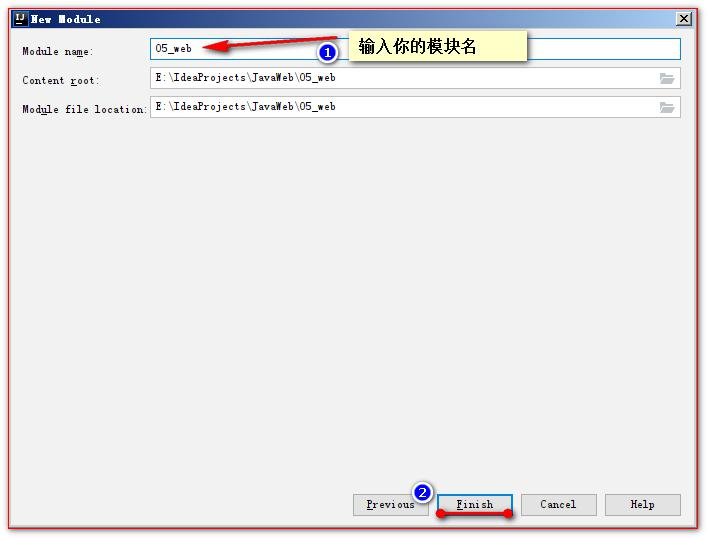
④ 创建成功
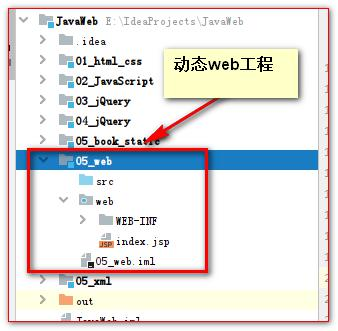
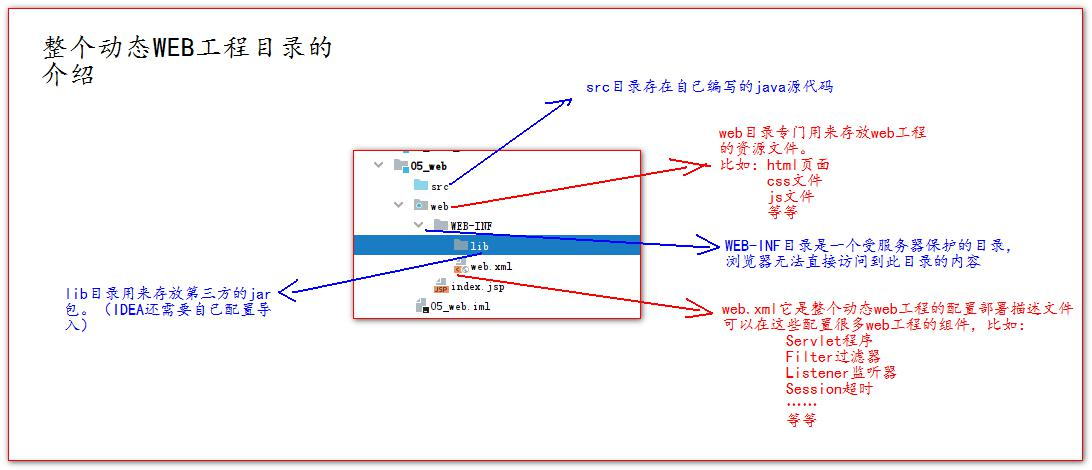
(2)Web 工程的目录介绍
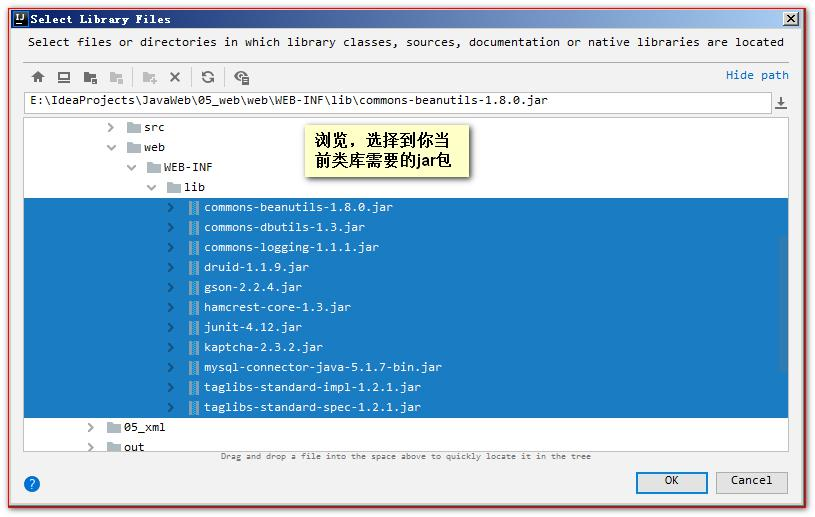
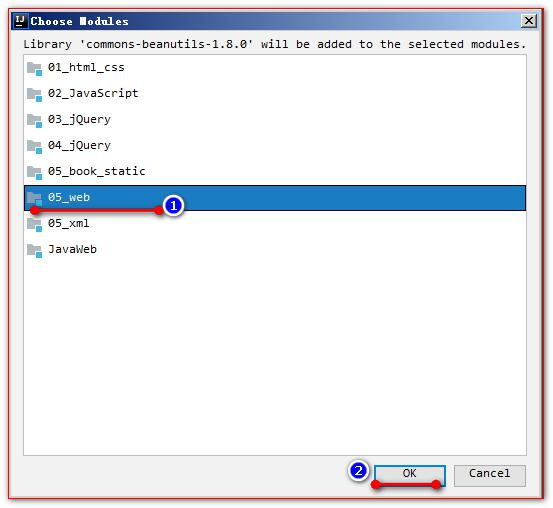
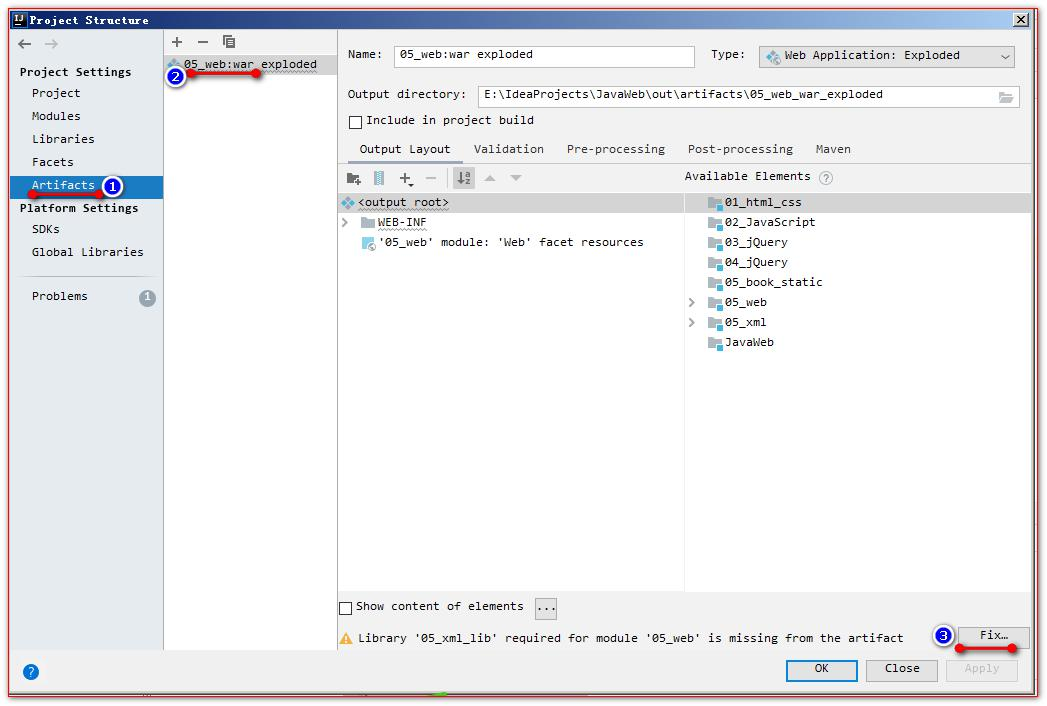
(3)给动态 web 工程添加额外 jar 包
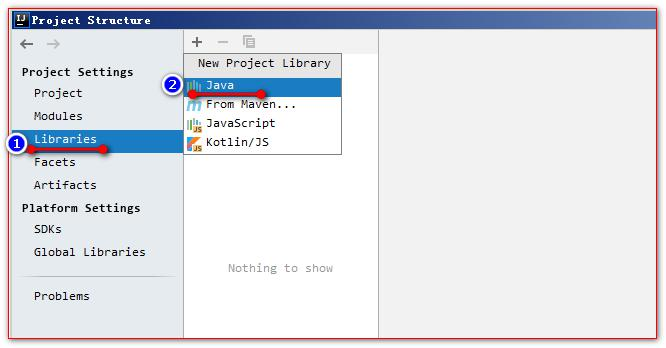
① 打开项目结构菜单操作界面,添加一个自己的类库;
② 添加类库需要的 jar 包文件;
③ 选择添加的类库,给哪个模块使用;
④ 选择 Artifacts 选项,将类库,添加到打包部署中;
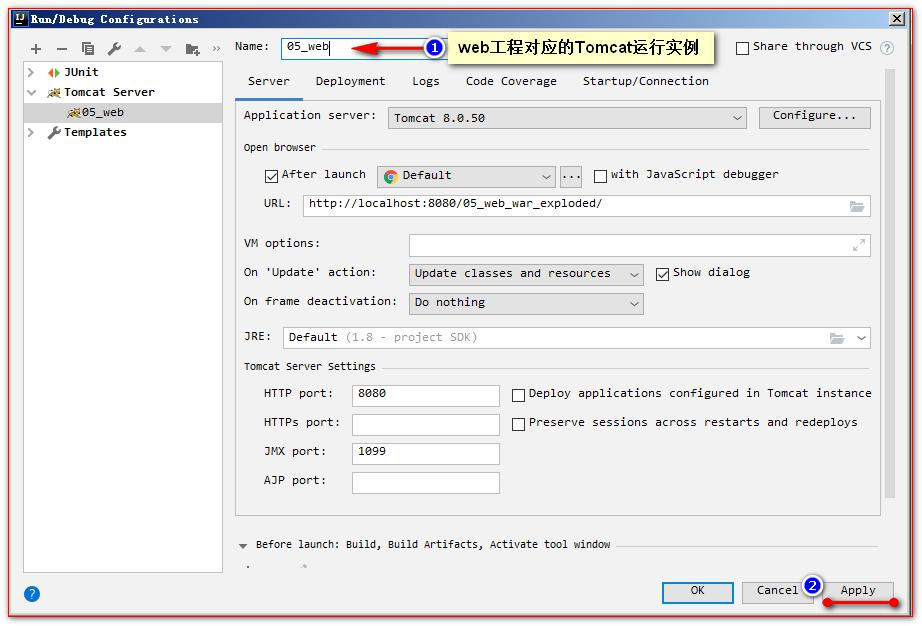
(4)IDEA 中部署工程到 Tomcat 上运行
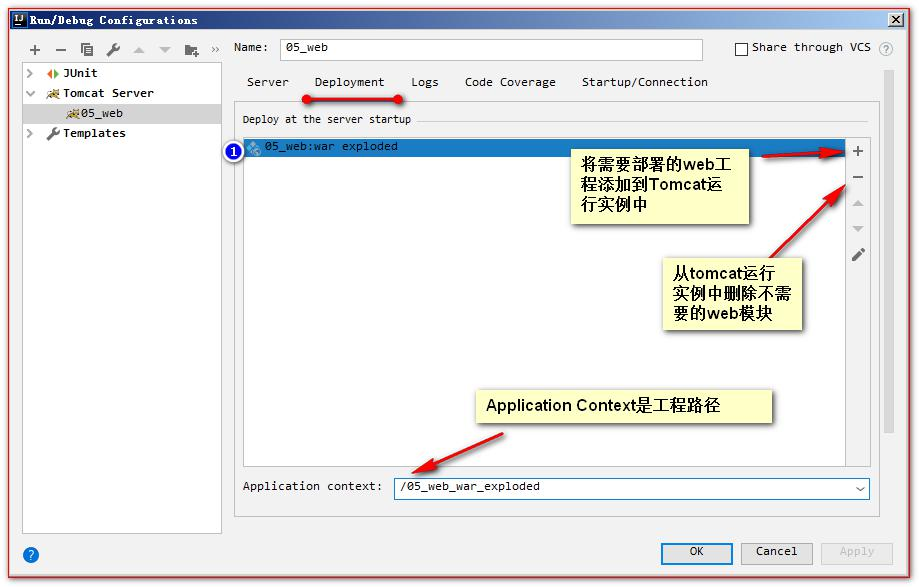
① 修改 web 工程对应的 Tomcat 运行实例名称;
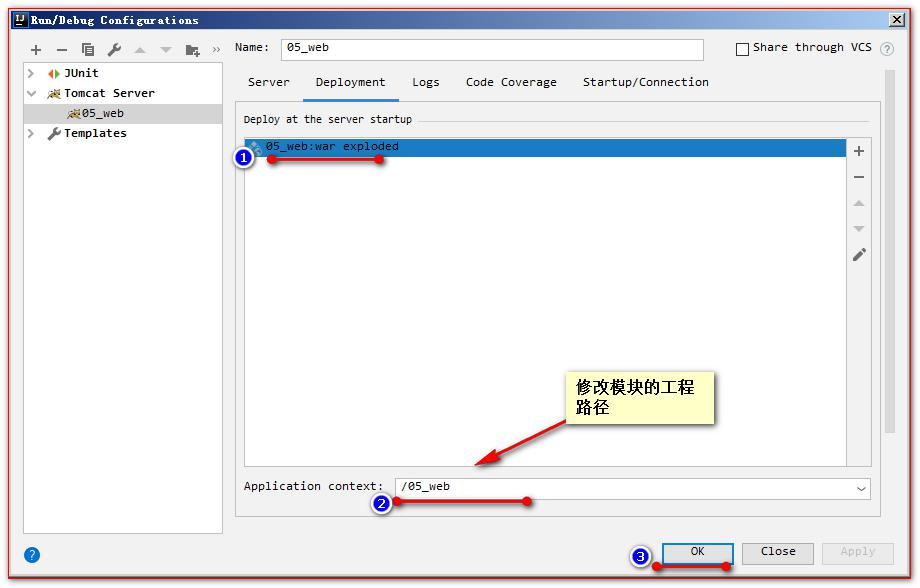
② 在 Tomcat 实例中部署运行的 web 工程模块;
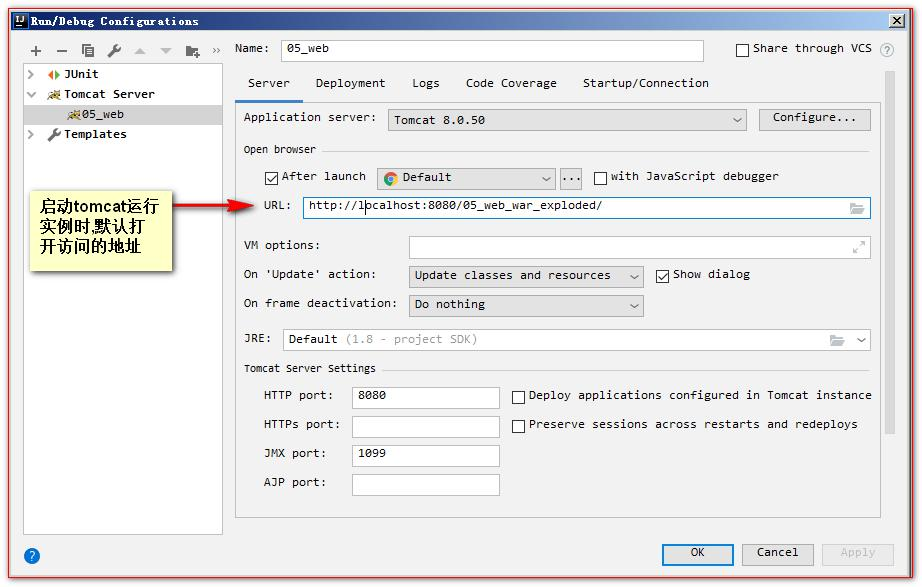
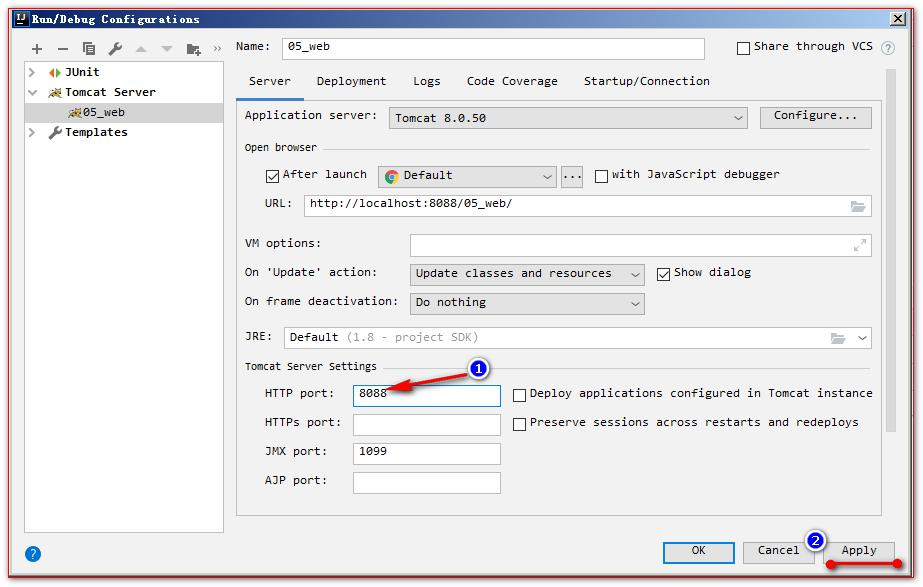
③ 修改 Tomcat 实例启动后默认的访问地址;
④ 在 IDEA 中运行和停止 Tomcat 实例:
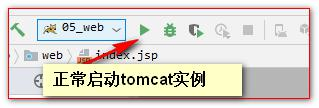
a、正常启动 Tomcat 实例:
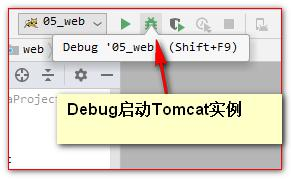
b、Debug 方式启动 Tomcat 运行实例;
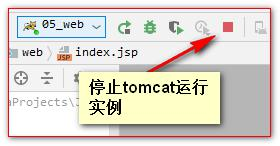
c、停止 Tomcat 实例;
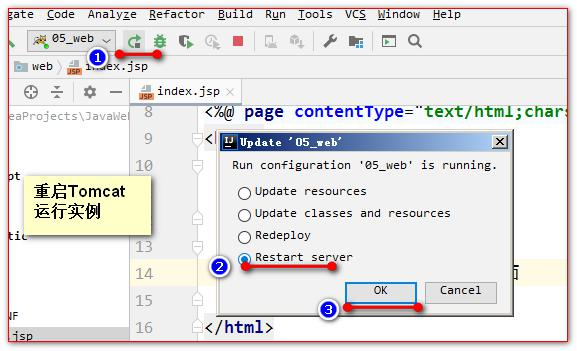
d、重启 Tomcat 运行实例;
(5)修改工程访问路径
(6)修改运行的端口号
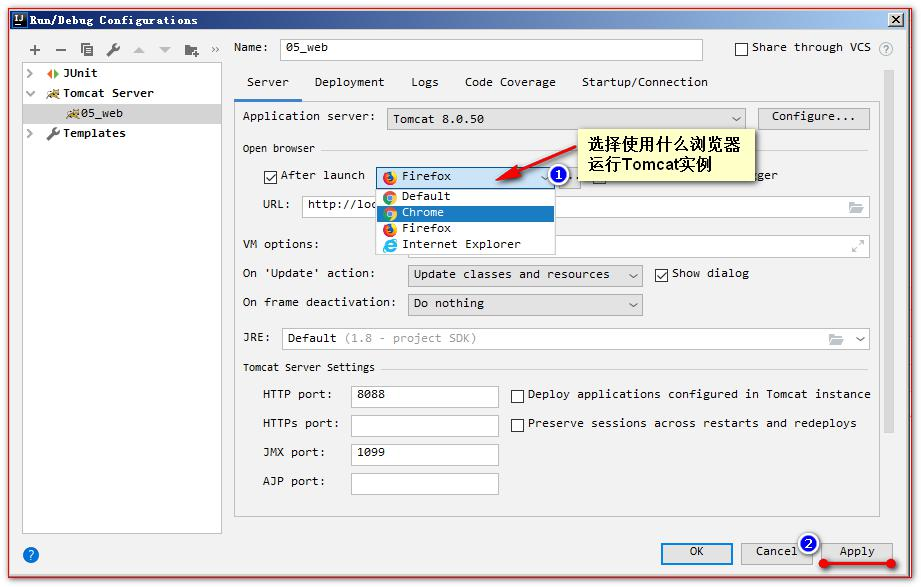
(7)修改运行使用的浏览器
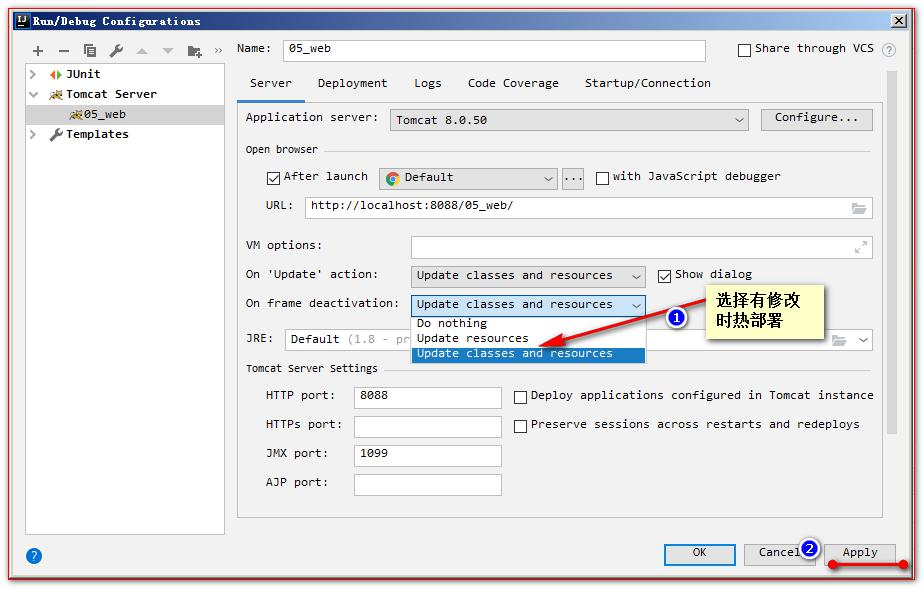
(8)配置资源热部署
四、Eclipse 和 IDEA 配置 Tomcat 的区别
1、Eclipse
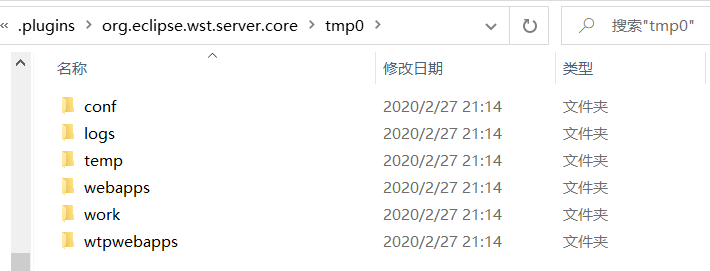
eclipse 配置 tomcat 时是本质上是映射了一个 tomcat 的镜像在.metadata 的 serer.core 目录下,每创一个 tomcat,就生成文件名为“tmp 编号”的 tomcat 的映射文件,创建的镜像和源 tomcat 就没有关系,eclipse 是通过这个镜像的 tomcat 去运行项目。
2、IDEA
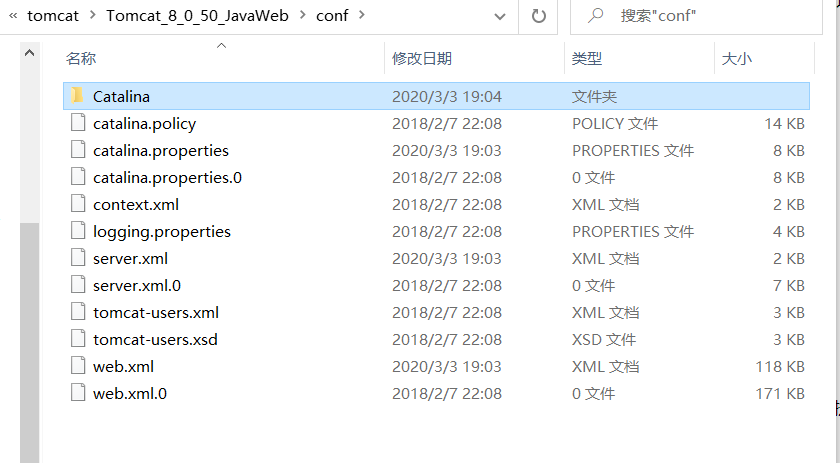
在 idea 中配置的 tomcat,在运行时 idea 不会把项目放到该路径下,而是复制一份足够的配置文件到 ${user.home}/.IntelliJIdea/system/tomcat 目录下也就是说每个项目都有属于自己的一份 tomcat 配置,互不干扰。每个项目的配置文件夹中有一个 /conf/Catalina/localhost/ROOT.xml 文件,内容如下:
<?xml version="1.0" encoding="UTF-8"?> <Context path="" docBase="D:\work\项目\target\xxx-web" />
其中,path 是指在访问此项目时,是否需要添加额外的路径,如果为空,则直接使用域名或者 ip 就可以访问到该项目
docBase 是指要运行的项目的部署位置,D:\work\项目 就是我的项目源代码的位置,target 是由 maven 构建后生成的,D:\work\项目\target\xxx-web
整个项目运行过程为:首先 build 项目,将构建结果写到项目的 target 目录下,然后 idea 复制一份 tomcat 的配置文件到 ${user.home}/.IntelliJIdea/system/tomcat 中,之后启动 tomcat 安装目录下的 catalina.bat 文件,tomcat 读取配置文件,找到项目位置,然后就运行起来了。


 浙公网安备 33010602011771号