
bean的生命周期
bean的生命周期
bean的生命周期指的就是bean从创建到销毁的过程
- 初始化容器
- 创建对象(内存分配)
- 执行构造方法
- 执行属性注入(set操作)
- 执行bean初始化方法
- 使用bean
- 执行业务操作
- 关闭/销毁容器
- 执行bean的销毁方法
管理bean的生命周期有两种方式,一种通过xml配置,一种通过接口实现方法
第一种 通过xml配置管理
编写初始方法和销毁方法
在初始方法和销毁方法中写好我们需要做的事
例如,当我们需要在UserService初始化和销毁时做一些事,我们可以这样写:
public class UserServiceImpl implements UserService {
    private UserMapper userMapper;
    public void setUserMapper(UserMapper userMapper) {
        this.userMapper = userMapper;
    }
    @Override
    public User getUserById(String id) {
        if (StringUtils.hasLength(id)) {
            //模拟获取用户
            User user = userMapper.selectById(id);
            System.out.println("user = " + user.toString());
            return user;
        }
        //模拟未找到用户
        System.out.println("用户id为空");
        return null;
    }

    public void init(){
        System.out.println("初始化UserService方法!!!");
    }

    public void destory(){
        System.out.println("销毁UserService方法!!!");
    }

}
其中init和destory分别是初始化和销毁方法,名字可以自定义,当我们使用xml来配置这初始化和销毁方法时,应该注意:
初始化方法和销毁方法必须是无参数的
随后我们就可以开始配置spring.xml
    <bean id="userMapper" class="com.zjw.ss.mapper.UserMapper">
    </bean>
     <bean id="userService" class="com.zjw.ss.service.impl.UserServiceImpl" init-method="init" destroy-method="destory">
        <property name="userMapper" ref="userMapper"/>
    </bean>
第二种 使用接口
spring提供了两个接口来自定义初始化和销毁方法
InitializingBean,DisposableBean
这两个接口各自有一个需要重写的方法
InitializingBean -> afterPropertiesSet()
DisposableBean -> destroy()
我们在这两个方法中写好我们初始化和销毁时需要做的内容
    @Override
    public void destroy() throws Exception {
        System.out.println("销毁UserService方法!!!");

    }

    @Override
    public void afterPropertiesSet() throws Exception {
        System.out.println("初始化UserService方法!!!");
    }
我们在xml中也就不需要再指定init-method和destroy-method
    <bean id="userMapper" class="com.zjw.ss.mapper.UserMapper">
    </bean>
    <bean id="userService" class="com.zjw.ss.service.impl.UserServiceImpl">
        <property name="userMapper" ref="userMapper"/>
    </bean>
Application的main方法:
public class StudySpringApplication {
    public static void main(String[] args) {
        ClassPathXmlApplicationContext ctx = new ClassPathXmlApplicationContext("spring.xml");
        UserServiceImpl userService = (UserServiceImpl) ctx.getBean("userService");
        User user = userService.getUserById("1");
    }
}
xml方式执行效果:

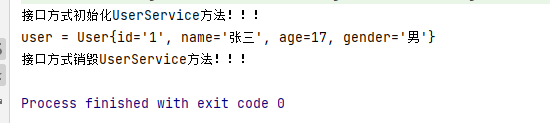
接口方式执行效果:

为什么只执行了初始化,却没有执行销毁方法呢
因为在程序执行结束后,jvm虚拟机被关闭时没有给容器销毁bean的机会
我们可以选择手动关闭spring容器
在Application的main方法中加上close方法
public class StudySpringApplication {
    public static void main(String[] args) {
        ClassPathXmlApplicationContext ctx = new ClassPathXmlApplicationContext("spring.xml");
        UserServiceImpl userService = (UserServiceImpl) ctx.getBean("userService");
        User user = userService.getUserById("1");
        ctx.close();
    }
}
或者在main方法中new ClassPathXmlApplicationContext("spring.xml")后的任意位置调用ctx.registerShutdownHook()
public class StudySpringApplication {
    public static void main(String[] args) {
        ClassPathXmlApplicationContext ctx = new ClassPathXmlApplicationContext("spring.xml");
        ctx.registerShutdownHook();
        UserServiceImpl userService = (UserServiceImpl) ctx.getBean("userService");
        User user = userService.getUserById("1");
    }
}
这两者的区别在于close方法会强制关闭IOC容器,执行完close方法后,无法再通过getBean获取容器中的bean
而registerShutdownHook方法可以放在方法的其他地方,不需要担心位置导致容器被关闭,这个方法会让IOC容器在jvm关闭前先执行关闭容器
尝试执行:

 浙公网安备 33010602011771号