

springboot项目通过雪花算法生成19位数字id
建议:
- 雪花算法可以用来生成id也可以用来生成订单号。但是不常使用的表可以使用自增,常用的表使用雪花算法生成id。这样效果更好
- 数据库表Id类型设置为 bigint (否则下面的代码也会报错)
首先生成雪花id,这样虽然可以直接调用也就是通过new这个类的对象来生成,但是因为使用了spring框架,交给容器管理更好,所以下面就通过配置来实现将类注入到容器中


import java.security.SecureRandom;

public class SnowflakeManager {
    private static final long EPOCH_STAMP = 1262275200000L;
    private static final long SEQUENCE_BIT = 12L;
    private static final long MACHINE_BIT = 5L;
    private static final long DATA_CENTER_BIT = 5L;
    private static final long MAX_SEQUENCE_NUM = -1L ^ (-1L << SEQUENCE_BIT);
    private static final long MAX_MACHINE_NUM = -1L ^ (-1L << MACHINE_BIT);
    private static final long MAX_DATA_CENTER_NUM = -1L ^ (-1L << DATA_CENTER_BIT);
    private static final long MACHINE_LEFT = SEQUENCE_BIT;
    private static final long DATA_CENTER_LEFT = SEQUENCE_BIT + MACHINE_BIT;
    private static final long TIMESTAMP_LEFT = SEQUENCE_BIT + MACHINE_BIT + DATA_CENTER_BIT;
    private final long machineId;
    private final long dataCenterId;
    private long sequence = 0L;
    private long lastTimestamp = -1L;

    public SnowflakeManager(long machineId, long dataCenterId) {
        if (machineId > MAX_MACHINE_NUM || machineId < 0) {
            throw new IllegalArgumentException(String.format("machine id can't be greater than %d or less than 0", MAX_MACHINE_NUM));
        }
        if (dataCenterId > MAX_DATA_CENTER_NUM || dataCenterId < 0) {
            throw new IllegalArgumentException(String.format("data center id can't be greater than %d or less than 0", MAX_DATA_CENTER_NUM));
        }
        this.machineId = machineId;
        this.dataCenterId = dataCenterId;
    }

    public synchronized long nextValue() throws Exception {
        String os = System.getProperty("os.name");
        SecureRandom secureRandom;
        if (os.toLowerCase().startsWith("win")) {
            // windows机器用
            secureRandom = SecureRandom.getInstanceStrong();
        } else {
            // linux机器用
            secureRandom = SecureRandom.getInstance("NativePRNGNonBlocking");
        }
        //SecureRandom secureRandom = SecureRandom.getInstanceStrong();
        long currentTimeMillis = this.currentTimeMillis();
        if(currentTimeMillis < this.lastTimestamp) {
            throw new Exception(String.format("Clock moved backwards. Refusing to generate id for %d milliseconds", (this.lastTimestamp-currentTimeMillis)));
        }

        if(this.lastTimestamp == currentTimeMillis) {
            this.sequence = (this.sequence+1) & MAX_SEQUENCE_NUM;
            if (this.sequence == 0) {
                this.sequence = secureRandom.nextInt(Long.valueOf(SEQUENCE_BIT).intValue());
                currentTimeMillis = this.tilNextMillis(this.lastTimestamp);
            }
        } else {
            this.sequence = secureRandom.nextInt(Long.valueOf(SEQUENCE_BIT).intValue());
        }
        this.lastTimestamp = currentTimeMillis;

        // 64 Bit ID (42(Millis)+5(Data Center ID)+5(Machine ID)+12(Repeat Sequence Summation))
        long nextId = ((currentTimeMillis-EPOCH_STAMP) << TIMESTAMP_LEFT)
                | (this.dataCenterId << DATA_CENTER_LEFT)
                | (this.machineId << MACHINE_LEFT)
                | this.sequence;

        return nextId;
    }

    private long tilNextMillis(long lastTimestamp) {
        long currentTimeMillis = this.currentTimeMillis();
        while (currentTimeMillis <= lastTimestamp) {
            currentTimeMillis = this.currentTimeMillis();
        }
        return currentTimeMillis;
    }

    private long currentTimeMillis() {
        return System.currentTimeMillis();
    }

    public static void main(String[] args) throws Exception {
        SnowflakeManager snowflakeManager = new SnowflakeManager(0L,0L);
        long l = snowflakeManager.nextValue();
        System.out.println(l);
    }
}
- 1、因为生成雪花id时要传入两个long型的参数,所以将这两个参数提到配置文件中来
application.yml (里面的包名改成自己的)
com:
  linshan:
    demo1:
      snowflake:
        machine-id: 1
        data-center-id: 1
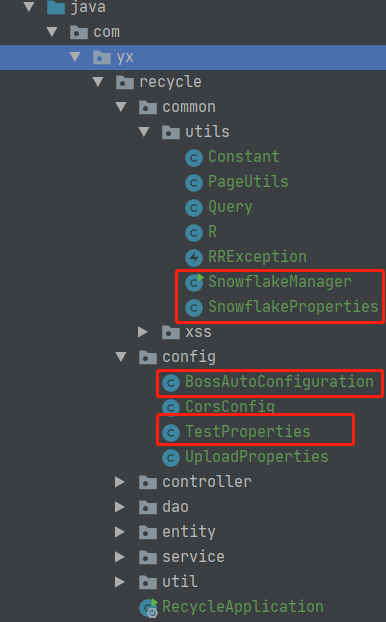
我的包结构如下:(可以自己适当调整)
- 2、创建一个类 TestProperties ,来获取配置文件中的信息,一个类 SnowflakeProperties 来存需要传入的两个参数。
TestProperties
import com.linshan.demo1.entity.SnowflakeProperties;
import lombok.Data;
import org.springframework.boot.context.properties.ConfigurationProperties;

@Data
//包名更改成自己的
@ConfigurationProperties(prefix = "com.linshan.demo1")
public class TestProperties {

    private SnowflakeProperties snowflake;

}
SnowflakeProperties
import lombok.Getter;
import lombok.Setter;

@Getter
@Setter
public class SnowflakeProperties {
    private long machineId;
    private long dataCenterId;
}
- 3、创建 BossAutoConfiguration 类
- 这里注意的是@EnableConfigurationProperties注解的作用是:使使用 @ConfigurationProperties 注解的类生效。
import com.linshan.demo1.entity.SnowflakeManager;
import org.springframework.beans.factory.annotation.Autowired;
import org.springframework.boot.autoconfigure.condition.ConditionalOnMissingBean;
import org.springframework.boot.context.properties.EnableConfigurationProperties;
import org.springframework.context.annotation.Bean;
import org.springframework.context.annotation.Configuration;

@Configuration
@EnableConfigurationProperties(TestProperties.class)
public class BossAutoConfiguration {
    @Autowired
    private TestProperties properties;

    @Bean
    @ConditionalOnMissingBean
    public SnowflakeManager snowflakeManager() {
        return new SnowflakeManager(this.properties.getSnowflake().getMachineId(), this.properties.getSnowflake().getDataCenterId());
    }
}
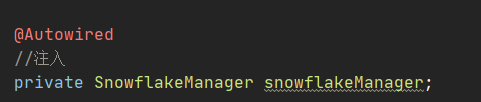
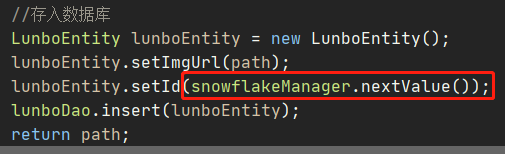
- 4、最后就是直接在需要使用的类中注入即可
一个小小后端的爬行痕迹

 浙公网安备 33010602011771号