
SDN第7次实验
(一)基本要求
(1)编写Python程序,调用OpenDaylight的北向接口下发指令删除s1上的流表数据。
def http_detele(url):
    url = url
    headers = {'Content-Type': 'application/json'}
    resp = requests.delete(url, headers=headers, auth=HTTPBasicAuth('admin', 'admin'))
    return resp


if __name__ == '__main__':
    url = 'http://127.0.0.1:8181/restconf/config/opendaylight-inventory:nodes/node/openflow:1/'
    with open('test.json') as f:
        jstr = f.read()
    resp = http_detele(url)
    print(resp.content)
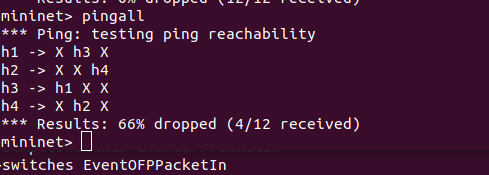
(2) 编写Python程序,调用OpenDaylight的北向接口下发硬超时流表,实现拓扑内主机h1和h3网络中断20s。

import requests
from requests.auth import HTTPBasicAuth


def http_put(url, jstr):
    url = url
    headers = {'Content-Type': 'application/json'}
    resp = requests.put(url, jstr, headers=headers, auth=HTTPBasicAuth('admin', 'admin'))
    return resp


if __name__ == '__main__':
    url = 'http://127.0.0.1:8181/restconf/config/opendaylight-inventory:nodes/node/openflow:1/flow-node-inventory:table/0/flow/1'
    with open('test.json') as f:
        jstr = f.read()
    resp = http_put(url, jstr)
    print(resp.content)
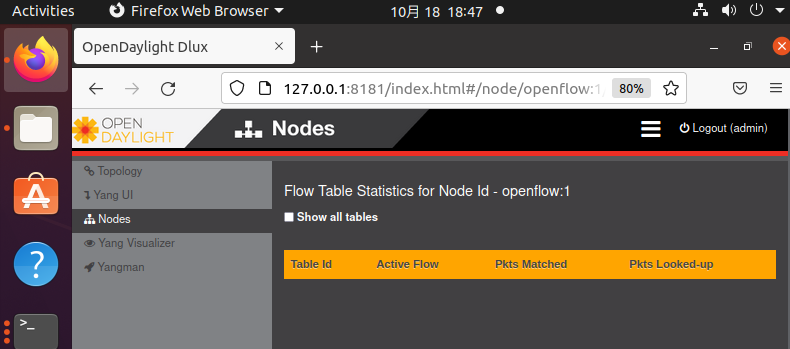
(4)编写Python程序,调用OpenDaylight的北向接口获取s1上活动的流表数。
def http_get(url):
    url = url
    headers = {'Content-Type': 'application/json'}
    resp = requests.get(url, headers=headers, auth=HTTPBasicAuth('admin', 'admin'))
    return resp


if __name__ == '__main__':
    url = 'http://127.0.0.1:8181/restconf/operational/opendaylight-inventory:nodes/node/openflow:1/flow-node-inventory:table/0/opendaylight-flow-table-statistics:flow-table-statistics'
    with open('test.json') as f:
        jstr = f.read()
    resp = http_get(url)
    print(resp.content)

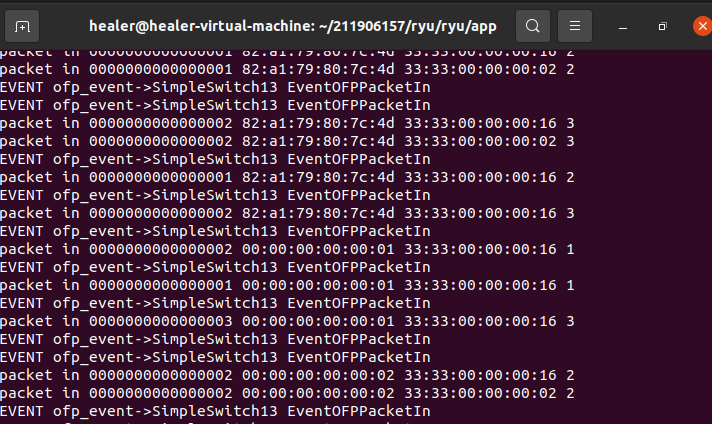
2.ryu
(1)编写Python程序,调用Ryu的北向接口,实现上述OpenDaylight实验拓扑上相同的硬超时流表下发。

def http_post(url, js):
    headers = {'Content-Type': 'application/json'}
    resp = requests.post(url, jstr, headers=headers)
    print(resp)


if __name__ == '__main__':
    url = 'http://localhost:8080/stats/flowentry/add'
    with open('test.json') as f:
        jstr = f.read()
    http_post(url, jstr)
{
"dpid": 1,
"match": {
"in-port": "1",
"dl_dst": "00:00:00:00:00:03"
},
"priority": 65535,
"hard_timeout": 20,
"cookie": "2",
"table_id": 0,
"actions": []
}
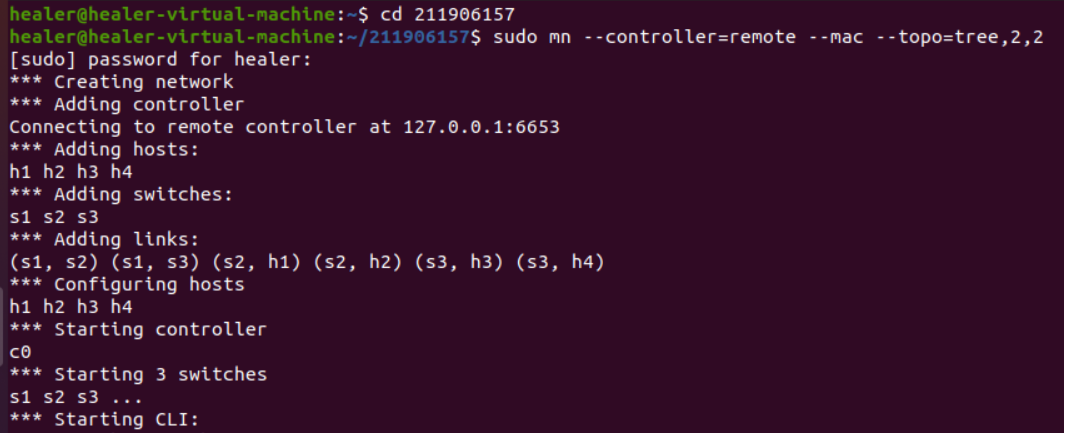
(2) 利用Mininet平台搭建下图所示网络拓扑,要求支持OpenFlow 1.3协议,主机名、交换机名以及端口对应正确。拓扑生成后需连接Ryu,且Ryu应能够提供REST API服务。

(3) 整理一个Shell脚本,参考Ryu REST API的文档,利用curl命令,实现和实验2相同的VLAN。
curl -X POST -d '{
  "dpid": 1,
  "match": {
    "in_port": 1
  },
  "actions": [
    {
      "type": "PUSH_VLAN",
      "ethertype": 33024
    },
    {
      "type": "SET_FIELD",
      "field": "vlan_vid",
      "value": 4096
    },
    {
      "type":"OUTPUT",
      "port": 3
    }
    ],
    "priority":5
}' http://localhost:8080/stats/flowentry/add

curl -X POST -d '
{
  "dpid": 1,
  "priority":5,
  "match": {
    "in_port": 2
  },
  "actions": [
    {
      "type": "PUSH_VLAN",
      "ethertype": 33024
    },
    {
      "type": "SET_FIELD",
      "field": "vlan_vid",
      "value": 4097
    },
    {
      "type":"OUTPUT",
      "port": 3
    }
    ]
}' http://localhost:8080/stats/flowentry/add

curl -X POST -d '
{
  "dpid": 1,
  "match": {
    "vlan_vid": 0
  },
  "actions": [
    {
      "type": "POP_VLAN",
      "ethertype": 33024
    },
    {
      "type":"OUTPUT",
      "port": 1
    }
    ],
    "priority":5
}
' http://localhost:8080/stats/flowentry/add

curl -X POST -d'
{
  "dpid": 1,
  "match": {
    "vlan_vid": 1
  },
  "actions": [
    {
      "type": "POP_VLAN",
      "ethertype": 33024
    },
    {
      "type":"OUTPUT",
      "port": 2
    }
    ],
    "priority":5
}
' http://localhost:8080/stats/flowentry/add
curl -X POST -d '{
  "dpid": 2,
  "match": {
    "in_port": 1
  },
  "actions": [
    {
      "type": "PUSH_VLAN",
      "ethertype": 33024
    },
    {
      "type": "SET_FIELD",
      "field": "vlan_vid",
      "value": 4096
    },
    {
      "type":"OUTPUT",
      "port": 3
    }
    ],
    "priority":5
}' http://localhost:8080/stats/flowentry/add

curl -X POST -d '
{
  "dpid": 2,
  "match": {
    "in_port": 2
  },
  "actions": [
    {
      "type": "PUSH_VLAN",
      "ethertype": 33024
    },
    {
      "type": "SET_FIELD",
      "field": "vlan_vid",
      "value": 4097
    },
    {
      "type":"OUTPUT",
      "port": 3
    }
    ],
    "priority":5
}' http://localhost:8080/stats/flowentry/add

curl -X POST -d '
{
  "dpid": 2,
  "match": {
    "vlan_vid": 0
  },
  "actions": [
    {
      "type": "POP_VLAN",
      "ethertype": 33024
    },
    {
      "type":"OUTPUT",
      "port": 1
    }
    ],
    "priority":5
}
' http://localhost:8080/stats/flowentry/add

curl -X POST -d'
{
  "dpid": 2,
  "match": {
    "vlan_vid": 1
  },
  "actions": [
    {
      "type": "POP_VLAN",
      "ethertype": 33024
    },
    {
      "type":"OUTPUT",
      "port": 2
    }
    ],
    "priority":5
}' http://localhost:8080/stats/flowentry/add
(二)进阶
编程实现基本要求第2部分Ryu(3)中的VLAN划分。
import requests

def http_post(url, js):
    headers = {'Content-Type': 'application/json'}
    resp = requests.post(url, jstr, headers=headers)
    print(resp.content)


if __name__ == '__main__':
    url = 'http://localhost:8080/stats/flowentry/add'
    for i in range(1, 9):
        with open('%s.json' % i) as f:
            jstr = f.read()
        http_post(url, jstr)
(将流表项分开为8个json文件并且逐个读取添加)
(三)心得
这次实验也较为成功。借鉴了网络还有大佬的哈哈哈哈快了很多(狠狠推荐https://www.cnblogs.com/Moonlightcode/p/15416597.html)。刚开始ODL里面重复删除流表导致一直无法下发删除命令。get取得活跃流表值也一直是零。。后面逐步解决了。也一直主要是python代码的编写。然后因为python代码有严格的缩进等等的要求,搞了很久。。百度排错。。还有学习了auno编写py文件,是ctrl + O 保存,ctrl + X推出。用更新pip的方法还是运行不了py文件,直接可以用python3 命令运行,不过格式上print()不能忘记加。再ryu的实验中 因为没有彻底结束ODL的使用第一次出错了,重启虚拟机就解决了,还有进阶同样是of_ctl.py是在app下面。这次就是通过py语言实现和postman一样的功能。进阶还是借鉴了同学啊哈哈哈哈。希望再接再厉!


