HIVE学习(待更新)
1 安装hive

下载
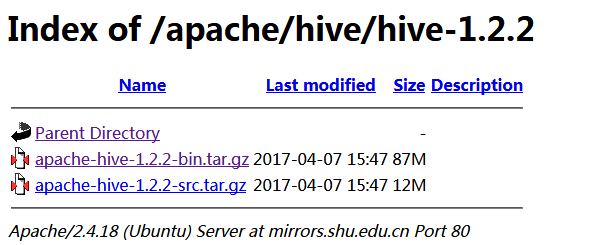
http://mirrors.shu.edu.cn/apache/hive/hive-1.2.2/,红框中的不需要编译。
由于hive是默认将元数据保存在本地内嵌的 Derby 数据库中,但是这种做法缺点也很明显,Derby不支持多会话连接,因此本文将选择mysql作为元数据存储。
安装mysql
yum安装mysql

1  wget -i -c http://dev.mysql.com/get/mysql57-community-release-el7-10.noarch.rpm

2 yum -y install mysql57-community-release-el7-10.noarch.rpm

3 yum -y install mysql-community-server

启动MySQL
systemctl start  mysqld.service
查看MySQL运行状态
systemctl status mysqld.service

mysql -uroot -p     # 回车后会提示输入密码
此时MySQL已经开始正常运行,不过要想进入MySQL还得先找出此时root用户的密码,通过如下命令可以在日志文件中找出密码:
ALTER USER 'root'@'localhost' IDENTIFIED BY 'new password';
12345

具体请参考
https://www.cnblogs.com/brianzhu/p/8575243.html

tar -zxvf apache-hive-1.2.3-bin.tar.gz 后的内容如下,进入到conf

cp hive-default.xml.template hive-site.xml
编辑文件hive-site.xml
<?xml version="1.0" encoding="utf-8"?> <?xml-stylesheet type="text/xsl" href="configuration.xsl"?> <!-- Licensed to the Apache Software Foundation (ASF) under one or more contributor license agreements. See the NOTICE file distributed with this work for additional information regarding copyright ownership. The ASF licenses this file to You under the Apache License, Version 2.0 (the "License"); you may not use this file except in compliance with the License. You may obtain a copy of the License at http://www.apache.org/licenses/LICENSE-2.0 Unless required by applicable law or agreed to in writing, software distributed under the License is distributed on an "AS IS" BASIS, WITHOUT WARRANTIES OR CONDITIONS OF ANY KIND, either express or implied. See the License for the specific language governing permissions and limitations under the License. --> <configuration> <property> <name>javax.jdo.option.ConnectionUserName</name> <value>xxxx</value> </property> <property> <name>javax.jdo.option.ConnectionPassword</name> <value>xxxx</value> </property> <property> <name>javax.jdo.option.ConnectionURL</name>mysql <value>jdbc:mysql://hostIP:3306/hive?createDatabaseIfNotExist=true&useSSL=false&nullNamePatternMatchesAll=true</value> </property> <property> <name>javax.jdo.option.ConnectionDriverName</name> <value>com.mysql.jdbc.Driver</value> </property> </configuration>
复制mysql的驱动程序到hive/lib下面
2 hive启动方式
运行hive之前首先要确保meta store服务已经启动,

nohup hive --service metastore > metastore.log 2>&1 &


如果需要用到远程客户端(比如 Tableau)连接到hive数据库,还需要启动hive service

nohup hive --service hiveserver2 > hiveserver2.log 2>&1 &

[sms@gc64 conf]$ hive --help
Usage ./hive <parameters> --service serviceName <service parameters>
Service List: beeline cli help hiveburninclient hiveserver2 hiveserver hwi jar lineage metastore metatool orcfiledump rcfilecat schemaTool version
Parameters parsed:
  --auxpath : Auxillary jars
  --config : Hive configuration directory
  --service : Starts specific service/component. cli is default
Parameters used:
  HADOOP_HOME or HADOOP_PREFIX : Hadoop install directory
  HIVE_OPT : Hive options
For help on a particular service:
  ./hive --service serviceName --help
Debug help:  ./hive --debug --help
hive2.0一下没有web查看
[sms@gc64 ~]$ hive

Logging initialized using configuration in jar:file:/home/sms/app/apache-hive-1.2.2-bin/lib/hive-common-1.2.2.jar!/hive-log4j.properties
Loading class `com.mysql.jdbc.Driver'. This is deprecated. The new driver class is `com.mysql.cj.jdbc.Driver'. The driver is automatically registered via the SPI and manual loading of the driver class is generally unnecessary.
hive>
    >
    >
    > show databases;
OK
default
Time taken: 1.285 seconds, Fetched: 1 row(s)
hive>
    >
    >
    >
    >
    >
    >
    >
    >
    >
from pyspark.sql import HiveContext,Row
from pyspark import SparkConf, SparkContext
conf = SparkConf().setMaster("local").setAppName("count")
sc = SparkContext(conf=conf)
hiveCtx=HiveContext(sc)
hiveCtx.sql("show tables").show()
hiveCtx.sql("select count(1) from (select msid from raw_data group by msid) a").show()


