

拿到GPU服务器后要干什么
0. 上架服务器
上架服务器,配置IPMI。
1. 安装ubuntu server
登录IPMI管理ip,加载ubuntu-server的iso安装包为virtual media。重启选择安装介质。
安装系统,选装OpenSSH, docker等需要的软件。配置网络ipv4静态ip,掩码,网关等
https://ubuntu.com/tutorials/install-ubuntu-server
注意:系统安装时选择的 docker 是用snap安装的,service名字会带有snap,访问docker服务需要通过snap操作。
注意:snap docker更换镜像源需要更改 /var/snap/docker/current/config/daemon.json,再 sudo snap restart docker
自行安装可以参照这里,或直接使用官方脚本安装
curl https://get.docker.com | sh \
  && sudo systemctl --now enable docker
安装完成后,可以配一下docker组 / rootless docker,启动服务等等。
下面是一个daemon.json的示例
{
    "registry-mirrors": [
        "http://hub-mirror.c.163.com",
        "https://docker.mirrors.ustc.edu.cn",
        "https://registry.docker-cn.com"
    ],
    "runtimes": {
        "nvidia": {
            "args": [],
            "path": "nvidia-container-runtime"
        }
    }
}
关于 rootless docker + nvidia-docker 不能正确调用gpu的问题,在 /etc/nvidia-container-runtime/config.toml 中的 [nvidia-container-cli] 栏添加 no-cgroups = true
2. 安装NVIDIA全家桶
sudo apt install ubuntu-drivers-common ubuntu-drivers devices
提示推荐下载 nvidia-driver-510 (还是下 nvidia-driver-510-server 吧,不然会安装X图形界面)
sudo apt install nvidia-driver-510
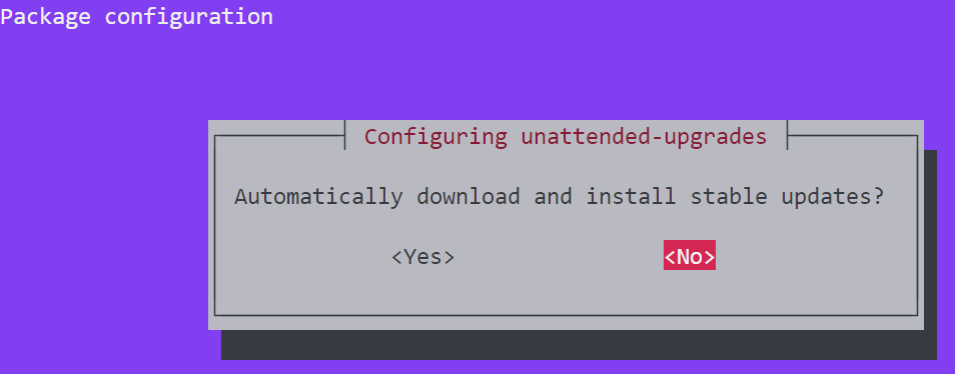
关掉 unattended-upgrades 的自动更新,这玩意会自动更新显卡驱动,造成某些程序的版本不支持问题。执行:
sudo dpkg-reconfigure unattended-upgrades
在弹出窗口界面选择 no 即可
完成上述安装后sudo reboot重启,自动进入x server,此时ctrl+alt+F3进入命令行,查看 nvidia-smi 看到显卡驱动安装成功
(秀一下显卡)

- 安装cuda
使用runfile的方法安装最方便(甚至可以用这个工具直接安装驱动):
https://docs.nvidia.com/cuda/cuda-installation-guide-linux/index.html#runfile
sudo sh cuda_<version>_linux.run --toolkit --silent --override
sudo vim /etc/environment # 在PATH变量中添加 "/usr/local/cuda/bin"
sudo vim /etc/ld.so.conf.d/cuda-<version>.conf # 若无内容则添加 "/usr/local/cuda/lib64"
sudo reboot
nvcc -V # 查看是否能打开,版本是否正确,确定binary安装成功
ldconfig -p | grep libcudart.so # 查看有无新安装的路径,若有则动态库安装成功
ps: /usr/local/cuda-<version> 是默认安装路径,/usr/local/cuda 会自动链接到某个版本,建议 ls -l 检查一下
sudo apt-get install zlib1g
wget https://developer.nvidia.com/compute/cudnn/secure/8.4.1/local_installers/11.6/cudnn-local-repo-ubuntu2004-8.4.1.50_1.0-1_amd64.deb # 来自 https://developer.nvidia.com/rdp/cudnn-download
sudo dpkg -i cudnn-local-repo-${OS}-8.x.x.x_1.0-1_amd64.deb
sudo cp /var/cudnn-local-repo-*/cudnn-local-*-keyring.gpg /usr/share/keyrings/
sudo apt-get update
sudo apt-get install libcudnn8=8.x.x.x-1+cudaX.Y
-4. 如果出了问题,卸载驱动、cuda、cudnn
https://docs.nvidia.com/cuda/cuda-installation-guide-linux/index.html#runfile-uninstallation
(实测510版驱动没有 nvidia-uninstall,那直接apt卸载:https://stackoverflow.com/a/62276101)
sudo apt-get --purge remove "*nvidia*"
sudo apt-get --purge remove "*cublas*" "cuda*" "nsight*"
3. 创建其他用户
sudo adduser [username]
# 批量创建用户:
# 文件每一行内容:pw_name:pw_passwd:pw_uid:pw_gid:pw_gecos:pw_dir:pw_shell
sudo newusers [users-info-file]
# 用`newusers`批量创建的用户并没有.bashrc .profile .bash_logout这样的文件,故我们需要从默认位置将这些bash配置复制到用户home下
cd /home
copy_and_chown() {
  if [ -e "${user}/${1}" ]; then
    cp /etc/skel/${1} $user/
    chown $user $user/${1}
  fi
}
for user in `ls -1`; do
  copy_and_chown .profile
  copy_and_chown .bashrc
  copy_and_chown .bash_logout
done
sudo visudo添加sudo权限 或者把用户直接添加到sudo组:
sudo usermod -G sudo -a [username]
# sudo usermod -G "" [username]
# 清除用户所在的二级组
如果发现用户名字写错了,可以更换用户名及所在目录,重命名用户组(一级组默认为用户名)
sudo usermod -d /home/[newname] -m -l [newname] [oldname]
sudo groupmod -n [newname] [oldname]
ps: 不要直接修改系统文件比如/etc/sudoer, /etc/passwd, /etc/group等,应使用visudo, usermod, groupmod等命令
Ubuntu账户管理,什么是一级二级组
用户及用户组重命名
man pages
4. 添加SSH连接,安装conda,安装cuda python环境测试
ssh连接到vscode(装系统的时候安装过OpenSSH),把本地公钥放到.ssh/authorized_keys,装各种插件
去官网wget下载anaconda安装包,bash Anaconda*****.sh 安装到/opt/anaconda3(都行)
修改/etc/bash.bashrc,将anaconda的默认路径添加到所有用户的PATH变量。
后来总有人向我反映 conda 打不开,PATH没加载上。可能是他们用了非bash登录?
The shell config file /etc/bash.bashrc is sometimes suggested for setting environment variables system-wide. While this may work on Bash shells for programs started from the shell, variables set in that file are not available by default to programs started from the graphical environment in a desktop session.
While /etc/profile is often suggested for setting environment variables system-wide, it is a configuration file of the base-files package, so it's not appropriate to edit that file directly. Use a file in /etc/profile.d instead as shown above. (Files in /etc/profile.d are sourced by /etc/profile.)
/etc/default/locale is specifically meant for system-wide locale environment variable settings. It's written to by the installer and when you use Language Support to set the language or regional formats system-wide. On a desktop system there is normally no reason to edit this file manually.
https://help.ubuntu.com/community/EnvironmentVariables
pip换源,conda换源,创建demo环境,下载pytorch测试
python -m pip install -i https://pypi.tuna.tsinghua.edu.cn/simple --upgrade pip
pip config set global.index-url https://pypi.tuna.tsinghua.edu.cn/simple

conda config --add channels https://mirrors.ustc.edu.cn/anaconda/pkgs/main/
conda create --name demo python=3.9
conda activate demo

conda install pytorch torchvision torchaudio cudatoolkit=11.3 -c pytorch
判断pytorch cuda cudnn等是否安装成功:
import torch

print('[pytorch version]:', torch.__version__)

if torch.cuda.is_available():
  print("[🈶] cuda.is_available()")

  # print cuda device name
  cuda_device_count = torch.cuda.device_count()
  print('[cuda device(s) ]:', cuda_device_count)
  for device_id in range(cuda_device_count):
    print('-', device_id, torch.cuda.get_device_name(device_id))
    # print(torch.cuda.get_device_properties(device_id))

  # check cudnn support
  if torch.backends.cudnn.is_available():
    print("[🈶] cudnn.is_available()")
    print('-', "cudnn.version:", torch.backends.cudnn.version())
  else:
    print("[🈚] cudnn.is_available()")

else:
  print("[🈚] cuda.is_available()")

# check mkl support
print(
  "[🈶]" if torch.backends.mkl.is_available() else "[🈚]",
  "mkl.is_available()"
  )

# check mklnn support
print(
  "[🈶]" if torch.backends.mkldnn.is_available() else "[🈚]",
  "mkldnn.is_available()"
  )

# check openmp support
print(
  "[🈶]" if torch.backends.openmp.is_available() else "[🈚]",
  "openmp.is_available()"
  )


【推荐】国内首个AI IDE,深度理解中文开发场景,立即下载体验Trae
【推荐】编程新体验,更懂你的AI,立即体验豆包MarsCode编程助手
【推荐】抖音旗下AI助手豆包,你的智能百科全书,全免费不限次数
【推荐】轻量又高性能的 SSH 工具 IShell:AI 加持,快人一步
· Manus爆火,是硬核还是营销?
· 终于写完轮子一部分:tcp代理 了,记录一下
· 震惊!C++程序真的从main开始吗?99%的程序员都答错了
· 别再用vector<bool>了!Google高级工程师:这可能是STL最大的设计失误
· 单元测试从入门到精通