
camunda_13_postgresql
前面都是使用H2数据库, 体验功能非常方便, 但分析table数据就比较麻烦了, 下面介绍如何使用postgresql作为后台数据库.
按照Camunda官方文档, 生产环境优先推荐Oracle 和 Postgresql, 当然MySQL和SQL Server也是支持的.
官方参考架构文档
下载并安装 postgresql
按照camunda和操作系统的要求, 我选择的是 postgresql 10.
安装过程序需要设定端口和超级账号 postgres 的密码.
下载网址
下载 jdbc driver
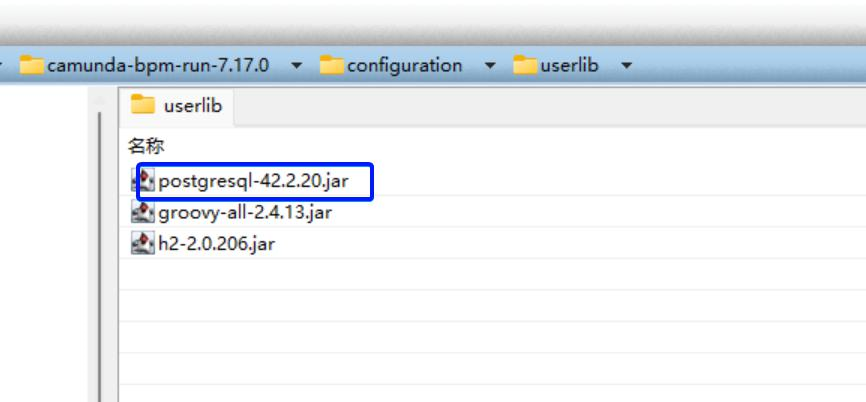
通过 dbeaver 软件很方便下载 postgresql jdbc driver, 并复制一份 jar 到 camunda 的 configuration\userlib\ 路径下.
创建数据库和table
-
在 dbeaver 手工创建一个 camunda 数据库, encoding选择 UTF8,

-
执行 configuration\sql\create\ 下的两个sql脚本, 创建数据表.
也可以在yaml文件中配置 schema-update 为 true, 由系统自动创建数据表.

修改 camunda 配置文件
生产环境应该参考 production.yml 进行设置. camunda 提供很多可配置项, 可参考官网, 配置属性
我是直接修改的 default.yml 文件, 仅改动了 datasource 和 logging.
spring.datasource:
    url: jdbc:postgresql://localhost:5432/camunda
    driver-class-name: org.postgresql.Driver
    username: postgres
    password: saas

logging:
    level.root: INFO
    file.name: logs/camunda-bpm-run.log

camunda.bpm:
    history-level: FULL
    history-level-default: FULL

    database:
        schema-update: true
        type: postgres
        jdbc-batch-processing: true
启动服务
启动完成后,登录http://localhost:8080/, 输入demo/demo账号登录.


【推荐】国内首个AI IDE,深度理解中文开发场景,立即下载体验Trae
【推荐】编程新体验,更懂你的AI,立即体验豆包MarsCode编程助手
【推荐】抖音旗下AI助手豆包,你的智能百科全书,全免费不限次数
【推荐】轻量又高性能的 SSH 工具 IShell:AI 加持,快人一步
· 震惊!C++程序真的从main开始吗?99%的程序员都答错了
· 【硬核科普】Trae如何「偷看」你的代码?零基础破解AI编程运行原理
· 单元测试从入门到精通
· 上周热点回顾(3.3-3.9)
· winform 绘制太阳,地球,月球 运作规律