Caddy2静态网站设置
============================
caddy2 文档
============================
https://caddy2.dengxiaolong.com/docs/
https://github.com/phpple/caddy2-cn-doc
============================
网站路径规划
============================
/root/web/caddy 目录存储Caddyfile
/root/web/site 目录存储web网页
/${HOME}/.local/share/caddy   Caddy2 会自动创建的 data storage 目录,用来存储CA证书
/${HOME}/.config/caddy/     Caddy2会自动创建的配置文件路径,比如存放 autosave.json 文件等
============================
CentOS 7环境的下载并安装
============================
最好是关闭SELinux, 否则 systemctl 自动启动会碰到很多问题.
#download
wget https://github.com/caddyserver/caddy/releases/download/v2.4.6/caddy_2.4.6_linux_amd64.tar.gz

#upzip
tar -zxf caddy_2.4.6_linux_amd64.tar.gz caddy

#copy file to program path
mv ./caddy  /usr/local/bin/

#设置仅root账号能写caddy二进制文件,其他账号可读可执行
chmod 755 /usr/local/bin/caddy

#check caddy 程序
which caddy
caddy version
============================
创建专有的用户
============================
systemd service自动启动需要先设置专有的用户
groupadd --system caddy

useradd --system \
--gid caddy \
--create-home \
--home-dir /var/lib/caddy \
--shell /usr/sbin/nologin \
--comment "Caddy web server" \
caddy
============================
创建相关目录和文件
============================
#创建一个空的 Caddyfile, 该文件并不是json格式, Caddy还支持另一种adapt的Json配置文件, 用的较少
#推荐将Caddyfile放到 /etc/caddy 路径下,这里为了方便备份放到 root 账号的路径下了。
mkdir -p /root/web/caddy/


#设置目录的owner为root账号和caddy group账号
chown -R root:caddy  /root/web/caddy
touch /root/web/caddy/Caddyfile
#创建web网页的存储目录
mkdir -p /root/web/site

#将目录的owner设置好为caddy group和user账号
chown caddy:caddy /root/web/site
============================
创建自启动服务配置文件
============================
#该配置文件中包含 Caddyfile 路径
touch /etc/systemd/system/caddy.service

#设置仅root账号可以修改该文件
chmod 644 /etc/systemd/system/caddy.service
下面是 /etc/systemd/system/caddy.service 文件的内容, 摘自caddy 的 github caddy.service 文件.
修改的仅仅是caddy 的执行路径:
# caddy.service
#
# For using Caddy with a config file.
#
# Make sure the ExecStart and ExecReload commands are correct
# for your installation.
#
# See https://caddyserver.com/docs/install for instructions.
#
# WARNING: This service does not use the --resume flag, so if you
# use the API to make changes, they will be overwritten by the
# Caddyfile next time the service is restarted. If you intend to
# use Caddy's API to configure it, add the --resume flag to the
# `caddy run` command or use the caddy-api.service file instead.

[Unit]
Description=Caddy
Documentation=https://caddyserver.com/docs/
After=network.target network-online.target
Requires=network-online.target

[Service]
Type=notify
User=caddy
Group=caddy
ExecStart=/usr/local/bin/caddy run --environ --config /root/web/caddy/Caddyfile
ExecReload=/usr/local/bin/caddy reload --config /root/web/caddy/Caddyfile
TimeoutStopSec=5s
LimitNOFILE=1048576
LimitNPROC=512
PrivateTmp=true
ProtectSystem=full
AmbientCapabilities=CAP_NET_BIND_SERVICE

[Install]
WantedBy=multi-user.target
============================
设置80/443端口防火墙
============================
#(可选,仅CentOS),关闭防火墙(如果之前没关闭的话)
systemctl status firewalld
systemctl stop firewalld
systemctl mask firewalld

# 如果不想关闭,可以加如下规则
firewall-cmd --permanent --zone=public --add-service=http
firewall-cmd --permanent --zone=public --add-service=https
firewall-cmd --reload
============================
启动 Caddy 服务
============================
# reloading daemon to apply caddy system service file
sudo systemctl daemon-reload

# starting caddy
sudo systemctl start caddy

# activating caddy system file
sudo systemctl enable caddy
sudo systemctl restart caddy

#check status
systemctl status caddy.service
============================
几种配置域名SSL证书的方式
============================
1 自签名方式,caddyfile中的语法:
   tls self_signed
   Caddy生成一个不可信的自签名证书,但可达到了密文传输的效果, 该证书持续7天,所以它一般仅用于本地开发。
2. 手工向证书发行方申请
   手动从证书发行方申请证书,然后在Caddy配置中指定证书和秘钥文件路径:
   tls /path/example.com.crt /path/example.com.key
3. 主机自动申请方式
   如果目标域名(例如: example.com)已经解析到了本机,那么 Caddy2 启动后会尝试自动通过 ACME HTTP 申请证书(默认的证书发行方为 let's encrypt)。
   优点:配置简单,
   语法如下, 后面的 email 参数是告知 CA 申请人的邮箱。
   tls email
2. dns 自动申请方式
   Let's encrypt通过域名服务商提供的域名解析记录api,来验证我们对域名的所有权。
   优点:不需要任何公网IP地址,只要通过dns的解析记录即可完成验证; 另外,如果网站启用了 CDN,必须使用这个方式。
   缺点:配置比较麻烦,需要设置一些环境变量,另外还需要下载对应dns 服务商的插件(插件简化了caddy调用DNS服务商API的过程),。 caddyfile中的语法:
   tls {
    dns <provider> ...
   }
==================================
编辑 Caddyfile 文件,并实现域名HTTP重定向HTTPS
==================================
/root/web/caddy/Caddyfile 文件内容如下:
下面配置已经支持404错误跳转,
http://example.com {
        redir https://example.com{url}
}

https://example.com {
        tls hostmaster@example.com
        root * /root/web/site
        encode gzip
        file_server
        header / {
                Content-Security-Policy = "upgrade-insecure-requests; default-src 'self'; style-src 'self'; script-src 'self'; img-src 'self'; object-src 'self'; worker-src 'self'; manifest-src 'self';"
                Strict-Transport-Security = "max-age=63072000; includeSubDomains; preload"
                X-Xss-Protection = "1; mode=block"
                X-Frame-Options = "DENY"
                X-Content-Type-Options = "nosniff"
                Referrer-Policy = "strict-origin-when-cross-origin"
                Permissions-Policy = "fullscreen=(self)"
                cache-control = "max-age=0,no-cache,no-store,must-revalidate"
        }
        handle_errors {
                @404 {
                     expression {http.error.status_code}==404
                }
                rewrite @404 /404.html
                file_server
        }
}
说明:
1.First line tells the caddy the domain name(example.com) that
block of configuration belongs to. It’s also used to fetch SSL
certificates.
2.The TLS block helps us to configure SSL for the
domain, for this specific file configuration email the hostname for any
issuance and errors in the SSL fetching and configuration
3.Root tells the root directory of the website contents
4.Encoding of the content
5.File_server helps caddy to serve static files
6.Header
block tells caddy to send these headers along with the response, the
specific config tells caddy to serve CSP, XSS, HSTS and cache control
headers along with the response
============================
常用命令
============================
# 以后台的方式启动 caddy
caddy start --config  /root/web/caddy/Caddyfile

# 以前台的方式启动 caddy
caddy run --config  /root/web/caddy/Caddyfile

# 停止
caddy stop

# reload 配置文件
caddy reload  --config  /root/web/caddy/Caddyfile


# 安装 CA 证书到本地目录
caddy trust

# 美化(格式化) Caddyfile
caddy fmt --overwrite /root/web/caddy/Caddyfile

# 将标准的 Caddyfile 转成 json 格式的等效配置文件, 一般不用这种配置文件
caddy adapt --config  /root/web/caddy/Caddyfile -pretty
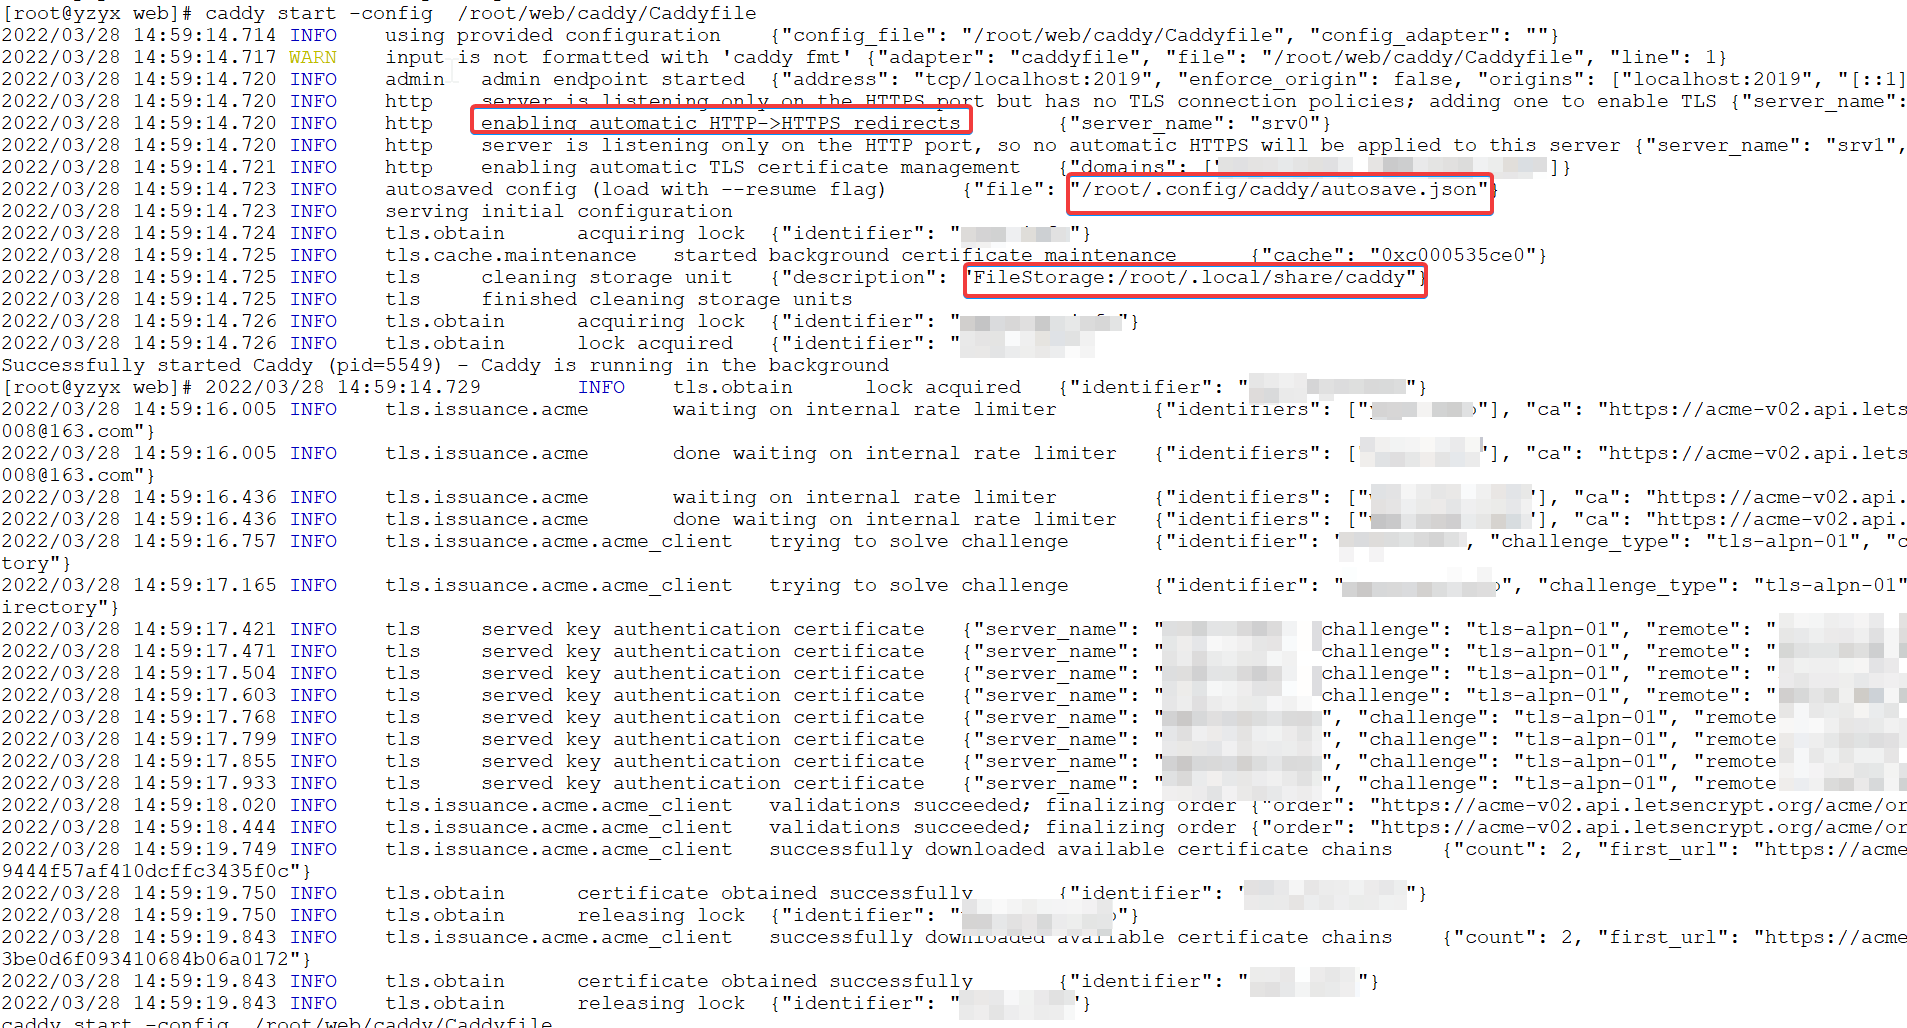
下面是 caddy start -config /root/web/caddy/Caddyfile 的启动截图:

============================
调整 ulimit 限定和 file-max 设定
============================
linux对每个用户都有默认的 ulimit 限制,一般情况下这这些设定值不适合作为web 服务器, 需要上调设定值, 设定值分soft和 hard两类, 硬配置必须大于等于软配置。
vi /etc/security/limits.conf
# 新增内容
*        soft    noproc 10240
*        hard    noproc 10240
*        soft    nofile 10240
*        hard    nofile 10240
ulimit 设定的是每个用户可打开句柄, fs.file-max 参数是整个操作系统可以打开的文件句柄数
vi /etc/sysctl.conf
# 新增内容
fs.file-max = 6553560
设置后需要重启Linux.
============================
参考
============================
https://caddy2.dengxiaolong.com/docs/
https://github.com/phpple/caddy2-cn-doc
https://www.jianshu.com/p/808a479ad138
https://www.geeksforgeeks.org/how-to-deploy-static-website-using-caddy-webserver/
https://zhuanlan.zhihu.com/p/389189311
https://tophat.top/posts/47d46cc9.html
https://vip.kingdee.com/article/2478?productLineId=1


【推荐】国内首个AI IDE,深度理解中文开发场景,立即下载体验Trae
【推荐】编程新体验,更懂你的AI,立即体验豆包MarsCode编程助手
【推荐】抖音旗下AI助手豆包,你的智能百科全书,全免费不限次数
【推荐】轻量又高性能的 SSH 工具 IShell:AI 加持,快人一步
· 震惊!C++程序真的从main开始吗?99%的程序员都答错了
· 【硬核科普】Trae如何「偷看」你的代码?零基础破解AI编程运行原理
· 单元测试从入门到精通
· 上周热点回顾(3.3-3.9)
· winform 绘制太阳,地球,月球 运作规律