
[Pyside6-Study] Chapter-2
1.面对对象的设计原则

# Import required modules
import sys
import time
from PySide6.QtWidgets import QApplication, QWidget


class SampleWindow(QWidget):
    """ Our main window class"""
    # Constructor function
    def __init__(self):
        QWidget.__init__(self)
        self.setWindowTitle("Sample Window")
        self.setGeometry(300, 300, 200, 150)
        self.setMinimumHeight(100)
        self.setMinimumWidth(250)
        self.setMaximumHeight(200)
        self.setMaximumWidth(800)

if __name__ == '__main__':
# Exception Handling
    try:
        myApp = QApplication(sys.argv)
        myWindow = SampleWindow()
        myWindow.show()
        time.sleep(3)
        myWindow.resize(300, 300)
        myWindow.setWindowTitle("Sample Window Resized")
        myWindow.repaint()
        myApp.exec()
        sys.exit(0)
    except NameError:
        print("Name Error:", sys.exc_info()[1])
    except SystemExit:
        print("Closing Window...")
    except Exception:
        print (sys.exc_info()[1])
继承QWidget类,QWidget类是主事件循环类,继承后需对主事件循环类实例使的初始化函数调用;
不使用继承时实例化就默认调用才不需要专门进行调用;
其它函数就字面意思
以下是我个人的编码习惯
# Import required modules
import sys
from PySide6.QtWidgets import QApplication, QWidget

class Main:
    def __init__(self) -> None:
        self.app = QApplication(sys.argv)
    def Design(self):
        self.win=QWidget()
        self.win.setWindowTitle("write by hardfood")
        self.win.setGeometry(300, 300, 200, 150)
        self.win.setMinimumHeight(100)
        self.win.setMinimumWidth(250)
        self.win.setMaximumHeight(200)
        self.win.setMaximumWidth(800)
        self.win.show()
    def run(self):
        self.Design()
        self.app.exec()

if __name__ == '__main__':
    xe = Main()
    xe.run()
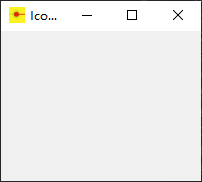
2.创建应用图标
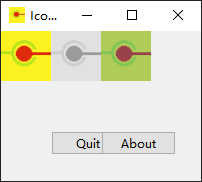
# Import required modules
import sys
from PySide6.QtGui import QIcon
from PySide6.QtWidgets import QApplication, QWidget
class SampleWindow(QWidget):
    """ Our main window class
    """
    def __init__(self):
        """ Constructor Function
        """
        QWidget.__init__(self)
        self.setWindowTitle("Icon Sample")
        self.setGeometry(300, 300, 200, 150)
    def setIcon(self):
        """ Function to set Icon
        """
        appIcon = QIcon('pyside_logo.png')
        self.setWindowIcon(appIcon)

if __name__ == '__main__':
 # Exception Handling
    try:
        myApp = QApplication(sys.argv)
        myWindow = SampleWindow()
        myWindow.setIcon()
        myWindow.show()
        myApp.exec()
        sys.exit(0)
    except NameError:
        print("Name Error:", sys.exc_info()[1])
    except SystemExit:
        print("Closing Window...")
    except Exception:
        print(sys.exc_info()[1])
运行效果如下
如下为ICON类的构造函数,字面意思
QIcon()
QIcon(engine)
QIcon(other)
QIcon(pixmap)
QIcon(filename)
3.QIcon(pixmap)
通过使用应用于QIcon类的位图函数定义图标的状态,QIcon类提供了各种显示图标的状态。
pixmap函数的语法是QIcon.pixmap(width, height[, mode=Normal[, state=Off]])
参数width和height表示图标的大小。根据行为的不同,状态可以是以下四种状态中的任何一种:
| 内容 | 描述 |
|
QIcon.Normal
|
显示当用户没有与图标交互,但图标所代表的功能可用时的位图 |
|
QIcon.Disabled
|
显示当图标所代表的功能不可用时的位图 |
|
QIcon.Active
|
当图标所代表的功能可用时显示位图,并且用户正在与图标进行交互,例如,将鼠标移到图标上或单击图标。 |
|
QIcon.Selected
|
显示当图标所代表的项目被选中时的位图。 |
状态参数可以用来描述位图要使用的状态。它可以取以下两个值中的任何一个
| 内容 | 描述 |
|
QIcon.Off
|
当小部件处于“关闭”状态时显示位图 |
|
QIcon.On
|
当小部件处于“打开”状态时显示位图 |
下面的函数将为你提供一个各种图标模式的例子,我们通过在位图函数中设置模式来创建图标。在SampleWindow类中添加前面程序中的以下函数。
    def setIconModes(self):
        myIcon1 = QIcon('pyside_logo.png')
        myLabel1 = QLabel('sample', self)
        pixmap1 = myIcon1.pixmap(50, 50, QIcon.Active, QIcon.On)
        myLabel1.setPixmap(pixmap1)
        myIcon2 = QIcon('pyside_logo.png')
        myLabel2 = QLabel('sample', self)
        pixmap2 = myIcon2.pixmap(50, 50, QIcon.Disabled, QIcon.Off)
        myLabel2.setPixmap(pixmap2)
        myLabel2.move(50, 0)
        myIcon3 = QIcon('pyside_logo.png')
        myLabel3 = QLabel('sample', self)
        pixmap3 = myIcon3.pixmap(50, 50, QIcon.Selected, QIcon.On)
        myLabel3.setPixmap(pixmap3)
        myLabel3.move(100, 0)
现在,在主程序中添加以下代码来调用这个函数:
...
myWindow.setIcon()
myWindow.setIconModes()#这个
myWindow.show()
...
现完整代码如下
# Import required modules
import sys
from PySide6.QtGui import QIcon
from PySide6.QtWidgets import QApplication, QWidget,QLabel
class SampleWindow(QWidget):
    """ Our main window class
    """
    def __init__(self):
        """ Constructor Function
        """
        QWidget.__init__(self)
        self.setWindowTitle("Icon Sample")
        self.setGeometry(300, 300, 200, 150)
    def setIcon(self):
        """ Function to set Icon
        """
        appIcon = QIcon('pyside_logo.png')
        self.setWindowIcon(appIcon)
    def setIconModes(self):
        myIcon1 = QIcon('pyside_logo.png')
        myLabel1 = QLabel('sample', self)
        pixmap1 = myIcon1.pixmap(50, 50, QIcon.Active, QIcon.On)
        myLabel1.setPixmap(pixmap1)
        myIcon2 = QIcon('pyside_logo.png')
        myLabel2 = QLabel('sample', self)
        pixmap2 = myIcon2.pixmap(50, 50, QIcon.Disabled, QIcon.Off)
        myLabel2.setPixmap(pixmap2)
        myLabel2.move(50, 0)
        myIcon3 = QIcon('pyside_logo.png')#'pyside_logo.png'
        myLabel3 = QLabel('sample', self)
        pixmap3 = myIcon3.pixmap(50, 50, QIcon.Selected, QIcon.On)
        myLabel3.setPixmap(pixmap3)
        myLabel3.move(100, 0)
if __name__ == '__main__':
 # Exception Handling
    try:
        myApp = QApplication(sys.argv)
        myWindow = SampleWindow()
        myWindow.setIcon()
        myWindow.setIconModes()
        myWindow.show()
        myApp.exec()
        sys.exit(0)
    except NameError:
        print("Name Error:", sys.exc_info()[1])
    except SystemExit:
        print("Closing Window...")
    except Exception:
        print(sys.exc_info()[1])
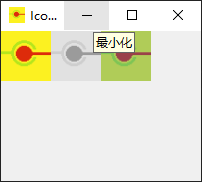
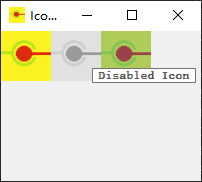
4.显示控件提示
我们的下一个定制是为所显示的图标的不同模式显示工具提示。
当您需要向用户显示一些帮助文本或信息时,工具提示非常方便。
显示窗口中使用的小部件的帮助文本是一个不可或缺的部分
GUI应用程序。我们使用QToolTip类为任何小部件提供工具提示(也称为气球帮助)。
QToolTip类定义了工具提示的属性,比如字体、颜色、富文本显示等等。例如,字体属性可以设置为:
QToolTip.setFont(QFont("Decorative", 8, QFont.Bold))
在设置字体之后,我们通过调用QWidget类提供的setToolTip()函数来将工具提示设置为小部件:
myLabel1.setToolTip('Active Icon')
修改前面的程序,如下面的代码片段所示:
def __init__(self):
 QWidget.__init__(self)
 self.setWindowTitle("Icon Sample")
 self.setGeometry(300, 300, 200, 150)
 QToolTip.setFont(QFont("Decorative", 8, QFont.Bold))
 self.setToolTip('Our Main Window')
 ...
def setIconModes(self):
...
 myLabel1.setPixmap(pixmap1)
 myLabel1.setToolTip('Active Icon')
 ...
 myLabel2.move(50, 0)
 myLabel2.setToolTip('Disabled Icon')
 ...
 myLabel3.move(100, 0)
 myLabel3.setToolTip('Selected Icon')
完整代码如下
# Import required modules
import sys
from PySide6.QtGui import QIcon,QFont
from PySide6.QtWidgets import QApplication, QWidget,QLabel,QToolTip

icon_path=r'C:\222.png'
class SampleWindow(QWidget):
    """ Our main window class
    """
    def __init__(self):
        """ Constructor Function
        """
        QWidget.__init__(self)
        self.setWindowTitle("Icon Sample")
        self.setGeometry(300, 300, 200, 150)
        QToolTip.setFont(QFont("Decorative", 8, QFont.Bold))
        self.setToolTip('Our Main Window')
    def setIcon(self):
        """ Function to set Icon
        """
        appIcon = QIcon(icon_path)
        self.setWindowIcon(appIcon)
    def setIconModes(self):
        myIcon1 = QIcon(icon_path)
        myLabel1 = QLabel('sample', self)
        myLabel1.setToolTip('Active Icon')
        pixmap1 = myIcon1.pixmap(50, 50, QIcon.Active, QIcon.On)
        myLabel1.setPixmap(pixmap1)
        myIcon2 = QIcon(icon_path)
        myLabel2 = QLabel('sample', self)
        myLabel2.setToolTip('Disabled Icon')
        pixmap2 = myIcon2.pixmap(50, 50, QIcon.Disabled, QIcon.Off)
        myLabel2.setPixmap(pixmap2)
        myLabel2.move(50, 0)
        myIcon3 = QIcon(icon_path)#icon_path
        myLabel3 = QLabel('sample', self)
        myLabel3.setToolTip('Selected Icon')
        pixmap3 = myIcon3.pixmap(50, 50, QIcon.Selected, QIcon.On)
        myLabel3.setPixmap(pixmap3)
        myLabel3.move(100, 0)
if __name__ == '__main__':
 # Exception Handling
    try:
        myApp = QApplication(sys.argv)
        myWindow = SampleWindow()
        myWindow.setIcon()
        myWindow.setIconModes()
        myWindow.show()
        myApp.exec()
        sys.exit(0)
    except NameError:
        print("Name Error:", sys.exc_info()[1])
    except SystemExit:
        print("Closing Window...")
    except Exception:
        print(sys.exc_info()[1])
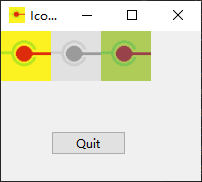
5.添加按钮控件
QPushButton可以用三种方式实例化。
它有三个参数不同构造函数。它们是:
QPushButton(parent=None)
QPushButton(text, [parent=None])
QPushButton(icon, text, [parent=None])
父参数可以是任何小部件,文本可以是任何字符串或一组unicode字符,icon是一个有效的QIcon对象。
在这个示例程序中,我们将添加一个按钮,该按钮将在单击时关闭应用程序。我们首先定义一个按钮,然后在点击(信号)时调用一个函数(槽)。
def setButton(self):
    """ Function to add a quit button
    """
    myButton = QPushButton('Quit', self)
    myButton.move(50, 100)
    myButton.clicked.connect(myApp.quit)
将前面的函数添加到前面的示例类中,并在调用myWindow的show()函数之前从__main__条件块中调用该函数。
这里的重点是myButton对象的click .connect()调用。
事件点击连接到插槽myApp.quit(),该插槽退出应用程序。
可以用一段代码或执行一组操作的用户定义函数替换槽。
要做到这一点,创建一个函数如下:
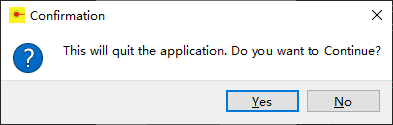
def quitApp(self):
    """ Function to confirm a message from the user
    """
    userInfo = QMessageBox.question(self, 'Confirmation',
    "This will quit the application. Do you want to Continue?",
    QMessageBox.Yes | QMessageBox.No)
    if userInfo == QMessageBox.Yes:
         myApp.quit()
    if userInfo == QMessageBox.No:
        pass
现在,改变setButton模块中的connect函数,在点击quit按钮时调用该函数:
myButton.clicked.connect(self.quitApp)
现所有代码如下:


# Import required modules
import sys
from PySide6.QtGui import QIcon,QFont
from PySide6.QtWidgets import QApplication, QWidget,QLabel,QToolTip,QPushButton,QMessageBox
#bili:崩析
icon_path=r'C:\222.png'
class SampleWindow(QWidget):
    """ Our main window class
    """
    def __init__(self):
        """ Constructor Function
        """
        QWidget.__init__(self)
        self.setWindowTitle("Icon Sample")
        self.setGeometry(300, 300, 200, 150)
        QToolTip.setFont(QFont("Decorative", 8, QFont.Bold))
        self.setToolTip('Our Main Window')
    def setIcon(self):
        """ Function to set Icon
        """
        appIcon = QIcon(icon_path)
        self.setWindowIcon(appIcon)
    def setIconModes(self):
        myIcon1 = QIcon(icon_path)
        myLabel1 = QLabel('sample', self)
        myLabel1.setToolTip('Active Icon')
        pixmap1 = myIcon1.pixmap(50, 50, QIcon.Active, QIcon.On)
        myLabel1.setPixmap(pixmap1)
        myIcon2 = QIcon(icon_path)
        myLabel2 = QLabel('sample', self)
        myLabel2.setToolTip('Disabled Icon')
        pixmap2 = myIcon2.pixmap(50, 50, QIcon.Disabled, QIcon.Off)
        myLabel2.setPixmap(pixmap2)
        myLabel2.move(50, 0)
        myIcon3 = QIcon(icon_path)#icon_path
        myLabel3 = QLabel('sample', self)
        myLabel3.setToolTip('Selected Icon')
        pixmap3 = myIcon3.pixmap(50, 50, QIcon.Selected, QIcon.On)
        myLabel3.setPixmap(pixmap3)
        myLabel3.move(100, 0)
    def setButton(self):
        """ Function to add a quit button
        """
        myButton = QPushButton('Quit', self)
        myButton.move(50, 100)
        # myButton.clicked.connect(myApp.quit)
        myButton.clicked.connect(self.quitApp)
    def quitApp(self):
        """ Function to confirm a message from the user
        """
        userInfo = QMessageBox.question(self, 'Confirmation',
            "This will quit the application. Do you want to Continue?",
            QMessageBox.Yes | QMessageBox.No)
        if userInfo == QMessageBox.Yes:
            myApp.quit()
        if userInfo == QMessageBox.No:
            pass
if __name__ == '__main__':
 # Exception Handling
    try:
        myApp = QApplication(sys.argv)
        myWindow = SampleWindow()
        myWindow.setIcon()
        myWindow.setIconModes()
        myWindow.setButton()
        myWindow.show()
        myApp.exec()
        sys.exit(0)
    except NameError:
        print("Name Error:", sys.exc_info()[1])
    except SystemExit:
        print("Closing Window...")
    except Exception:
        print(sys.exc_info()[1])
在执行程序并点击退出按钮时,你会得到一个确认消息,你可以点击是或否:
6.使窗口在屏幕上居中
许多窗口应用程序的重要性取决于它们在屏幕上的显示方式。
对于任何GUI应用程序,更好的做法是将窗口显示在屏幕的中心。
这样做有两个好处。
一是吸引用户的注意,二是调整显示格式显示于各种不同的显示器屏幕。
没有直接的方法可以通过调用某个类的预定义函数使窗口居中。
因此,我们编写了自己的方法center来将窗口的中心位置定位到任何屏幕上。
该方法获取它正在调用的对象,并将其相对于所显示的屏幕居中:
   def center(self):
        """ Function to center the application
        """
        qRect = self.frameGeometry()
        # centerPoint = QDesktopWidget().availableGeometry().center()
        # https://stackoverflow.com/questions/68037950/module-pyqt6-qtwidgets-has-no-attribute-qdesktopwidget
        centerPoint = QGuiApplication.primaryScreen().availableVirtualGeometry().center() #pyside2-->pyside6
        qRect.moveCenter(centerPoint)
        self.move(qRect.topLeft())
为了做到这一点,首先我们获取想居中的窗口的大小和位置。
然后,我们需要得到屏幕的中心点。最后,我们将窗口移到屏幕的中心。
frameGeometry()函数将返回一个qrect对象,用于保存窗口的高度、宽度、顶部和左侧点。
QDesktopWidget(). availablegeometry ().center()调用将返回屏幕的中心点。
接下来的两行将窗口移动到屏幕的中心点。
记住之前在myWindow调用这个函数show()将设置显示于屏幕上;
7.关于对话框
我们的下一步操作是向应用程序添加一个关于对话框。
“关于”框是一个显示有关应用程序的修订信息的对话框。
它还可能包括安装的版本和版权信息。
QMessageBox类为此提供了一个内置函数。参数如下:
PySide.QtGui.QMessageBox.about(parent, title, text)
父参数接受任何有效的QWidget对象。
标题和文本可以通过Unicode参数提供。
about框将有一个标记为OK的按钮。
为了解释它的工作原理,我们现在将添加一个名为About的按钮,以及该按钮的点击信号,我们称其为一个插槽,该插槽将向用户显示About框。
其代码如下所示
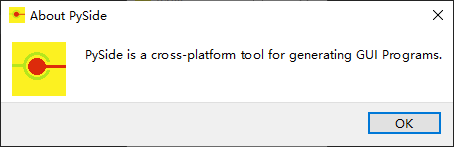
    def setAboutButton(self):
        """ Function to set About Button
        """
        self.aboutButton = QPushButton("About", self)
        self.aboutButton.move(100, 100)
        self.aboutButton.clicked.connect(self.showAbout)
    def showAbout(self):
        """ Function to show About Box
        """
        QMessageBox.about(self.aboutButton, "About PySide",
        "PySide is a cross-platform tool for generating GUI Programs.")
在调用myWindow.show()之前从__main__块调用这个函数。
执行时,您将看到一个添加了About按钮的窗口。
单击此按钮,将显示一个单独的对话框,其中包含程序中给出的标题和内容文本。
您还可以注意到,默认情况下,窗口的一侧还显示了应用程序图标。
输出示例如下所示,供参考:
此时的所有代码如下;
# Import required modules
import sys
from PySide6.QtGui import QIcon,QFont,QGuiApplication
from PySide6.QtWidgets import QApplication, QWidget,QLabel,QToolTip,QPushButton,QMessageBox

icon_path=r'C:\Users\Y0137\Desktop\222.png'
class SampleWindow(QWidget):
    """ Our main window class
    """
    def __init__(self):
        """ Constructor Function
        """
        QWidget.__init__(self)
        self.setWindowTitle("Icon Sample")
        self.setGeometry(300, 300, 200, 150)
        QToolTip.setFont(QFont("Decorative", 8, QFont.Bold))
        self.setToolTip('Our Main Window')
    def setIcon(self):
        """ Function to set Icon
        """
        appIcon = QIcon(icon_path)
        self.setWindowIcon(appIcon)
    def setIconModes(self):
        myIcon1 = QIcon(icon_path)
        myLabel1 = QLabel('sample', self)
        myLabel1.setToolTip('Active Icon')
        pixmap1 = myIcon1.pixmap(50, 50, QIcon.Active, QIcon.On)
        myLabel1.setPixmap(pixmap1)
        myIcon2 = QIcon(icon_path)
        myLabel2 = QLabel('sample', self)
        myLabel2.setToolTip('Disabled Icon')
        pixmap2 = myIcon2.pixmap(50, 50, QIcon.Disabled, QIcon.Off)
        myLabel2.setPixmap(pixmap2)
        myLabel2.move(50, 0)
        myIcon3 = QIcon(icon_path)#icon_path
        myLabel3 = QLabel('sample', self)
        myLabel3.setToolTip('Selected Icon')
        pixmap3 = myIcon3.pixmap(50, 50, QIcon.Selected, QIcon.On)
        myLabel3.setPixmap(pixmap3)
        myLabel3.move(100, 0)
    def center(self):
        """ Function to center the application
        """
        qRect = self.frameGeometry()
        # centerPoint = QDesktopWidget().availableGeometry().center()
        # https://stackoverflow.com/questions/68037950/module-pyqt6-qtwidgets-has-no-attribute-qdesktopwidget
        centerPoint = QGuiApplication.primaryScreen().availableVirtualGeometry().center() #pyside2-->pyside6
        qRect.moveCenter(centerPoint)
        self.move(qRect.topLeft())
    def setAboutButton(self):
        """ Function to set About Button
        """
        self.aboutButton = QPushButton("About", self)
        self.aboutButton.move(100, 100)
        self.aboutButton.clicked.connect(self.showAbout)
    def showAbout(self):
        """ Function to show About Box
        """
        QMessageBox.about(self.aboutButton, "About PySide",
        "PySide is a cross-platform tool for generating GUI Programs.")
    def setButton(self):
        """ Function to add a quit button
        """
        myButton = QPushButton('Quit', self)
        myButton.move(50, 100)
        # myButton.clicked.connect(myApp.quit)
        myButton.clicked.connect(self.quitApp)
    def quitApp(self):
        """ Function to confirm a message from the user
        """
        userInfo = QMessageBox.question(self, 'Confirmation',
            "This will quit the application. Do you want to Continue?",
            QMessageBox.Yes | QMessageBox.No)
        if userInfo == QMessageBox.Yes:
            myApp.quit()
        if userInfo == QMessageBox.No:
            pass
if __name__ == '__main__':
 # Exception Handling
    try:
        myApp = QApplication(sys.argv)
        myWindow = SampleWindow()
        myWindow.setIcon()
        myWindow.setIconModes()
        myWindow.setButton()
        myWindow.setAboutButton()
        myWindow.center()
        myWindow.show()
        myApp.exec()
        sys.exit(0)
    except NameError:
        print("Name Error:", sys.exc_info()[1])
    except SystemExit:
        print("Closing Window...")
    except Exception:
        print(sys.exc_info()[1])
8.定时器
大多数GUI应用程序都有时间限制,使用计时器来捕获有关程序运行时和其他类似任务的信息是非常重要的。
您还可以使用计时器以指定的时间间隔生成一些事件,计算某些动作的运行时间,实现一个倒计时计时器,等等。
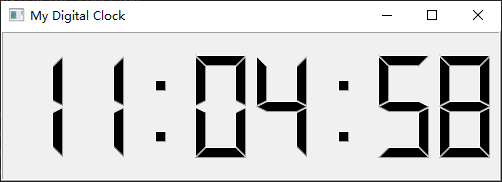
本章的这一部分将介绍如何在我们的应用程序中创建和使用计时器,我们将开发一个数字时钟应用程序,解释计时器的概念。
在Qt中用于创建此应用程序的类是PySide.QtCore.QTimer
PySide.QtCore.QDateTime。
QTimer类为计时器提供高级编程接口。
它提供了重复的和单次射击的计时器。
QTimer对象,可以在时隙到期之前的任何位置停止
QTimer.start(1000)
QTimer.stop()
AllCode:
# Import required modules
import sys
from PySide6.QtCore import QDateTime, QTimer, SIGNAL
from PySide6.QtWidgets import QApplication, QWidget, QLCDNumber
class MyTimer(QWidget):
    """ Our Main Window class for Timer
    """
    def __init__(self):
        """ Constructor Function
        """
        QWidget.__init__(self)
        self.setWindowTitle('My Digital Clock')
        timer = QTimer(self)
        self.connect(timer, SIGNAL("timeout()"), self.updtTime)
        self.myTimeDisplay = QLCDNumber(self)
        self.myTimeDisplay.setSegmentStyle(QLCDNumber.Filled)
        self.myTimeDisplay.setDigitCount(8)
        self.myTimeDisplay.resize(500, 150)
        timer.start(1000)
    def updtTime(self):
        """ Function to update current time
        """
        #bili:崩析 cnblogs:戳人痛处
        currentTime = QDateTime.currentDateTime().toString('hh:mm:ss')
        self.myTimeDisplay.display(currentTime)
        # Main Function
if __name__ == '__main__':
    # Exception Handling
    try:
        myApp = QApplication(sys.argv)
        myWindow = MyTimer()
        myWindow.show()
        myApp.exec_()
        sys.exit(0)
    except NameError:
        print("Name Error:", sys.exc_info()[1])
    except SystemExit:
        print("Closing Window...")
    except Exception:
        print(sys.exc_info()[1])
运行效果如下
setSegmentStyle()函数设置要显示的QLCDNumber的样式,它可以取以下值:
| 内容 | 描述 |
|
QLCDNumber.Outline
|
给出用背景色填充的凸起部分。 |
|
QLCDNumber.Filled
|
给出用windowText颜色填充的凸起段 |
|
QLCDNumber.Flat
|
给出用windowText颜色填充的平面段 |
这里还需要注意的一点是setDigitCount函数,它将设置显示的数字数量,默认值为5。


【推荐】国内首个AI IDE,深度理解中文开发场景,立即下载体验Trae
【推荐】编程新体验,更懂你的AI,立即体验豆包MarsCode编程助手
【推荐】抖音旗下AI助手豆包,你的智能百科全书,全免费不限次数
【推荐】轻量又高性能的 SSH 工具 IShell:AI 加持,快人一步
· 阿里最新开源QwQ-32B,效果媲美deepseek-r1满血版,部署成本又又又降低了!
· 单线程的Redis速度为什么快?
· SQL Server 2025 AI相关能力初探
· AI编程工具终极对决:字节Trae VS Cursor,谁才是开发者新宠?
· 展开说说关于C#中ORM框架的用法!
2021-03-09 {记}网易云音乐的外链使用