Appium入门(6)__appium-desktop安装
部分摘自:http://www.testclass.net/appium/appium-base-desktop/
Appium-Server主要用来监听移动设备,然后将不同编程语言编写的 appium 脚本解析,然后驱动移动设备来运行
但Appium-Server有一两年没有更新了。Windows版在 2015 年底止步于的 AppiumForWindows_1_4_16_1.zip
于是,新的工具 Appium-desktop 来了! 它来继续 Appium-Server的使命,当然, Appium-Server当前仍然是可用的。
一、下载与安装
appium-desktop 下载地址:这里
下载appium-desktop-Setup-1.3.1.exe
二、启动运行
安装完成桌面会生成一个紫色的 appium 图标,双击打开。
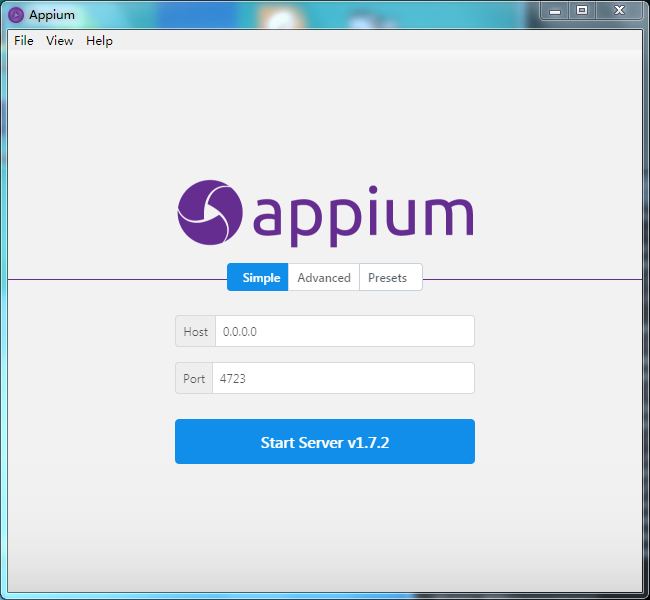
直接点击Start Server v1.7.2

start server后,可以使用CMD执行python脚本用例,Appium上会有相应日志输出
或者通过Start Inspector Session 去录制或启动app

三、Start Inspector Session
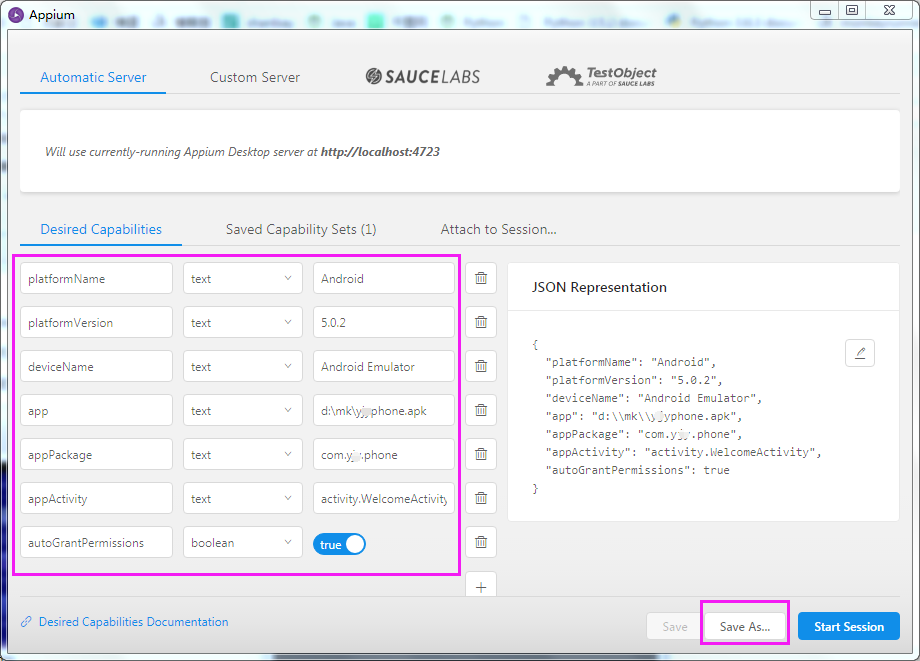
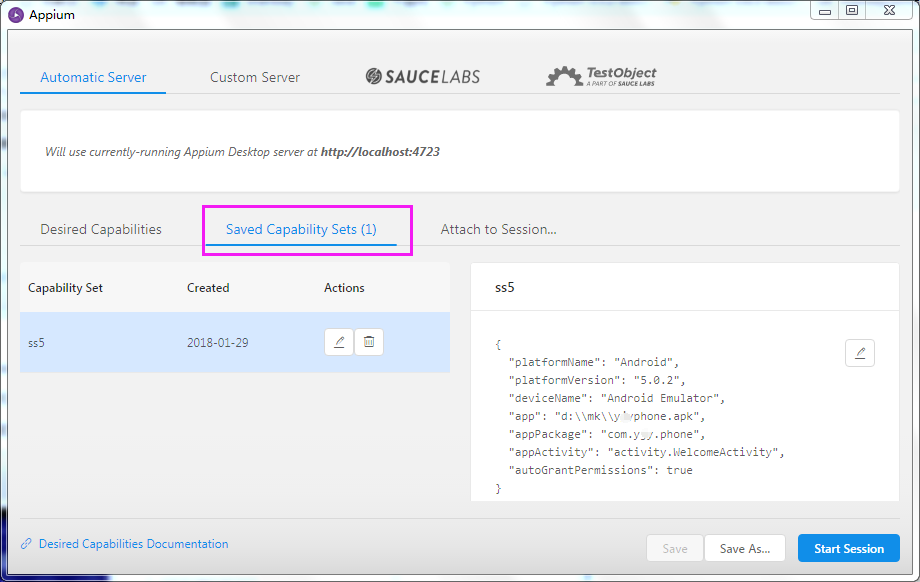
(1)、配置相应参数,点击save as...保存为模板,在Saved Capability Sets中可查看,下次直接使用
如果想要使用真机,必须再加一个字段udid,是text类型


(2)Start Session
启动后,手机端会出现三个APP :Appium setting ; Unlock; 要测试的APK包
APPium界面显示如下,可以定位元素位置,可以录制脚本

录制完成后,选择语言、拷贝全部代码至编辑器,脚本就生成 了
#coding=utf-8
# This sample code uses the Appium python client
# pip install Appium-Python-Client
# Then you can paste this into a file and simply run with Python

from appium import webdriver
from appium.webdriver.common.touch_action import TouchAction

caps = {}
caps["platformName"] = "Android"
caps["platformVersion"] = "5.0.2"
caps["deviceName"] = "Android Emulator"
caps["app"] = "d:\\mk\\xxphone.apk"
caps["appPackage"] = "com.xx.phone"
caps["appActivity"] = "activity.WelcomeActivity"
caps["autoGrantPermissions"] = True

driver = webdriver.Remote("http://localhost:4723/wd/hub", caps)

TouchAction(driver).press(x=737, y=795).move_to(x=-511, y=-12).release().perform()

TouchAction(driver).press(x=787, y=791).move_to(x=-565, y=17).release().perform()

TouchAction(driver).tap([(523, 1448)]).perform()
TouchAction(driver).tap([(507, 984)]).perform()
TouchAction(driver).tap([(532, 1645)]).perform()

driver.quit()


