深度学习笔记2:数据增强
上一节由于训练数据集样本量较小,模型过早拟合最终我们在测试数据集的分类精度只达到了70%,本章节我们通过使用数据增强降低过拟合的方法。使用数据增强之后,模型的分类精度将提高到 80%~85%。数据增强是指从现有的训练样本中生成更多的训练数据,做法是利用一些能够生成可信图像的随机变换来增强(augment)样本。数据增强的目标是,模型在训练时不会两次查看完全相同的图片。这有助于模型观察到数据的更多内容,从而具有更强的泛化能力。
数据准备
定义数据增强代码
from tensorflow import keras
from tensorflow.keras import layers

data_augmentation = keras.Sequential([
    layers.RandomFlip("horizontal"),
    layers.RandomRotation(0.1),
    layers.RandomZoom(0.2),
    ])
加载数据集
import  pathlib
new_base_dir = pathlib.Path('C:/Users/wuchh/.keras/datasets/dogs-vs-cats-small')

batch_size = 32
img_height = 180
img_width = 180

train_dataset = keras.preprocessing.image_dataset_from_directory(
    new_base_dir / 'train' ,
    validation_split=0.2,
    subset="training",
    seed=123,
    image_size=(img_height, img_width),
    batch_size=batch_size
)

validation_dataset = keras.preprocessing.image_dataset_from_directory(
    new_base_dir / 'train' ,
    validation_split=0.2,
    subset="validation",
    seed=123,
    image_size=(img_height, img_width),
    batch_size=batch_size
)
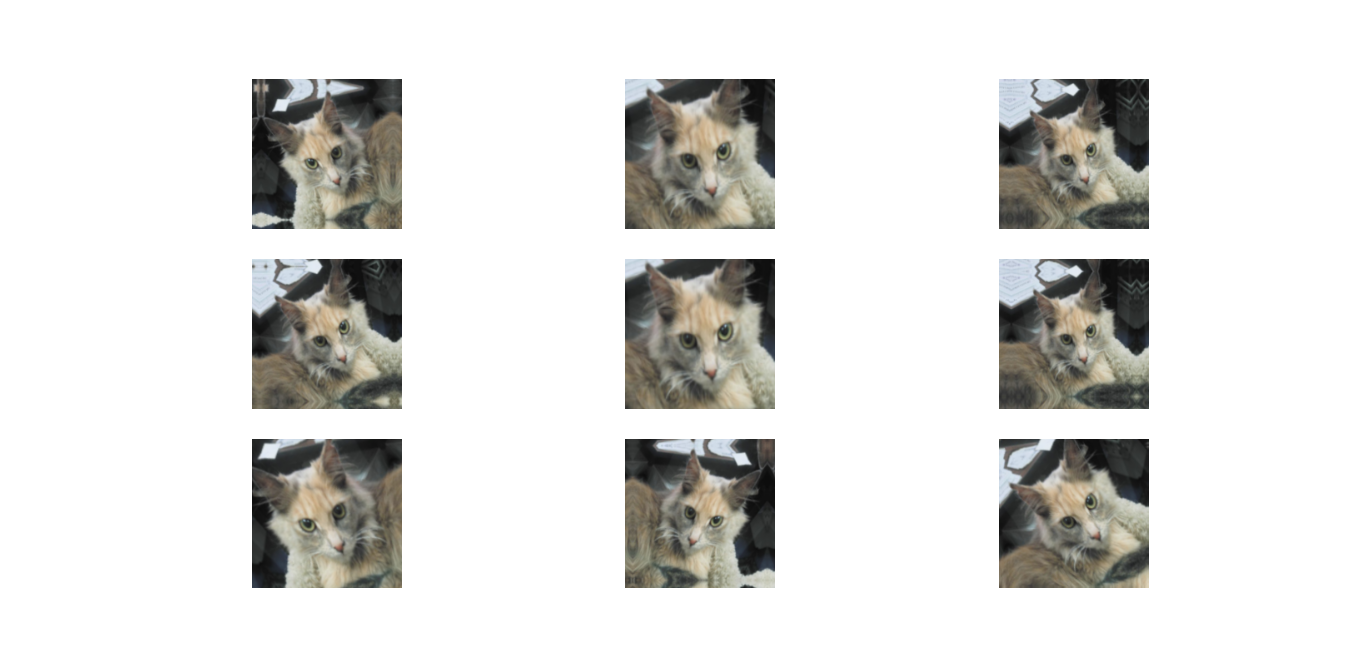
显示几张增强后的训练图像
import matplotlib.pyplot as plt

plt.figure(figsize=(10, 10))
for images, _ in train_dataset.take(1):
    for i in range(9):
        augmented_images = data_augmentation(images)
        ax = plt.subplot(3, 3, i + 1)
        plt.imshow(augmented_images[0].numpy().astype("uint8"))
        plt.axis("off")
    plt.show()
数据增强神经网络模型
inputs = keras.Input(shape=(180, 180, 3))
x = data_augmentation(inputs) #数字增强
x = layers.Rescaling(1./255)(x)
x = layers.Conv2D(filters=32, kernel_size=3, activation="relu")(x)
x = layers.MaxPooling2D(pool_size=2)(x)
x = layers.Conv2D(filters=64, kernel_size
=3, activation="relu")(x)
x = layers.MaxPooling2D(pool_size=2)(x)
x = layers.Conv2D(filters=128, kernel_size=3, activation="relu")(x)
x = layers.MaxPooling2D(pool_size=2)(x)
x = layers.Conv2D(filters=256, kernel_size=3, activation="relu")(x)
x = layers.MaxPooling2D(pool_size=2)(x)
x = layers.Conv2D(filters=256, kernel_size=3, activation="relu")(x)
x = layers.Flatten()(x)
x = layers.Dropout(0.5)(x)
outputs = layers.Dense(1, activation="sigmoid")(x)
model = keras.Model(inputs=inputs, outputs=outputs)
model.compile(loss="binary_crossentropy",optimizer="rmsprop",metrics=["accuracy"])
训练卷积神经网络
callbacks = [keras.callbacks.ModelCheckpoint(filepath="convnet_from_scratch_with_augmentation.model",
                                             save_best_only=True,monitor="val_loss")]
history = model.fit(    train_dataset,    epochs=100,    validation_data=validation_dataset,    callbacks=callbacks)
在测试集上评估模型
test_dataset = keras.preprocessing.image_dataset_from_directory(
new_base_dir / 'test' ,
seed=123,
image_size=(img_height, img_width),
batch_size=batch_size)

test_model = keras.models.load_model("convnet_from_scratch_with_augmentation.model")
test_loss, test_acc = test_model.evaluate(test_dataset)
print(f"Test accuracy: {test_acc:.3f}")
>>> test_model = keras.models.load_model("convnet_from_scratch_with_augmentation.model")
>>> test_loss, test_acc = test_model.evaluate(test_dataset)
 3/32 [=>............................] - ETA: 2s - loss: 0.4401 - accuracy: 0.7604Corrupt JPEG da 9/32 [=======>......................] - ETA: 1s - loss: 0.5328 - accuracy: 0.7535Corrupt JPEG da32/32 [==============================] - 2s 69ms/step - loss: 0.4752 - accuracy: 0.7890
>>> print(f"Test accuracy: {test_acc:.3f}")
Test accuracy: 0.789
>>>
这次我的测试精度达到了 78.9%,这个进步不少!


 浙公网安备 33010602011771号