.Net Core 使用百度UEditor编辑器
一、准备文件
1. 下载UEditor官方版本.删除其中后端文件。保留后端文件夹中的config.json文件
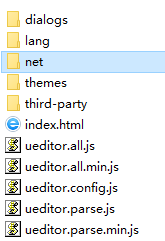
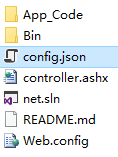
2. 在NuGet管理器中搜索UEditorNetCore,拿到项目地址,下载源码

下载地址:https://github.com/sankeyou/UEditorNetCore
二、使用参考文档:http://www.cnblogs.com/durow/p/6116393.html
1. Startup.cs 注入UEditor服务
     public void ConfigureServices(IServiceCollection services)
        {
            //参数1为配置文件路径,默认为项目目录下config.json
            //参数2参数为是否缓存配置文件,默认false
            services.AddUEditorService();
            services.AddMvc();
        }

2. 添加Controller用于处理来自UEditor的请求
    [Route("api/[controller]")]
    public class UEditorController : Controller
    {
        private UEditorService ue;
        public UEditorController(UEditorService ue)
        {
            this.ue = ue;
        }

        public void Do()
        {
            ue.DoAction(HttpContext);
        }
    }
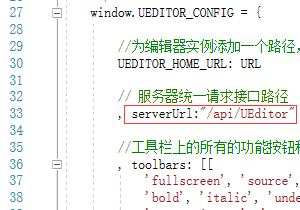
注意:路由的地址应于ueditor.config.js配置中的serverUrl一致。
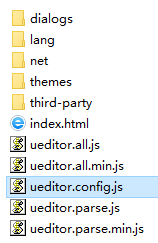
3. 把之前保留的config.json文件拷贝到,使用编辑器的网站根目录下,修改上传操作配置PathFormat和Prefix。例如:

三. 关于上传保存路径。因为下载了源码,我是直接在源码里修改。存放到其他文件夹
打开下载的源码:
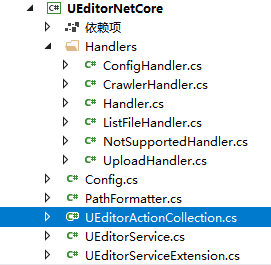
1. 修改选中类 UploadImageAction,UploadScrawlAction,UploadVideoAction,UploadFileAction 方法。例如:
        private void UploadImageAction(HttpContext context)
        {
            new UploadHandler(context, new UploadConfig()
            {
                AllowExtensions = Config.GetStringList("imageAllowFiles"),
                //PathFormat = Config.GetString("imagePathFormat"),
                PathFormat = Guid.NewGuid().ToString(),//修改一下文件名的生成方式,我是直接使用GUID
                SizeLimit = Config.GetInt("imageMaxSize"),
                UploadFieldName = Config.GetString("imageFieldName"),
                SaveFilePath = Config.GetString("imageSaveFilePath")//新增一个参数用于获取保存路径,在config文件中新增配置项
            }).Process();
        }//修改后的
        private void UploadImageAction(HttpContext context)
        {
            new UploadHandler(context, new UploadConfig()
            {
                AllowExtensions = Config.GetStringList("imageAllowFiles"),
                PathFormat = Config.GetString("imagePathFormat"),
                SizeLimit = Config.GetInt("imageMaxSize"),
                UploadFieldName = Config.GetString("imageFieldName")
            }).Process();
        }//修改前
修改后的配置内容

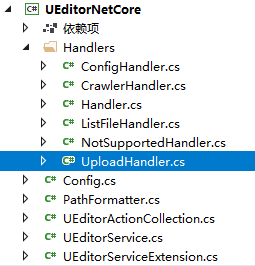
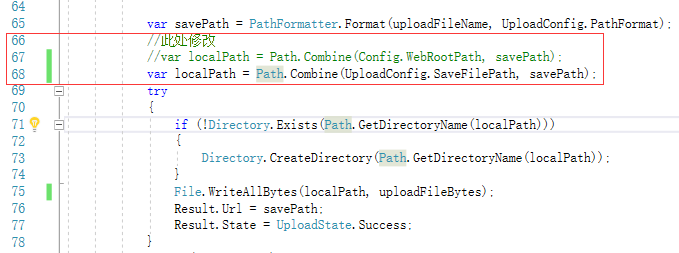
2. 修改图中选中类。替换保存文件使用Config.WebRootPath的路径
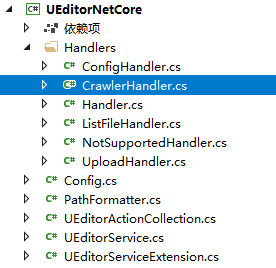
3. 从其他网站复制在编辑器粘贴的图片,如果要将其保存到本地。修改下图选中文件,如果不保存则修改ueditor.config.js 配置


【推荐】国内首个AI IDE,深度理解中文开发场景,立即下载体验Trae
【推荐】编程新体验,更懂你的AI,立即体验豆包MarsCode编程助手
【推荐】抖音旗下AI助手豆包,你的智能百科全书,全免费不限次数
【推荐】轻量又高性能的 SSH 工具 IShell:AI 加持,快人一步
· 10年+ .NET Coder 心语,封装的思维:从隐藏、稳定开始理解其本质意义
· .NET Core 中如何实现缓存的预热?
· 从 HTTP 原因短语缺失研究 HTTP/2 和 HTTP/3 的设计差异
· AI与.NET技术实操系列:向量存储与相似性搜索在 .NET 中的实现
· 基于Microsoft.Extensions.AI核心库实现RAG应用
· TypeScript + Deepseek 打造卜卦网站:技术与玄学的结合
· 阿里巴巴 QwQ-32B真的超越了 DeepSeek R-1吗?
· 【译】Visual Studio 中新的强大生产力特性
· 10年+ .NET Coder 心语 ── 封装的思维:从隐藏、稳定开始理解其本质意义
· 【设计模式】告别冗长if-else语句:使用策略模式优化代码结构