ttkbootstrap
ttkbootstrap 文档
ttkbootstrap 基础的使用
ttkbootstrap实战 注册信息
ttkbootstrap实战 简易计算器ttkbootstrap实战 手风琴面板ttkbootstrap实战 数据表单
ttkbootstrap实战 均衡器
ttkbootstrap实战 文件备份工具
ttkbootstrap实战 文件搜索工具
ttkbootstrap实战 鼠标设置工具
ttkbootstrap实战 音乐播放器等四个案例
按钮的创建
#Button
import ttkbootstrap as ttk
from ttkbootstrap.constants import *
root = ttk.Window()
ttk.Button(root, text="SUCCESS", bootstyle=SUCCESS).pack(side=LEFT, padx=5, pady=10)
ttk.Button(root, text="INFO, OUTLINE", bootstyle=(INFO, OUTLINE)).pack(side=LEFT, padx=5, pady=10)
ttk.Button(root, text="INFO", bootstyle=INFO).pack(side=LEFT, padx=5, pady=10)
ttk.Button(root, text="PRIMARY", bootstyle=(PRIMARY, "outline-toolbutton")).pack(side=LEFT, padx=5, pady=10)
ttk.Button(root, text="PRIMARY, outline", bootstyle=(PRIMARY, "outline")).pack(side=LEFT, padx=5, pady=10)
ttk.Button(root, text="PRIMARY", bootstyle=PRIMARY).pack(side=LEFT, padx=5, pady=10)
ttk.Button(root, text="link", bootstyle="link").pack(side=LEFT, padx=5, pady=10)
ttk.Button(root, text="success-link", bootstyle="success-link").pack(side=LEFT, padx=5, pady=10)
ttk.Button(root, text="PRIMARY-link", bootstyle="PRIMARY-link").pack(side=LEFT, padx=5, pady=10)
ttk.Button(root, text="success", bootstyle="success").pack(side=LEFT, padx=5, pady=10)
ttk.Button(root, text="disabled", state="disabled").pack(side=LEFT, padx=5, pady=10) #在禁用状态下创建按钮
root.mainloop()

窗口的创建
import ttkbootstrap as ttk
#实例化创建应用程序窗口,其实大部分命令与tkinter相似
root = ttk.Window(
    title="窗口名字",    #设置窗口的标题
    themename="litera",   #设置主题
    size=(1066,600),    #窗口的大小
    position=(100,100),   #窗口所在的位置
    minsize=(0,0),     #窗口的最小宽高
    maxsize=(1920,1080),  #窗口的最大宽高
    resizable=None,     #设置窗口是否可以更改大小
    alpha=1.0,       #设置窗口的透明度(0.0完全透明)
    )
# root.place_window_center()  #让显现出的窗口居中
# root.resizable(False,False)  #让窗口不可更改大小
# root.wm_attributes('-topmost', 1)#让窗口位置其它窗口之上
root.mainloop()
按钮方法的绑定
#command
import ttkbootstrap as ttk
from ttkbootstrap.constants import *
from tkinter import filedialog

# 编写submitBTN的方法
def on_submitBTN():
  print('你点击了提交按钮')
# 编写cancelBTN的方法
def on_cancelBTN():
  print('你点击了退出按钮')
# 编写choiceBTN的方法
def on_choiceBTN():
  #filedialog
  filepath = filedialog.askopenfilename() print(filepath) root = ttk.Window( title='3按钮方法的绑定', size=(600, 300), resizable=(False, False), themename='superhero', position=(600, 300) ) # 往窗口添加两个按钮,使用command参数绑定方法
#command
choiceBTN = ttk.Button(master=root, text='选择文件', style='WARNING', command=on_choiceBTN)
choiceBTN.pack(padx=10, side=LEFT)
submitBTN = ttk.Button(master=root, text='提交', style='SUCCESS', command=on_submitBTN)
submitBTN.pack(padx=10, side=LEFT)
cancelBTN = ttk.Button(master=root, text='退出', style='DANGER', command=on_cancelBTN)
cancelBTN.pack(padx=10, side=LEFT)

# 启动事件循环
root.mainloop()
#filedialog
Python之Tkinter包的filedialog模块介绍-CSDN博客
官方介绍见https://docs.python.org/zh-cn/3/library/dialog.html#module-tkinter.filedialog
filedialog模块包含了一些常用的对话框,包括:
1. askopenfilename函数:打开文件对话框,用于选择一个文件,返回文件路径,类型为字符串。语法格式如下:askopenfilename(**options),其中**options是可选的关键字参数。
2. askopenfilenames函数:打开文件对话框,用于选择多个文件,返回一个元组,包括所有选择文件的路径。语法格式如下:askopenfilenames(**options),其中**options是可选的关键字参数。
3. asksaveasfilename函数:保存文件对话框,用于选择文件的保存路径和文件名。语法格式如下:asksaveasfilename(**options) ,其中**options是可选的关键字参数。
4. askdirectory函数:选择目录对话框,用于选择一个目录,返回目录路径。语法格式如下:askdirectory(**options) ,其中**options是可选的关键字参数。
这些对话框提供了用户友好的界面,使得用户可以方便地浏览文件系统,选择文件或目录。在tkinter应用程序中,可以使用filedialog模块来创建这些对话框,以便用户可以与文件系统进行交互。
**options关键字参数常用的有:
☆ title 指定文件对话框的标题栏文本。
☆ defaultextension 指定文件的后缀,例如:defaultextension='.jpg',那么当用户输入一个文件名'Python'的时候,文件名会自动添加后缀为'Python.jpg' 。注意:如果用户输入文件名包含后缀,那么该选项不生效。允许使用 “*” 通配符。
☆ filetypes 指定筛选文件类型的下拉菜单选项,该选项的值是由二元组构成的列表,每个二元组是由(类型名,后缀)构成,例如:filetypes=[('文本', '.txt'), ('栅格', '.tif'), ('动图', '.gif')]。(看情况,当文件夹中文件很多且类型很多,建议给出该参数)
☆ initialdir 指定打开保存文件的默认路径,默认路径是当前文件夹。
☆ multiple 是否确定选择多个文件,if true user may select more than one file。
例如
选择多个文件:filedialog.askopenfilename(title='请选择一个文件', initialdir=r'D:\数据\测试数据', filetypes=[("文本文档", ".txt"), ('Excel', '.xls .xlsx'), ('All Files', ' *')], defaultextension='.tif', multiple=True)
选择多个文件:filedialog.askopenfilename(title='请选择多个文件', initialdir=r'D:\数据\测试数据', filetypes=[( "文本文档", ".txt"), ('Excel', '.xls .xlsx'), ('All Files', ' *')])
选择文件存储路径:filedialog.asksaveasfile(title='请选择文件存储路径', initialdir=r'D:\数据\测试数据', filetypes=[( "文本文档", ".txt"), ('Excel', '.xls .xlsx'), ('All Files', ' *')], defaultextension='.tif')
选择文件夹:filedialog.askdirectory(title='选择存放的位置!', initialdir=r'D:\数据\测试数据')
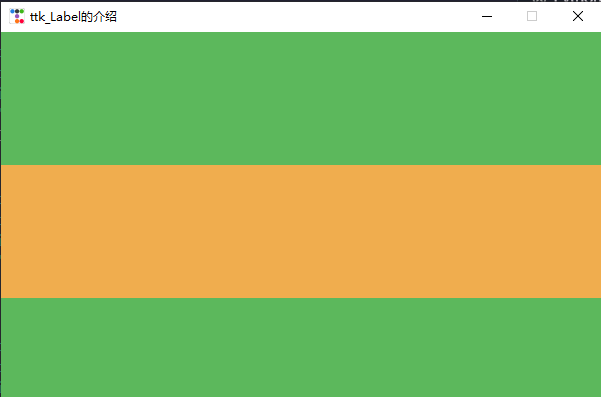
label的介绍
import ttkbootstrap as ttk
from ttkbootstrap.constants import *
# 创建Tkinter窗口
root = ttk.Window(
  title='ttk_Label的介绍',
  size=(600, 400),
  resizable=(False, False),
  position=(600, 400),
  themename='superhero'
)
# 新建2个容器上下平分窗口
container1 = ttk.Frame(master=root, style='SUCCESS')
container1.pack(fill=BOTH, expand=True)
container2 = ttk.Frame(master=root, style='WARNING')
container2.pack(fill=BOTH, expand=True)
container3 = ttk.Frame(master=root, style='SUCCESS')
container3.pack(fill=BOTH,expand=True)
# 启动事件循环
root.mainloop()
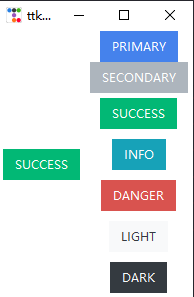
#style
import ttkbootstrap as ttk
from ttkbootstrap.constants import *
root = ttk.Window()
ttk.Button(root, text="SUCCESS", bootstyle=SUCCESS).pack(side=LEFT, padx=5, pady=10)
PRIMARYBTN = ttk.Button(master=root, text='PRIMARY', style=PRIMARY)
PRIMARYBTN.pack(padx=5, side=TOP)
SECONDARYBTN = ttk.Button(master=root, text='SECONDARY', style=SECONDARY)
SECONDARYBTN.pack(padx=5, side=TOP)
SUCCESSBTN = ttk.Button(master=root, text='SUCCESS', style=SUCCESS)
SUCCESSBTN.pack(pady=5, side=TOP)
INFOBTN = ttk.Button(master=root, text='INFO', style=INFO)
INFOBTN.pack(pady=5, side=TOP)
DANGERBTN = ttk.Button(master=root, text='DANGER', style=DANGER)
DANGERBTN.pack(pady=5, side=TOP)
LIGHTBTN = ttk.Button(master=root, text='LIGHT', style=LIGHT)
LIGHTBTN.pack(pady=5, side=TOP)
DARKBTN = ttk.Button(master=root, text='DARK', style=DARK)
DARKBTN.pack(pady=5, side=TOP)
root.mainloop()
弹窗的介绍
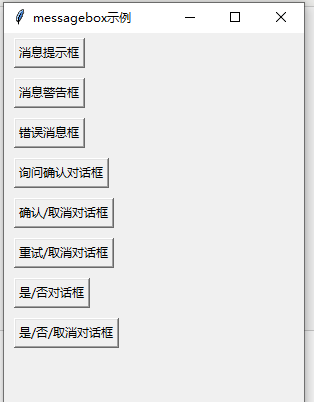
#messagebox
import tkinter as tk
from tkinter import messagebox

win = tk.Tk()
win.title("messagebox示例")
win.geometry("300x400")

# 信息消息框
def showinfomsg():
    msg1 = messagebox.showinfo(title="消息提示", message="欢迎")
    print(msg1)
# 警告消息框
def showwarningmsg():
    msg2 = messagebox.showwarning(title="消息警告", message="警告,该操作有风险")
    print(msg2)
def showerrormsg():
    msg3 = messagebox.showerror(title="错误消息", message="出错了")
    print(msg3)
# 疑问消息框
def askquestionmsg():
    msg4 = messagebox.askquestion(title="询问确认", message="确认吗")
    print(msg4)
def askokcancelmsg():
    msg5 = messagebox.askokcancel(title="确定或取消", message="确定吗")
    print(msg5)
def askretrycancelmsg():
    msg6 = messagebox.askretrycancel(title="重试或取消", message="是否重试")
    print(msg6)
def askyesonmsg():
    msg7 = messagebox.askyesno(title="是或否", message="是否开启")
    print(msg7)
def askyesnocancelmsg():
    msg8 = messagebox.askyesnocancel(title="是或否或取消", message="请选择是或否或取消选", default=messagebox.CANCEL)
    print(msg8)
btn = tk.Button(win, text='消息提示框', command=showinfomsg)
btn.pack(padx=10,pady=5, anchor='w')
btn = tk.Button(win, text='消息警告框', command=showwarningmsg)
btn.pack(padx=10,pady=5, anchor='w')
btn = tk.Button(win, text='错误消息框', command=showerrormsg)
btn.pack(padx=10,pady=5, anchor='w')
btn = tk.Button(win, text='询问确认对话框', command=askquestionmsg)
btn.pack(padx=10,pady=5, anchor='w')
btn = tk.Button(win, text='确认/取消对话框', command=askokcancelmsg)
btn.pack(padx=10,pady=5, anchor='w')
btn = tk.Button(win, text='重试/取消对话框', command=askretrycancelmsg)
btn.pack(padx=10,pady=5, anchor='w')
btn = tk.Button(win, text='是/否对话框', command=askyesonmsg)
btn.pack(padx=10,pady=5, anchor='w')
btn = tk.Button(win, text='是/否/取消对话框', command=askyesnocancelmsg)
btn.pack(padx=10,pady=5, anchor='w')
win.mainloop()
messagebox中工具函数如下:
1.消息提示框
tkinter.messagebox.showinfo(‘title’,‘message’,icon= None,type= None):
返回值为点击的按键的值,包括“yes”(是)、“no”(否)、“retry”(重试)、“ok”(确定)、“cancel”(取消)、“ignore”(忽略)、”abort“(中止)。
2.消息警告框
tkinter.messagebox.showwarning(‘title’,‘message’,icon= None,type= None):
返回值为点击的按键的值,包括“yes”(是)、“no”(否)、“retry”(重试)、“ok”(确定)、“cancel”(取消)、“ignore”(忽略)、”abort“(中止)。
3.消息错误框
tkinter.messagebox.showerror(‘title’,‘message’,icon= None,type= None):
返回值为点击的按键的值,包括“yes”(是)、“no”(否)、“retry”(重试)、“ok”(确定)、“cancel”(取消)、“ignore”(忽略)、”abort“(中止)。
4.对话框
tkinter.messagebox.askquestion(‘title’,‘message’,icon= None,type= None):
返回值为点击的按键的值,包括“yes”(是)、“no”(否)、“retry”(重试)、“ok”(确定)、“cancel”(取消)、“ignore”(忽略)、”abort“(中止)。
tkinter.messagebox.askokcancel(‘title’,‘message’,icon= None,type= None):
返回值为True或False,当单击的按钮值为“ok”(确定)时返回True,否则都为False
tkinter.messagebox.askyesno(‘title’,‘message’,icon= None,type= None):
返回值为True或False,当单击的按钮键值为“yes”(是)时返回True,否则都返回False
tkinter.messagebox.askyesnocancel(‘title’,‘message’,icon= None,type= None):
返回值为True、False、None,当单击的按键值为“yes”(是)时返回True、当单击的按键值为“cancel”(取消)时返回None,否则都返回False
tkinter.messagebox.askretrycancel(‘title’,‘message’,icon= None,type= None):
返回值为True或False,当单击的按钮值为“retry”(重试)时返回True,否则都为False
默认情况下使用者在调用messagebox时只要设置提示区字符串即可。但如果有需要,可以通过如下两个选项来设置图标和按键
icon:定制的图标区图标选项,该选项支持“error”、“info”、“question”、“warning”(默认为“info”图标)
PDF分页工具
更改按钮的字体和颜色
#configure
import ttkbootstrap as ttk
from ttkbootstrap.constants import *
# 创建Tkinter窗口
root = ttk.Window(
  title='修改BUTTON名称的字体、字号及颜色',
  size=(1000, 200)
)
创建一个样式对象并配置按钮样式
style = ttk.Style()
style.configure('TButton', font=('华文彩云', 20), foreground='purple')
# 创建按钮并应用样式
buttonB1 = ttk.Button(master=root, text='测试按钮B1', style='success')
buttonB1.pack(padx=40, side='left')
buttonB2 = ttk.Button(master=root, text='测试按钮B2', style='warning')
buttonB2.pack(padx=40, side='left')
# 第三个按钮的代码在图片中不完整,以下是根据上下文推测的完整代码
buttonB3 = ttk.Button(master=root, text='测试按钮B3', style='TButton')
buttonB3.pack(padx=40, side='left')
# 启动事件循环
root.mainloop()
删除
#ScrolledText
import ttkbootstrap as ttk
from ttkbootstrap.constants import *
# 创建Tkinter窗口
root = ttk.Window(
  title='ttkbootstrap带滚动条的文本框介绍',
  size=(1000, 400),
  resizable=(False, False),
  themename='superhero'
)
# 创建一个容器
container1 = ttk.Frame(master=root, style='INFO')
container1.pack(fill=BOTH, expand=True)
# 定义插入文本的函数
def oninsert():
  # 这里应该包含插入文本到文本框的逻辑
  text1.insert('insert', '你已点击插入按钮\n\n') # 在文本框插入文本
  text1.see(END) # 将文本框的视图滚动到末尾,即文本焦点定位在文本最后
def onread():
  # 这里应该包含插入文本到文本框的逻辑
  t1=text1.get(0.0, END) # 在文本框插入文本
  print(t1)
  print('**************')
  t2=text1.get(1.0, END) # 在文本框插入文本
  print(t2)
def ondel():
  # 这里应该包含插入文本到文本框的逻辑
  text1.delete(0.0, END) # 在文本框插入文本
# 生成带滚动条的文本框
text1 = ttk.ScrolledText(master=container1)
text1.pack(side=LEFT)
# 向文本框添加文字的按钮
insertBTN = ttk.Button(master=container1, text='插入文本', style=SUCCESS, command=oninsert)
insertBTN.pack(padx=10, side=LEFT)
readBTN = ttk.Button(master=container1, text='READ文本', style=SUCCESS, command=onread)
readBTN.pack(padx=10, side=LEFT)
delBTN = ttk.Button(master=container1, text='del文本', style=SUCCESS, command=ondel)
delBTN.pack(padx=10, side=LEFT)
# 启动事件循环
root.mainloop()
复选按钮的介绍
#Checkbutton
import ttkbootstrap as ttk
from ttkbootstrap.constants import *
# 定义复选框状态改变时调用的函数
def chick_check1():
  if check_var1.get(): # 读取check_var判断用户有没有选择
    print('你已同意条款',check_var1.get())
  else:
    print('不同意1',check_var1.get())
def chick_check2():
  if check_var2.get(): # 读取check_var判断用户有没有选择
    print('你已同意条款',check_var2.get())
  else:
    print('不同意2',check_var2.get())

# 创建主窗口
root = ttk.Window(size=(200, 200), themename='superhero')
# 创建一个IntVar对象来追踪Checkbutton的状态
check_var1 = ttk.IntVar()
check_var2 = ttk.IntVar()
# 创建复选框并绑定方法
check1 = ttk.Checkbutton(root, text="请勾选以同意条款chick_check1", style='SUCCESS', variable=check_var1, command=chick_check1)
check1.pack()
# 创建另一个复选框,没有绑定状态改变的方法
check2 = ttk.Checkbutton(root, text="请勾选以同意条款chick_check2", style='WARNING', variable=check_var2, command=chick_check2)
check2.pack()
# 创建另一个复选框,没有绑定状态改变的方法
check3 = ttk.Checkbutton(root, text="请勾选以同意条款", style='WARNING')
check3.pack()
# 启动事件循环
root.mainloop()
菜单的新建和绑定
#mymenu
import ttkbootstrap as ttk
from ttkbootstrap.constants import *

# 创建主窗口
root = ttk.Window(title='菜单按钮Menubutton的介绍', size=(600, 400), resizable=(False, False), themename='superhero')
# 定义按钮点击事件的处理函数
def print_info1():
  print('打印信息1')
def print_info2():
  print('打印信息2')
def print_info3():
  print('打印信息3')
# 新建Menubutton
mymenubutton = ttk.Menubutton(master=root, text='我的菜单', style='SUCCESS')
mymenubutton.place(relx=0, rely=0) # 把菜单按钮放置在窗口的中心
# 向Menubutton添加下拉菜单
mymenu = ttk.Menu(master=mymenubutton)
# 为下拉菜单添加菜单项并绑定方法
mymenu.add_command(label='打印信息1', command=print_info1)
mymenu.add_command(label='打印信息2', command=print_info2)
mymenu.add_command(label='打印信息3', command=print_info3)
# 将下拉菜单配置到Menubutton
mymenubutton.configure(menu=mymenu)
# 启动事件循环
root.mainloop()
教你使用radiobutton
#Radiobutton
import ttkbootstrap as ttk
from ttkbootstrap.constants import *
def onbutton():
  s1=variable1.get() # 读取用户的选择
  print(f'用户选择了:{s1}')
  variable2.set(s1)

root = ttk.Window(themename='superhero', size=(600, 200), title='RadioButton介绍')
# 通过自定义style改变按钮的大小
#mystyle = ttk.Style()
#mystyle.configure('TRadiobutton', font=('宋体', 20), foreground='orange')
container1=ttk.Frame(root,bootstyle=SUCCESS)
#container1=ttk.Frame(root,bootstyle=SUCCESS)
#container1.pack(fill=BOTH,expand=YES)
container1.pack(expand=YES)
container2=ttk.Frame(root)
container2.pack(fill=BOTH,expand=YES)
variable1 = ttk.Variable()
variable2 = ttk.StringVar()
rd1 = ttk.Radiobutton(master=container1, text='选择我', value='Option1', style=SUCCESS, variable=variable1,command=onbutton)
rd1.pack(padx=20, side=LEFT)
rd2 = ttk.Radiobutton(master=container1, text='选择他', value='Option2', style=WARNING, variable=variable1,command=onbutton)
rd2.pack(padx=20, side=LEFT)
rd3 = ttk.Radiobutton(master=container1, text='选择你', value='Option3', style=INFO, variable=variable1,command=onbutton)
rd3.pack(padx=20, side=LEFT)
rd4 = ttk.Radiobutton(master=container1, text='选择它', value='Option4', style=DANGER, variable=variable1,command=onbutton)
rd4.pack(padx=20, side=LEFT)
lb1=ttk.Label(master=container2,text='lab:', )
lb1.pack(side=LEFT)
#variable2.set = 'DD' + variable2
lb2=ttk.Label(master=container2,textvariable=variable2, style=INFO)
lb2.pack(padx=40,side=LEFT)
root.mainloop()
after方法窗口定期更新
#after #strftime
# 定义时间更新函数
import ttkbootstrap as ttk
from datetime import datetime
def update_time(label):
  nowtime1 = datetime.now().strftime('%H:%M:%S') # 获取当前时间
  label['text'] = f'时间:{nowtime1}' #★
  label.after(1000, update_time, label) # 参数一:间隔时间,单位是毫秒,1000=1秒;参数二:调用的函数update_time,参数三:update_time的实参新建窗口
root = ttk.Window(title='after方法显示时间', size=(600, 400), themename='superhero')
# 用Label标签显示时间
label_time = ttk.Label(master=root, text='', font=('微软雅黑', 40), style='PRIMARY')
label_time.pack(pady=150)
update_time(label_time)
root.mainloop()
#datetime
Python之datetime模块 - 一抹浅笑 - 博客园 (cnblogs.com)
from  datetime import *

dt = datetime.now()
#日期减一天
dt1 = dt + timedelta(days=-1)#昨天
dt2 = dt - timedelta(days=1)#昨天
dt3 = dt + timedelta(days=1)#明天
print(dt1)
print(dt2)
print(dt3)
delta_obj = dt3-dt
print (type(delta_obj),delta_obj)#<type 'datetime.timedelta'> 1 day, 0:00:00
print (delta_obj.days ,delta_obj.total_seconds())#1 86400.0
#2024-09-08 17:03:14.189756
#2024-09-08 17:03:14.189756
#2024-09-10 17:03:14.189756
#<class 'datetime.timedelta'> 1 day, 0:00:00
#1 86400.0
dt=datetime.now()#datetime对象
print(dt.year,dt.month,dt.day,dt.hour,dt.minute,dt.second,dt.microsecond,dt.tzinfo)
print(dt.date()) #2024-09-09
print(dt.time()) #17:09:54.139035
#dt. replace ([ year[ , month[ , day[ , hour[ , minute[ , second[ , microsecond[ , tzinfo] ] ] ] ] ] ] ]):
print('timetuple',dt.timetuple())
print(dt.utctimetuple()) #time.struct_time(tm_year=2024, tm_mon=9, tm_mday=9, tm_hour=17, tm_min=8, tm_sec=42, tm_wday=0, tm_yday=253, tm_isdst=0)
print(dt.toordinal()) #739138
print('weekday',dt.weekday()) #0
print(dt.isocalendar()) #datetime.IsoCalendarDate(year=2024, week=37, weekday=1)
#print(dt.isoformat([sep] ))
print(dt.ctime())#返回一个日期时间的C格式字符串,等效于time.ctime(time.mktime(dt.timetuple()));Mon Sep  9 17:07:38 2024
#print(dt.strftime(format))
notebook控件帮在一个窗口添加多个模块
#notebook #Frame
# 定义时间更新函数
import ttkbootstrap as ttk
from ttkbootstrap.constants import *
root = ttk.Window(title='title',size=(300,200),resizable=(False,False),themename='superhero')
notebook = ttk.Notebook(master=root, style=SUCCESS)
notebook.pack(fill=BOTH, expand=YES)
# 生成三个子选项卡
tab1 = ttk.Frame(notebook)
label1 = ttk.Label(master=tab1, text='这是第一个选项卡', font=('宋体', 40), style=WARNING)
label1.pack(expand=NO)
tab2 = ttk.Frame(notebook)
label2 = ttk.Label(master=tab2, text='这是第二个选项卡', font=('宋体', 40), style=INFO)
label2.pack(expand=YES)
tab3 = ttk.Frame(notebook)
label3 = ttk.Label(master=tab3, text='这是第三个选项卡', font=('宋体', 40), style=DANGER)
label3.pack(expand=YES)
# 向notebook添加子选项卡...
notebook.add(tab1, text='选项卡 1-WARNING')
notebook.add(tab2, text='选项卡 2-INFO')
notebook.add(tab3, text='选项卡 3-DANGER')
root.mainloop()
进度条如何使用
#Floodgauge
# 定义时间更新函数
import ttkbootstrap as ttk
from ttkbootstrap.constants import *
root = ttk.Window(title='Floodgauge控件实现进度条', size=(600, 400), resizable=(False, False), themename='superhero')

# 添加进度条控件
fg = ttk.Floodgauge(master=root,
          length=500, # 设置进度条长度
          maximum=100, # 进度条最大值为100
          mask='', # 进度条上的文本信息
          font=('微软雅黑', 20)) # mask显示文本的格式
fg.pack(pady=40)
bt = ttk.Button(master=root, text='开始', style='PRIMARY',command=lambda:update_mask(fg,0))
bt.pack(pady=10)
bt.focus_set()
lb = ttk.Label(master=root, text='FLoodgauge进度条的介绍', font=('微软雅黑', 30), style='PRIN')
lb.pack(pady=10)

def update_mask(fg, value): # fg就是进度条本身,value是进度值
  if value <= 100: # value没有到100, 才更新
    fg['value'] = value
    fg['mask'] = f'加载进度{value}%'
    root.after(50, lambda: update_mask(fg, value + 1))
root.mainloop()
教你使用仪表盘
import ttkbootstrap as ttk
#from tkinter import ttk
# 创建Tkinter窗口实例
root = ttk.Window(
 title='Meter控件介绍',
 size=(600, 400),
 resizable=(False, False),
 themename='superhero',
 position=(600, 400)
)
# 创建Meter控件
meter = ttk.Meter(
 master=root,
 amounttotal=100, # 设置总数
 amountused=15, # 设置起始值
 metertype='semi', # 半圆, 默认值是整个圆形
# "gauge": 表示一个仪表盘样式的进度条。
#"semi": 表示一个半圆形的进度条。
#"full": 表示一个完整的圆形进度条。
#"horizontal": 表示一个水平进度条。
#"vertical": 表示一个垂直进度条。
 meterthickness=60, # 设置条型大小
 stripethickness=10, # 设置刻度
 subtext='LOADING', # 设置文本
 subtextfont='-size 20', # 设置字体大小
 subtextstyle='SUCCESS', # 子文本样式
 textfont='-size 40', # 主文本字体大小
 bootstyle='WARNING', # 引导样式
 metersize=400, # 圆盘大小
 interactive=True # 鼠标更改圆盘数值,默认是False
)

# 将Meter控件添加到窗口中
meter.pack()
# 定义更新圆盘数值的函数
def update_meter(meter, value):
 if value <= 100:
  meter['amountused'] = value
  root.after(50, lambda: update_meter(meter, value + 1))
 else:
  value = 0
  meter['amountused'] = value
  root.after(50, lambda: update_meter(meter, value + 1))
# 启动Tkinter事件循环
update_meter(meter, 0)
root.mainloop()

 浙公网安备 33010602011771号