First Adventures in Google Closure -摘自网络
Contents
- Introduction
- Background
- Hello Closure World
- Dependency Management
- Making an AJAX call with Google Closure
- Closure Templates
- Using plovr to Simplify Closure Development
- More Closure Templates
- Animations in Google Closure
- Using plovr for Production
- And Finally...
Introduction
This walkthrough will demonstrate the use of Google Closure by starting at the obligatory 'hello world' level and will build on that, step-by-step, to produce a simple animated stock ticker. This is a beginner-level article but it's not an introduction to the JavaScript language. I will assume a basic understanding of objects and functions in JavaScript.
If you're new to JavaScript, it's important to spend some time with the raw language. There can be no substitute for the insight and experience gained from this. It won't be long though before you're going to need the help of a JavaScript library. And that is where this article picks up. The advantage of using a library like this is that it can help protect you from some of the JavaScript Gotchas and from a lot of cross-browser compatibility issues, etc.
Update: The code is now also available on github, and you can see a working version of the ticker on the project's github pages.
Background
Google Closure is a set of tools developed by Google to help develop rich web applications using JavaScript. In a nutshell, it consists of:
- A library containing a set of reusable UI widgets and controls, plus some lower-level utilities for DOM manipulation, animation, etc.
- A templating system to help dynamically build HTML.
- A compiler to minimize the code so it will download and run quicker.
- A linter utility for checking the JavaScript against a set of style guidelines.
The application described in this article introduces a handful of the utilities provided by the library. I will also demonstrate the creation of a simple Closure Template, and make some basic use of the compiler.
At various points throughout the walkthrough, I will stop to describe some of the concepts and ideas behind Google Closure that I have learnt while starting out with the library myself, including its approach to namespaces, dependency management, events, etc.
Hello Closure World
So, to get started, let's say we want the ability to place a div tag anywhere in our html where we want the ticker tape to appear. Let's start with some html like this...
<html>
<head>
    <title>Closure Ticker Tape</title>
</head>
<body>
    <!-- The 'tickerTapeDiv' div is where we want the ticker tape to appear -->
    <div id="tickerTapeDiv"></div>

    <!-- And this is the JavaScript that will do the work to insert the ticker tape! -->
    <script src="TickerTape.js"></script>
    <script>tickerTape.insert('tickerTapeDiv');</script>
</body>
</html>
Next create a TickerTape.js file with some JavaScript to define that tickerTape.insert function, like this...
goog.provide('tickerTape');
goog.require('goog.dom');

tickerTape.insert = function(elementId) {
    var tickerContainer = goog.dom.getElement(elementId);
    tickerContainer.innerHTML = "Hello Closure World - the ticker tape will go here!";
}
Now, as you've probably guessed, that strange goog object scattered around the code comes from the Google Closure library. We'll talk about that shortly but for now, to make the above code work, we'll need to get a local copy of the library as shown here and add a script tag referencing it in the html as shown below:
<!-- The 'tickerTapeDiv' div is where we want the ticker tape to appear -->
<div id="tickerTapeDiv"></div>

<!-- The relative paths to any required library files. -->
<!-- For now we just need to include the base.js file from the library. -->
<!-- (The exact path will depend on where you saved the library files.) -->
<script src="..\closure-library\closure\goog\base.js"></script>

<!-- And this is the JavaScript that will do the work to insert the ticker tape! -->
<script src="TickerTape.js"></script>
<script>tickerTape.insert('tickerTapeDiv');</script>
If you open the HTML file in your favourite browser now, you should see something like this...
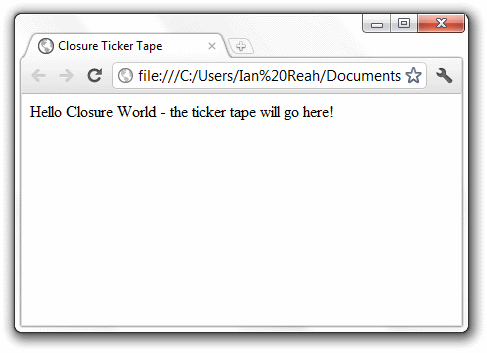
Good - so now we can go through the JavaScript we've written and find out what this goog thing is all about.
The body of the function should be fairly self-explanatory. It uses one of the library's DOM helper utilities goog.dom.getElement to find the element where we want to place the ticker tape and, for now, simply sets its inner HTML to a hello world message.
var tickerContainer = goog.dom.getElement(elementId);
tickerContainer.innerHTML = "Hello Closure World - the ticker tape will go here!";
The most interesting part of the code we've written so far is probably those first two lines...
goog.provide('tickerTape');
goog.require('goog.dom');
...they're part of the library's namespacing and dependency management system. That's quite fundamental to the library so we'll stop there for a while and work through them and some of the reasoning behind them in the next section. But, congratulations - now you've got another hello world program under your belt!
Dependency Management
JavaScript doesn't have a linker. Each compilation unit (essentially each script tag) has its top-level variables and functions thrown in to a common namespace (the global object) together with those from any other compilation units.
So, if you have two (or more) of these that happen to have top-level variables or functions with the same name, then the two parts of the program will interfere with each other in weird and wonderful (and very wrong) ways that can be quite a challenge to track down.
You can address this by organising your code into 'namespaces'. In Google Closure, a namespace is basically a chain of objects hanging off the global object. If each part of your program only adds variables and functions to the object chain that represents its own namespace then you will reduce the risk of them inadvertently interfering with each other.
You define your namespaces with goog.provide and use goog.require to indicate any other namespaces that you want to make use of. Let's look at each of these in turn.
goog.provide
goog.provide ensures that a chain of objects exists corresponding to the input namespace. So, in our hello world example, goog.provide('tickerTape') makes sure that the tickerTape object is available to us so we can go ahead and add our insert function to it.
More precisely, goog.provide will split the input string into individual names using the dot '.' as a delimiter. Then, starting with the left-most name, it will check to see if there is an object already defined on goog.global with that name. If there is, then that existing object is used, but if there isn't, it will add a new object literal with that name to goog.global. It will then continue through the names from left to right and repeat the process (making sure subsequent names are added to the previous object in the chain).
Let's see if we can make that clearer with another example. For example, goog.provide('example.name.space') would be equivalent to writing the following JavaScript...
// Splitting the input string into individual names using the dot as a
// delimiter we get...
//     'example', 'name', 'space'
// So, starting with 'example', is there already an object
// on goog.global that we can use?
// Create one if there isn't.
var example = goog.global.example || (goog.global.example = {});

// Then moving from left to right the next object is 'name'.
// So, does that already exist
// on our 'example' object?  Again, create one if required.
if(!example.name) example.name = {};

// And finally moving on to the next object 'space', add that (if necessary) to the
// object chain we've built up already
if(!example.name.space) example.name.space = {};
So goog.provide is good because it saved me a load of typing and it means I don't need to worry as much about my objects trampling over each other or interfering with the global namespace. Future calls to goog.provide won't upset existing namespaces – it will either use existing objects or append new objects as appropriate.
(By the way, you can think of goog.global as an alias for the global object.)
goog.require
We've seen how we can define namespaces to help prevent any part of our program from inadvertently affecting another part. However, we wouldn't be able to write very interesting programs if the parts weren't allowed to interact at all! This is where we need goog.provide's partner: goog.require.
Put simply, goog.require is used to specify other namespaces that are explicitly used in a JavaScript file, so we can be sure that the functions, etc, that we need have been made available to us before we use them.
If the namespace has already been provided (i.e., if the object chain already exists on goog.global), then there's no need to do anything further. But if it hasn't, then it will find the file that provides the namespace and any files that provide namespaces that file requires, and so on... When it has found them all, it simply adds script tags to include them in the appropriate order.
In our case, that single call to goog.require('goog.dom') is enough for the library to work out that it needs to add the following script tags in order to resolve our dependencies:
<script src="closure-library/closure/goog/debug/error.js" type="text/javascript"></script>
<script src="closure-library/closure/goog/string/string.js" type="text/javascript">
</script>
<script src="closure-library/closure/goog/asserts/asserts.js" type="text/javascript">
</script>
<script src="closure-library/closure/goog/array/array.js" type="text/javascript"></script>
<script src="closure-library/closure/goog/useragent/useragent.js" type="text/javascript">
</script>
<script src="closure-library/closure/goog/dom/browserfeature.js" type="text/javascript">
</script>
<script src="closure-library/closure/goog/dom/tagname.js" type="text/javascript"></script>
<script src="closure-library/closure/goog/dom/classes.js" type="text/javascript"></script>
<script src="closure-library/closure/goog/math/coordinate.js" type="text/javascript">
</script>
<script src="closure-library/closure/goog/math/size.js" type="text/javascript"></script>
<script src="closure-library/closure/goog/object/object.js" type="text/javascript">
</script>
<script src="closure-library/closure/goog/dom/dom.js" type="text/javascript"></script>
Now can you imagine having to maintain all that by hand?
Note: This only describes how it works when using the uncompiled source, which is good for development but has performance issues for production. When you compile your code with the Closure Compiler, instead of including script tags for entire JavaScript files, it will work out exactly which parts of the code you require and paste them in directly. (As well as doing what it can to make the combined code as small as possible so it can load as quickly as possible.) I'll show you a simple way to produce this compiled code later, but how the compiler works is beyond the scope of this article.
goog.addDependency
There is one other aspect of Google Closure's dependency management that we don't use in our example, but it is important to be aware of when you come to create more complex programs yourself.
Namespaces provided and required by a JavaScript file should be registered using goog.addDependency. This gives it all the information it needs to build up the dependency graph so it can work out exactly which files need to be included to provide a particular namespace and all of its dependencies.
We don't need to do this in our example because we're only using namespaces from the library and there is already a file in the closure library called deps.js which contains the required calls to goog.addDependency for the library's namespaces.
When your programs contain multiple namespaces with dependencies between them, then this is something you will need to consider. Fortunately, you don't necessarily have to manually create and maintain your own deps.js file though. There are tools to help you. For example, the library comes with a python script to help you, or you can use a tool like plovr. (I'll be saying a bit more about plovr later, because it really does simplify the process of development with Google Closure.)
base.js
Just one last thing before we move on and start to develop our 'hello world' program into something a bit more interesting: If you haven't worked it out already, that script tag we added to the html to include base.js from the closure library...
<script src="..\closure-library\closure\goog\base.js"></script>
Well, you need that because that's where the goog.global object is set up and functions like goog.provide, goog.require and goog.addDependency (among others) are defined. So, clearly, none of this would work without that!
Ok. Let's get back to the development of our ticker tape. Next we're going to look at how we can get some data in to our application.
Making an AJAX Call with Google Closure
To get the data, we're going to use YQL (Yahoo! Query Language) and one of the many open data tables built by the community. I'm not going to go into YQL and how the open data tables work here, but if you haven't used them before, you should definitely take a look. Often, while working on learning projects like this, one of the challenges can be getting hold of a good set of real data. A resource like YQL with the open data tables can be invaluable.
We'll use the yahoo.finance.quotes table to get stock quotes for our stock ticker. (I would assume that much of the financial data we'll be getting back is delayed - so don't go investing your life savings based on what you see here!)
Google Closure provides a class for handling XMLHttpRequests: goog.net.XhrIo. This is a good example of the library doing its job of protecting you from various browser differences as there are differences in their implementations of XMLHttpRequest.
There are a few ways of using the class but the simplest is to use the static send function to make a one-off asynchronous request. Just give it the URI to request and a callback function to invoke when the request completes.
goog.net.XhrIo.send('http://query.yahooapis.com/v1/public/yql?\
                q=select * from yahoo.finance.quotes where symbol in\
                ("HSBA.L, RDSA.L, BP.L, VOD.L, GSK.L,
		AZN.L, BARC.L, BATS.L, RIO.L, BLT.L")\
                &env=store://datatables.org/alltableswithkeys&format=json',
		function(completedEvent) {
    var tickerContainer = goog.dom.getElement(elementId);
    tickerContainer.innerHTML = "Hello Closure World - now I've got some data for you!";
});
Or, after a bit of refactoring to make it easier to read, hopefully you can see how simple it is...
tickerTape.interestingStocks =
        ["HSBA.L", "RDSA.L", "BP.L", "VOD.L", "GSK.L",
	"AZN.L", "BARC.L", "BATS.L", "RIO.L", "BLT.L"];

tickerTape.insert = function(elementId) {
    var queryStringFormat = 'http://query.yahooapis.com/v1/public/yql?\
                    q=select * from yahoo.finance.quotes where symbol in ("%s")\
                    &env=store://datatables.org/alltableswithkeys&format=json';

    var queryString = goog.string.format(queryStringFormat, tickerTape.interestingStocks);

    goog.net.XhrIo.send(queryString, function(completedEvent) {
        var tickerContainer = goog.dom.getElement(elementId);
        tickerContainer.innerHTML = "Hello Closure World -
					now I've got some data for you!";
    });
}
Here tickerTape.interestingStocks just includes some of the top stocks from the FTSE 100. You could change it to include any other symbols you like.
You might have to be a bit careful with that long query string in your JavaScript file. I've laid it out over a few lines with indents for clarity in the article, but if that whitespace ends up as spaces in the URI, you'll just get a bad request response!
Notice that we've simply replaced the list of symbols in the original query string with %s. That's so we can put the URI query together using goog.string.format which enables us to do sprintf-like formatting.
Of course, you'll have to add a couple of extra calls to goog.require for the additional library utilities we're using...but you knew that already, didn't you?
goog.require('goog.string.format');
goog.require('goog.net.XhrIo');
Opening the HTML file in a browser now should give you something like this...
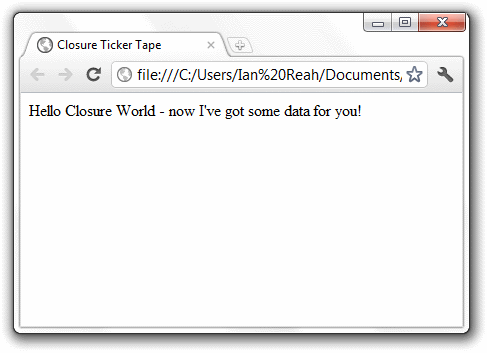
Ok, so maybe it's still not all that exciting to look at, but we've now made an asynchronous URI request and put some HTML in our page when the request completed.
The XhrIo class is event based. That callback we passed to the send function gets assigned as a 'listener' to the goog.net.EventType.COMPLETE event on the XhrIo object.
We'll be looking at events a bit more later when we come to animate the ticker, but for now what you need to know is that when an event listener gets called it is passed an object representing the event. The event object has a target property referencing the object that originated the event. In our case, the target property of the event object will point to the XhrIo object used to send the request. We can use this to access the data returned from the request...
goog.net.XhrIo.send(queryString, function(completedEvent) {
    var xhr = completedEvent.target;
    var json = xhr.getResponseJson();
});
And the JSON we get back looks something like this... (There's actually a whole load more information in each of those items in the quote array, but I'm only showing a few of the fields here to make it easier to see the structure of the JSON.)
{
    "query": {
        "count":3,
        "created":"2011-09-22T21:01:53Z",
        "lang":"en-US",
        "results":{
            "quote":[{"Bid":"486.15","Change":"-25.30",
			"Symbol":"HSBA.L","Volume":"47371752"},
                     {"Bid":"1998.00","Change":"-73.0001",
			"Symbol":"RDSA.L","Volume":"4519560"},
                     {"Bid":"383.95","Change":"-19.95",
			"Symbol":"BP.L","Volume":"46864036"}]
		}
	}
}
So we can easily get to the data and start displaying it...
goog.net.XhrIo.send(queryString, function(completedEvent) {
    var xhr = completedEvent.target;
    var json = xhr.getResponseJson();

    var tickerContainer = goog.dom.getElement(elementId);
    for(var i = 0; i < json.query.count; i++) {
        tickerContainer.innerHTML += goog.string.format
		("Bid %d: %s\t", i, json.query.results.quote[i].Bid);
    }
});
You can open the HTML file now and you should see the bid prices for each of the stocks we requested...
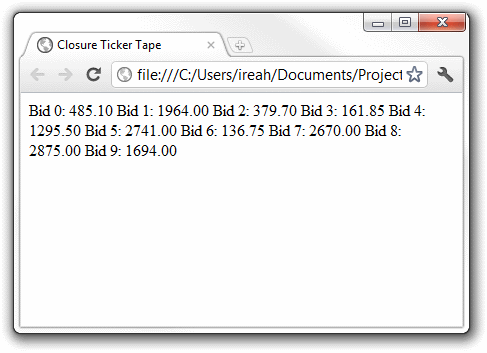
Now we're getting somewhere! Of course, we could continue building up our HTML for each quote within that loop, but Google Closure provides an alternative - Closure Templates.
Closure Templates
Closure Templates provide a simple syntax for dynamically building HTML. With Closure Templates, you can lay out your HTML with line breaks and indentation making it much easier to read. The template compiler will remove the line terminators and whitespace. It will also escape the HTML for you so that's another thing you don't need to worry about.
Closure templates are defined in files with a .soy extension, and they should start by defining a namespace for the templates in the file. So let's go ahead and create a TickerTape.soy file and start with the namespace...
{namespace tickerTape.templates}
The rest of the file can then contain one or more template definitions. A template is defined within a template tag, and each must have a unique name – starting with a dot to indicate that it is relative to the file's namespace. So, let's create our first template called stockItem below that namespace definition:
{template .stockItem}
{/template}
A template must be preceded with a JSDoc style header, with a @param declaration for each required parameter and a @param? declaration for any optional parameters. We don't need any optional parameters, but if we define the fields from the objects in the quote array in our JSON then it means we'll be able to use the template by simply passing in any of those objects. We're going to use the Symbol, Volume, Bid and Change fields...
/**
 * Create the html for a single stock item in the ticker tape
 * @param Symbol {string}
 * @param Volume {number}
 * @param Bid {number}
 * @param Change {number}
 */
{template .stockItem}
{/template}
In the body of the template, we can simply lay out our HTML in an easily readable and maintainable manner, and insert the values of the input parameters as required with the {$paramName} syntax.
/**
 * Create the html for a single stock item in the ticker tape
 * @param Symbol {string}
 * @param Volume {number}
 * @param Bid {number}
 * @param Change {number}
 */
{template .stockItem}
<span class="stockItem">
    <span class="symbol">{$Symbol}</span>
    <span class="volume">{$Volume}</span>
    <span class="bid">{$Bid}</span>
    <span class="change">{$Change}</span>
</span>
{/template}
To use the template in our JavaScript, we just need to add a call to goog.require for the template namespace to the top of our JavaScript file...
goog.require('tickerTape.templates');
...and then, instead of building up the HTML for each quote within the loop, we can just pass the quote objects over to the template...
for(var i = 0; i < json.query.count; i++) {
    tickerContainer.innerHTML +=
	tickerTape.templates.stockItem(json.query.results.quote[i]);
}
The bad news is that you won't be able to see the results of this straight away. First, to compile the template, you will need to download the latest files from the closure template project hosting site, then run a Java file, then add some script tags to the HTML for the additional dependencies... do you know what? This is getting way too much! Let's break there and look at one of the tools I mentioned earlier that will deal with all this for us!
Using plovr to Simplify Closure Development
plovr greatly simplifies Closure development by streamlining the process of compiling your closure templates, managing your dependencies, and minimizing your JavaScript.
During development with plovr, you will be able to edit your JavaScript and/or Soy files, refresh your browser, and have it load the updated version to reflect your edits. It will also display any errors or warnings from the compilation at the top of the browser.
The easiest way to get going with plovr:
- Download the latest pre-built binary of plovr from here.
- Create a plovr config file. Call it plovr.config. There's more about the plovr config options here, but in its simplest form it will look something like:
{
    // Every config must have an id, and it
    // should be unique among the configs being
    // served at any one time.
    // (You'll see why later!)
    "id": "tickerTape",

    // Input files to be compiled...
    // ...the file and its dependencies will be
    // compiled, so you don't need to manually
    // include the dependencies.
    "inputs": "TickerTape.js",

    // Files or directories where the inputs'
    // dependencies can be found ("." if everything
    // is in the current directory)...
    // ...note that the Google Closure Library and
    // Templates are bundled with plovr, so you
    // don't need to point it to them!
    "paths": "."
}
- Start plovr with the following command. (Note that the exact name of the plovr .jar file that you downloaded might be slightly different, so make sure you use the right filename in the command.)
java -jar plovr-c047fb78efb8.jar serve plovr.config
You should see something like this:
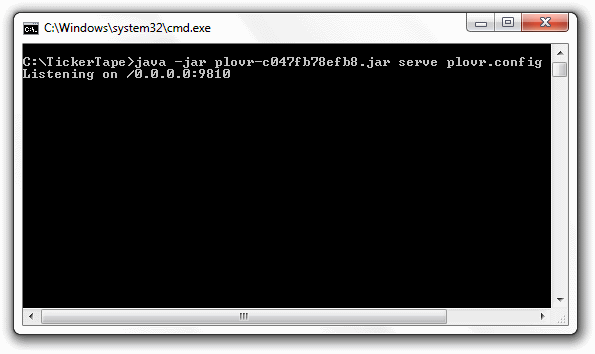
As you can see, by default plovr runs on port 9810. So all we need is a script tag in our HTML with the URL as shown below. Notice that this really is all we need - I've removed the script tag referencing the library's base.js file and the reference to our tickerTape.js. Your HTML should now look like this:
<html>
<head>
    <title>Closure Ticker Tape</title>
</head>
<body>
    <!-- The 'tickerTapeDiv' div is where we want the ticker tape to appear -->
    <div id="tickerTapeDiv"></div>

    <!-- With plovr running in server mode (as described) this url will return the -->
    <!-- compiled code for the configuration with given id (tickerTape, in our case) -->
    <!-- When setting the mode parameter to 'RAW' the output gets loaded into -->
    <!-- individual script tags, which can be useful for development if you end up -->
    <!-- needing to step into the code to debug. -->
    <script src="http://localhost:9810/compile?id=tickerTape&mode=RAW"></script>

    <!-- Now we can simply call our function to insert the ticker tape -->
    <script>tickerTape.insert('tickerTapeDiv');</script>
</body>
</html>
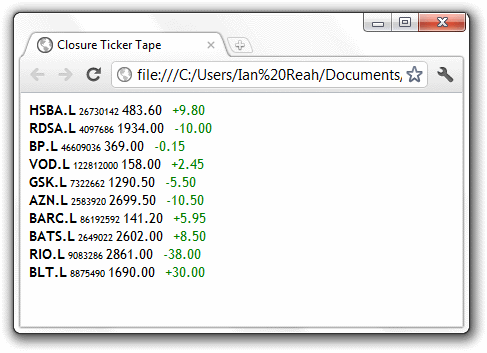
Now loading the HTML in a browser will automatically compile any templates, etc. It also means you can edit your JavaScript &/or Templates and simply refresh the browser to see the effect of the changes. So, at last, you can see the results of creating that Closure Template...
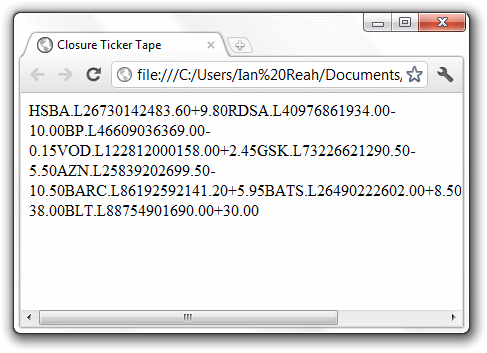
Or, with a bit of simple CSS styling...
body {
    overflow-x: hidden;
}

.stockItem {
    font-family:"Trebuchet MS", Helvetica, sans-serif;
    font-size:14px;
    display: inline-block;
    width:250px;
}

.symbol {
    font-weight:bold;
    margin-right:3px;
}

.volume {
    font-size:10px;
    margin-right:3px;
}

.bid {
    margin-right:10px;
}

.change {
    color: green;
}
More Closure Templates
Now that we've streamlined our development process, it is very easy to play around some more with our template and see what else we can do.
One simple thing we can do is use the if command for conditional output. The syntax for the command looks like this:
{if <expression>}
    ...
{elseif <expression>}
    ...
{else}
    ...
{/if}
So, instead of just outputting the Change value directly in our template, we can format it differently for a positive and a negative change. Open the TickerTape.soy file and replace the line which outputs the Change value with the following...
{if $Change < 0}
    <span class="changeDown">{$Change}</span>
{else}
    <span class="changeUp">{$Change}</span>
{/if}
...and with the necessary additions to the CSS...
.changeDown {
    color: red;
}

.changeUp {
    color: green;
}
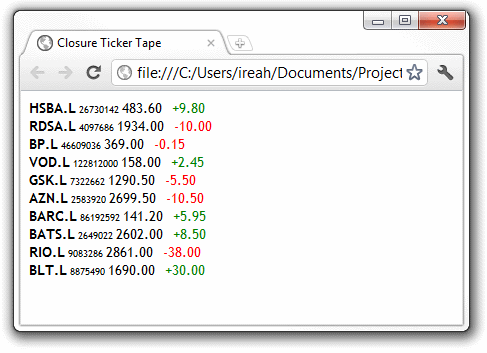
...you just need to refresh the browser to see something like this. Notice the colour highlighting for positive and negative changes.
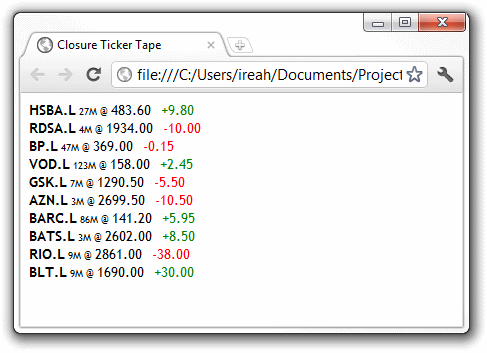
Closure templates can also make calls to other closure templates. Supposing we wanted to format those long, messy numbers we're getting for Volume. We could do that in a separate template and call it from our template, passing in the Volume value as a parameter. Add the following to our template to replace the line where we're currently outputting the Volume value within a span...
<span class="volume">
    {call .formatVolume}
        {param Volume: $Volume /}
    {/call} @
</span>
And then define the new template at the bottom of our TickerTape.soy file. This uses some more conditional output to show the Volume as thousands, millions, or billions (K, M, or B) as appropriate to the magnitude of the value.
/**
 * Format the stock's volume using K, M, or B
 * for thousands, millions, or billions!
 * @param Volume {number}
 */
{template .formatVolume}
{if $Volume < 1000}
    {$Volume}
{elseif $Volume < 1000000}
    {round($Volume/1000)}K
{elseif $Volume < 1000000000}
    {round($Volume/1000000)}M
{else}
    {round($Volume/1000000000)}B
{/if}
{/template}
And, with another browser refresh, you should see something like this...(Oh, yeah - I snuck in an @ symbol between the volume and bid values. Looks better, I think?)
Check out the documentation for some further reading on the Closure Template concepts and commands.
Animations in Google Closure
The final thing we want to do to our ticker tape is to animate it. In other words, make it continuously scroll along the top of the page. This is how we'll do it...
- Move the ticker tape to the left until the first item moves completely out of view.
- Change the order of the items by moving the first one to the end so that the second one goes to the front.
- Repeat 1 and 2.
This should give the effect of a continuous scrolling and wrapping ticker tape. But, one step at a time...let's see how we could achieve that first part of animating the ticker tape to move the first item out of view.
First, we need to make sure that the ticker tape container has the appropriate style settings for us to be able to move its position (i.e., it must be positioned relatively). Of course, we could just do this in the CSS file but it doesn't feel right that our code will rely on something being set in a separate file for it to work properly. A better way would be to set up what we need ourselves in the JavaScript - and, as you would expect, the closure library provides some utilities in goog.styles for us to do this.
So, you know the drill, go ahead and add the goog.require at the top of the file with the others...
goog.require('goog.style');
Then add a new function at the bottom of the file as follows. (This new function is where we're going to do our animation.)
tickerTape.start = function(tickerContainer) {
    // Note - we're assuming that all items in the ticker have the same width
    // (styled in css)
    var firstItem = goog.dom.getFirstElementChild(tickerContainer);
    var itemWidth = goog.style.getSize(firstItem).width;

    // Make sure the container is set up properly for us to be able to
    // influence its position
    goog.style.setStyle(tickerContainer, 'position', 'relative');
    goog.style.setWidth(tickerContainer,
		itemWidth * tickerTape.interestingStocks.length);
}
To start with, all we're doing in this new function is to set the position style on the container to relative and set its width so that it's wide enough to contain the whole tape without wrapping over multiple lines.
Notice how I've calculated the required width by getting the width of the first item and multiplying it by the number of items. This implies the assumption that all stock items are the same width, but I'm not too worried about that for now. We can change it if it becomes a problem.
Let's make a call to this new function at the end of our AJAX callback to see the results so far...
goog.net.XhrIo.send(queryString, function(completedEvent) {
    var xhr = completedEvent.target;
    var json = xhr.getResponseJson();

    var tickerContainer = goog.dom.getElement(elementId);
    for(var i = 0; i < json.query.count; i++) {
        tickerContainer.innerHTML += tickerTape.templates.stockItem
					(json.query.results.quote[i]);
    }

    tickerTape.start(tickerContainer);
});
And you should see something like this...
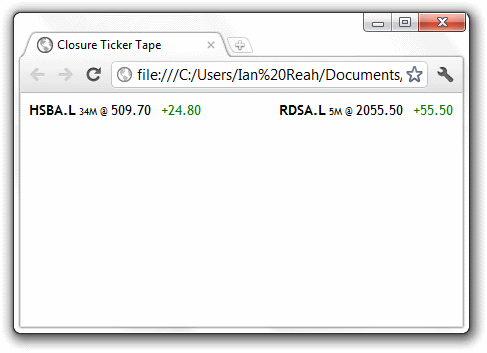
In Google Closure, we can create an animation object by providing an array of start co-ordinates, an array of end co-ordinates, and a duration (in milliseconds). Then calling play on the animation object will animate those co-ordinates in a linear fashion from their starting positions, reaching the ending positions after the specified duration.
So, in our case, to animate the ticker from its starting position towards the left for the width of one item over 5000ms, we need to add the following code to the end of our start function...
// We animate for the width of one item...
var startPosition = goog.style.getPosition(tickerContainer);
var animation = new goog.fx.Animation([ startPosition.x , startPosition.y ],
        [ startPosition.x - itemWidth, startPosition.y ], tickerTape.animationDuration);
animation.play();
Note that, for the sake of readability and maintainability, I've declared the animation duration as a top-level variable in our namespace.
// Time taken to scroll the width of one item in the ticker (in milliseconds)
tickerTape.animationDuration = 5000;
And, of course, we need to add the goog.require('goog.fx.Animation') call for the animation.
We're not quite there yet though. You can run the code as it is, but you won't see anything moving. The animation object is happily throwing out these numbers to animate the co-ordinates we gave it, but we're not paying any attention to it! The animation object will regularly raise a goog.fx.Animation.EventType.ANIMATE event with the new co-ordinates, so we need to listen to that event and respond appropriately. To do that, we use goog.events.listen to assign an event listener.
goog.events.listen(animation, goog.fx.Animation.EventType.ANIMATE, function(event) {
    goog.style.setPosition(tickerContainer, event.x, event.y);
});
Remember earlier, when we were talking about the XhrIo AJAX call? I said that the callback we passed to the send function gets assigned as a 'listener' to the goog.net.EventType.COMPLETE event. Well that's exactly what we're doing here. We're adding a listener to the goog.fx.Animation.EventType.ANIMATE event on our animation object and providing a callback which sets the position of our container based on the new co-ordinates. The event object provided to our callback has an x and a y property providing the new co-ordinate.
Make sure you've added the above code after constructing the animation object and before calling animation.play(), and you should see things start to move when you run it.
Have a look at this tutorial if you want to read up a bit more on the library's event model.
Hopefully you saw the ticker tape scrolling along to the left and then stop when the first item was out of view. We can achieve our final step of swapping the items around and repeating the animation by listening to the goog.fx.Animation.EventType.END event. Just add the following code before the call to animation.play()...
// Shuffle the items around (removing the first item & adding it to the end)
// and repeat the animation.
// This	gives the effect of a continuous, wrapping ticker.
goog.events.listen(animation, goog.fx.Animation.EventType.END, function(event) {
    firstItem = goog.dom.getFirstElementChild(tickerContainer);
    goog.dom.removeNode(firstItem);
    goog.dom.appendChild(tickerContainer, firstItem);

    animation.play();
});
And that's it! Your ticker tape should now be continuously animating. It's still a very simple application with plenty of room for improvement. There's very little in the way of validation or error-handling, and there is the limitation that the stock quotes are retrieved once so the data remains static unless the page is refreshed. But I'll leave that as an exercise for the reader!
In the final section, we'll take a brief look at using the compiler to minimize the code for production.
Using plovr for Production
Once we're ready to release our application we're going to want to compile the code. The easiest way to do this is with the following plovr command...(Don't forget to use the appropriate file name for your plovr jar file.)
java -jar plovr-c047fb78efb8.jar build plovr.config > tickerTape-compiled.js
This gives us a single JavaScript file, tickerTape-compiled.js, containing all our code, compiled templates, and required library code. We can change our HTML to reference this...
<html>
<head>
    <title>Closure Ticker Tape</title>
    <link href="styles.css" rel="stylesheet" type="text/css" />
</head>
<body>
    <!-- The 'tickerTapeDiv' div is where we want the ticker tape to appear -->
    <div id="tickerTapeDiv"></div>

    <!-- In production we compile our JavaScript to minimize it and then just -->
    <!-- load that here. -->
    <script src="tickerTape-compiled.js"></script>

    <!-- Now we can simply call our function to insert the ticker tape -->
    <script>tickerTape.insert('tickerTapeDiv');</script>
</body>
</html>
...and we just need to upload the three files (HTML, CSS, and compiled JavaScript) to see our ticker tape in action in a production environment.
By default, the code is compiled using SIMPLE_OPTIMIZATIONS. This minimizes the code by removing comments, whitespace, and linebreaks, as well as renaming local variables and function parameters to shorter names. You can get a much smaller compiled file by switching to ADVANCED_OPTIMIZATIONS. Just add a line to our plovr.config file for "mode": "ADVANCED".
ADVANCED_OPTIMISATIONS is much more aggressive and makes certain assumptions about the code. As a result, it can require extra effort to make sure the compiled code will run in the same way as the raw code. This is beyond the scope of this walkthrough but you can read more on how to achieve this here.
And Finally...
There's one more important aspect of Google Closure to mention before we finish. If you download the source code provided with the article, you'll notice that I use those JSDoc style comments all over the code, and not just to annotate the templates.
Of course, it's always good to document your code, but these comments are more than that. By being a bit more precise with the documentation syntax, the compiler can actually use them to perform some static checks on the code, and therefore warn you about certain mistakes or inconsistencies. You can read more about the JSDoc syntax here.
Well that turned out to be quite a long article, but I wanted to do something beyond the 'hello world' level and I hope it's been informative and given some insights into a broad range of the aspects of Google Closure.


· 10年+ .NET Coder 心语,封装的思维:从隐藏、稳定开始理解其本质意义
· .NET Core 中如何实现缓存的预热?
· 从 HTTP 原因短语缺失研究 HTTP/2 和 HTTP/3 的设计差异
· AI与.NET技术实操系列:向量存储与相似性搜索在 .NET 中的实现
· 基于Microsoft.Extensions.AI核心库实现RAG应用
· 阿里巴巴 QwQ-32B真的超越了 DeepSeek R-1吗?
· 10年+ .NET Coder 心语 ── 封装的思维:从隐藏、稳定开始理解其本质意义
· 【译】Visual Studio 中新的强大生产力特性
· 【设计模式】告别冗长if-else语句:使用策略模式优化代码结构
· 字符编码:从基础到乱码解决