SpringBoot入门01-环境部署
随笔目录:
- 环境准备
- 创建过程
- 编码试行
- 环境准备
如果编辑器是还没有配置过相关环境的,在用SpringBoot开发项目的时候,需要先环境,spring boot官网建议的开发工具是: STS或Idea 本人建议eclise-jee中加入STS插件,方法如下:
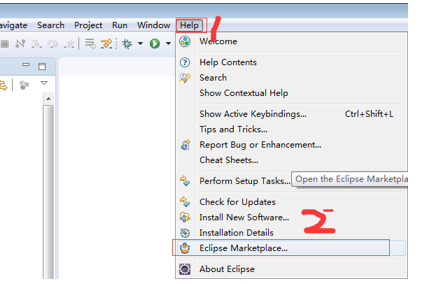
1.在eclipse中的【help】-->【eclipse marketplace】
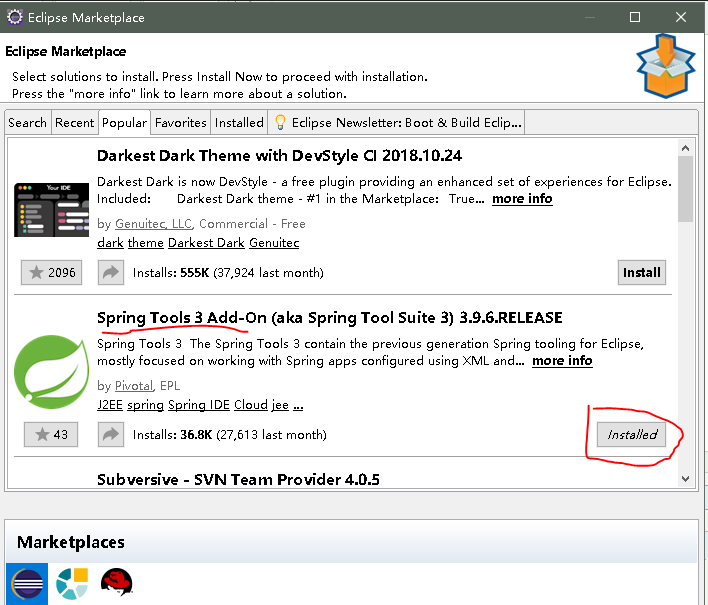
2.在打开的窗口中,打开【popular】,选择绿色叶子,点击安装,如果没有看到,尝试搜索
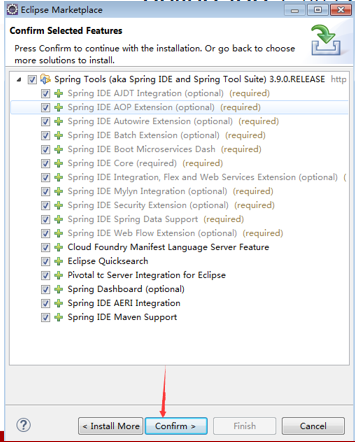
3.之后就是一些自动下载安装步骤,合理选择和点击下一步即可

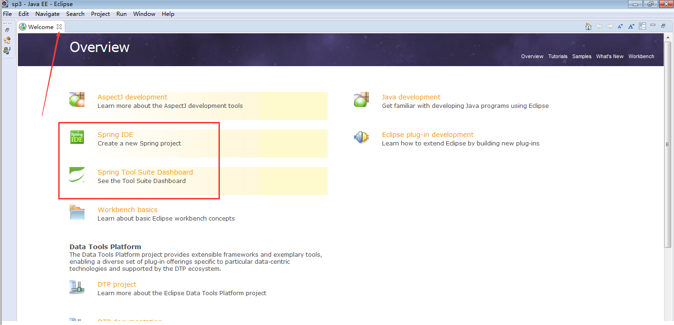
4.到此,环境准备完成
- 创建项目
1.【File】-->【new】-->【other】
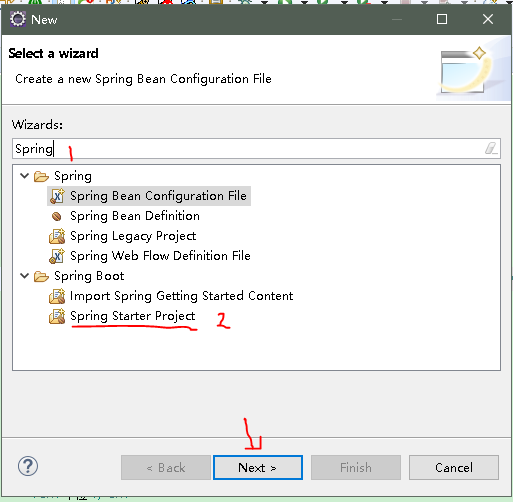
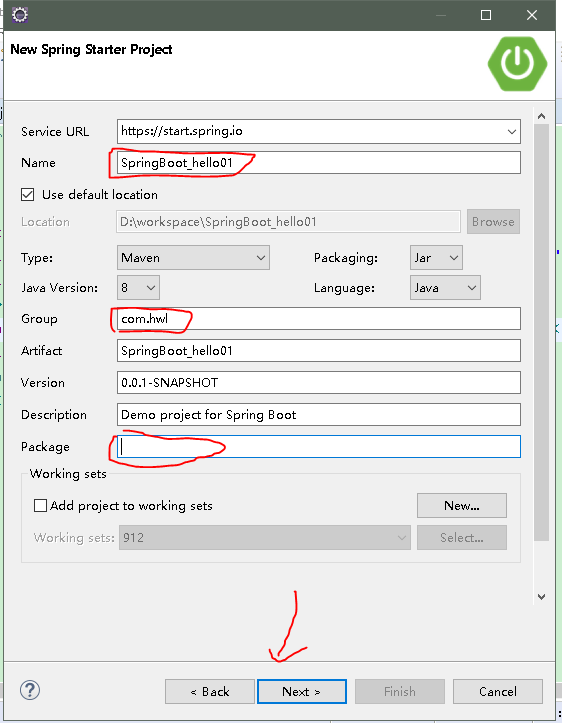
2.配置项目信息
3.勾选web
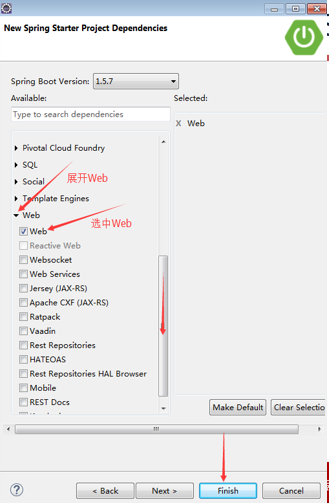
第一次创建,由于下载相应的依赖包可能会比较慢,可以先喝杯茶

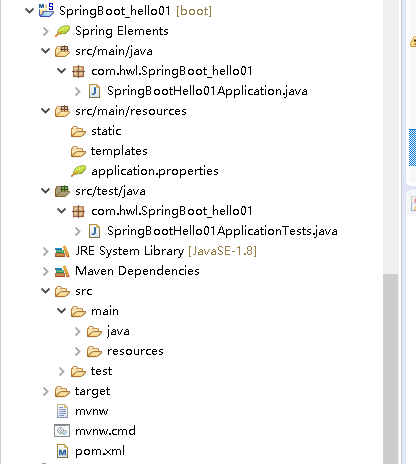
4.项目建好后的项目结构
5.添加包层次控制层和实体层
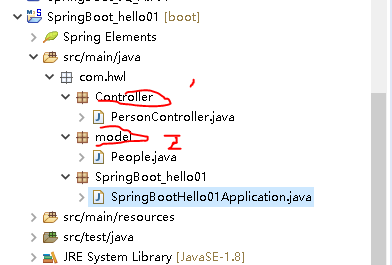
实体层代码:

 1 package com.hwl.model;
 2
 3 public class People {
 4
 5     private String name;
 6     private int age;
 7     private String sex;
 8
 9     @Override
10     public String toString() {
11         return "People [name=" + name + ", age=" + age + ", sex=" + sex + "]";
12     }
13
14     public People() {
15         super();
16     }
17
18     public People(String name, int age, String sex) {
19         super();
20         this.name = name;
21         this.age = age;
22         this.sex = sex;
23     }
24
25     public String getName() {
26         return name;
27     }
28
29     public void setName(String name) {
30         this.name = name;
31     }
32
33     public int getAge() {
34         return age;
35     }
36
37     public void setAge(int age) {
38         this.age = age;
39     }
40
41     public String getSex() {
42         return sex;
43     }
44
45     public void setSex(String sex) {
46         this.sex = sex;
47     }
48
49
50
51
52 }
控制层代码:

 1 package com.hwl.Controller;
 2
 3 import org.springframework.stereotype.Controller;
 4 import org.springframework.web.bind.annotation.RequestMapping;
 5 import org.springframework.web.bind.annotation.ResponseBody;
 6
 7 import com.hwl.model.People;
 8
 9 @Controller
10 public class PersonController {
11
12     @ResponseBody
13     @RequestMapping(value="/getPeople")
14     public People getPeople() {
15         return new People("菜鸟",20,"男");
16     }
17 }
6.尝试运行
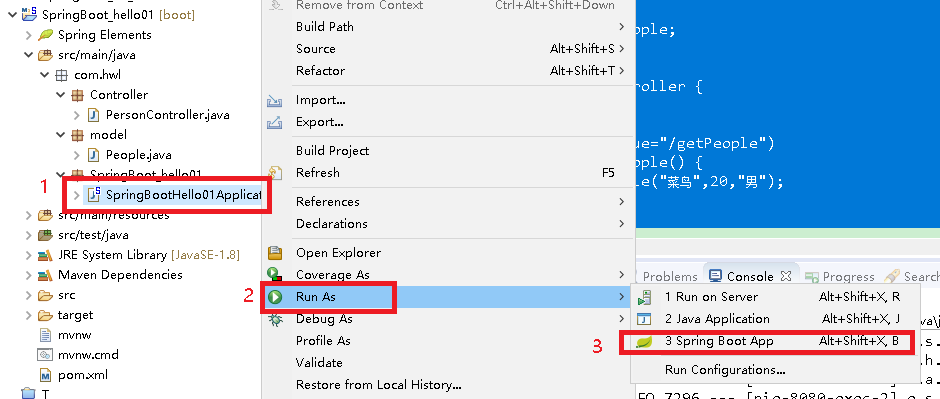
7.成功启动
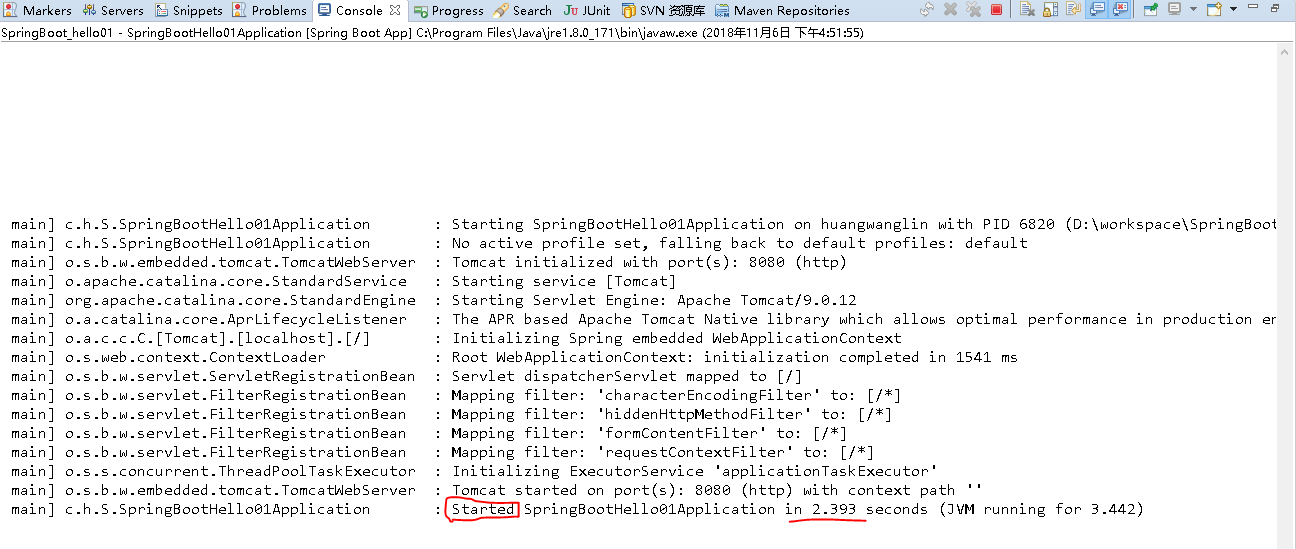
8.尝试通过浏览器访问
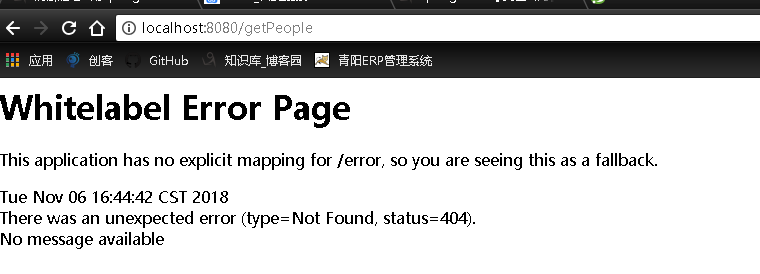
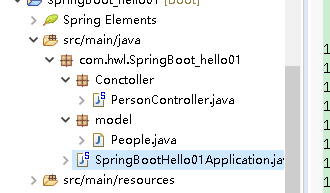
遇到了一些问题,访问不到,检查发现包层次问题,导致无法访问,当前情况下,自己的包需要和主函数文件同级
修改包结构:
尝试运行并浏览器访问:

到此,一个简单的项目打通了,很方便简介啊~


