

codeigniter3整合smarty
Codeigniter 3.0+Smarty-3.1.14
1、下载Smarty类库,并放到CI/Controller/libraries;
修改Smarty.class.php文件名为Smarty.php
2、配置autoload.php,自动加载smarty类
<?php
$autoload['libraries'] = array('smarty/Smarty');
3、在config下面创建smarty.php配置文件,并在autoload.php中自动加载
<?php
//config/smarty.php$config['template_dir'] = APPPATH . "views/templates";
$config['compile_dir'] = APPPATH . "views/templates_c";
//autoload.php
$autoload['config'] = array('smarty');
4、创建helper方法,获取smarty对象,省得每次调用都要重写创建代码
function get_smt()
  {
    $ci = &get_instance();
    $_sm = $ci->smarty;
    $_sm->template_dir = $ci->config->item('template_dir');      //加载smarty.php配置
    $_sm->compile_dir = $ci->config->item('compile_dir');       //加载smarty.php配置
return $_sm; }
5、使用
创建控制器,通过helper方法获取smarty对象,再调用smarty方法
public function index()
{
$_sm = get_smt();
$_sm->display('demo1.html');
}
自定义函数:
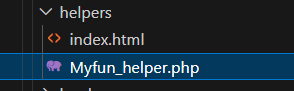
1、创建helper函数,Myfun_helper.php
创建方法函数:
function fn_info()
  {
    return 1111;
  }
2、控制器中,注册方法函数(smarty3.0开始使用registerPlugin)
class Hehe extends CI_Controller
{

  public function __construct()
  {
    parent::__construct();
  }

  public function index()
  {
    require APPPATH . 'config/smarty.php';
    $_sm->registerPlugin('function', 'k_info', 'fn_info');  //注册方法函数
    $_sm->display('demo1.tpl');
  }
}
3、视图中调用即可
<body>
    {k_info}
</body>
注册块函数
function fn_kuai($arr, $content, $template, $repeat)  //开始标签处$repeat为true,结束标签时$repeat为false
  {
    if ($repeat) {    //默认块函数会调用两遍,第一遍是开始标签,第二遍是结束标签
      return "你的年龄是:{$arr['age']},身高是:{$arr['height']},体重是:{$arr['tizhong']}";
    }
  }
视图中调用
<body>
    {k_info age=38 height=178 tizhong=62 }{/k_info}
</body>
