5、lvs使用进阶(01)
四层、七层负载均衡的区别 https://jaminzhang.github.io/lb/L4-L7-Load-Balancer-Difference/
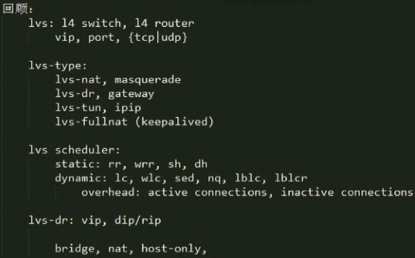
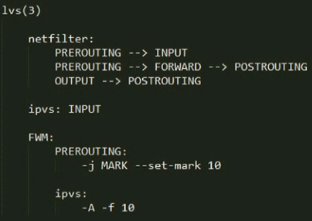
netfilter/iptables简介 https://segmentfault.com/a/1190000009043962
LVS使用防火墙标记实现多端口绑定服务 http://www.unixfbi.com/453.html
一,防火墙标记介绍
FirewallMark FWM 防火墙标记 一个集群服务(lvs-dr调度web server)可以将两个服务(如80/443/22等)绑定在一起调度
我们使用LVS/DR模式搭建web服务器的负载均衡,如果web服务器需要同时支持http和https的话,需要配置两套服务了,一套基于http的80端口,另一套基于https的443端口。配置两套有没有感觉维护起来比较麻烦。有没有其他的解决方案呢?答案是有的。下面我们来看看防火墙标记与LVS结合实现这一功能。
防火墙标记和lvs结合,可以让两个服务指向同一个集群,例如我们这里把80和443端口的服务都指向同一个集群。功能:将共享一组RS的集群服务统一进行定义。
通过FWM定义集群的方式步骤:
(1)在director上netfilter的mangle表的PREROUTING定义用于"打标"的规则
# iptables -t mangle -A PREROUTING -d $vip -p $protocol --dports $dport -j MARK --set-mark $num
$vip是LVS的VIP地址,$dport是要访问本地的端口,$num是防火墙标记位。如果想让2个不同的端口当做同一个集群服务的话,这里的$num的值要一样。
(2)基于FWM定义集群服务:
# ipvsadm -A -f $num -s scheduler
2、示例 (借助RIP、DIP、VIP都在同一网段,已经做好的LVS-DR模型)
(1)准备工作
# ipvsadm -L -n //首先查看是否有ipvsadm的规则,如果有,则清空

# ipvsadm -C //清空规则
# iptables -t mangle -L -n //查看是否有iptables规则链,记得禁用firewalld
# iptables -t mangle -F //如果有则清空
或
# iptables -t mangle -x
# iptables -t nat -x //nat的规则也需要清理
# iptables -t mangle -L -n
Chain PREROUTING (policy ACCEPT)
target prot opt source destination
Chain INPUT (policy ACCEPT)
target prot opt source destination
Chain OUTPUT (policy ACCEPT)
target prot opt source destination
Chain POSTROUTING (policy ACCEPT)
target prot opt source destination
(2)定义iptables规则
# iptables -t mangle -A PREROUTING -d 192.168.184.145 -p tcp --dport 80 -j MARK --set-mark 10
//请求的是VIP,目标端口是80,都会打上标记10
# iptables -t mangle -L -n
Chain PREROUTING (policy ACCEPT)
target prot opt source destination
MARK tcp -- 0.0.0.0/0 192.168.184.145 tcp dpt:80 MARK set 0xa
(3)添加ipvsadm规则,基于FirewallMark定义LVS负载均衡集群
# ipvsadm -A -f 10 -s rr
# ipvsadm -a -f 10 -r 192.168.184.142 -g
# ipvsadm -a -f 10 -r 192.168.184.143 -g

(4)此时在浏览器中输入IP地址即可访问


这样的好处在于将两种集群定义成同一个来调度,以上的集群规则不变,将SSH服务做成负载均衡集群。
利用SSH服务连接192.168.184.145,此时请求的是director的VIP。

接下来在director上把SSH服务也定义为集群,并且和上面web服务(142/143)是同一个集群,需要添加一条iptables规则,即防火墙为10的目标端口再添加一个22端口就可以了,集群规则无需改变。
# iptables -t mangle -A PREROUTING -d 192.168.184.145 -p tcp --dport 22 -j MARK --set-mark 10 //当请求的服务目标端口是22时,会打上标记10
此时再用SSH服务登陆VIP:192.168.184.145:两张图片对比可知,虽然都是利用SSH服务请求的192.168.184.145,但返回的RIP地址是不一样的,这就FWM防火墙标记意义

3、下面配置同时调度80和443端口
配置https证书
(1)创建CA(在director上即192.168.184.141上创建)
# cd /etc/pki/CA
# (umask 077; openssl genrsa -out private/cakey.pem 2048) //生成私钥
# touch index.txt
# echo 01 > serial
# openssl req -new -x509 -key private/cakey.pem -out cacert.pem -days 365 //生成自签证书
You are about to be asked to enter information that will be incorporated
into your certificate request.
What you are about to enter is what is called a Distinguished Name or a DN.
There are quite a few fields but you can leave some blank
For some fields there will be a default value,
If you enter '.', the field will be left blank.
-----
Country Name (2 letter code) [XX]:CN
State or Province Name (full name) []:Beijing
Locality Name (eg, city) [Default City]:Beijing
Organization Name (eg, company) [Default Company Ltd]:Dongshi
Organizational Unit Name (eg, section) []:Ops
Common Name (eg, your name or your server's hostname) []:ca.dongshi.com
Email Address []:
# ls -l
-rw-r--r-- 1 root root 1326 Oct 7 14:24 cacert.pem
drwxr-xr-x. 2 root root 6 Aug 4 2017 certs
drwxr-xr-x. 2 root root 6 Aug 4 2017 crl
-rw-r--r-- 1 root root 0 Oct 7 14:08 index.txt
drwxr-xr-x. 2 root root 6 Aug 4 2017 newcerts
drwx------. 2 root root 23 Oct 7 14:07 private
-rw-r--r-- 1 root root 3 Oct 7 14:08 serial
(2)为两个real server申请身份证书
# cd /etc/httpd
# mkdir ssl
# cd ssl
# (umask 077; openssl genrsa -out httpd.key 1024) //生成私钥
# openssl req -new -key httpd.key -out httpd.csr //
You are about to be asked to enter information that will be incorporated
into your certificate request.
What you are about to enter is what is called a Distinguished Name or a DN.
There are quite a few fields but you can leave some blank
For some fields there will be a default value,
If you enter '.', the field will be left blank.
-----
Country Name (2 letter code) [XX]:CN
State or Province Name (full name) []:Beijing
Locality Name (eg, city) [Default City]:Beijing
Organization Name (eg, company) [Default Company Ltd]:Dongshi
Organizational Unit Name (eg, section) []:Ops
Common Name (eg, your name or your server's hostname) []:web.dongshi.com
Email Address []:webadmin@dongshi.com
Please enter the following 'extra' attributes
to be sent with your certificate request
A challenge password []:
An optional company name []:
# ll
total 8
-rw-r--r-- 1 root root 708 Oct 7 14:42 httpd.csr
-rw------- 1 root root 887 Oct 7 14:37 httpd.key
# scp httpd.csr root@192.168.184.141:/tmp //发给CA
# openssl ca -in /tmp/httpd.csr -out /tmp/httpd.crt //在director(141)上CA签署证书
Using configuration from /etc/pki/tls/openssl.cnf
Check that the request matches the signature
Signature ok
Certificate Details:
Serial Number: 1 (0x1)
Validity
Not Before: Oct 7 06:45:40 2018 GMT
Not After : Oct 7 06:45:40 2019 GMT
Subject:
countryName = CN
stateOrProvinceName = Beijing
organizationName = Dongshi
organizationalUnitName = Ops
commonName = web.dongshi.com
emailAddress = webadmin@dongshi.com
X509v3 extensions:
X509v3 Basic Constraints:
CA:FALSE
Netscape Comment:
OpenSSL Generated Certificate
X509v3 Subject Key Identifier:
CA:90:D4:89:72:AC:10:33:4C:F2:BC:E8:C9:A1:FD:32:78:8B:F1:59
X509v3 Authority Key Identifier:
keyid:5D:51:43:8D:89:13:72:9F:AF:33:3E:BD:4A:0B:2F:16:4B:D9:0E:B1
Certificate is to be certified until Oct 7 06:45:40 2019 GMT (365 days)
Sign the certificate? [y/n]:y
1 out of 1 certificate requests certified, commit? [y/n]y
Write out database w
# scp /tmp/httpd.crt 192.168.184.142:/etc/httpd/ssl/ //在director上把签署好的证书发给142
# scp -rp /etc/httpd/ssl/ 192.168.184.143:/etc/httpd //在RS1(142)上,把ssl下的文件以及权限都复制给RS2
root@192.168.184.143's password:
httpd.key 100% 887 875.6KB/s 00:00
httpd.csr 100% 708 764.7KB/s 00:00
httpd.crt 100% 3801 2.1MB/s 00:00
在RS1(142)上安装mod_ssl,Apache如果使用数字证书的话都是使用的mod_ssl这个模块
# yum install mod_ssl -y 两台都要装
# vim /etc/httpd/conf.d/ssl.conf //编辑配置文件,修改三处
DocumentRoot "/var/www/html" //启动虚拟主机的DocumentRoot
SSLCertificateFile /etc/pki/tls/certs/localhost.crt 修改为:
SSLCertificateFile /etc/httpd/ssl/httpd.crt
SSLCertificateKeyFile /etc/pki/tls/private/localhost.key 修改为:
SSLCertificateKeyFile /etc/httpd/ssl/httpd.key
# httpd -t //检查语法
# systemctl restart httpd
# scp /etc/httpd/conf.d/ssl.conf root@192.168.184.143:/etc/httpd/conf.d/ssl.conf //把修改好的ssl.conf文件赋值给RS2,并在RS2重启httpd
# netstat -tunlp //查看是否监听443端口
以上证书配置完成
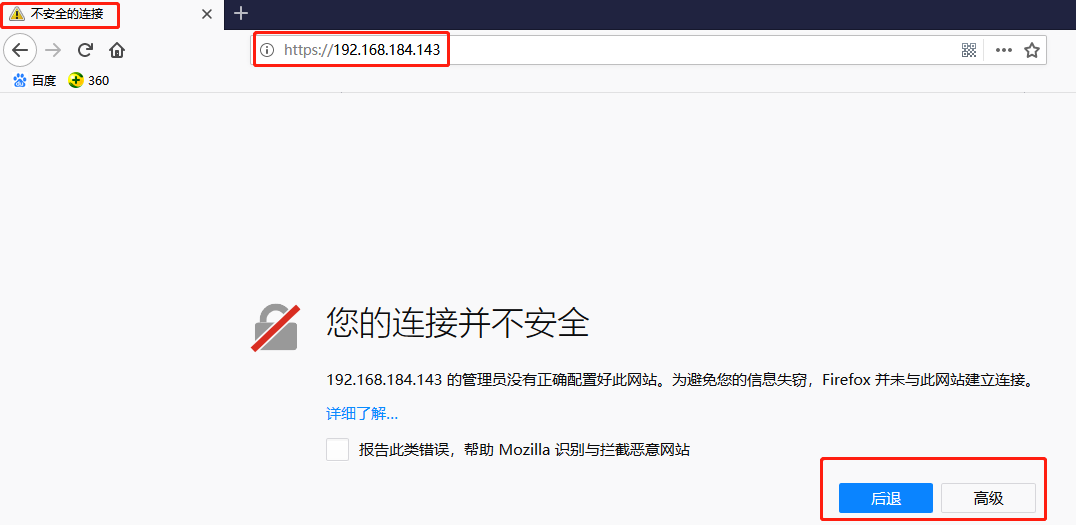
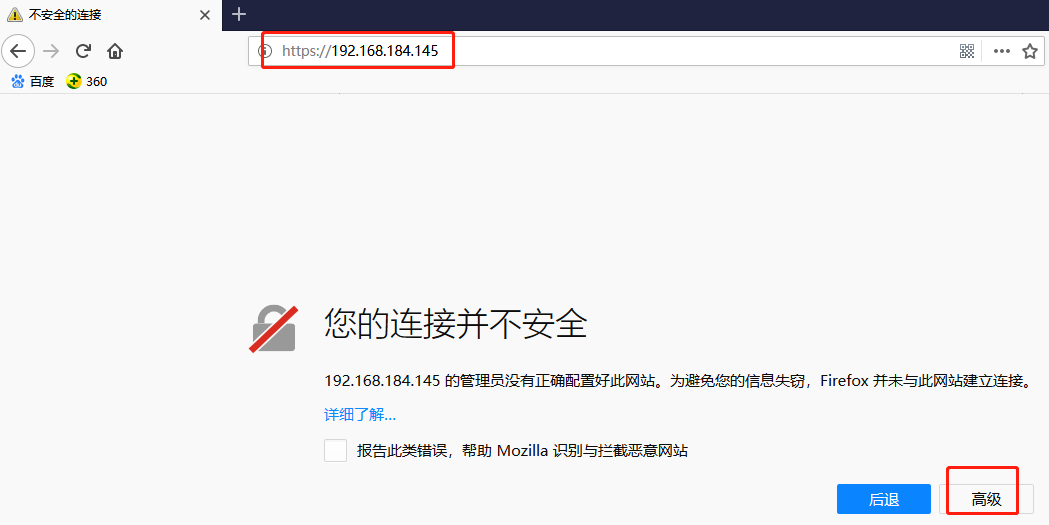
在浏览器中输入https://192.168.184.143,显示不安装连接,点击高级,
再点击添加例外
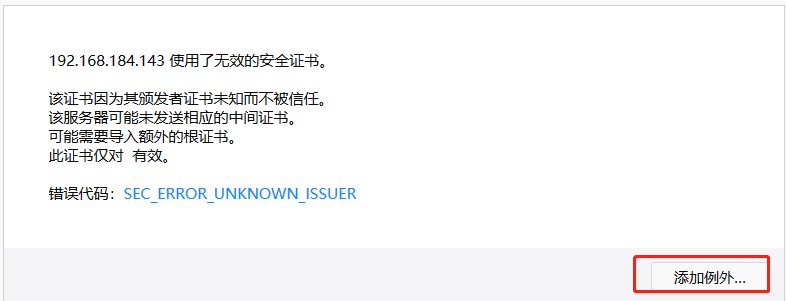
点击确认安全例外
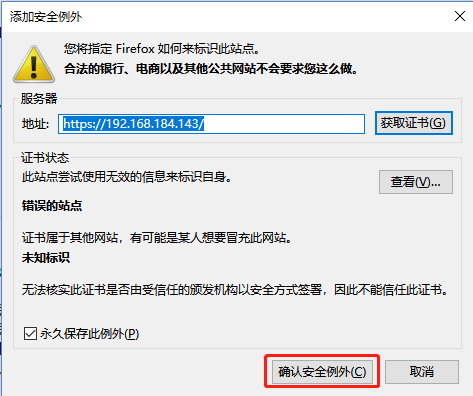
即可查看网页内容

4、接下来配置把443当作一个集群服务来调度
在director(141)上操作,首先先把两台RS当作一个集群服务,看是否可以运行
# ipvsadm -C //先清理出先前的规则,再添加规则
# ipvsadm -A -t 192.168.184.145:443 -s rr
# ipvsadm -a -t 192.168.184.145:443 -r 192.168.184.142 -g
# ipvsadm -a -t 192.168.184.145:443 -r 192.168.184.143 -g
在浏览器中输入https://192.168.184.145/进行测试


# ipvsadm -L -n -c
IPVS connection entries
pro expire state source virtual destination
TCP 00:05 FIN_WAIT 192.168.184.1:53031 192.168.184.145:443 192.168.184.143:443
TCP 00:40 FIN_WAIT 192.168.184.1:53034 192.168.184.145:443 192.168.184.142:443
TCP 14:56 ESTABLISHED 192.168.184.1:53038 192.168.184.145:443 192.168.184.142:443
TCP 01:49 FIN_WAIT 192.168.184.1:53037 192.168.184.145:443 192.168.184.143:443
经过测试,完全没有问题
下面把443服务定义成一种集群来调度
# ipvsadm -C
# iptables-save > /etc/sysconfig/iptables //把之前的iptables规则存储起来
# vim /etc/sysconfig/iptables //把80端口下方的22端口改为443
1 # Generated by iptables-save v1.4.21 on Sun Oct 7 15:42:36 2018
2 *mangle
3 :PREROUTING ACCEPT [3387:274859]
4 :INPUT ACCEPT [3387:274859]
5 :FORWARD ACCEPT [0:0]
6 :OUTPUT ACCEPT [1461:166692]
7 :POSTROUTING ACCEPT [1461:166692]
8 -A PREROUTING -d 192.168.184.145/32 -p tcp -m tcp --dport 80 -j MARK --set-xmark 0xa/0xffffffff
9 -A PREROUTING -d 192.168.184.145/32 -p tcp -m tcp --dport 443 -j MARK --set-xmark 0xa/0xffffffff
10 COMMIT
11 # Completed on Sun Oct 7 15:42:36 2018
12 # Generated by iptables-save v1.4.21 on Sun Oct 7 15:42:36 2018
13 *nat
14 :PREROUTING ACCEPT [509:75999]
15 :INPUT ACCEPT [122:15141]
16 :OUTPUT ACCEPT [13:1274]
17 :POSTROUTING ACCEPT [13:1274]
18 COMMIT
19 # Completed on Sun Oct 7 15:42:36 2018
# iptables -t mangle -F //清空之前的iptables规则
# iptables-restore < /etc/sysconfig/iptables //并把上面存储的iptables规则重新导入
# iptables -t mangle -L -n
Chain PREROUTING (policy ACCEPT)
target prot opt source destination
MARK tcp -- 0.0.0.0/0 192.168.184.145 tcp dpt:80 MARK set 0xa
MARK tcp -- 0.0.0.0/0 192.168.184.145 tcp dpt:443 MARK set 0xa
添加ipvsadm规则
# ipvsadm -A -f 10 -s rr
# ipvsadm -a -f 10 -r 192.168.184.142 -g
# ipvsadm -a -f 10 -r 192.168.184.143 -g
测试:浏览器输入192.168.184.145即可访问


测试:浏览器输入https://192.168.184.145即可访问


把web server服务和443服务绑定在一起之后呢?
假设一种场景,对web服务器来讲需要session保持。一个在线购物网站,在购物时,如果不结账,一般是http协议,当结账时,需要网站跳转,可能会在同一个域名下,但是协议必须自动转换为https协议。对于一个大型站点来讲,无论是http或https背后都会有一大堆服务器及负载均衡。当访问时本来是http协议被当作80这个服务被调度到real server1,等会付账时把协议改成了https协议了,和上次80服务的调度还有关系吗?即http集群服务和https集群服务是同一种服务吗?即便把两种服务定义为相同的防火墙标记,但是这两个服务仍是独立的服务,只不过通过防火墙标记把它们绑定在一起进行调度,但是两个服务仍然在不同的RS上。
虽然有一种调度算法SH会把来自同一个客户端的请求都发送至同一个RS,假如开始是使用http协议访问,于是用户请求第一次被调度到RS1上,但结账时,协议转为https了,https和http不是同一种服务,所以不会放在同一个RS上进行调度,所以在协议转换为https时,请求可能被调度到RS2上。不同的服务维护的会话表是不一样的。
解决方法:session保持三种方法:session集群、session复制、session服务器,但这三种方法要依赖iptables以外的组件,所以可以使用iptables持久连接的功能解决上述问题。

