MIT6.S081 Lab syscall
这一个实验的主要内容就是给 xv6 添加两个系统调用:trace 和 sysinfo。
Using gdb (easy)
这个部分我就不做了……
M1 的 Macbook Air 上的 gdb 太难安装了,所以暂时用不了 gdb 调试……
System call tracing (moderate)
In this assignment you will add a system call tracing feature that may help you when debugging later labs. You'll create a new
tracesystem call that will control tracing. It should take one argument, an integer "mask", whose bits specify which system calls to trace. For example, to trace the fork system call, a program callstrace(1 << SYS_fork), whereSYS_forkis a syscall number fromkernel/syscall.h. You have to modify the xv6 kernel to print out a line when each system call is about to return, if the system call's number is set in the mask. The line should contain the process id, the name of the system call and the return value; you don't need to print the system call arguments. Thetracesystem call should enable tracing for the process that calls it and any children that it subsequently forks, but should not affect other processes.
这个任务要求我们添加一个系统调用 trace。这个系统调用会给当前进程添加一个 mask,代表一系列我们需要跟踪的系统调用编号集合。当这个进程调用了在 mask 中的系统调用的时候,在即将返回前我们就要打印类似于下面的一行信息:
3: syscall read -> 1023
这一行信息中,依次有效的内容是进程号、系统调用名和返回值。
这个 trace 系统调用设置的 mask 应该对所有其子进程生效。
准备系统调用
我们跟着 Hints 中的步骤一步步来。
Add
$U/_traceto UPROGS in Makefile
在 Makefile 中添加终端命令,这个我们很熟悉了:
UPROGS=\
	......
	$U/_trace\
Run make qemu and you will see that the compiler cannot compile
user/trace.c, because the user-space stubs for the system call don't exist yet: add a prototype for the system call touser/user.h, a stub touser/usys.pl, and a syscall number tokernel/syscall.h. The Makefile invokes the perl scriptuser/usys.pl, which producesuser/usys.S, the actual system call stubs, which use the RISC-Vecallinstruction to transition to the kernel. Once you fix the compilation issues, run trace 32 grep hello README; it will fail because you haven't implemented the system call in the kernel yet.
首先我们要添加在 user/user.h 中添加 trace 函数的原型:
// system calls
int fork(void);
// .......
int trace(int);
然后在 user/usys.pl 中添加系统调用的存根:
entry("trace");
接着在 kernel/syscall.h 中添加一个系统调用号:
#define SYS_trace 22
添加 struct proc 的成员
我们需要在每个进程的状态中,添加一个成员变量来记录这个 mask。
进程的结构体被定义在 kernel/proc.h 中,我们只需要在最后加上 mask 的定义即可。
struct proc {
    // ...
    // mask
  	int trace_mask;
}
编写 sys_trace
trace 系统调用的具体实现需要在 kernel/sysproc.c 中定义一个叫做 sys_trace 的函数。
我们可以观察这个文件中已经存在的函数,了解如何编写一个系统调用。
uint64
sys_exit(void)
{
  int n;
  argint(0, &n);
  exit(n);
  return 0;  // not reached
}

uint64
sys_getpid(void)
{
  return myproc()->pid;
}
从这个文件开头的前两个函数中,我们可以得知两个有用的信息:
- 当仅传递一个
int类型的参数的时候,我们可以使用argint(0, &x)函数来将之存入int类型的变量x中。 - 如果需要获得当前进程的结构体指针,可以使用
myproc()函数。
于是我们很容易就可以写出这个系统调用的实现:
uint64
sys_trace(void)
{
  int mask;

  argint(0, &mask);

  myproc()->trace_mask = mask;

  return 0;
}
修改 fork
前面我们在要求中说到,这个 trace 系统调用设置的 mask 应该对所有其子进程生效。
这也就要求我们,在 fork 出一个子进程的时候,应该将父进程的 mask 赋值给子进程的 mask。这很容易实现:
int
fork(void)
{
  // ...
  np->cwd = idup(p->cwd);

  np->trace_mask = p->trace_mask;

  safestrcpy(np->name, p->name, sizeof(p->name));

  pid = np->pid;

  release(&np->lock);
  // ...
}
修改 syscall
这里我们要修改 syscall 文件了。
大概有三步。
首先,我们需要将 sys_trace 函数添加进 syscalls 这个函数指针数组中,在此之前不要忘记声明一下外部函数。
extern uint64 sys_trace(void);

static uint64 (*syscalls[])(void) = {
// ...
[SYS_trace]   sys_trace,
};
之后,我们要定义一个字符串数组,用来将系统调用编号映射成对应的名称。
static char *syscall_name[] = {
[SYS_fork]    "fork",
[SYS_exit]    "exit",
[SYS_wait]    "wait",
[SYS_pipe]    "pipe",
[SYS_read]    "read",
[SYS_kill]    "kill",
[SYS_exec]    "exec",
[SYS_fstat]   "fstat",
[SYS_chdir]   "chdir",
[SYS_dup]     "dup",
[SYS_getpid]  "getpid",
[SYS_sbrk]    "sbrk",
[SYS_sleep]   "sleep",
[SYS_uptime]  "uptime",
[SYS_open]    "open",
[SYS_write]   "write",
[SYS_mknod]   "mknod",
[SYS_unlink]  "unlink",
[SYS_link]    "link",
[SYS_mkdir]   "mkdir",
[SYS_close]   "close",
[SYS_trace]   "trace"
};
最后,我们需要修改 syscall 函数,在系统调用即将返回的时候,判断这个调用是否在 mask 中,并进行相应的输出。
void
syscall(void)
{
  int num;
  struct proc *p = myproc();

  num = p->trapframe->a7;
  if(num > 0 && num < NELEM(syscalls) && syscalls[num]) {
    // Use num to lookup the system call function for num, call it,
    // and store its return value in p->trapframe->a0
    p->trapframe->a0 = syscalls[num]();

    // processing trace
    if ((p->trace_mask >> num) & 1) {
      printf("%d: syscall %s -> %d\n", p->pid, syscall_name[num], p->trapframe->a0);
    }
  } else {
    printf("%d %s: unknown sys call %d\n",
            p->pid, p->name, num);
    p->trapframe->a0 = -1;
  }
}
运行结果

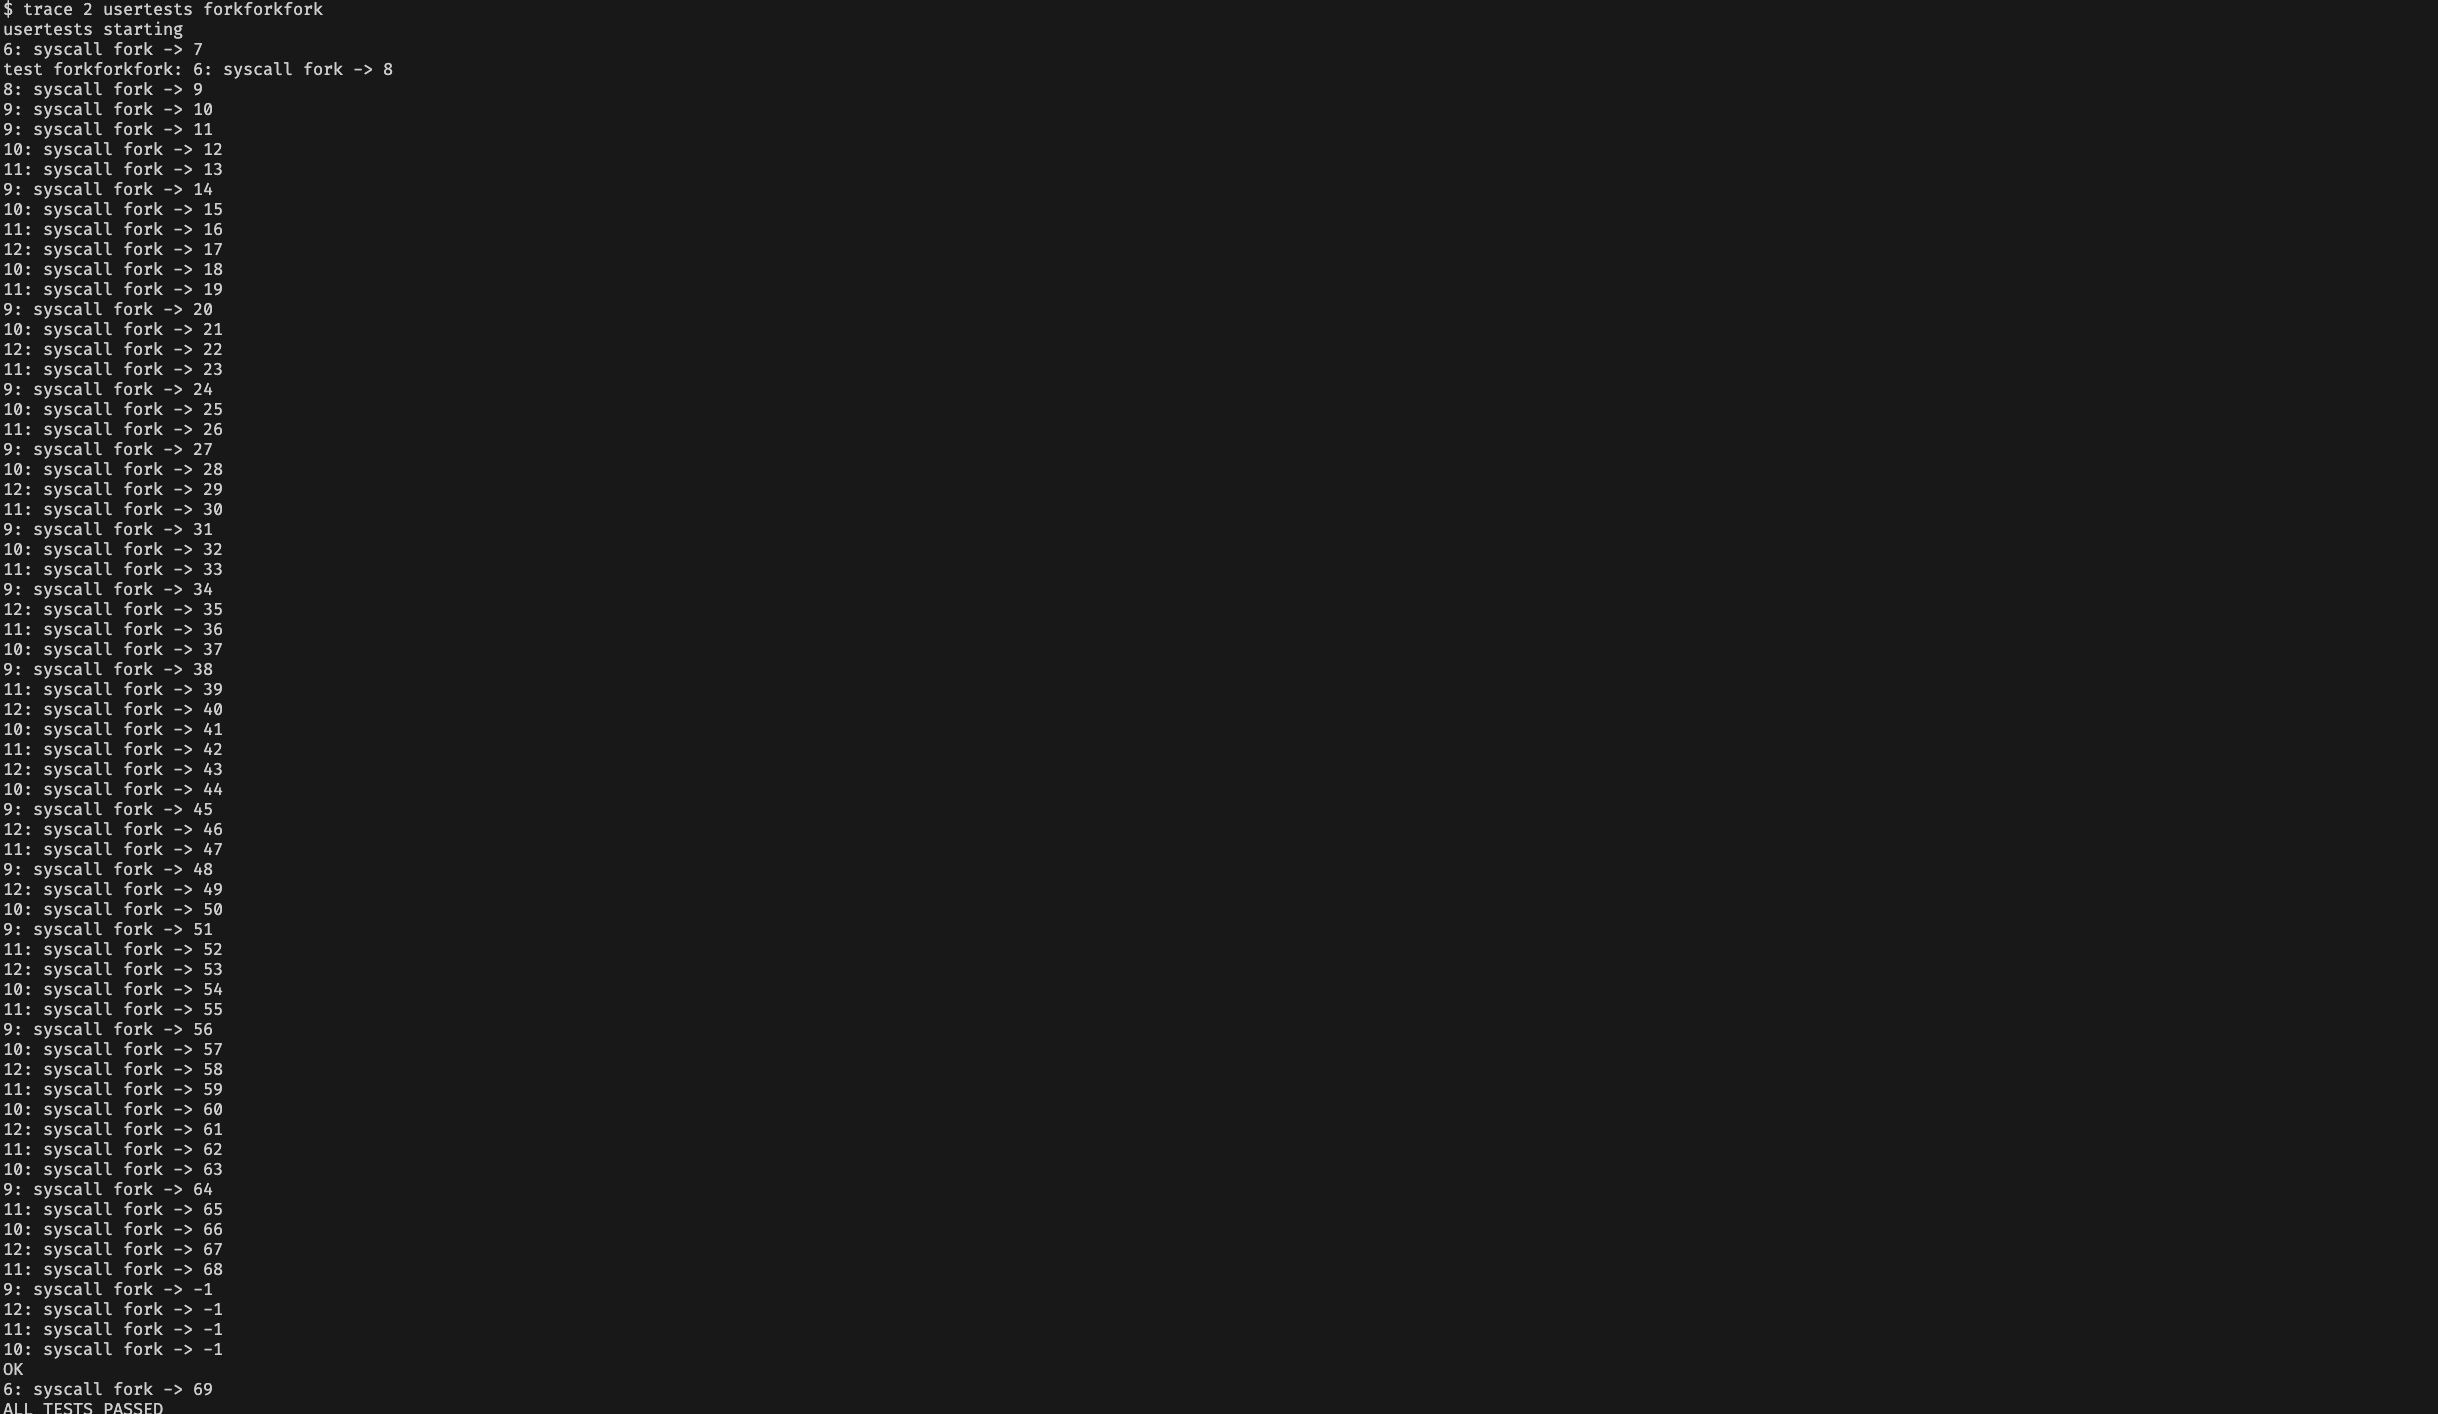
评测结果
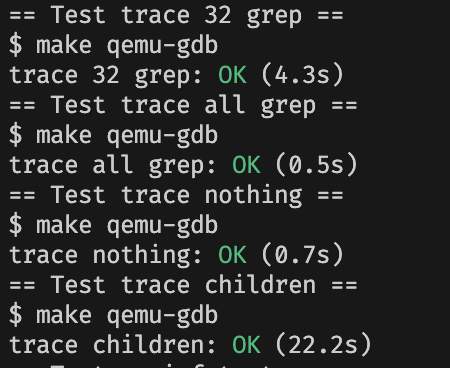
完美通关!
Sysinfo (moderate)
In this assignment you will add a system call,
sysinfo, that collects information about the running system. The system call takes one argument: a pointer to astruct sysinfo(seekernel/sysinfo.h). The kernel should fill out the fields of this struct: thefreememfield should be set to the number of bytes of free memory, and thenprocfield should be set to the number of processes whosestateis notUNUSED. We provide a test programsysinfotest; you pass this assignment if it prints "sysinfotest: OK".
这个任务主要是要添加 sysinfo 系统调用,这个系统调用只要获得两个关于系统的信息:
- 物理内存中空闲空间的大小
- 进程的数量
准备系统调用
这里和前一个任务基本上差不多,就不展开了。
需要注意的区别是在 user/user.h 中,要记得声明 struct sysinfo。
struct sysinfo;
int sysinfo(struct sysinfo *);
计算进程总数
通过阅读 kernel/proc.c 的一些代码可知,系统的进程都存放在 proc 数组中。因此只需要枚举 proc 数组,对于每一项都判断其 state 是否为 UNUSED 即可。
uint64 count_process(void) {
  uint64 cnt = 0;

  for (int i = 0; i < NPROC; ++i) {
    if (proc[i].state != UNUSED) {
      ++cnt;
    }
  }

  return cnt;
}
计算空闲内存
这里需要一些虚拟内存的知识了……不过还好,即使没学过仿照别的函数应该也能写出来。
xv6 是将所有的空闲空间组织成链表,链表每一项的信息直接存放在空闲页中。因此,我们只需要从链表首指针开始,通过 next 成员遍历链表同时计数,即可得到结果。
uint64 count_free_memory(void) {
  struct run *r;
  uint64 cnt = 0;

  acquire(&kmem.lock);
  r = kmem.freelist;
  while (r) {
    ++cnt;
    r = r->next;
  }
  release(&kmem.lock);

  return cnt * PGSIZE;
}
编写 sys_sysinfo
首先要声明 count_free_memory 和 count_process 两个外部函数。
在 sys_sysinfo 函数中,我们首先使用 argaddr 获得需要存放结果的地址。这个地址是用户进程的虚拟地址。
然后我们定义局部变量 info 来中转结果。
最后,使用 copyout 函数,将内核中的数据,存放到用户进程的虚拟内存中。
extern uint64 count_free_memory(void);
extern uint64 count_process(void);

uint64 sys_sysinfo(void) {
  struct sysinfo *dest;
  argaddr(0, (uint64*)&dest);

  struct sysinfo info;
  info.freemem = count_free_memory();
  info.nproc = count_process();

  if(copyout(myproc()->pagetable, (uint64)dest, (char *)&info, sizeof(info)) < 0)
    return -1;
  return 0;
}
修改 syscall.c
主要是有三个地方要改,一个是添加 sys_sysinfo 外部函数的声明,还有 syscalls 函数指针列表,syscall_name 系统调用名列表。
和前一个任务类似,不展开。
结果

测试
得分
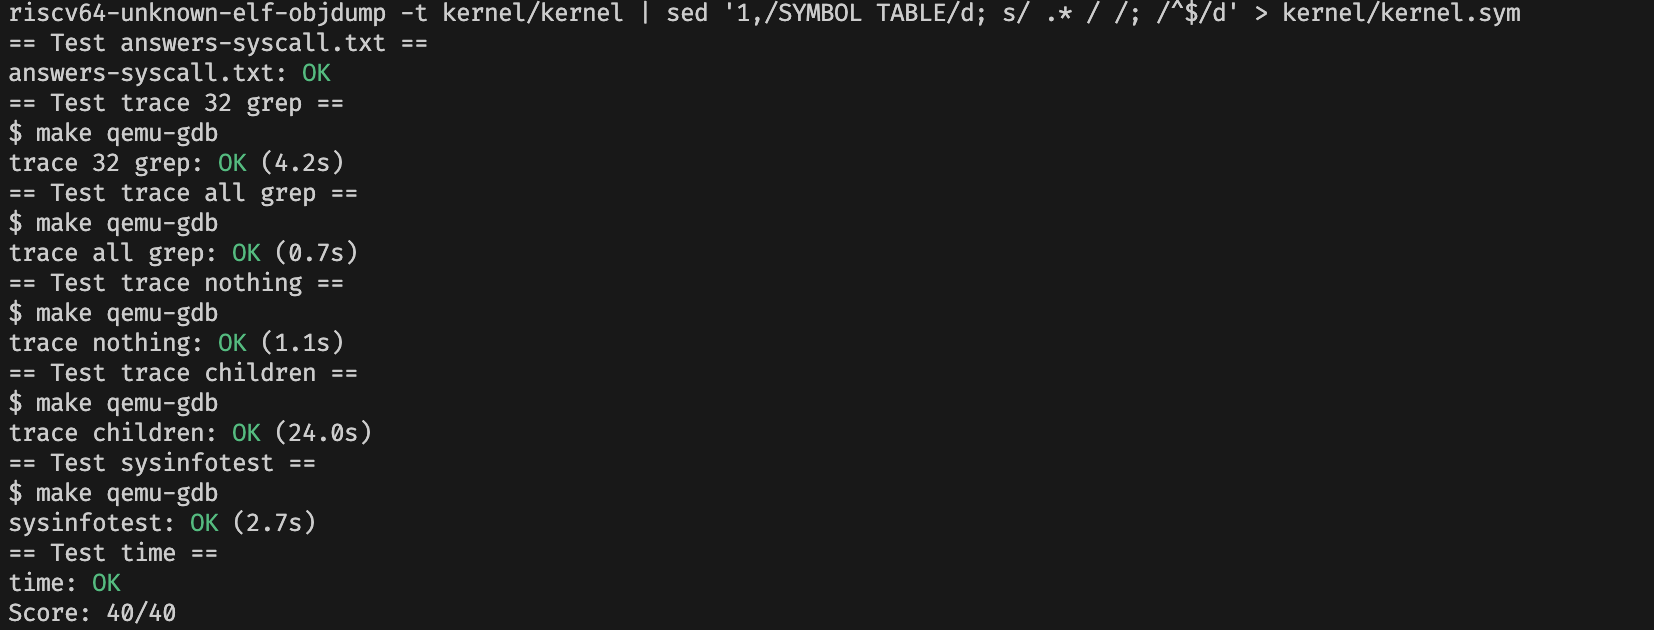
完美通关!

