在 Windows 系统上,使用 Certbot 生成 Let's Encrypt 的泛域名证书
https://www.cnblogs.com/liucai/p/17460451.html
https://zhuanlan.zhihu.com/p/627526278
在 Windows 系统上,你可以使用 Certbot 生成 Let's Encrypt 的泛域名证书。以下是具体步骤
软件准备:
-
安装 OpenSSL:首先,你需要在你的 Windows 系统上安装 OpenSSL。你可以从 OpenSSL 官方网站 下载适合你系统的版本。
-
安装 Certbot:然后,你需要安装 Certbot。你可以从 Certbot 官方网站 下载适合你系统的版本。
在 Windows 系统上,你可以使用 Certbot 生成 Let's Encrypt 的泛域名证书。以下是具体步骤:
-
安装 Certbot 的 DNS 插件:首先,你需要安装 Certbot 的 DNS 插件。DNS 插件的具体名称取决于你的 DNS 提供商。例如,如果你使用的是 Cloudflare,你需要安装
certbot-dns-cloudflare插件。你可以在 Certbot 的官方网站上找到插件的安装指南。 -
获取 API 凭据:你需要从你的 DNS 提供商那里获取 API 凭据,以便 Certbot 可以自动更新 DNS 记录。你需要将这些凭据保存在一个文件中,Certbot 将使用这个文件来验证你的域名。
-
生成证书:打开命令提示符,然后运行以下命令来生成证书:certbot certonly --manual --preferred-challenges dns -d "*.yourdomain.com"
在这个命令中,你需要将 yourdomain.com 替换为你的实际域名。
-
验证域名:Certbot 会提供一些指示,告诉你如何添加一个 DNS TXT 记录到你的域名。你需要登录到你的 DNS 提供商,然后按照 Certbot 的指示添加 TXT 记录。
-
完成验证:在你添加了 TXT 记录之后,回到命令提示符,然后按 Enter。Certbot 会验证你的域名,如果验证成功,它将生成证书。
-
安装证书:最后,你需要在你的服务器上安装证书。安装过程取决于你的服务器类型。
Certbot 生成的证书通常是 PEM 格式的,而 Windows 通常需要 PFX(也称为 PKCS#12)格式的证书。你可以使用 OpenSSL 将 PEM 格式的证书转换为 PFX 格式。
以下是具体步骤:
-
找到你的证书和私钥:Certbot 生成的证书和私钥通常位于
/etc/letsencrypt/live/yourdomain.com/目录下,其中yourdomain.com是你的域名。证书文件通常是fullchain.pem,私钥文件通常是privkey.pem。 -
转换证书:打开命令提示符,然后运行以下命令来转换证书:openssl pkcs12 -export -out certificate.pfx -inkey privkey.pem -in fullchain.pem
在这个命令中,你需要将 privkey.pem 和 fullchain.pem 替换为你的实际文件路径。certificate.pfx 是输出的 PFX 证书文件。
-
输入密码:OpenSSL 会提示你输入一个密码。这个密码将用于保护 PFX 文件。当你在 Windows 上安装证书时,你需要输入这个密码。
-
安装证书:最后,你可以在 Windows 上安装 PFX 证书。你可以双击 PFX 文件,然后按照提示进行操作。
windows下使用Certbot申请通配符证书
一、下载并安装软件
在这个网站下载最新的软件并安装https://github.com/certbot/certbot/

下载完成后直接双击安装就行了
安装完成后,以管理员方式运行cmd,输入cretbot --version,如果有显示就说明安装成功了
C:\Windows\System32>certbot --version
certbot 2.5.0
命令行工具使用说明
用法:
certbot [子命令] [选项] [-d 域名] [-d 域名] ...
Certbot工具用于获取和安装 HTTPS/TLS/SSL 证书。默认情况下,Certbot会尝试为本地网页服务器
(如果不存在会默认安装一个到本地)获取并安装证书。最常用的子命令和选项如下:
获取, 安装, 更新证书:
(默认) run 获取并安装证书到当前网页服务器
certonly 获取或更新证书,但是不安装
renew 更新已经获取但快过期的所有证书
-d 域名列表 指定证书对应的域名列表,域名之间使用逗号分隔
--apache 使用Apache插件进行身份认证和安装
--standalone 运行一个独立的网页服务器用于身份认证
--nginx 使用Nginx插件进行身份认证和安装
--webroot 把身份认证文件放置在服务器的网页根目录下
--manual 使用交互式或脚本钩子的方式获取证书
-n 非交互式运行
--test-cert 从预交付服务器上获取测试证书
--dry-run 测试获取或更新证书,但是不存储到本地硬盘
证书管理:
certificates 显示使用Certbot生成的所有证书的信息
revoke 撤销证书(supply --cert-path)
delete 删除证书二、申请通配符证书的命令
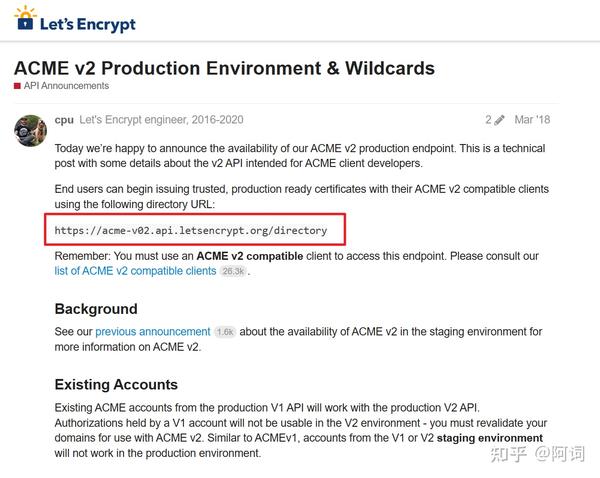
certbot certonly -d "*.example.top" -d example.top --manual --preferred-challenges dns-01 --server https://acme-v02.api.letsencrypt.org/directory命令说明:
- certonly 安装模式
- -d 申请证书的域名,如果是通配符域名输入 *.http://example.com
- –manual 使用交互式或脚本钩子的方式获取证书
- –preferred-challenges dns 使用 DNS 方式校验域名所有权
- –server,Let’s Encrypt ACME v2 版本使用的服务器不同于 v1 版本,需要显示指定

*.example.top换成你想要申请的域名就可以了,接下来,会提示需要进行手动验证DNS:
Saving debug log to C:\Certbot\log\letsencrypt.log
Requesting a certificate for *.example.top and example.top
- - - - - - - - - - - - - - - - - - - - - - - - - - - - - - - - - - - - - - - -
Please deploy a DNS TXT record under the name:
_acme-challenge.example.top.
with the following value:
MeZetcO-5n_7WeJIitM_eAR8lWUZ2EQriWOg1OxBcaE
- - - - - - - - - - - - - - - - - - - - - - - - - - - - - - - - - - - - - - - -
Press Enter to Continue我的域名是阿里云申请的域名,去域名解析那手动添加一条TXT记录就可以了,我这里申请的是通配符域名,还有一级域名,就需要添加两条记录来验证
Please deploy a DNS TXT record under the name:
_acme-challenge.example.top.
with the following value:
8eBntKwxymhu1erZuE7J9KPZnuxmE6kiYnBrDD3DkXU
(This must be set up in addition to the previous challenges; do not remove,
replace, or undo the previous challenge tasks yet. Note that you might be
asked to create multiple distinct TXT records with the same name. This is
permitted by DNS standards.)
Before continuing, verify the TXT record has been deployed. Depending on the DNS
provider, this may take some time, from a few seconds to multiple minutes. You can
check if it has finished deploying with aid of online tools, such as the Google
Admin Toolbox: https://toolbox.googleapps.com/apps/dig/#TXT/_acme-challenge.example.top.
Look for one or more bolded line(s) below the line ';ANSWER'. It should show the
value(s) you've just added.
- - - - - - - - - - - - - - - - - - - - - - - - - - - - - - - - - - - - - - - -
Press Enter to Continue根据提示操作完成后,在域名解析那就有两条TXT记录了,如下:

接着就会显示申请成功的信息了
Successfully received certificate.
Certificate is saved at: C:\Certbot\live\example.top\fullchain.pem
Key is saved at: C:\Certbot\live\example.top\privkey.pem
This certificate expires on 2023-08-05.
These files will be updated when the certificate renews.
NEXT STEPS:
- This certificate will not be renewed automatically. Autorenewal of --manual certificates requires the use of an authentication hook script (--manual-auth-hook) but one was not provided. To renew this certificate, repeat this same certbot command before the certificate's expiry date.
- - - - - - - - - - - - - - - - - - - - - - - - - - - - - - - - - - - - - - - -
If you like Certbot, please consider supporting our work by:
* Donating to ISRG / Let's Encrypt: https://letsencrypt.org/donate
* Donating to EFF: https://eff.org/donate-le
- - - - - - - - - - - - - - - - - - - - - - - - - - - - - - - - - - - - - - - -这里已经提示的证书的存放位置,直接进c盘去找就好了,这里发现这些文件是快捷方式,然后还有一个readme文件,打开里面提示是不要移动也不要修改名称,看一下快捷方式的属性就发现证书文件存在了另一个文件夹:C:\Certbot\archive
This directory contains your keys and certificates.
`privkey.pem` : the private key for your certificate.
`fullchain.pem`: the certificate file used in most server software.
`chain.pem` : used for OCSP stapling in Nginx >=1.3.7.
`cert.pem` : will break many server configurations, and should not be used
without reading further documentation (see link below).
WARNING: DO NOT MOVE OR RENAME THESE FILES!
Certbot expects these files to remain in this location in order
to function properly!
We recommend not moving these files. For more information, see the Certbot
User Guide at https://certbot.eff.org/docs/using.html#where-are-my-certificates.既然不让我移动或改名,那我复制出来使用就可以了。
三、关于续签证书
刚刚申请成功的地方,有一个关于续签的说明如下:
NEXT STEPS:
- This certificate will not be renewed automatically. Autorenewal of --manual certificates requires the use of an authentication hook script (--manual-auth-hook) but one was not provided. To renew this certificate, repeat this same certbot command before the certificate's expiry date.翻译过来就是说:
下一个步骤:
—该证书不会自动更新。——manual证书的自动更新需要使用身份验证挂钩脚本(——manual-auth-hook),但没有提供。要更新该证书,请在证书到期之前重复相同的certbot命令。
我理解就是如果下次经续签,可能就是要重新申请一次。反正也不麻烦,大概几分钟就搞定了,那就下次再重新申请吧。
华为云HTTPS证书配置提交时提示“证书链不齐全”,如何进行证书链补齐?
https://support.huaweicloud.com/usermanual-cdn/cdn_01_0086.html
HTTPS配置仅支持PEM格式的证书/私钥内容上传,针对不同的证书颁发机构,对证书内容的上传有不同的要求。
Root CA机构颁发的证书
Root CA机构颁发的证书是一份完整的证书,配置HTTPS时,仅上传该证书即可。
通过记事本打开*.PEM格式的证书文件,可以查看到类似图1所示的全部证书信息。
PEM格式证书:
- 以证书链“-----BEGIN CERTIFICATE-----”开头,以证书链“-----END CERTIFICATE-----”结尾。
- 证书链之间的内容,要求每行64个字符,最后一行允许不足64个字符。
- 证书内容不包含空格。
中级机构颁发的证书
中级机构颁发的证书文件包含多份证书,配置HTTPS时,需要将所有证书拼接在一起组成一份完整的证书后再上传。拼接后的证书类似图2。
RSA私钥格式要求
PEM格式的文件可以存放证书或私钥,如果*.PEM只包含私钥,一般用*.KEY代替。
通过记事本打开*.PEM或*.KEY的私钥文件,可以查看到类似图3所示的全部私钥信息。
RSA格式私钥:
- 以证书链“-----BEGIN RSA PRIVATE KEY-----”开头,以证书链“-----END RSA PRIVATE KEY-----”结尾。
- 证书链之间的内容,要求每行64个字符,最后一行允许不足64个字符。
- 证书内容不包含空格。
当私钥的证书链带有“-----BEGIN PRIVATE KEY-----,-----END PRIVATE KEY-----”或者“-----BEGIN ENCRYPTED PRIVATE KEY-----,-----END ENCRYPTED PRIVATE KEY-----”信息时,需要使用OpenSSL工具执行以下命令进行转换:
openssl rsa -in old_key.key -out new_key.key
本文作者:韩憨
本文链接:https://www.cnblogs.com/hanby/p/17583275.html
版权声明:本作品采用知识共享署名-非商业性使用-禁止演绎 2.5 中国大陆许可协议进行许可。


【推荐】国内首个AI IDE,深度理解中文开发场景,立即下载体验Trae
【推荐】编程新体验,更懂你的AI,立即体验豆包MarsCode编程助手
【推荐】抖音旗下AI助手豆包,你的智能百科全书,全免费不限次数
【推荐】轻量又高性能的 SSH 工具 IShell:AI 加持,快人一步