Windows Phone中使用Local DataBase与ISolateStorage—在MVVM模式下(—)
像我们知道的一样,Windows Phone支持ISolateStorage,Mango中还新增了使用Linq的SQL CE作为本地数据库。下面我们就用MVVMLight来模拟个消息发送和查看消息历史记录的IM简易聊天窗口,来看看WP7是怎么使用ISolateStorage和Local DataBase的:
一.新建MVVMLight的Windows Phone Project
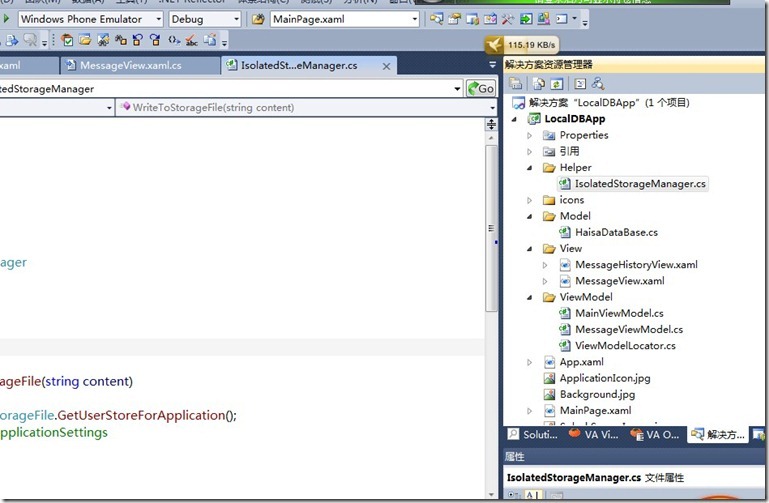
MVVMLight的教程可以在园子里搜一下,或者去MVVMLight作者的官方网站。建完Project后,MVVMLight的Windows Phone 模板已经自动生成了MainPage.xaml,以及一个MainViewModel。我们在Project中添加View文件夹,新建两个View,即两个PhoneApplicationPage,作为发送Message窗口和查看Message History记录。还有新建一个ViewModel(MessageViewModel),Model中新增一个HaisaDataBase,用来管理我们的LocalDataBase。本来想定义一个ISolateStorageManager的Helper类,但是微软已经把ISolateStorage封装的够简单了,所以此处就省略了。
添加后如下图示:
可以看到图中工程中有个icons的文件夹,是用来保存PhoneApplicationPage.ApplicationBar的图标文件。
二.在Model中建立SQL CE数据库
我们新建个UserInfoTable,使其继承INotifyPropertyChanged,INotifyPropertyChanging接口,并对其声明[Table] Attribute。在UserInfoTable表中声明几个属性作为Table的Column,在属性前面加上[Column] Attribute。包括
UserId、UserNameAndTime、UserPwd、UserMessage。代码类似下图:1: [Table]2: ublic class UserInfoTable:INotifyPropertyChanged,INotifyPropertyChanging3:4: #region UserId Column5: private int _userId;6: [Column(IsPrimaryKey=true,IsDbGenerated=true,DbType="INT Not null identity",CanBeNull=false,AutoSync=AutoSync.OnInsert)]7: public int UserId8: {9: get{return _userId; }10: set{11: if(value==null) return;12:13: NotifyPropertyChanging("UserId");14: _userId=value;15: NotifyPropertyChanged("UserId");16:17: }18: #endregion19: .........20:21: }在Windows Phone中,即可用UserInfoTable Class来生成数据库中的UserInfoTable表,当然要记得引用下面几个命名空间
using System.Data.Linq; using System.Data.Linq.Mapping; using Microsoft.Phone.Data.Linq; using Microsoft.Phone.Data.Linq.Mapping;我们再新建一个HaisaDataContext类继承DataContext,构造函数继承DataContext的构造函数,在其中添加我们的ConnectionString,还有声明我们的Table,如下面代码:
1: public class HaisaDataContext:DataContext2: {3: public static string DBConnectionString = "Data Source=isostore:/Haisa_DataBase.sdf";4: public HaisaDataContext(string connectionString):base(connectionString){}5: public Table<UserInfoTable> HaisaTable;6:7: }到这里我们的LocalDataBase就建立完了,关于Local DataBase的更多信息请查看MSDN。
三.建立MessageView.xaml界面以及绑定MessageViewModel
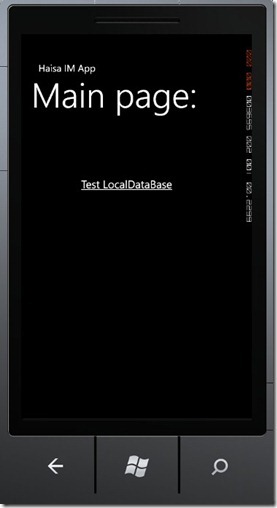
我们在MainPage.xaml中添加一个HyperlinkButton,设置NavigateUri="/View/MessageView.xaml" 。
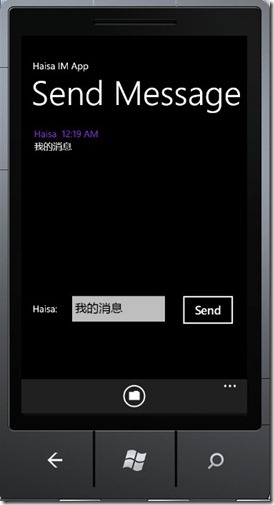
然后我们开始设计MessageView.xaml,用VS或者Blend在MessageView.xaml中设计类似聊天工具的界面时,我们先加入一个Listbox来显示当前发送的Message列表,然后添加一个消息输入框和Send Message按钮。如图示:
第二个图中可以看到一个ApplicationBar,这个ApplicationBar用来查看消息历史记录,导航至新的Message History Page。
ApplicationBar的添加类似下面:
1: <phone:PhoneApplicationPage.ApplicationBar>2: <shell:ApplicationBar IsVisible="True" IsMenuEnabled="True">3: <shell:ApplicationBar.MenuItems>4: <shell:ApplicationBarMenuItem x:Name="menuItem_History" Text="History"/>5: </shell:ApplicationBar.MenuItems>6: <shell:ApplicationBarIconButton x:Name="appbar_HistoryButton"7: IconUri="/icons/appbar.folder.rest.png"8: Text="Message History"9: Click="appbar_HistoryButton_Click"/>10: </shell:ApplicationBar>11: </phone:PhoneApplicationPage.ApplicationBar>其中ApplicationBarIconButton的appbar_HistoryButton_Click中调用NavigationService的Navigate方法进行导航。
后台代码如下:
1: private void appbar_HistoryButton_Click(object sender, System.EventArgs e)2: {3: this.NavigationService.Navigate(new Uri("/View/MessageHistoryView.xaml",UriKind.RelativeOrAbsolute));4: }第一步中我们已经建立了一个新的MessageViewModel,作为MessageView和MessageHistoryView公用的ViewModel,当然,实际建项目时这两个最好分开,因为功能不一致,但是我们这里只共用一个ViewModel以简化代码。
我们在ViewModelLocator中注册MessageViewModel:
1: public MessageViewModel MsgViewModel2: {3: get4: {5: return new MessageViewModel();6: }7:8: }这样子我们就可以在MessageView和MessageHistoryView的xaml文件中通过这样的方式在View中绑定ViewModel
DataContext="{Binding MsgViewModel,Source={StaticResource Locator}}"到这一步,基本框架的东西都已经搭好了,下一步就是开始添加SendMessage和ShowMessageHistory的功能,我们将在下一篇中继续,
Coming Soon…….


