01 elasticsearch学习笔记-环境安装
docker-compose安装EFK
git clone https://github.com/haimait/docker_compose_efk
docker-compose up -d
Fluentd            # 日志收集
Elasticsearch      # 数据库
Kibana             # 图形管理系统
Docs文档
https://www.elastic.co/guide/cn/elasticsearch/guide/current/getting-started.html
视频教程
【狂神说Java】ElasticSearch7.6.x最新完整教程通俗易懂
https://www.bilibili.com/video/BV17a4y1x7zq?t=922&p=5
软件下载
下载慢的小伙伴们可以到 华为云的镜像去下载
速度很快,自己找对应版本就可以
ElasticSearch: https://mirrors.huaweicloud.com/elasticsearch/?C=N&O=D
ElasticSearch: https://www.elastic.co/cn/downloads/past-releases/elasticsearch-6-2-4
logstash: https://mirrors.huaweicloud.com/logstash/?C=N&O=D
kibana: https://mirrors.huaweicloud.com/kibana/?C=N&O=D
ik 下载地址:https://github.com/medcl/elasticsearch-analysis-ik/releases
windows环境下Elasticsearch和head插件的安装
elasticsearch-head: https://github.com/mobz/elasticsearch-head
https://blog.csdn.net/weixin_44141284/article/details/121553749
elaticsearch目录介绍
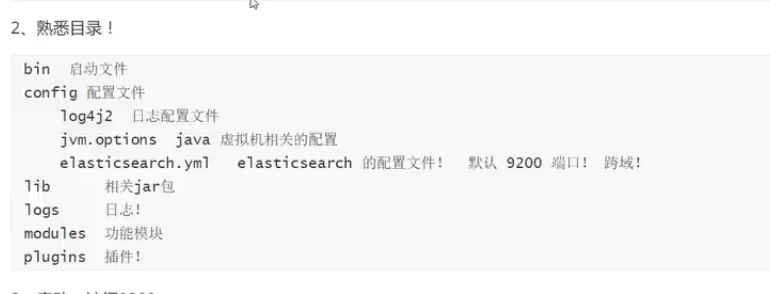
windows环境下的Elasticsearch安装
1.下载软件
Elasticsearch软件: https://www.elastic.co/cn/downloads/elasticsearch
2.对安装包进行解压,并进入bin目录下,
双击执行:elasticsearch.bat
3.看到started说明启动成功,
打开浏览器访问http://localhost:9200
安装elaticsearch-head
elaticsearch-head 我们就把它当作数据展示工具!我们后面所有的查询用Kibana
前提:必须安装好node环境和grunt工具
测试命令:node -v 及 grunt -version
    git clone git://github.com/mobz/elasticsearch-head.git
	npm config set registry https://registry.npm.taobao.org
    cd elasticsearch-head
    npm install
    npm run start

    open http://localhost:9100/
解决跨域的问题
vim elasticsearch.yml
添加下面的两行
http.cors.enabled: true
http.cors.allow-origin: "*"
修改完配置后,要重启es
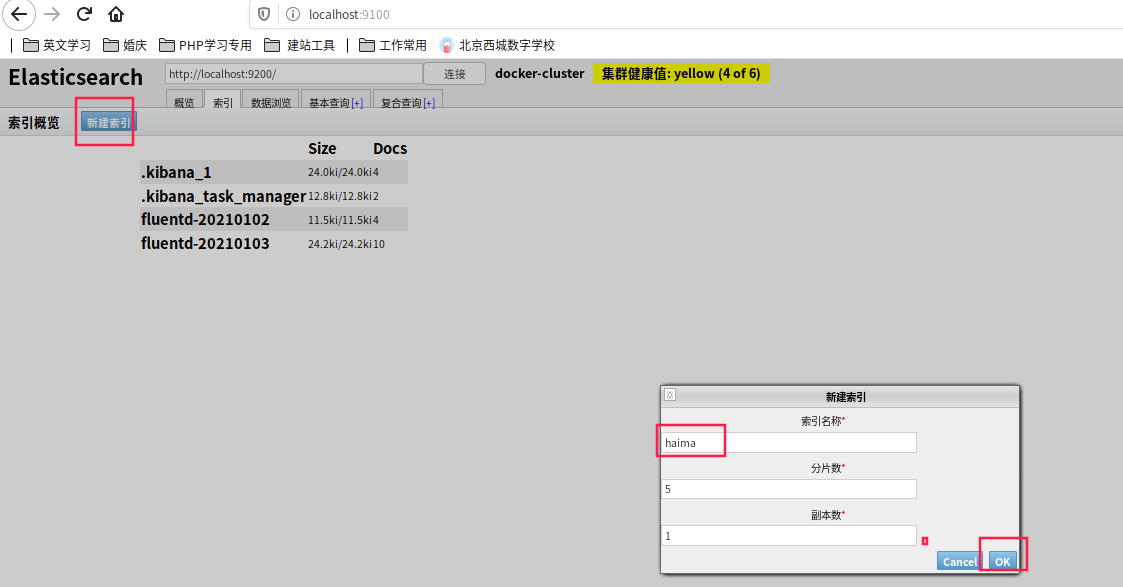
初学可以做es索引当做一个数据库,可以建立索引,文档(库里的数据)
新建索引

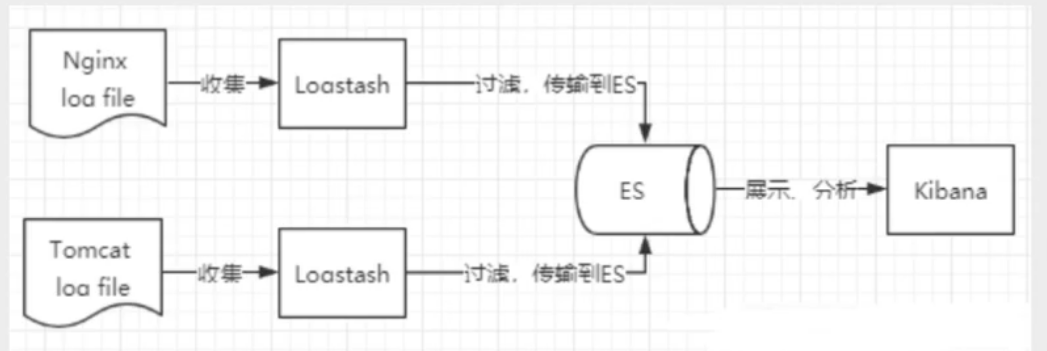
了解ELK

了解Kibana

官网:
https://www.elastic.co/cn/kibana
下载:
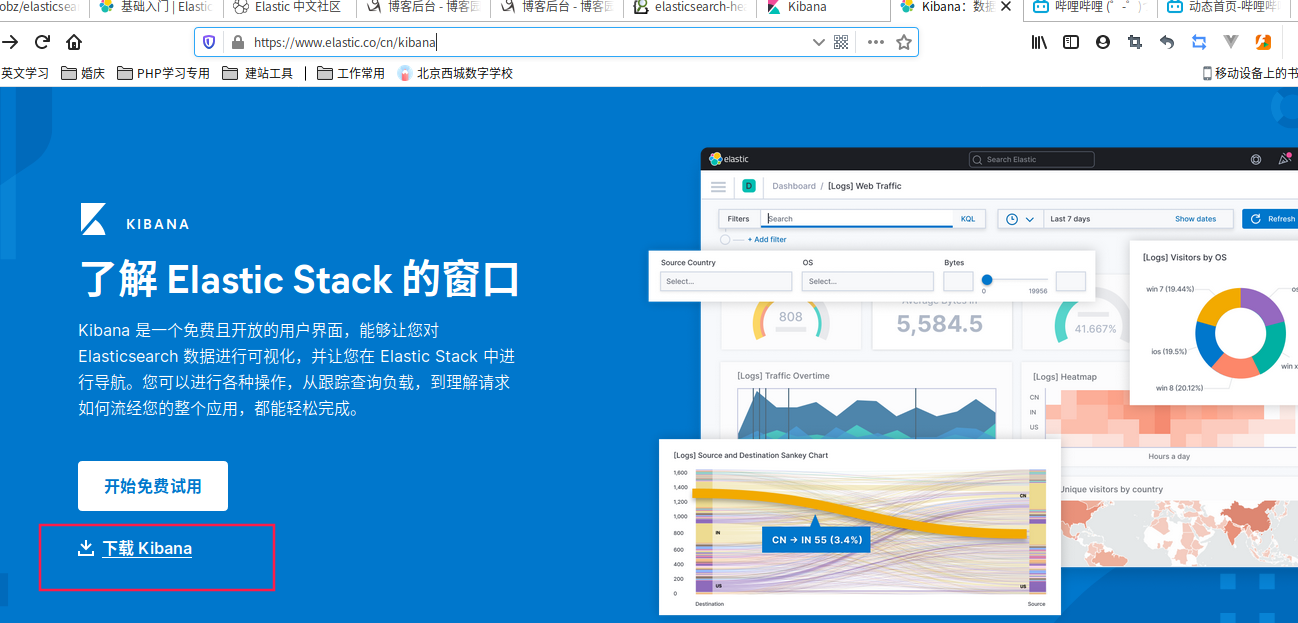
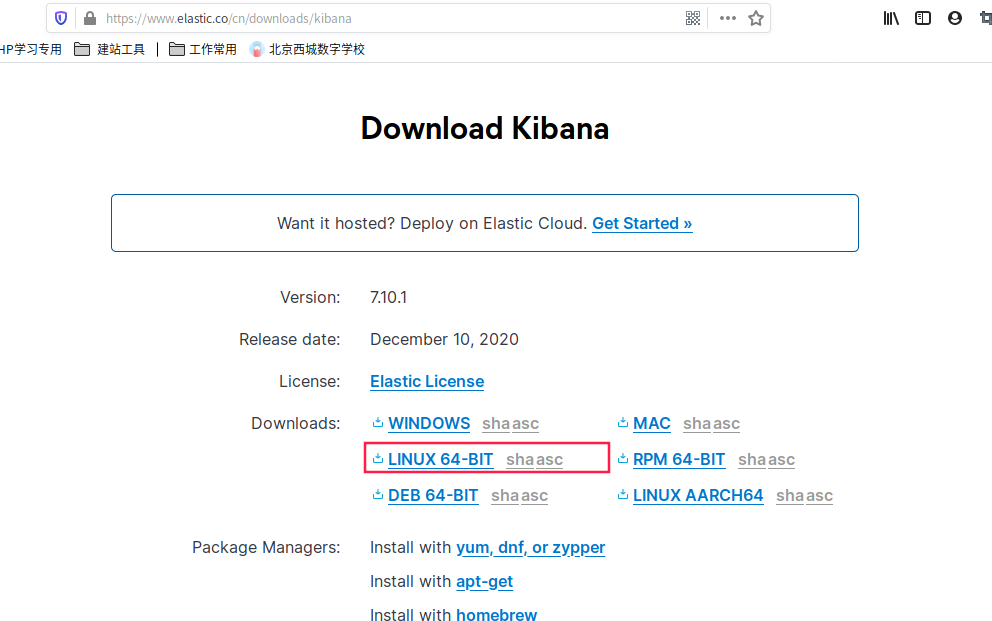
下载完毕后,解压也需要一些时间!是一个标准的工程!
好处:ELK基本上都是拆箱即用
以下以window版本的操作界面
启动测试
- 解压后端的目录
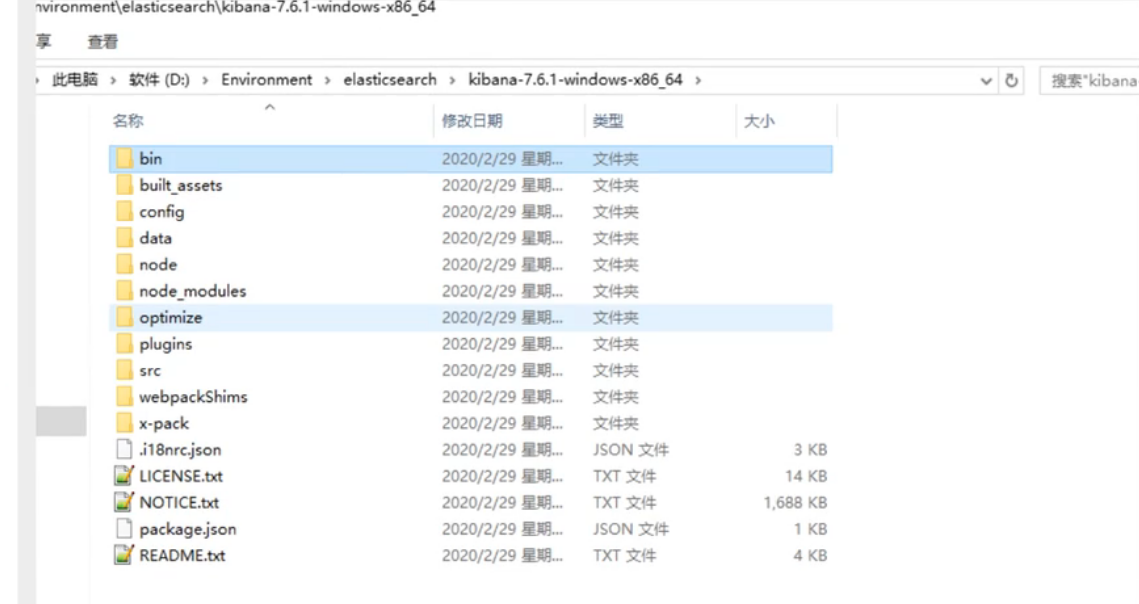
- 修改配置
修改es服务器地址和汉化
修改kibana.yml
es6配置
# es地址:
elasticsearch.url: "http://127.0.0.1:9200"


# 支持中文
i18n.locale: "zh-CN"
es7配置
server.name: kibana
server.host: "0.0.0.0"
elasticsearch.hosts: [ "http://10.10.11.133:9200" ] #  TODO 修改为自己的ip
xpack.monitoring.ui.container.elasticsearch.enabled: true
#elasticsearch.username: "elastic"  # es账号
#elasticsearch.password: "123456"   # es密码
i18n.locale: zh-CN # 中文
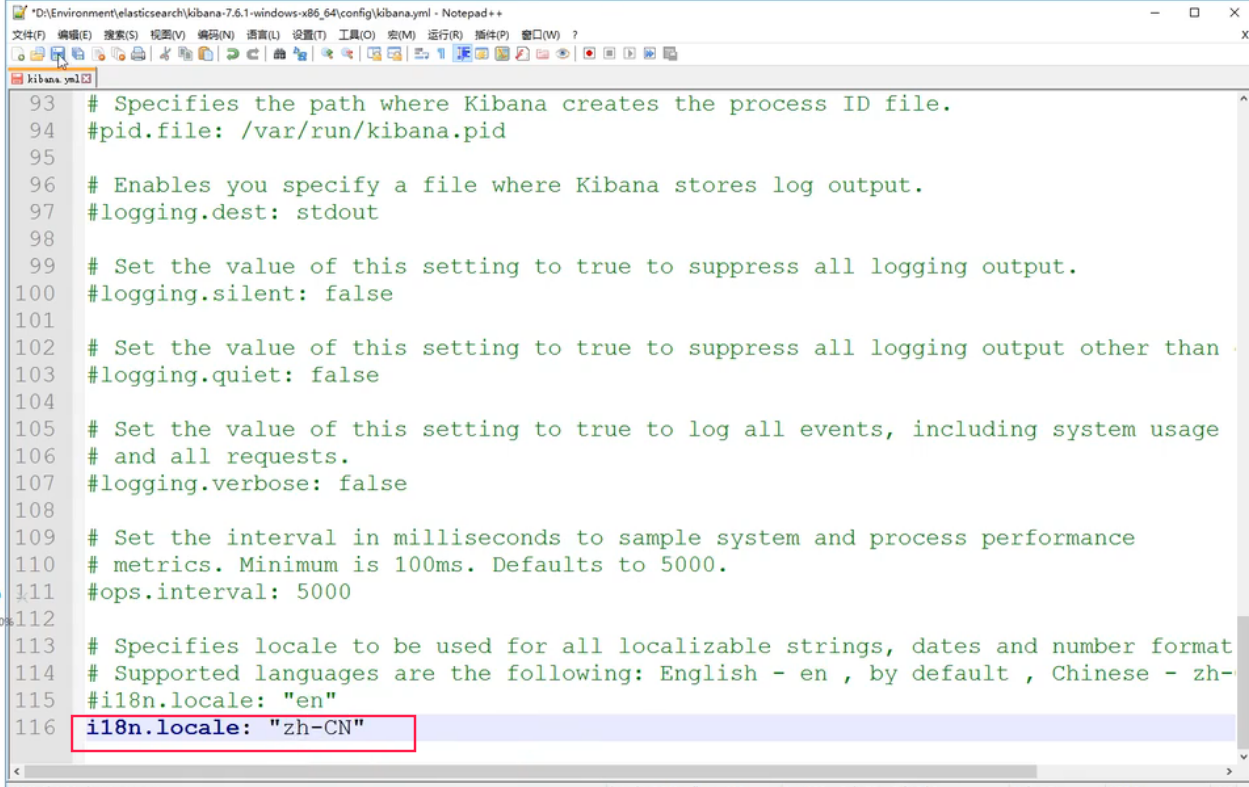
- 运行bin/kibana.bat
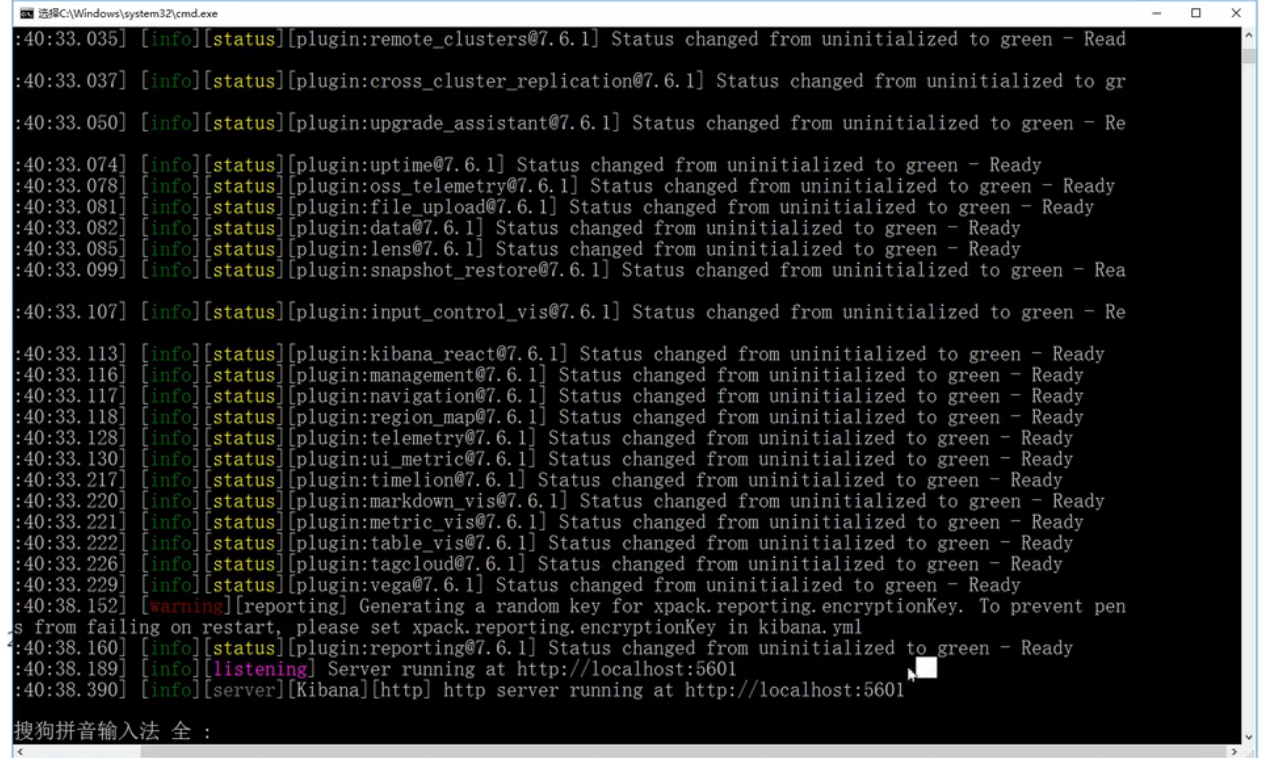
- 访问测试

- 开发工具!(POST、CURL、HEAD、谷歌浏览器插件测试!kibana)
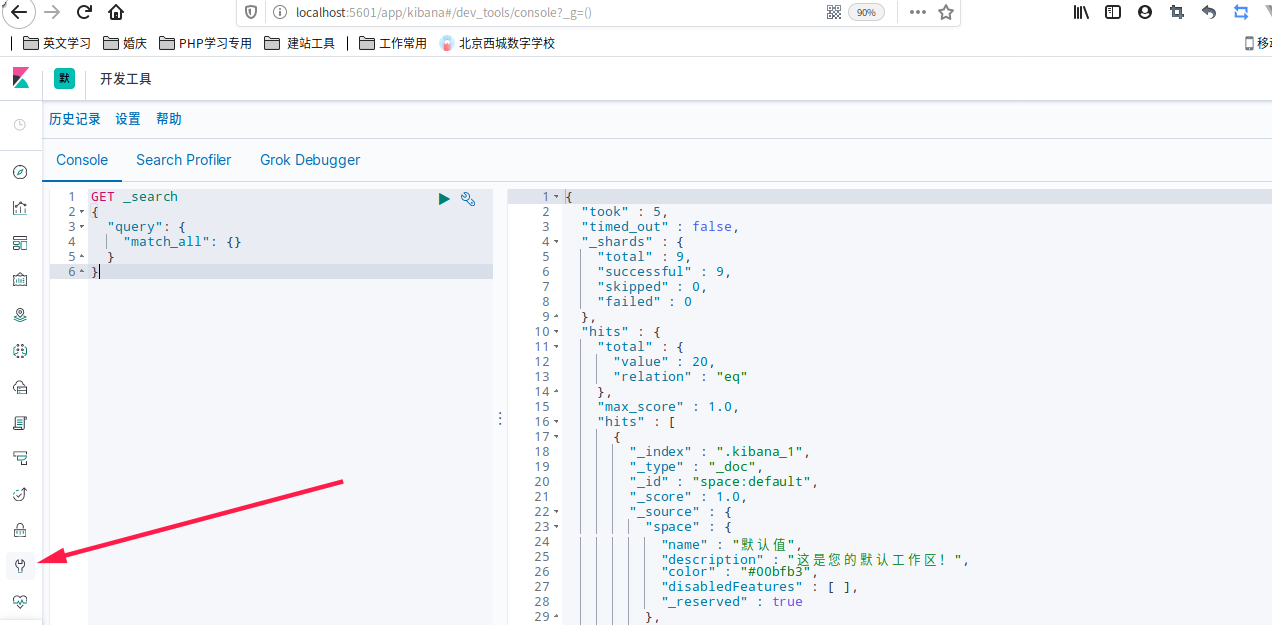
我们之后的所有操作都在这里编写!
修改完后重启服务


 浙公网安备 33010602011771号