4-1-Linux桌面虚拟化技术KVM(基于CentOS 6.8)
Linux桌面虚拟化技术KVM
KVM 即Kernel-based Virtual Machine 基亍内核的虚拟机是一个开源的系统虚拟化模块,自Linux 2.6.20之后集成在Linux的各个主要发行版本中。它使用Linux自身的调度器进行管理,所以相对于Xen,其核心源码很少。KVM目前已成为学术界的主流VMM之一。KVM的虚拟化需要硬件支持(如Intel VT技术或者AMD V技术)。是基于硬件的完全虚拟化。而Xen早期则是基于软件模拟的Para-Virtualization。
1 环境准备
1.1 添加一个20G的硬盘,用于存KVM虚拟机
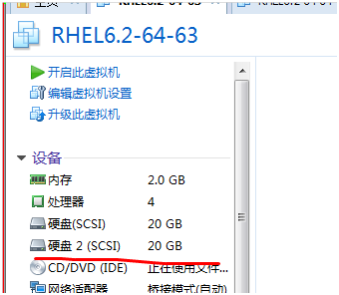
注:只有64位RHEL6以上系统支持KVM。32位系统不支持。
操作系统必须是RHEL6 64位, RHEL6 32不能安装KVM
1.2 查看CPU是否支持硬件虚拟化技术
CPU要支持虚拟化,查看自己的CPU是否支持全虚拟化虚拟化技术且是64位的
Intel:cat /proc/cpuinfo | grep --color vmx
AMD :cat /proc/cpuinfo | grep --color svm
看看flag有没有上面的vmx戒者是svm,有的话就是支持全虚拟化技术
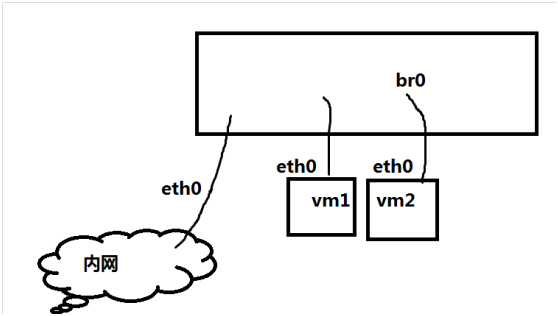
1.3 配置KVM桥接功能
网桥介绍: 我们经常所说的Bridge设备其实就是网桥设备,也就相当亍现在的二层交换机,用亍连接同一网段内的所有机器,所以我们的目的就是将网络设备eth0添加到br0,此时br0就成为了所谓的交换机设备,我们物理机的eth0也是连接在上面的。
添加桥接设备br0: 相当于一个二层交换机
安装包:
[root@xuegod63 ~]# rpm -ivh /mnt/Packages/bridge-utils-1.2-9.el6.x86_64.rpm
把eth0绑到br0桥设备上:
[root@xuegod63 ~]# cd /etc/sysconfig/network-scripts/
[root@xuegod63 network-scripts]# cp ifcfg-eth0 /tmp/ #备份一下eth0
[root@xuegod63 network-scripts]# vim ifcfg-eth0 #编辑配置文件为以下内容
DEVICE=eth0
NM_CONTROLLED=yes
IPADDR=192.168.1.63#这些蓝色内容接下来,需要删除
NETMASK=255.255.255.0
GATEWAY=192.168.1.1
DNS1=202.106.46.151
ONBOOT=yes
TYPE=Ethernet
BOOTPROTO=none
IPV6INIT=no
USERCTL=no
PREFIX=24
DEFROUTE=yes
IPV4_FAILURE_FATAL=yes
NAME="eth0"
HWADDR=00:0C:29:12:EC:1E
BRIDGE="br0"#在文件最后插入这一行
生成桥设备的配置文件:
[root@xuegod63 network-scripts]# vim ifcfg-br0 #创建ifcfg-br0 文件,并写入以下内容
DEVICE="br0"
NM_CONTROLLED="yes"
ONBOOT="yes"
TYPE="Bridge"
BOOTPROTO=none
IPADDR=192.168.1.63
NETMASK=255.255.255.0
GATEWAY=192.168.1.1
DNS1=192.168.1.1
注:TYPE="Bridge" , B要大写
[root@xuegod63 network-scripts]# /etc/init.d/network restart
正在关闭接口 eth0: bridge br0 does not exist!
[确定]
关闭环回接口: [确定]
弹出环回接口: [确定]
弹出界面 eth0: [确定]
弹出界面 br0: [确定]
测试br0:
root@xuegod63 network-scripts]# ifconfig
[root@xuegod63 network-scripts]# ping g.cn
PING g.cn (203.208.37.20) 56(84) bytes of data.
64 bytes from 203.208.37.20: icmp_seq=1 ttl=57 time=12.3 ms
查看桥接的信息:
[root@xuegod63 network-scripts]# brctl show
bridge name bridge id STP enabled interfaces
br0 8000.000c2912ec1e no eth0
2 创建一个kvm虚拟机
2.1 创建一个分区
[root@xuegod63 ~]# fdisk /dev/sdb #创建sdb1,大小20G
Device contains neither a valid DOS partition table, nor Sun, SGI or OSF disklabel
Building a new DOS disklabel with disk identifier 0xe2316600.
Changes will remain in memory only, until you decide to write them.
After that, of course, the previous content won't be recoverable.
Warning: invalid flag 0x0000 of partition table 4 will be corrected by w(rite)
WARNING: DOS-compatible mode is deprecated. It's strongly recommended to
switch off the mode (command 'c') and change display units to
sectors (command 'u').
Command (m for help): n
Command action
e extended
p primary partition (1-4)
p
Partition number (1-4): 1
First cylinder (1-2610, default 1):
Using default value 1
Last cylinder, +cylinders or +size{K,M,G} (1-2610, default 2610):
Using default value 2610
Command (m for help): w
The partition table has been altered!
Calling ioctl() to re-read partition table.
Syncing disks.
格式化,挂载使用
[root@xuegod63 Desktop]# mkfs.ext4 /dev/sdb1
[root@xuegod63 network-scripts]#mount /dev/sdb1 /var/lib/libvirt/images/ #安装虚拟机默认存放的路径
在/etc/fstab文件中添加启动自动挂载
[root@xuegod43 ~]# blkid
/dev/sda3: UUID="32a4a727-2cc9-4fce-829a-4d3615a06ff6" TYPE="ext4"
/dev/sdb1: UUID="e842da57-6886-4271-aba2-8e8e311eaf54" TYPE="ext4"
/dev/sda1: UUID="8bf27674-93a6-49f8-90a9-f9e425fe93d1" TYPE="ext4"
/dev/sda2: UUID="9a9fbdc0-151a-4b1f-bd1d-66f7c727ca06" TYPE="swap"
[root@xuegod43 ~]# vim /etc/fstab
#
# /etc/fstab
# Created by anaconda on Tue May 9 04:51:54 2017
#
# Accessible filesystems, by reference, are maintained under '/dev/disk'
# See man pages fstab(5), findfs(8), mount(8) and/or blkid(8) for more info
#
UUID=32a4a727-2cc9-4fce-829a-4d3615a06ff6 / ext4 defaults 1 1
UUID=8bf27674-93a6-49f8-90a9-f9e425fe93d1 /boot ext4 defaults 1 2
UUID=9a9fbdc0-151a-4b1f-bd1d-66f7c727ca06 swap swap defaults 0 0
tmpfs /dev/shm tmpfs defaults 0 0
devpts /dev/pts devpts gid=5,mode=620 0 0
sysfs /sys sysfs defaults 0 0
proc /proc proc defaults 0 0
UUID=e842da57-6886-4271-aba2-8e8e311eaf54 /var/lib/libvirt/images ext4 defaults 0 0
2.2 安装kvm
安装KVM模块、管理工具和libvirt
[root@xuegod63 ~]# yum install kvm virt-manager libvirt -y
注:
kvm : KVM虚拟化模块
virt-manager: KVM图形化管理工具
libvirt: 虚拟化服务
查看安装完KVM后的服务:
[root@xuegod63 ~]# service libvirtd start #虚拟化服务
[root@xuegod63 ~]# chkconfig libvirtd on
确定正确加载kvm 模块
[root@xuegod63 ~]# lsmod | grep kvm
kvm_intel 50380 0
kvm 305113 1 kvm_intel
检查KVM 是否成功安装可以使用virsh命令检查虚拟机的状态
[root@xuegod63 ~]# virsh list
Id Name State
----------------------------------
2.3 创建虚拟机
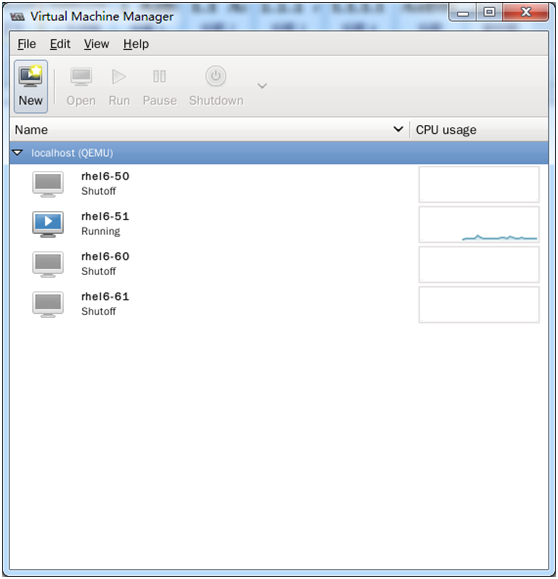
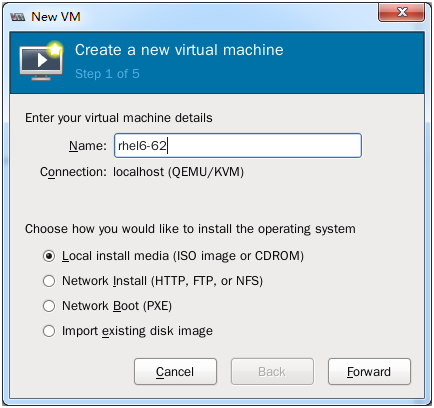
使用命令:virt-manager 建立虚拟机
[root@xuegod43 ~]# virt-manager
出现虚拟机管理界面
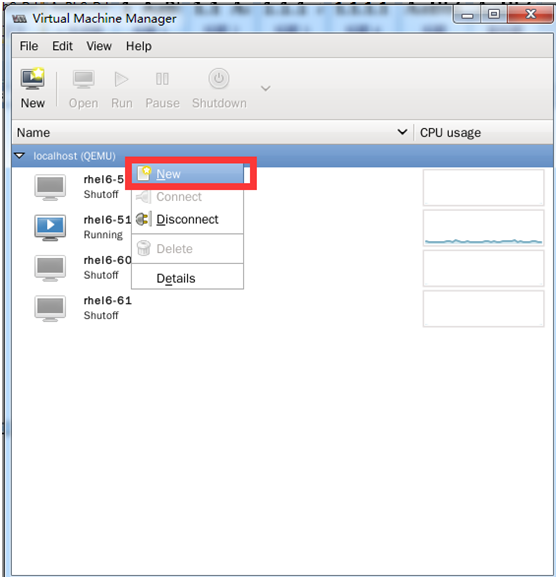
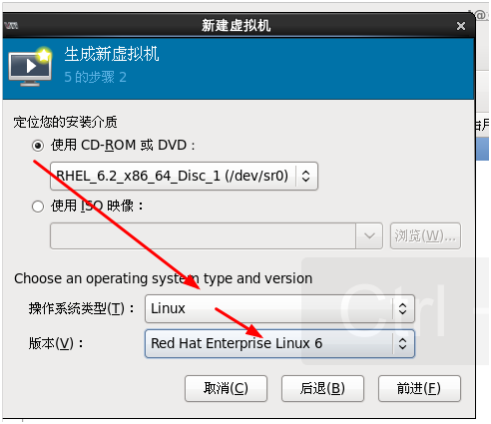
填写虚拟机名称,选择本地介质安装(光盘先挂载)

注:不要选择立即分配整个磁盘

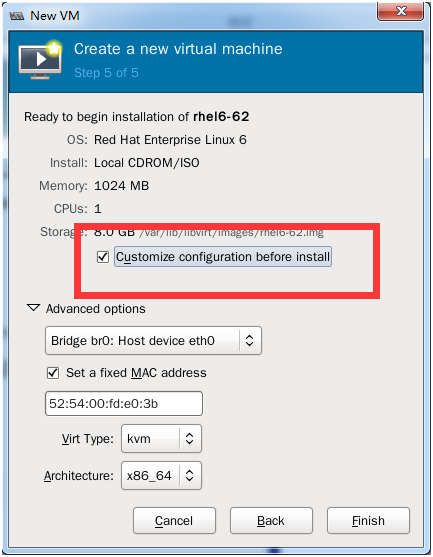
一定要勾选提交提前配置,网卡选择主机设备eth0(桥接br0)
点“完成”

键盘设置一定要选en-us,否则键盘不可用
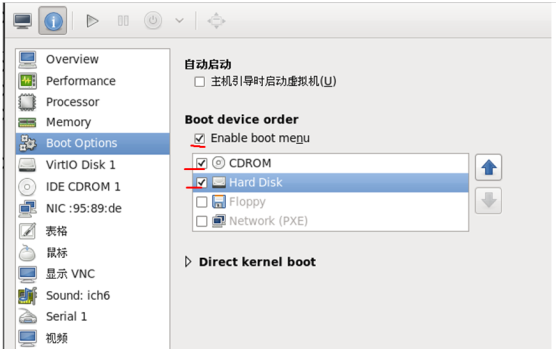
修改KVM 中BIOS引导顺序:
3 设置虚拟机
做一件事: 安装acpid服务 -》 yum源
3.1 给KVM配置个IP
安装
配置网卡IP地址:
[root@localhost ~]# cat /etc/sysconfig/network-scripts/ifcfg-eth0
DEVICE="eth0"
HWADDR="52:54:00:95:89:DE"
IPADDR=192.168.1.99
NETMASK=255.255.255.0
GATEWAY=192.168.1.1
DNS1=192.168.1.1
NM_CONTROLLED="yes"
ONBOOT="yes"
[root@localhost ~]# service network restart #启劢网卡
3.2 给kvm虚拟机安装acipd
注:在kvm虚拟机上安装acipd服务后,才可以在宿主机上执行重启,开关机操作
在xuegod63上搭建yum源服务
[root@xuegod63 ~]# yum install httpd -y
[root@xuegod63 ~]# service httpd start
[root@xuegod63 ~]# mount /dev/cdrom /var/www/html/
配置kvm 虚拟机rhel6-71 的yum源
[root@xuegod63 ~]# ssh 192.168.1.71
[root@localhost ~ ]# cd /etc/yum.repos.d
[root@localhost ~ ]# vim rhel6.repo # 写入以下内容
[rhel6]
name= rhel6
baseurl=http://192.168.1.63/
#baseurl=file:///mnt/
enabled=1
gpgcheck=0
gpgkey=file:///etc/pki/rpm-gpg/RPM-GPG-KEY-redhat-release
[root@localhost ~ ]#rm -rf rhel-source.repo #删除多余的yum源配置文件
[root@localhost ~ ]# setenforce 0 #关闭selinux
[root@localhost ~ ]#iptables -F #关闭防火墙
在kvm 虚拟机rhel6-71安装 acpid服务
[root@localhost yum.repos.d]# yum install acpid -y
[root@localhost yum.repos.d]# service acpid start //启劢acpic服务,
[root@localhost yum.repos.d]# chkconfig --list acpid
acpid 0:off 1:off 2:on 3:on 4:on 5:on 6:off //安装后默认会加入到开机启劢的
在xuegod63 KVM真机上测试:
[root@xuegod63 ~]# virsh shutdown rhel6-71 #关闭rhel6-71虚拟机
virsh命令其他用法:
[root@localhost ~]# virsh autostart rhel6-71 #设置rhel6-71虚拟机为物理机开机后,自动启动
[root@xuegod63 ~]# chkconfig --list libvirtd #开机启劢了
libvirtd 0:off 1:off 2:off 3:on 4:on 5:on 6:off
测试:
reboot后,没有发现开机自劢启劢。原因是什么?
[root@xuegod63 ~]# vim /etc/fstab #记得设置开机自劢挂载sdb1,丌然后开机启劢丌了虚拟机
/dev/sdb1 /var/lib/libvirt/images ext4 defaults 0 0
3.3 KVM虚拟机常用命令
[root@xuegod63 ~]# virsh list
Id 名称 状态
----------------------------------
1 rhel6-71 running
[root@localhost ~]# virsh list #列出在运行的虚拟机
[root@localhost ~]# virsh start rhel6-71 #启劢vm1虚拟机
[root@localhost ~]# virsh shutdown rhel6-71 #关闭vm1虚拟机
