
Nginx相关模块学习使用实践指南
转载自:https://www.bilibili.com/read/cv16150654?spm_id_from=333.999.0.0
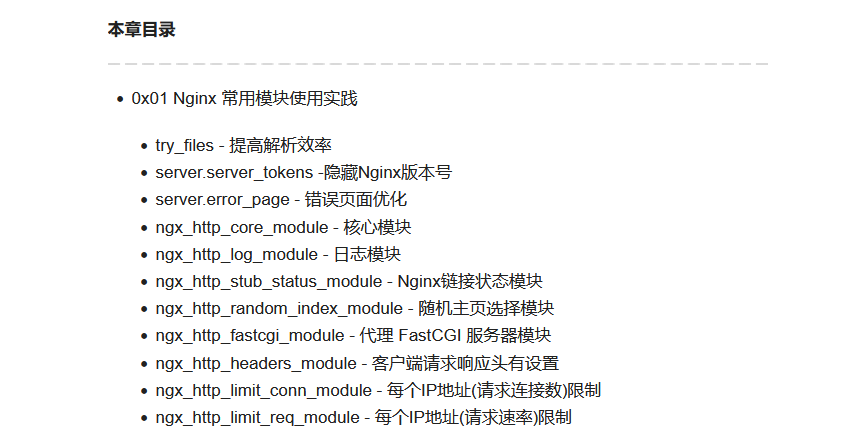
0x01 Nginx 常用模块使用实践
官方模块使用手册:http://nginx.org/en/docs/
ngx_http_core_module - 核心模块
try_files - 提高解析效率
描述: try_files是nginx中http_core核心模块所带的指令,主要是能替代一些rewrite的指令,提高解析效率。
关键点1:按指定的file顺序查找存在的文件,并使用第一个找到的文件进行请求处理

关键点2:查找路径是按照给定的root或alias为根路径来查找的

关键点3:如果给出的file都没有匹配到,则重新请求最后一个参数给定的uri,就是新的location匹配

关键点4:如果是格式2,如果最后一个参数是 = 404 ,若给出的file都没有匹配到,则最后返回404的响应码
Syntax: 	try_files file ... uri;
try_files file ... =code;
Default: 	—
Context: 	server, location
示例演示:
# 1.例如,访问 http://127.0.0.1/images/test.gif 如果 /app/html/images/test.gif 不存在该文件则会重写请求到 http://127.0.0.1/images/weiyigeek.gif
location ^~ /images/ {
  root /app/html/images/;
  try_files $uri $uri/ /images/weiyigeek.gif;
}

# 2.其他用法,若未找到给定顺序的文件,则将会交给location @weiyigeek 处理(相当于匹配到了@weiyigeek 来匹配)
location / {
  try_files /weiyigeek/index.html $uri $uri/index.html $uri.html @weiyigeek;
}
location @weiyigeek {
  proxy_pass http://www.weiyigeek.top;
}
server.server_tokens -隐藏Nginx版本号
描述: 为了保证Nginx的安全我们有必要隐藏Nginx版本号以增加攻击难度与针对性。
# 隐藏版本号
server_tokens on;
server.error_page - 错误页面优化
描述: 我们可以通过error_page进行自定义配置指定服务器返回的错误代码对应的页面。
Context 范围: http、server、location
Tips: 如果当前配置级别没有 error_page 指令时将从上层配置继承。
使用示例:
# 1.错误代码响应页面跳转
error_page 404 https://www.weiyigeek.top/error.html;
error_page 400 403 404 405 408 410 412 413 414 415 http://www.weiyigeek.top/error-40x.jpg;
error_page 500 501 502 503 504 http://www.weiyigeek.top/error-50x.jpg;

# 2.错误代码重定向路径设置
error_page 403  /warn/403.html;

# 3.内部跳转时无需改变URI可以将错误处理转到一个命名路径
error_page 404 @fallback;
location @another_url {
  root /usr/share/nginx/html/warn;
}
location @fallback {
  proxy_pass http://backendweiyigeek;
}
upstream backendweiyigeek {
  server 192.168.12.1:8080;
  server 192.168.12.2:8080;
}

# 4.使用"=response"语法改变响应状态码.
error_page 404 =200 /empty.png;
ngx_http_log_module - 日志模块
nginx配置文件中记录访问日志和错误日志:
# 访问日志方式
Syntax:   access_log path [format [buffer=size] [gzip[=level]] [flush=time] [if=condition]];
Default: 	access_log logs/access.log combined;
Context: 	http, server, location, if in location, limit_except
# 额外语法:
  access_log syslog:server=address[,parameter=value] [format [if=condition]];
# 参数说明:
  * path   指定日志的存放位置。
  * format 指定日志的格式。默认使用预定义的combined。
  * buffer 用来指定日志写入时的缓存大小。默认是64k。
  * gzip   日志写入前先进行压缩。压缩率可以指定,从1到9数值越大压缩比越高,同时压缩的速度也越慢。默认是1。
  * flush  设置缓存的有效时间。如果超过flush指定的时间,缓存中的内容将被清空。

# 错误日志方式
Syntax:   error_log path level;

# 日志格式
Syntax:	log_format name [escape=default|json|none] string ...;
Default:
log_format combined "...";
Context:	http
错误日志 记录等级 [level] 说明
debug 信息非常详细

info 信息详细

notice (默认)

warn 警告

error 错误

crit 比较严重

alert 很严重

emerg 恐慌级别
温馨提示: 上述等级从上至下日志详细程度逐级递减。
日志 Format 格式变量:
参数                      说明                                         示例
$remote_addr             客户端地址                                    113.145.15.16
$remote_user             客户端用户名称                                 --
$time_local              访问时间和时区                                18/Jul/2012:17:00:01 +0800
$request                 请求的URI和HTTP协议                           "GET /weiyigeek.html HTTP/1.1"
$http_host               请求地址,即浏览器中你输入的地址(IP或域名)     weiyigeek.top 192.168.100.100
$status                  HTTP请求状态                                  200
$upstream_status         upstream状态                                  200
$body_bytes_sent         发送给客户端文件内容大小                        1547
$http_referer            url跳转来源                                   https://www.baidu.com/
$http_user_agent         用户终端浏览器等信息                           Mozilla/4.0 (compatible; MSIE 8.0; Windows NT 5.1; Trident/4.0; SV1; GTB7.0; .NET4.0C;
$ssl_protocol            SSL协议版本                                   TLSv1
$ssl_cipher              交换数据中的算法                               RC4-SHA
$upstream_addr           后台upstream的地址,即真正提供服务的主机地址     10.10.10.100:80
$request_time            整个请求的总时间                                0.205 (代表 Nginx 从收到客户端请求、到发送完响应的整个时间)
$upstream_response_time  请求过程中,upstream响应时间                    0.002 (在 Nginx 接受完 client 的请求后,再和 upstream server 请求的过程的时间)
日志 Format 的几种格式:
# 常规模式
log_format main '$remote_addr - $remote_user [$time_local] "$request" '
                '$status $body_bytes_sent "$http_referer" '
                '"$http_user_agent" "$http_x_forwarded_for"';

# 压缩格式
log_format custom '$remote_addr - $remote_user - $http_x_forwarded_for [$time_local] "$request" '
                  '$status $body_bytes_sent "$http_referer" '
                  '"$http_user_agent" rt=$request_time urt=$upstream_response_time';

log_format combined '$remote_addr - $remote_user [$time_local]'
                    '"$request" $status $body_bytes_sent '
                    '"$http_referer" "$http_user_agent" rt=$request_time urt=$upstream_response_time';

# upstream 格式
log_format upstream_time '$remote_addr - $remote_user [$time_local] '
                         '"$request" $status $body_bytes_sent '
                         '"$http_referer" "$http_user_agent"'
                        'rt=$request_time uct="$upstream_connect_time" uht="$upstream_header_time" urt="$upstream_response_time"';

# json 字符串模式
log_format logstash_json '{"@timestamp":"$time_iso8601",'
       '"host": "$server_addr",'
       '"client": "$remote_addr",'
       '"size": $body_bytes_sent,'
       '"responsetime": $request_time,'
       '"domain": "$host",'
       '"url":"$request_uri",'
       '"referer": "$http_referer",'
       '"agent": "$http_user_agent",'
       '"status":"$status",'
       '"x_forwarded_for":"$http_x_forwarded_for"}';
基础示例
# 1.关闭 access_log与error_log 即不记录访问日志与错误日志。
access_log off;
error_log /dev/null;  # 注意此处并不是off而是/dev/null

# 2.debug 调试模式开启,启用时将在error log中记录notice级别的重写日志。
error_log  /var/logs/nginx/example.com.error.log;
rewrite_log on;

# 3.指定访问日志进行gzip当缓存到达128k或者1分钟后写入到日志文件中与错误日志记录等级。
access_log /var/log/nginx/access.log main buffer=128k gzip flush=1m;
error_log /var/log/nginx/error.log warn buffer=256k;

# 4.分析 Web Server 的性能配置,gizp compression需要zlib库的支持
access_log /path/to/access.log.gz combined buffer=32k gzip flush=5m;
# 其压缩格式需要通过`zcat`命令查看
$ zcat /path/to/access.log.gz
187.217.160.191 - - [29/Mar/2020:14:35:49 +0800]"GET / HTTP/1.1" 200 2046 "-" "Mozilla/5.0 (Windows NT 6.1; Win64; x64; rv:74.0) Gecko/20100101 Firefox/74.0" 0.000 0.001


# 5.忽略favicon.ico日志减少无需信息IO
location = /favicon.ico {
  log_not_found     off;
  access_log     off;
}

# 5.按天生成Nginx日志配置,首先修改 nginx.conf 文件, 利用map设置一个时间logdate变量为y-m-d格式。
map $time_iso8601 $logdate {
  default 'nodate';
  '~^(?<ymd>\d{4}-\d{2}-\d{2})' $ymd;
}

# 补充方式.如下方式未进行复现(如有需求请自己测试)
# server {
  ....
  # if ( $time_iso8601  ~ "(\d{4}-\d{2}-\d[2})") {
  #   set $logdate $1
  # }
  ....
# }

access_log /var/log/nginx/access-${logdate}.log main;  # 注意如果设置缓存写入日志,则不支持路径中存在变量。

# 执行 nginx 的用户权限赋予其可以修改日志(不建议使用root), 然后重启nginx。
$ chown -R ubuntu:root /var/log/nginx
$ nginx -s reload
补充方式: 利用进行logrotate.d日志轮转
# 针对 Nginx logrotate.d 日志轮转设置
$ vim /etc/logrotate.d/nginx
/var/log/nginx/*.log {     # 指定需要轮转处理的日志文件
  daily              # 日志文件轮转周期,可用值为: daily/weekly/yearly
  missingok          # 忽略错误信息
  rotate 7           # 轮转次数,即最多存储7个归档日志,会删除最久的归档日志
  minsize 5M	       # 限制条件,大于5M的日志文件才进行分割,否则不操作
  dateext            # 以当前日期作为命名格式
  compress           # 轮循结束后,已归档日志使用gzip进行压缩
  delaycompress      # 与compress共用,最近的一次归档不要压缩
  notifempty         # 日志文件为空,轮循不会继续执行
  create 640 nginx nginx # 新日志文件的权限
  sharedscripts          # 有多个日志需要轮询时,只执行一次脚本
  postrotate             # 将日志文件转储后执行的命令。以endscript结尾命令需要单独成行
  if [ -f /var/run/nginx.pid ]; then   # 判断nginx的PID。# 默认logrotate会以root身份运行
    kill -USR1 `cat /var/run/nginx.pid`
  fi
  endscript
}

# 执行命令:
/usr/sbin/logrotate -f /etc/logrotate.conf

# 创建定时计划任务
$ crontab -e
0 1 * * * /usr/sbin/logrotate -f /etc/logrotate.conf
ngx_http_stub_status_module - Nginx链接状态模块
描述:即在编译时候加入预编译参数--with-http_stub_status_module,它是一个实时统计Nginx Client状态的;
基础语法:
Context: server,location;  #使用的上下文范围
Syntax: stu_status;
使用案例:
server {
  ...
  location /project_status {
    stub_status;
  }
  ...
}
使用效果:
Active Connections: 当前活动链接数 2 个
第一个 server 表示 Nginx 启动到现在共处理了 2 个连接。
第二个 accepts 表示 Nginx 启动到现在共成功创建 2 次握手。
第三个 handled requests 表示总共处理了 5 次请求。
reading 读取客户端的Header信息数.这个操作只是读取头部信息,读取完后马上进入writing状态,因此时间很短。
writing 响应数据到客户端的Header信息数.这个操作不仅读取头部,还要等待服务响应,因此时间比较长。
waiting 开启keep-alive后等候下一次请求指令的驻留连接.
WeiyiGeek.stub_status
温馨提示: 正常情况下waiting数量是比较多的并不能说明性能差,反而如果reading+writing数量比较多说明服务并发有问题。
ngx_http_random_index_module - 随机主页选择模块
描述:编译选项--with-help_random_index_module在目录中随机选择一个主页;
基础语法:
Context: location;  #使用的上下文范围
Syntax: random_index on|off; #默认off
使用案例:
server {
  ...
  location / {
    root /opt/app;
    random_index on;
    #index index.html index.htm
  }
  ...
}
ngx_http_fastcgi_module - 代理 FastCGI 服务器模块
描述: 该 ngx_http_fastcgi_module 模块允许将请求传递给 FastCGI 服务器。
参考地址: http://nginx.org/en/docs/http/ngx_http_fastcgi_module.html
fastcgi_pass - 设置 FastCGI 服务器的地址, IP地址或者域名。

fastcgi_pass_header - 传递表头到 FastCGI 服务器。

fastcgi_param - 应传递给 FastCGI 服务器的参数, 该值可以包含文本、变量及其组合。

fastcgi_index - 设置 FastCGI 服务器的首页。

fastcgi_read_timeout time - 定义从 FastCGI 服务器读取响应的超时时间。

fastcgi_send_timeout time - 设置将请求传输到 FastCGI 服务器的超时时间。

fastcgi_cache zone | off; - 定义用于缓存的共享内存区域。

fastcgi_split_path_info regex;- 定义一个捕获 $fastcgi_path_info 变量值的正则表达式。

fastcgi_store on | off | string; - 允许将文件保存到磁盘。

fastcgi_temp_path path [level1 [level2 [level3]]]; - 定义一个用于存储临时文件的目录,其中包含从 FastCGI 服务器接收到的数据
参考示例:
# php解析
location ~ .*\.(php|php5)?$ {
  # FastCGI Server 相关配置
  fastcgi_pass blog.weiyigeek.top:9000;
  fastcgi_pass unix:/tmp/fastcgi.socket;
  fastcgi_index index.php;

  # FastCGI 参数 相关配置
  fastcgi_param SCRIPT_FILENAME /home/www/scripts/php$fastcgi_script_name;
  fastcgi_param QUERY_STRING    $query_string;
  fastcgi_param REQUEST_METHOD  $request_method;
  fastcgi_param CONTENT_TYPE    $content_type;
  fastcgi_param CONTENT_LENGTH  $content_length;

  # FastCGI 相关参数调优
  fastcgi_cache ngx_fcgi_cache;
  fastcgi_cache_valid 200 302 1h;
  fastcgi_cache_valid 301 1d;
  fastcgi_cache_valid any 1m;
  fastcgi_cache_min_uses 1;
  fastcgi_cache_use_stale error timeout invalid_header http_500;
  fastcgi_cache_key http://$host$request_uri;

  # FastCGI 发送、读取超时时间设置
  fastcgi_read_timeout 60;
  fastcgi_send_timeout 60;

  # FastCGI 请求截取配置
  # 例如,进行 /show.php/article/0001 请求,参数变量结果如下。
  fastcgi_split_path_info       ^(.+\.php)(.*)$;
  fastcgi_param SCRIPT_FILENAME /path/to/php$fastcgi_script_name; # SCRIPT_FILENAME参数 /path/to/php/show.php
  astcgi_param PATH_INFO       $fastcgi_path_info; # PATH_INF O参数 /article/0001

  # 其它conf包含配置
  include fastcgi.conf;
}
ngx_http_headers_module - 客户端请求响应头有设置
描述: 该 ngx_http_headers_module 模块允许将“Expires”和“Cache-Control”头字段以及任意字段添加到响应头中。
语法参数
add_header name value [always]; : 如果响应代码等于 200、201 (1.3.10)、204、206、301、302、303、304、307 (1.1.16、1.0.13) 或 308 (1.13),则将指定字段添加到响应标头), 当指定了 always 参数(1.7.5),则无论响应代码为多少都将添加标头字段。

expires [modified] time; | expires epoch | max | off; : 如果响应代码等于 200、201 (1.3.10)、204、206、301、302、303、304、307 (1.1.1),则启用或禁用添加或修改“Expires”和“Cache-Control”响应头字段。 16、1.0.13) 或 308 (1.13.0), 该参数可以是正时间或负时间(不缓存)。
使用演示:
示例1.在 location 块中 添加 request_method 判断 options 请求
if ($request_method = 'OPTIONS') {
  add_header Access-Control-Allow-Origin *;
  add_header Access-Control-Allow-Methods GET,POST,PUT,DELETE,OPTIONS,PATCH;
  add_header Access-Control-Allow-Credentials true;
  add_header Access-Control-Allow-Headers DNT,X-Mx-ReqToken,Keep-Alive,User-Agent,X-Requested-With,If-Modified-Since,Cache-Control,Content-Type,Authorization;
  return 204;
}
示例2.按照请求来源设置响应头
# 1.在location块中,判断当前来源的域名($http_origin)是不是符合条件,
# 2.符合条件的话就用add_header指令设置 Access-Control-Allow-Origin
location ~ \.ico|jpg|gif|png|js|css|woff2|ttf$ {
  root /usr/local/app/images; #存放静态文件的路径
  expires 1h;
 # 只有 blog.weiyigeek.top 域名请求访问添加如下响应头。
  if ($http_origin ~ [a-z]+\.weiyigeek\.top$){
    add_header Access-Control-Allow-Origin $http_origin;
    add_header Access-Control-Request-Method GET;
  }
}
示例3.利用添加的Access-Control-Allow-Origin响应头解决字体跨域配置方法。
location ~* \.(eot|ttf|woff|woff2|svg)$ {
  add_header Access-Control-Allow-Origin *;
  # add_header Access-Control-Allow-Origin $http_origin;
  add_header Access-Control-Allow-Headers X-Requested-With;
  add_header Access-Control-Allow-Methods GET,POST,OPTIONS;
}
ngx_http_limit_conn_module - 每个IP地址(请求连接数)限制
描述: ngx_http_limit_conn_module 模块用于限制每个定义的键的连接数,特别是来自单个 IP 地址的连接数,并非所有连接都被计算在内。只有当服务器正在处理一个请求并且已经读取了整个请求标头时,才计算一个连接。
参考地址: http://nginx.org/en/docs/http/ngx_http_limit_conn_module.html
Directives - 指令
limit_conn zone number; : 为给定键值设置共享内存区域和最大允许连接数, 当超过此限制时,服务器将返回错误以响应请求

limit_conn_dry_run on | off; : 默认off,启用干运行模式,在此模式下连接数不受限制但是在共享内存区域中,过多的连接数将照常考虑在内。

limit_conn_log_level info | notice | warn | error; : 默认error,为服务器限制连接数的情况设置所需的日志记录级别。

limit_conn_status code; : 默认503,设置要返回的状态代码以响应被拒绝的请求。

limit_conn_zone key zone=name:size; : 设置共享内存区域的参数,该区域将保留各种键的状态, 状态包括当前连接数,可以包含文本、变量及其组合。
示例演示:
# 例如,每个 IP 地址一次只允许一个连接。
limit_conn_zone $binary_remote_addr zone=addr:10m;
server {
  location /download/ {
    limit_conn addr 1;
  }
}

# 例如,以下配置将限制每个客户端 IP 与服务器的连接数,同时限制与虚拟服务器的连接总数。
limit_conn_zone $binary_remote_addr zone=perip:10m;
limit_conn_zone $server_name zone=perserver:10m;
server {
  ...
  limit_conn perip 10;
  limit_conn perserver 100;
}
温馨提示: 嵌入式变量 $limit_conn_status 其保留限制连接数的结果。
温馨提示: 在 HTTP/2 和 SPDY 中,每个并发请求都被视为一个单独的连接。
ngx_http_limit_req_module - 每个IP地址(请求速率)限制
描述: 该模块用于限制每个已定义键的请求处理速率,特别是来自单个 IP 地址的请求的处理速率。
Directives - 指令
limit_req zone=name [burst=number] [nodelay | delay=number]; : 设置共享内存区域和请求的最大突发大小,如果请求速率超过为区域配置的速率,则其处理将延迟,以便以定义的速率处理请求, 默认情况下最大突发大小等于零。

limit_req_zone key zone=name:size rate=rate [sync];, 设置共享内存区域的参数以及请求速率,该区域将保留各种键的状态, 状态存储当前过多请求数,可以包含文本、变量及其组合, 例如 $binary_remote_addr.

limit_req_dry_run on | off;, 默认off, 启用dry运行模式。在此模式下请求处理速率不受限制,但是在共享内存区域中,过多的请求数将照常计算在内。

limit_req_log_level info | notice | warn | error;,默认 error, 为服务器由于速率超过或延迟请求处理而拒绝处理请求的情况设置所需的日志记录级别。

limit_req_status code;, 默认 503, 设置要返回的状态代码以响应被拒绝的请求.
示例演示:
# 1.此处,状态保存在 10 MB 区域“one”中,并且此区域的平均请求处理速率不能超过每秒 1 个请求。
limit_req_zone $binary_remote_addr zone=one:10m rate=1r/s;
server {
  location /search/ {
    # 漏桶数(队列数)为5个(相当于设置一个大小为5的缓冲区)并不启用延时,超过了访问频次的请求会先放到这个缓冲区中等待, 如果又超过缓冲区的请求数那便直接返回 503。
    limit_req zone=one burst=5;
  }
}

# 2.如果不希望在限制请求时延迟过多的请求,则应使用以下参数 nodelay (无延迟的意思), 表示请求超过频次时可提供处理(burst + rate)个请求的能力, 当请求速率超过(burst + rate)数量时就会直接返回 503。
limit_req zone=one burst=5 nodelay;

# 3.例如,以下配置将限制来自单个 IP 地址的请求的处理速率,同时限制虚拟服务器的请求处理速率
limit_req_zone $binary_remote_addr zone=perip:10m rate=1r/s;
limit_req_zone $server_name zone=perserver:10m rate=10r/s;
server {
  ...
  limit_req zone=perip burst=5 nodelay;
  limit_req zone=perserver burst=10;
}
温馨提示: 上面的示例中将客户端IP地址用作密钥, 请注意这里使用的不是$remote_addr变量,而是$binary_remote_addr变量。$binary_remote_addr变量的大小对于IPv4地址始终为4字节,对于IPv6地址始终为16字节。存储状态在32位平台上始终占64字节,在64位平台上始终占128字节。一个兆字节的区域可以保存大约16000个64字节的状态或大约8000个128字节的状态, 即在10m字节的区域选64位平台下则可以保存 8000x10 = 80000个状态针对128字节来说。
温馨提示: burst 相当于设置一个缓冲区大小,超过了rate 访问频次的请求会先放到这个缓冲区中等待,如果又超过缓冲区的请求数将会直接返回503。
温馨提示: nodelay 表示无延迟的意思,设置其将永远不会存在请求需要等待的情况,即当请求数超过(burst + rate)数量的时候就会直接返回503, 补充一点nodelay一定是与burst配合使用的。
温馨提示: 嵌入式变量 $limit_req_status 其保留限制请求处理速率的结果。

