本章介绍SpringBoot 与任务,这里任务包括异步任务和定时任务
异步任务
在Java应用中,绝大多数情况下都是通过同步的方式来实现交互处理的;但是在处理与第三方系统交互的时候,容易造成响应迟缓的情况,之前大部分都是使用多线程来完成此类任务,其实,在Spring 3.x之后,就已经内置了@Async来完美解决这个问题。
@Async
1、新建一个SpringBoot Web项目

 1 <?xml version="1.0" encoding="UTF-8"?>
 2 <project xmlns="http://maven.apache.org/POM/4.0.0"
 3          xmlns:xsi="http://www.w3.org/2001/XMLSchema-instance"
 4          xsi:schemaLocation="http://maven.apache.org/POM/4.0.0 http://maven.apache.org/xsd/maven-4.0.0.xsd">
 5     <modelVersion>4.0.0</modelVersion>
 6
 7     <groupId>com.test</groupId>
 8     <artifactId>test-springboot-task</artifactId>
 9     <version>1.0-SNAPSHOT</version>
10
11
12     <parent>
13         <groupId>org.springframework.boot</groupId>
14         <artifactId>spring-boot-starter-parent</artifactId>
15         <version>2.1.8.RELEASE</version>
16     </parent>
17
18     <properties>
19
20         <project.build.sourceEncoding>UTF-8</project.build.sourceEncoding>
21         <project.reporting.outputEncoding>UTF-8</project.reporting.outputEncoding>
22         <java.version>1.8</java.version>
23     </properties>
24
25     <dependencies>
26
27         <dependency>
28             <groupId>org.springframework.boot</groupId>
29             <artifactId>spring-boot-starter-web</artifactId>
30         </dependency>
31
32
33         <dependency>
34             <groupId>org.springframework.boot</groupId>
35             <artifactId>spring-boot-starter-test</artifactId>
36             <scope>test</scope>
37         </dependency>
38
39     </dependencies>
40
41
42     <!-- SpringBoot打包插件,可以将代码打包成一个可执行的jar包 -->
43     <build>
44         <plugins>
45             <plugin>
46                 <groupId>org.springframework.boot</groupId>
47                 <artifactId>spring-boot-maven-plugin</artifactId>
48             </plugin>
49         </plugins>
50     </build>
51 </project>
2、编辑一个AsyncService,写一个say方法,这里的say方法要处理的内容,就是异步任务,且需要等待5秒钟,在方法上加上@Async注解
 1 @Service
 2 public class AsyncService {
 3
 4     // 告诉Spring这是一个异步方法
 5     @Async
 6     public void say(){
 7         try {
 8             Thread.sleep(5000);
 9         } catch (InterruptedException e) {
10             e.printStackTrace();
11         }
12         System.out.println("数据处理中。。。。。。");
13     }
14 }
3、在启动类上,使用@EnableAsync开启异步注解功能
1 // 开启异步注解
2 @EnableAsync
3 @SpringBootApplication
4 public class Application {
5
6     public static void main(String[] args) {
7         SpringApplication.run(Application.class, args);
8     }
9 }
4、编写一个AsyncController用来调用异步任务。内容如下:
 1 @RestController
 2 public class AsyncController {
 3
 4     @Autowired
 5     AsyncService asyncService;
 6
 7     @RequestMapping("/hello")
 8     public String say(){
 9         asyncService.say();
10         return "success";
11     }
12 }
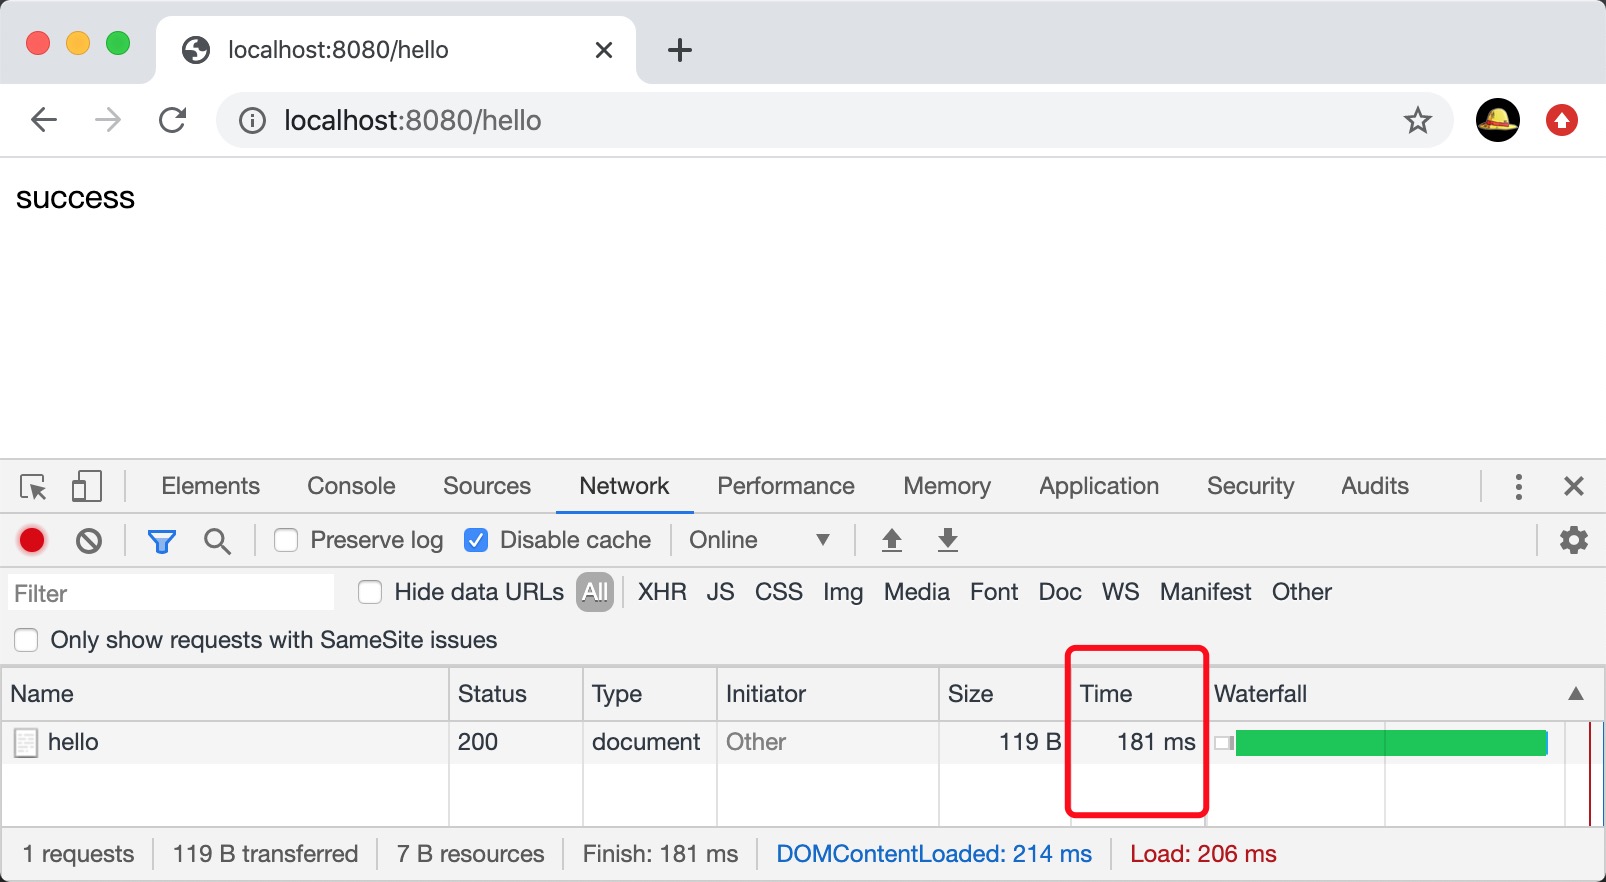
5、测试,在浏览器上是使用地址:http://localhost:8080/hello,访问AsyncController,F12查看浏览器控制台,可以看到请求响应耗时181,证明say()方法是异步执行的

Spring提供了异步执行任务调度的方式,提供TaskExecutor 、TaskScheduler 接口。
TaskExecutor 接口
1、在容器中注入TaskExecutor
1 @Bean
2 public TaskExecutor taskExecutor() {
3     ThreadPoolTaskExecutor taskExecutor = new ThreadPoolTaskExecutor();
4     taskExecutor.setMaxPoolSize(10);
5     taskExecutor.setCorePoolSize(5);
6     taskExecutor.setQueueCapacity(20);
7     return taskExecutor;
8 }
2、编写controller,调用TaskExecutor执行任务
 1 @RestController
 2 public class TaskExecutorController {
 3
 4     // 注入任务执行器
 5     @Autowired
 6     TaskExecutor taskExecutor;
 7
 8
 9     @RequestMapping("/taskExecutor")
10     public String executor(){
11         // 执行任务
12         taskExecutor.execute(new Runnable(){
13             @Override
14             public void run() {
15                 System.out.println(Thread.currentThread().getName() +  ":taskExecutor ..... start " + new Date());
16                 try {
17                     Thread.sleep(3000);
18                 } catch (InterruptedException e) {
19                     e.printStackTrace();
20                 }
21                 System.out.println(Thread.currentThread().getName() +  ":taskExecutor ..... end " + new Date());
22             }
23         });
24         return "success";
25     }
26 }
3、启动项目测试,访问地址:http://localhost:8080/taskExecutor,可以看到响应时间只有25ms,任务值异步执行

TaskScheduler 接口
1、在容器中注入TaskScheduler
1 @Bean
2 public TaskScheduler taskScheduler() {
3     ThreadPoolTaskScheduler taskScheduler = new ThreadPoolTaskScheduler();
4     taskScheduler.setPoolSize(10);
5
6     return taskScheduler;
7 }
2、编写controller,调用TaskScheduler执行任务
 1 @RestController
 2 public class TaskSchedulerController {
 3
 4     // 注入TaskScheduler
 5     @Autowired
 6     TaskScheduler taskScheduler;
 7
 8     @RequestMapping("/taskScheduled")
 9     public String executor(){
10
11         taskScheduler.schedule(new Runnable(){
12             @Override
13             public void run() {
14                 System.out.println(Thread.currentThread().getName() +  ":taskScheduled ..... start " + new Date());
15                 try {
16                     Thread.sleep(3000);
17                 } catch (InterruptedException e) {
18                     e.printStackTrace();
19                 }
20                 System.out.println(Thread.currentThread().getName() +  ":taskScheduled ..... end " + new Date());
21             }
22         }, new Date(new Date().getTime() + 5000));
23         return "success";
24     }
25 }
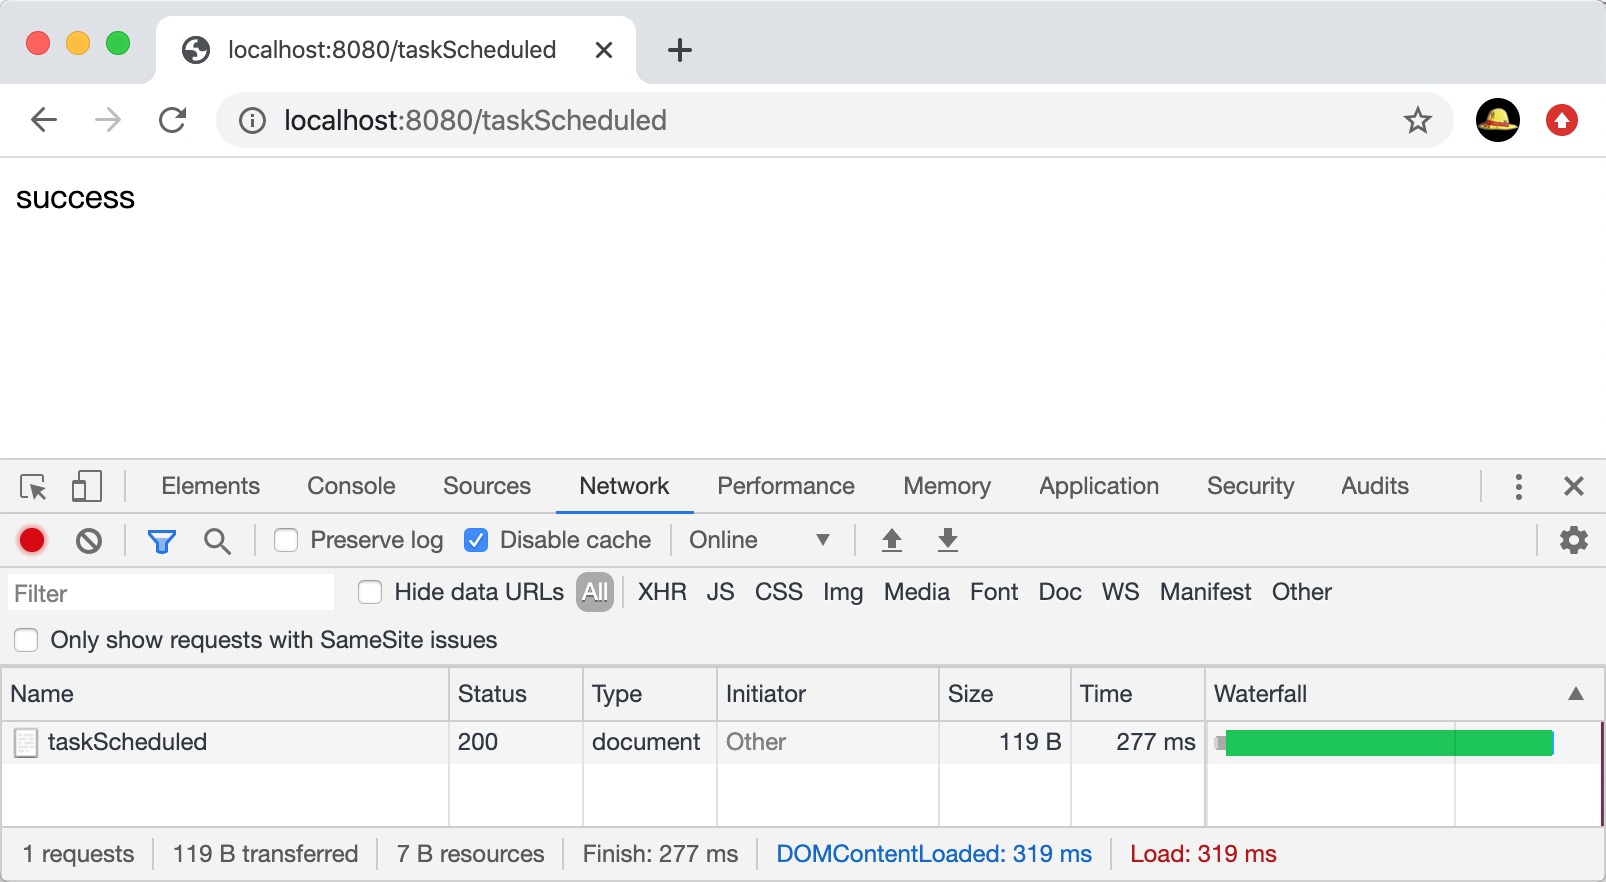
3、启动项目测试,访问地址:http://localhost:8080/taskScheduled,可以看到响应时间只有277ms,任务值异步执行

定时任务
项目开发中经常需要执行一些定时任务,比如需要在每天凌晨时候,分析一次前一天的日志信息。
1、编写定时任务Service,且在方式上使用@Scheduled,里面是cron表达式(可以参阅网上其他文档)
1 @Service
2 public class ScheduledService {
3
4     @Scheduled(cron = "0/5 * * * * ?")
5     public void hello(){
6         System.out.println("hello ... " + new Date());
7     }
8 }
2、在启动类上,使用@EnableScheduling开启定时任务功能
1 // 开启定时任务注解
2 @EnableScheduling
3 @SpringBootApplication
4 public class Application {
5
6     public static void main(String[] args) {
7         SpringApplication.run(Application.class, args);
8     }
9 }
3、 启动项目测试,观察控制台,定时任务按时间规则执行


