本周介绍SpringBoot项目的国际化是如何处理的,阅读本章前请阅读【SpringBoot】SpringBoot与Thymeleaf模版(六)的相关内容
国际化原理
1、在Spring中有国际化Locale(区域信息对象);LocaleResolver(获取区域信息对象,区域信息解析器),2个重要的对象,通过区域信息解析器就能自动给页面绑定不同的数据内容。
2、查看SpringBoot项目中,WebMvcAutoConfiguration类中有注入区域信息解析器AcceptHeaderLocaleResolver
 1 // 注入区域信息解析器
 2 @Bean
 3 @ConditionalOnMissingBean
 4 @ConditionalOnProperty(prefix = "spring.mvc", name = "locale")
 5 public LocaleResolver localeResolver() {
 6     if (this.mvcProperties.getLocaleResolver() == WebMvcProperties.LocaleResolver.FIXED) {
 7         return new FixedLocaleResolver(this.mvcProperties.getLocale());
 8     }
 9     // 默认注入AcceptHeaderLocaleResolver区域信息解析器
10     AcceptHeaderLocaleResolver localeResolver = new AcceptHeaderLocaleResolver();
11     localeResolver.setDefaultLocale(this.mvcProperties.getLocale());
12     return localeResolver;
13 }
3、查看AcceptHeaderLocaleResolver.java源码,它返回的区域信息对象,是从请求头获取 语言信息
 1 @Override
 2 public Locale resolveLocale(HttpServletRequest request) {
 3     Locale defaultLocale = getDefaultLocale();
 4     if (defaultLocale != null && request.getHeader("Accept-Language") == null) {
 5         return defaultLocale;
 6     }
 7     // 从请求中获取 语言类型
 8     Locale requestLocale = request.getLocale();
 9     List<Locale> supportedLocales = getSupportedLocales();
10     if (supportedLocales.isEmpty() || supportedLocales.contains(requestLocale)) {
11         return requestLocale;
12     }
13     Locale supportedLocale = findSupportedLocale(request, supportedLocales);
14     if (supportedLocale != null) {
15         return supportedLocale;
16     }
17     return (defaultLocale != null ? defaultLocale : requestLocale);
18 }
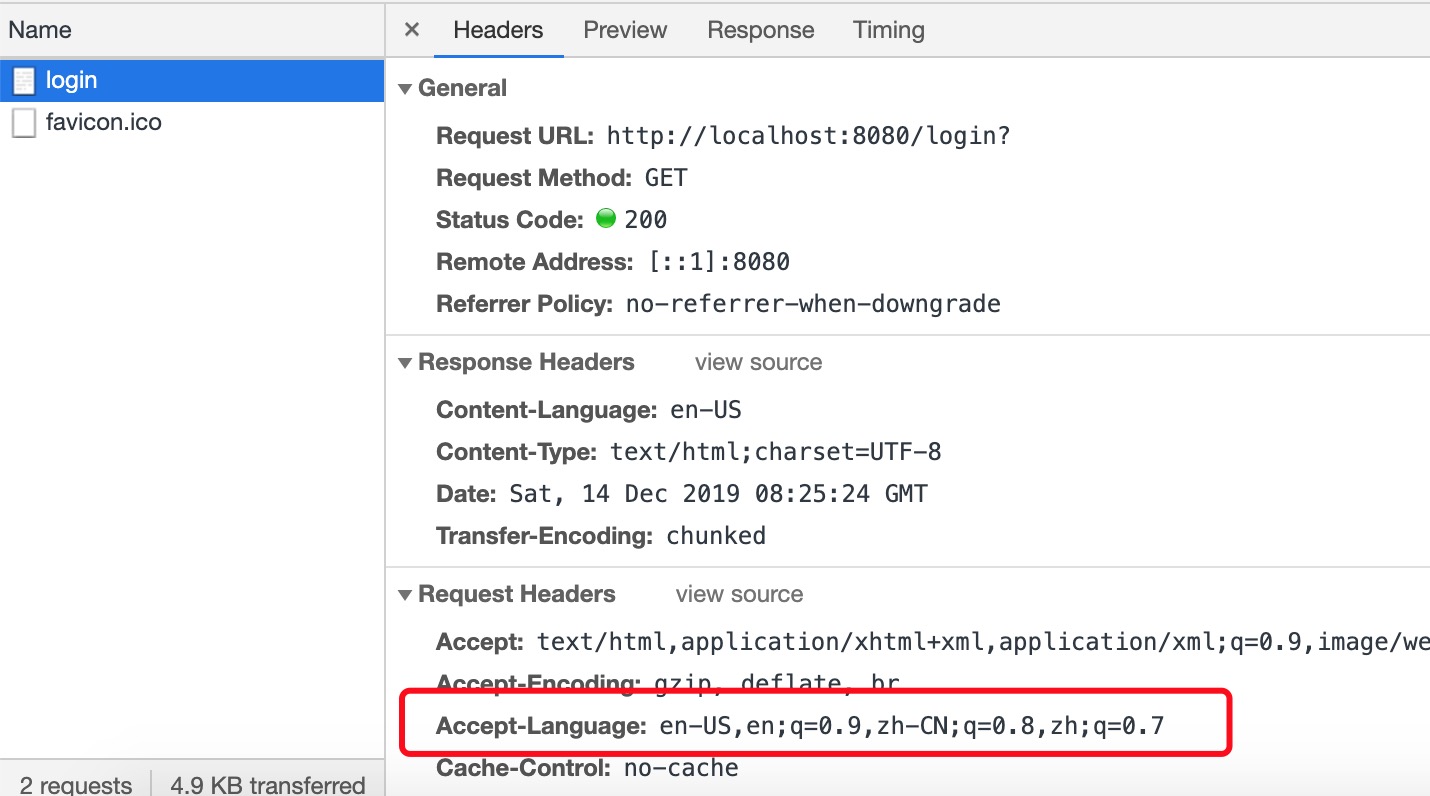
4、F12查看浏览器请求,发现所有请求都会带上语言信息

国际化开发
1、新建一个SpringBoot的web项目。pom.xml文件如下:

 1 <?xml version="1.0" encoding="UTF-8"?>
 2 <project xmlns="http://maven.apache.org/POM/4.0.0"
 3          xmlns:xsi="http://www.w3.org/2001/XMLSchema-instance"
 4          xsi:schemaLocation="http://maven.apache.org/POM/4.0.0 http://maven.apache.org/xsd/maven-4.0.0.xsd">
 5     <modelVersion>4.0.0</modelVersion>
 6
 7     <groupId>com.test</groupId>
 8     <artifactId>test-springboot-i18n</artifactId>
 9     <version>1.0-SNAPSHOT</version>
10
11     <parent>
12         <groupId>org.springframework.boot</groupId>
13         <artifactId>spring-boot-starter-parent</artifactId>
14         <version>2.1.8.RELEASE</version>
15     </parent>
16
17     <properties>
18
19         <project.build.sourceEncoding>UTF-8</project.build.sourceEncoding>
20         <project.reporting.outputEncoding>UTF-8</project.reporting.outputEncoding>
21         <java.version>1.8</java.version>
22     </properties>
23
24     <dependencies>
25         <dependency>
26             <groupId>org.springframework.boot</groupId>
27             <artifactId>spring-boot-starter-web</artifactId>
28         </dependency>
29
30         <dependency>
31             <groupId>org.springframework.boot</groupId>
32             <artifactId>spring-boot-starter-thymeleaf</artifactId>
33         </dependency>
34
35         <dependency>
36             <groupId>org.springframework.boot</groupId>
37             <artifactId>spring-boot-starter-test</artifactId>
38             <scope>test</scope>
39         </dependency>
40
41     </dependencies>
42
43
44     <!-- SpringBoot打包插件,可以将代码打包成一个可执行的jar包 -->
45     <build>
46         <plugins>
47             <plugin>
48                 <groupId>org.springframework.boot</groupId>
49                 <artifactId>spring-boot-maven-plugin</artifactId>
50             </plugin>
51         </plugins>
52     </build>
53 </project>
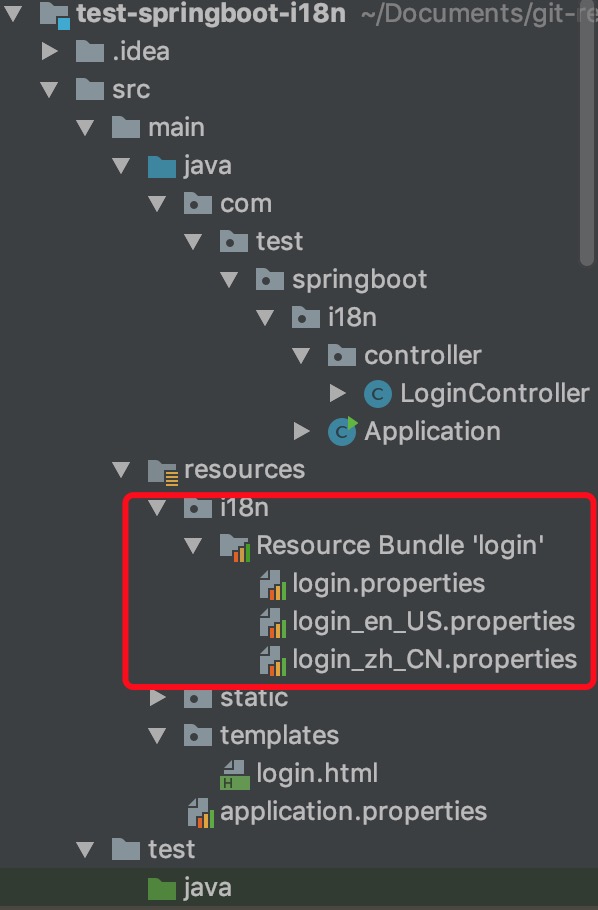
2、编写国际化配置文件,一个默认配置文件,一个英文配置文件,一个中文配置文件

内容如下:
1 login.tip=请登录~
2 login.username=用户名~
3 login.password=密码~
4 login.btn=登陆~
3、在SpringBoot的配置文件(application.properties)中绑定国际化配置文件
1 # 国际化配置文件
2 spring.messages.basename=i18n.login
4、编辑controller,转发界面
1 @Controller
2 public class LoginController {
3
4     @RequestMapping(value = "/login")
5     public String toLogin(){
6         return "login";
7     }
8
9 }
5、编写login.html页面
 1 <!DOCTYPE html>
 2 <!--
 3  xmlns:th="http://www.thymeleaf.org" 的作用是增加thymeleaf的语法提示
 4 -->
 5 <html lang="en" xmlns:th="http://www.thymeleaf.org">
 6 <head>
 7     <meta charset="UTF-8">
 8     <title>Title</title>
 9 </head>
10 <body style="text-align:center">
11 <h4>[[#{login.tip }]]</h4>
12 <form>
13     [[#{login.username}]]:<input type="text"/><br>
14     [[#{login.password}]]:<input type="password"/><br>
15     <button type="submit">[[#{login.btn}]]</button>
16 </form>
17 <a>中文</a> <a>English</a>
18 </body>
19 </html>
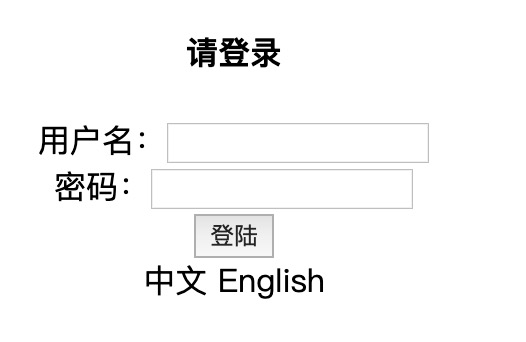
6、重启项目,使用地址:http://localhost:8080/login,进行访问,通过浏览器设置,改变浏览器语音的值,可以看到界面上的变化
中文版: 英文版:
英文版:
自定义区域信息解析器
逻辑:编辑一个区域信息解析器,从请求参数中获取区域信息,没传参数使用默认的区域信息。
1、编辑区域信息解析器,MyLocaleResoler.java
 1 package com.test.springboot.i18n.component;
 2
 3 import org.springframework.util.StringUtils;
 4 import org.springframework.web.servlet.LocaleResolver;
 5
 6 import javax.servlet.http.HttpServletRequest;
 7 import javax.servlet.http.HttpServletResponse;
 8 import java.util.Locale;
 9
10 public class MyLocaleResoler implements LocaleResolver {
11
12     @Override
13     public Locale resolveLocale(HttpServletRequest request) {
14         String l  = request.getParameter("l");
15         Locale locale = Locale.getDefault();
16         if(!StringUtils.isEmpty(l)) {
17             String[] split = l.split("_");
18             locale = new Locale(split[0], split[1]);
19         }
20         return locale;
21     }
22
23     @Override
24     public void setLocale(HttpServletRequest request, HttpServletResponse response, Locale locale) {
25
26     }
27 }
2、注入Spring容器中,在Application.java类中添加一个方法。
1 // 向容器中注入LocaleResolver
2 @Bean
3 public LocaleResolver localeResolver(){
4     return new MyLocaleResoler();
5 }
3、编写前端页面,是请求带上不同的参数,login.html,如下:
 1 <!DOCTYPE html>
 2 <!--
 3  xmlns:th="http://www.thymeleaf.org" 的作用是增加thymeleaf的语法提示
 4 -->
 5 <html lang="en" xmlns:th="http://www.thymeleaf.org">
 6 <head>
 7     <meta charset="UTF-8">
 8     <title>Title</title>
 9 </head>
10 <body style="text-align:center">
11 <h4>[[#{login.tip }]]</h4>
12 <form>
13     [[#{login.username}]]:<input type="text"/><br>
14     [[#{login.password}]]:<input type="password"/><br>
15     <button type="submit">[[#{login.btn}]]</button>
16 </form>
17 <!-- 请求带上语言的相关参数 -->
18 <a th:href="@{/login(l='zh_CN')}">中文</a> <a th:href="@{/login(l='en_US')}">English</a>
19 </body>
20 </html>
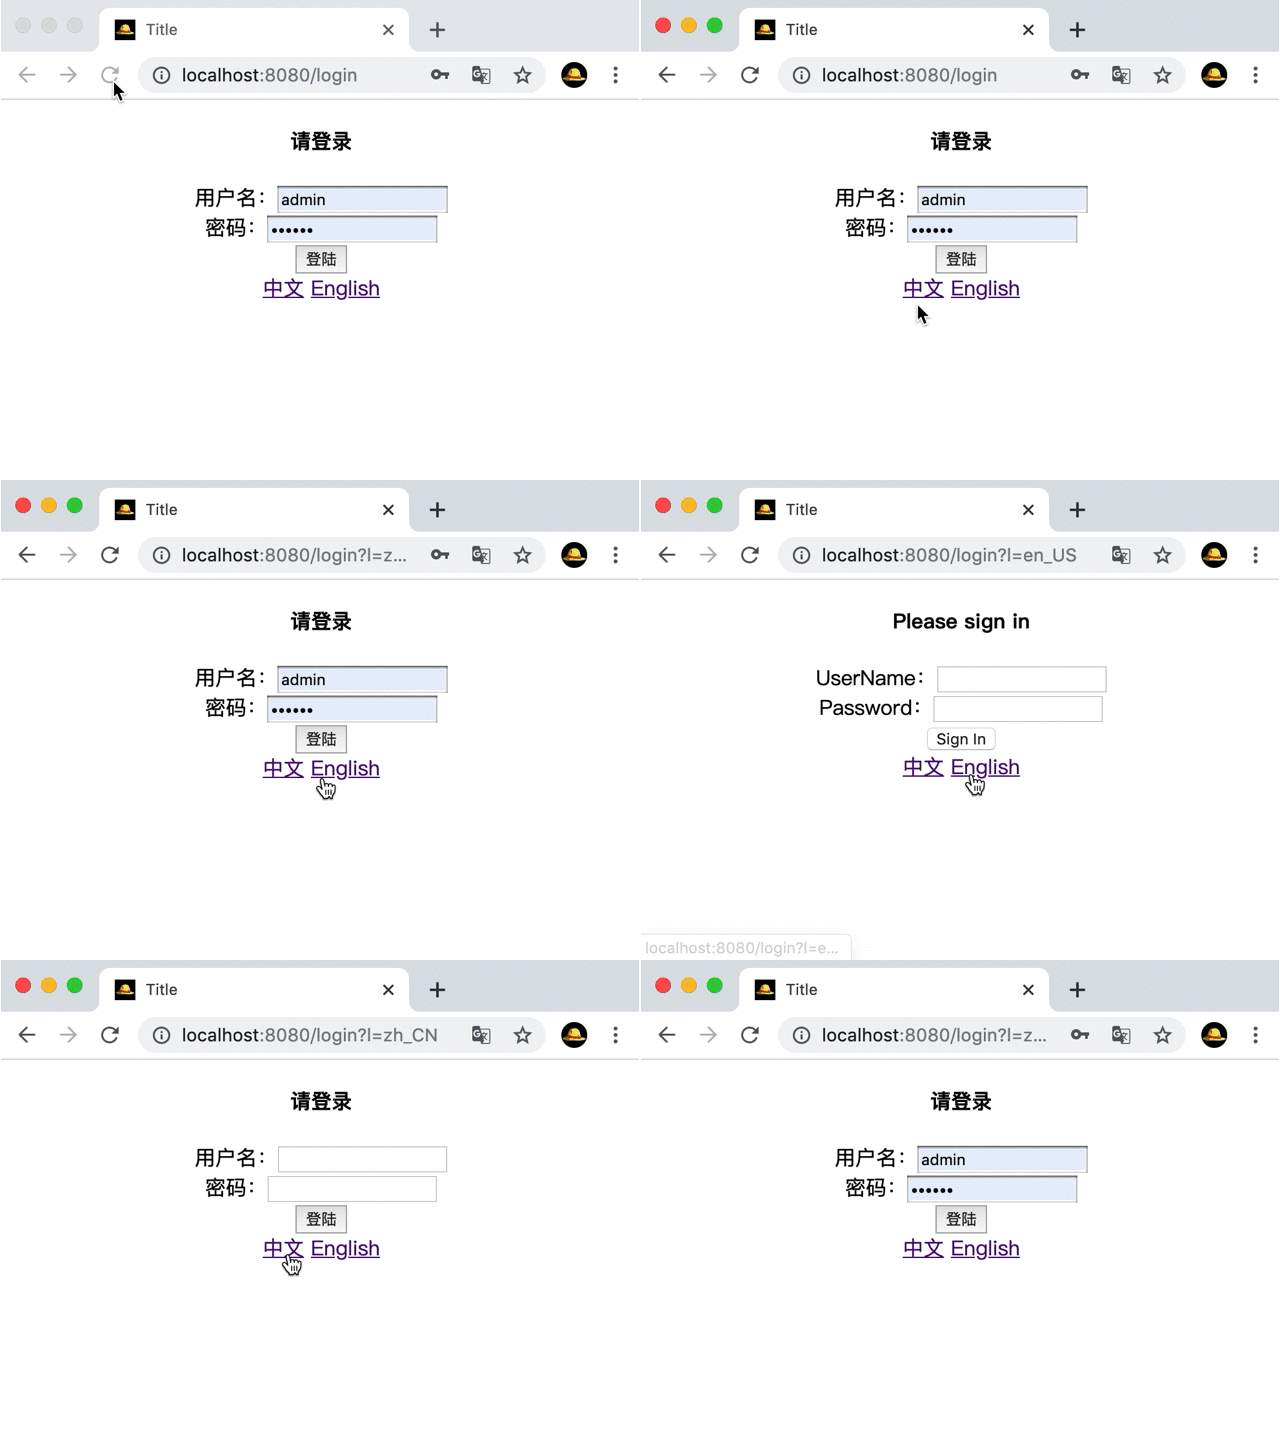
4、重启项目,使用浏览器访问界面,效果如下:

参数使用
1、使用
@Controller
public class LoginController {

    @Autowired
    private MessageSource messageSource;

    @RequestMapping(value = "/login")
    public String toLogin(){
        return "login";
    }

    @RequestMapping(value = "/msg")
    @ResponseBody
    public String msg(){
        String message = messageSource.getMessage("login.msg", new Object[] {"P1", "P2"}, LocaleContextHolder.getLocale());
        System.out.println("messageSource.getMessage() = " + message);
        return "msg";
    }
}
2、配置
login.msg=zzzzzzzzz{0}xxxxxxxxxxx{1}ccccc


