spring boot项目中使用swagger2
1. 引入依赖
 <dependency>
            <groupId>io.springfox</groupId>
            <artifactId>springfox-swagger2</artifactId>
            <version>2.9.2</version>
        </dependency>
        <dependency>
            <groupId>io.springfox</groupId>
            <artifactId>springfox-swagger-ui</artifactId>
            <version>2.9.2</version>
        </dependency>
关于版本可以根据自己的spring版本去下载,我这边是最新的。
2. 配置
新建SwaggerConfig.clss
@Configuration
@EnableSwagger2
public class SwaggerConfig {

    @Bean
    public Docket createdApi(){
        return new Docket(DocumentationType.SWAGGER_2)
                .apiInfo(apiInfo())
                .select()
            // 这个包要是你的启动类的所在包,这样才能检测到所有的API
                .apis(RequestHandlerSelectors.basePackage("com.yang"))
            // 设置对外开放的API,这里就是/v1下的所有
                .paths(PathSelectors.regex("/v1/.*"))
                .build();
    }

    private ApiInfo apiInfo(){
        return new ApiInfoBuilder()
                .title("springboot利用swagger构建api文档")
                .description("学习Demo")
                .termsOfServiceUrl("https://www.cnblogs.com/gyyyblog/")
                .version("0.1")
                .build();
    }
}
代码内容根据字面意思就知道了,就不解释了。不太明白的可以留言。
3. 启动项目
访问http://localhost:8089/swagger-ui.html,你要根据自己的启动端口来写,我的8080其他服务再用,就自己改了。看一下效果。
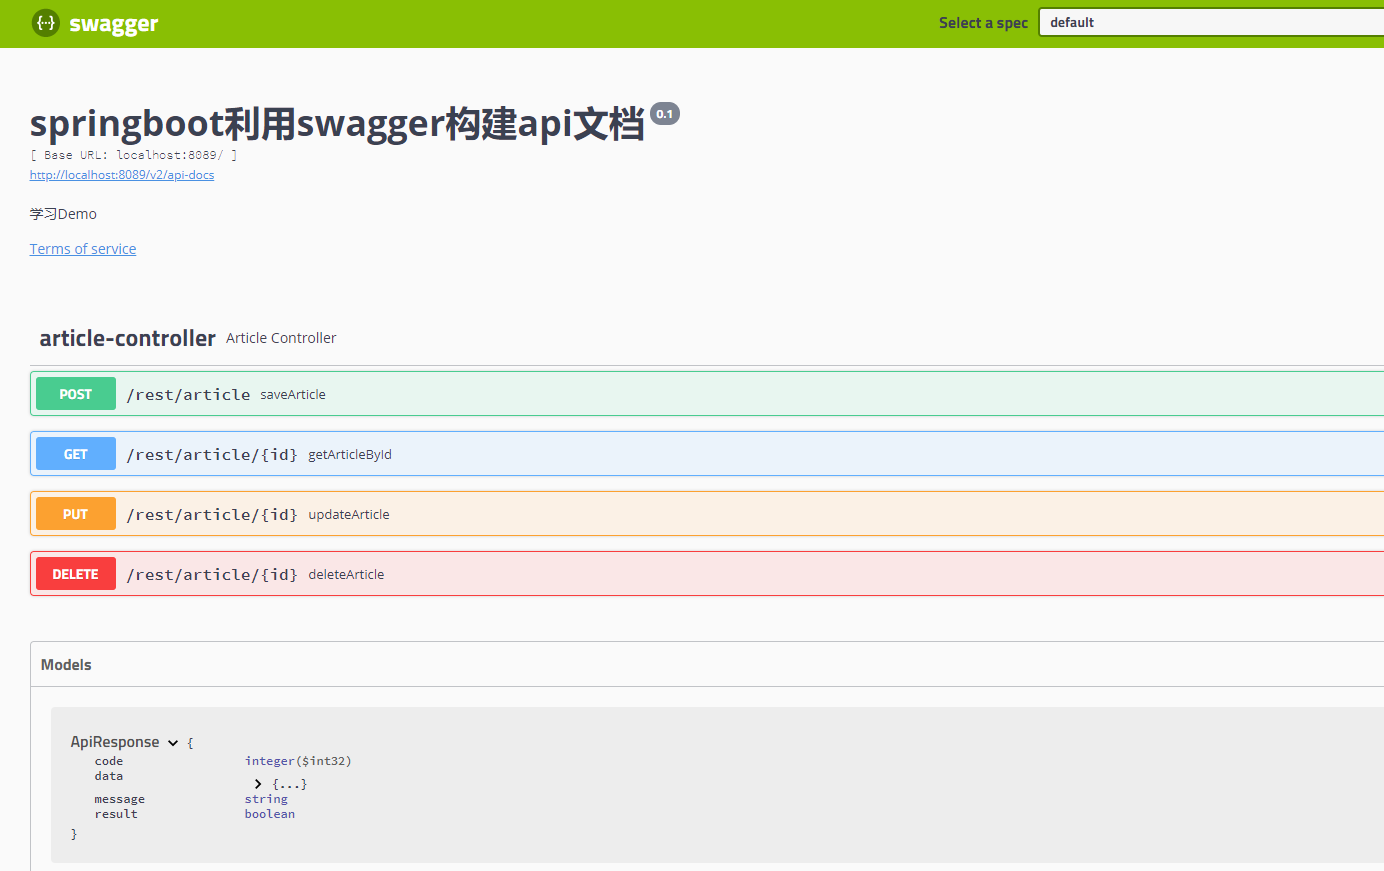
然后自己点进去看一下就懂了。
扩展
其实自己生成的已经够用了,如果按照restful风格去开发的话。如果你想自定义一些东西的话,这边有几个注解提供使用。
// 给Api添加一些描述信息
@ApiOperation(value = "添加文章",notes = "添加新的文章",tags = "Article",httpMethod = "POST")
// 标注返回值含义
    @ApiResponses(
            {
                    @ApiResponse(code=200,message="成功",response= Response.class),
                    @ApiResponse(code=403,message="没有权限",response= Response.class)
            }
    )
    @PostMapping("/article")
    public Response saveArticle(@RequestBody Article article){
        log.info("添加一条数据");
        return Response.success();
    }
效果:
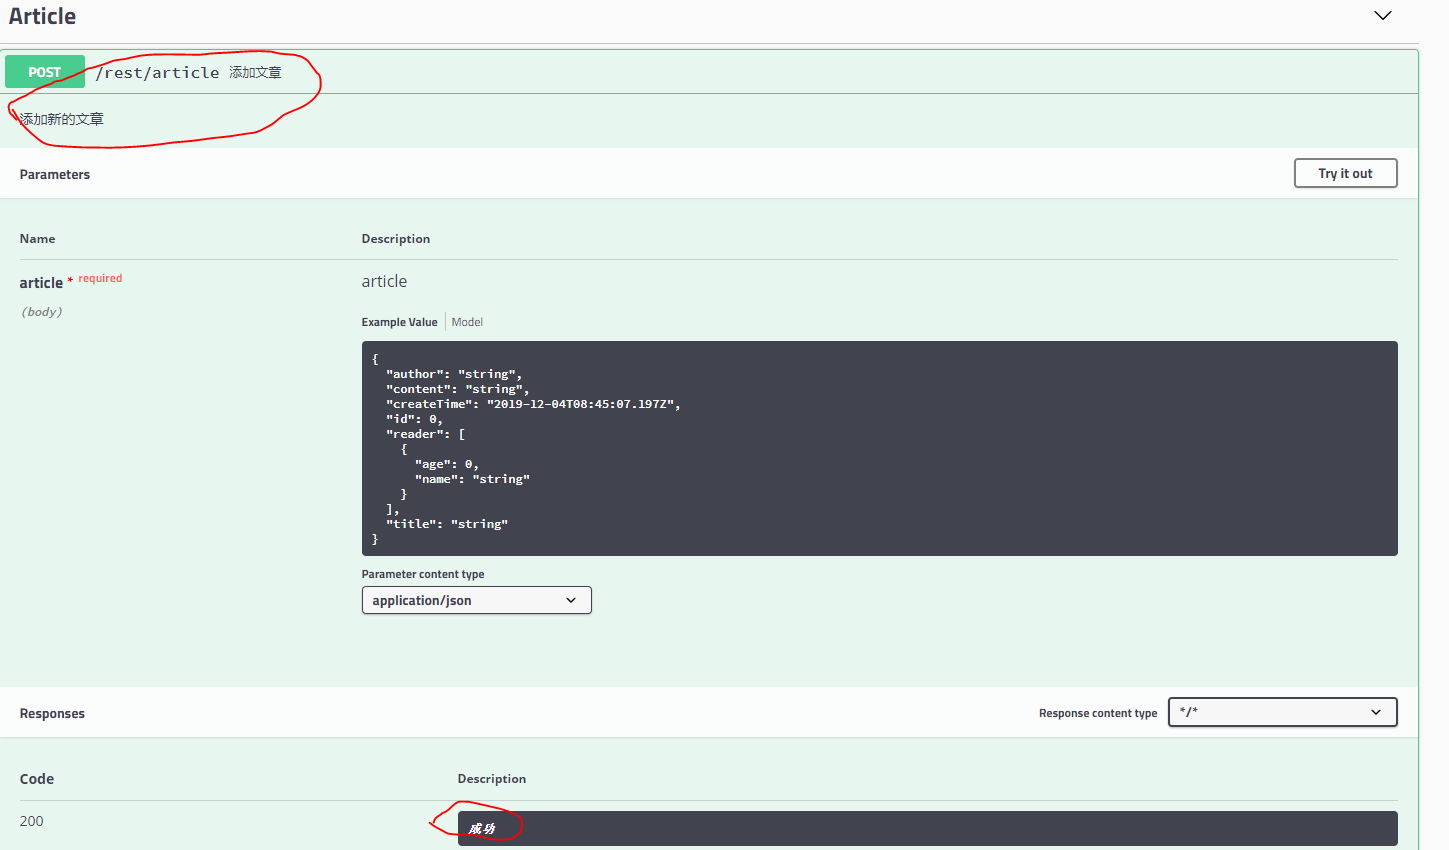
类似这样的,但我从来没写过这种注解,实话实说,因为没必要呀,上面这些信息都会自动生成,但是是英文的,如果你写代码规范,相信不会看不懂的。
谢谢大家,欢迎指出错误
邮箱:2754371607@qq.com
交友: 同款QQ号
