elasticsearch安装head插件
链接不是插件
4、解决方案
修改elasticsearch.yml文件
vim $ES_HOME$/config/elasticsearch.yml
# 增加如下字段
-
http.cors.enabled: true
-
http.cors.allow-origin: "*"
重启es和head即可
重启ES:
关闭ES:control+c或
第一步:安装nodejs
head插件是nodejs实现的,所以必须先安装Nodejs
参考:http://blog.java1234.com/blog/articles/354.html
sudo yum install epel-release
sudo yum install nodejs
node --version
好了,安装成功了。
然后就是npm。
sudo yum install npm --enablerepo=epel
再然后express
sudo npm install -g express
这还不行,还需要
sudo npm install -g express-generator
哈哈,好啦,成功了
---------------------
作者:skalpat
来源:CSDN
原文:https://blog.csdn.net/qq_40270754/article/details/82052264
版权声明:本文为博主原创文章,转载请附上博文链接!
第二步:安装git
我们要用git方式下载head插件
参考:http://blog.java1234.com/blog/articles/353.html
git是一个分布式版本控制系统
我们在Centos上安装GIT有好几种方式。这里我们用最简单的yum命令方式 一步到位,省了下载编译安装这些繁琐过程。
输入命令:
yum install -y git
验证:
git --version

卸载命令:
yum remove git
第三步:下载以及安装head插件
当然我们安装的地方是 /usr/local/
打开 https://github.com/mobz/elasticsearch-head
Running with built in server
-
git clone git://github.com/mobz/elasticsearch-head.git -
cd elasticsearch-head -
npm install - npm ERR! phantomjs-prebuilt@2.1.16 install: `node install.js` 报这个错误
- npm install phantomjs-prebuilt@2.1.16 --ignore-scripts 解决
sudo npm cache clean -f
sudo npm install -g n
sudo n stable
上面是更新最新Node的方法,不需要像上面那样指定NodeJS的版本号
-
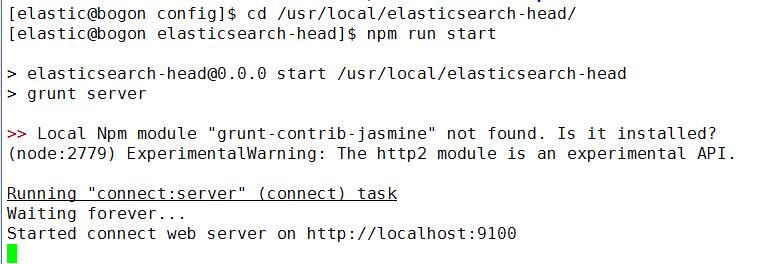
npm run start
我们用这种最简单的方式安装
第四步:配置elasticsearch,允许head插件访问
进入elasticsearch config目录 打开 elasticsearch.yml
最后加上
http.cors.enabled: true
http.cors.allow-origin: "*"
第五步:测试
启动elasticsearch,再进入head目录,执行npm run start 启动插件

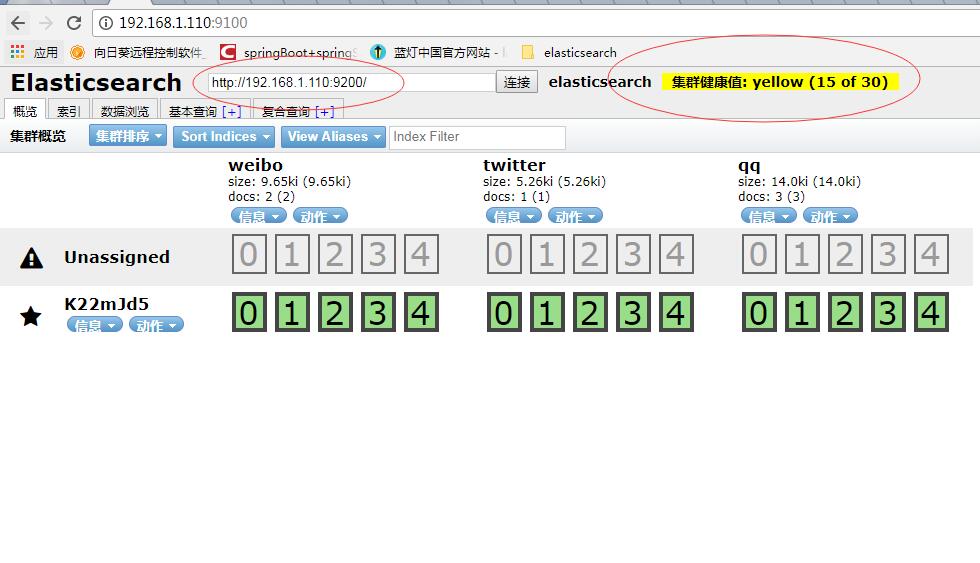
说明启动成功,然后浏览器 执行 http://192.168.1.110:9100/

内部输入 http://192.168.1.110:9200/ 点击连接 如果右侧输出黄色背景字体 说明配置完整OK;
后面我们讲解具体怎么用;


 浙公网安备 33010602011771号